
pydbg的安裝和編譯過程
文章一:
http://www.glamenv-septzen.net/en/view/13
Yesterday I tried installing pydbg and pydasm on my notepc.
pydasm is popular, famous library to disassemble machine codes (opcodes).
pydbg is also popular, famous library to build lightweight, extensible debugger for Windows platform.
Actually, pydbg is included in PaiMei, windows platform debugger framework.
The journey was hard, full of struggle and traps with python distutils.
I left these notes, memos, and traps for future person (including myself) who want installing these excellent reverse engineering tools written in python and c.
My notepc environments are:
CPU : Intel Pentium M (Centrino) 1.2GHz
RAM : 1GB
OS : Windows XP Professional SP3 (Japanese)
Python: Python 2.5 (install from MSI installer)
        Install Dir : C:\Python25
Visual Studio : Visual C++ 2008 Express Edision (SP1)
Subversion: TortoiseSVN 1.6.x
We require Subversion to obtain PaiMei later.
Okay, Let's begin.
Installing pydasm step-by-step
pydbg requires pydasm. We have to install pydasm before installing pydbg.
But pydasm is written by c, and no official binary release for win32 platform.
Out environments uses:
Python 2.5
Visual C++ 2008 Express Edition SP1
getting libdasm
pydasm is included "libdasm", simple x86 disassembly library. Author of pydasm is another person to author of libdasm.
libdasm was written by jt (nologin.org), pydasm was written by ero (dkbza.org). pydasm was contributed to libdasm.
- dkbza - pydasm (just showing libdasm download link, short overview, example codes)
Now, let's download libdasm, including pydasm from following url:
When download success, expand tar.gz into your favorite directory.
Yesterday, I get libdasm-1.5.tar.gz. After expanding, I got following directory trees:
libdasm-1.5\
    libdasm.c
    README.txt
    ...
    bin\
    pydasm\
    ...
try compile -> errors!!
Next, open command prompt, setup your VC++ environment (ex: vcvars32.bat). Confirm "C:\Python25" is added PATH environment or ".py" extension is associated with "C:\Python25\python.exe".
In your command prompt, cd to "libdasm-1.5\pydasm", and type:
> setup.py build_ext
running build_ext
error: Python was built with Visual Studio 2003;
extensions must be built with a compiler than can generate compatible binaries.
Visual Studio 2003 was not found on this system. If you have Cygwin installed,
you can try compiling with MingW32, by passing "-c mingw32" to setup.py.
Ouch!! Why? My command prompt enviroments are surely prepared for VC++ tools!!
> cl
Microsoft(R) 32-bit C/C++ Optimizing Compiler Version 15.00.30729.01 for 80x86
Copyright (C) Microsoft Corporation.  All rights reserved.
...
> link
Microsoft (R) Incremental Linker Version 9.00.30729.01
Copyright (C) Microsoft Corporation.  All rights reserved.
The answer is, Python's distutils tool (used from setup.py) checks Visual Studio's registry keys and confirm proper version is installed or not.
Unfortunately, registry keys installed by VC++2008 Express Edision on my environment are not what distutils expected.
avoiding distutil's registry key checks
Then how to avoid these annoying registry key checks ?
The answer is, edit distutil's library source code. Python is open source, and distutils are written in python.
(Skips my surveys and researches for distutils and its source code.)
As a result, edit following source code:
C:\Python25\Lib\distutils\msvccompiler.py
In msvccompiler.py:
...
class MSVCCompiler (CCompiler) :
    ...
    def __init__ (self, verbose=0, dry_run=0, force=0):
        ...
        # comment out here!!
        self.__macros = MacroExpander(self.__version)
Registry keys checks are implemented in MacroExpander() and its constructor. And, "self.__macros" is optional, not needed. So removing this line doesn't effect to compiling.
After removing unneccesary line, delete old ".pyc" file, msvccompiler.pyc, may be exists in same directory to ".py".
try compiling again -> build success!!
In msvccompiler.py, there's no registry checks when "DISTUTILS_USE_SDK" and "MSSdk" environments are set and "cl.exe" is found in PATH environment.
So we set "DISTUTILS_USE_SDK" and "MSSdk" in our command prompt window:
> set DISTUTILS_USE_SDK=1
> set MSSdk=1
Every thing is okay for each environment values. msvccompiler.py only checks each key is exists, ignoring values.
Okay, let's try compiling:
> setup.py build_ext
running build_ext
building 'pydasm' extension
creating build
creating build\temp.win32-2.5
creating build\temp.win32-2.5\Release
C:\Program Files\Microsoft Visual Studio 9.0\VC\BIN\cl.exe \
    /c /nologo /Ox /MD /W3 /GX /DNDEBUG \
    -IC:\Python25\include -IC:\Python25\include -IC:\Python25\PC \
    /Tc../libdasm.c /Fobuild\temp.win32-2.5\Release\../libdasm.obj
C:\Program Files\Microsoft Visual Studio 9.0\VC\BIN\cl.exe \
    /c /nologo /Ox /MD /W3 /GX /DNDEBUG \
    -IC:\Python25\include -IC:\Python25\include -IC:\Python25\PC \
    /Tcpydasm.c /Fobuild\temp.win32-2.5\Release\pydasm.obj
creating build\lib.win32-2.5
C:\Program Files\Microsoft Visual Studio 9.0\VC\BIN\link.exe \
    /DLL /nologo /INCREMENTAL:NO \
    /LIBPATH:C:\Python25\libs /LIBPATH:C:\Python25\PCBuild /EXPORT:initpydasm \
    build\temp.win32-2.5\Release\../libdasm.obj build\temp.win32-2.5\Release\pydasm.obj \
    /OUT:build\lib.win32-2.5\pydasm.pyd \
    /IMPLIB:build\temp.win32-2.5\Release\..\pydasm.lib
(omitting warnings from build output)
When all work correct, we'll get
libdasm-1.5\pydasm\build\lib.win32-2.5\pydasm.pyd
install pydasm and test ... oh-no, "MSVCR90.dll" not foud !?
Now invoking install command:
> setup.py install
running install
running build
running build_ext
running install_lib
copying build\lib.win32-2.5\pydasm.pyd -> C:\Python25\Lib\site-packages
copying build\lib.win32-2.5\pydasm.pyd.manifest -> C:\Python25\Lib\site-packages
running install_egg_info
Removing C:\Python25\Lib\site-packages\pydasm-1.5-py2.5.egg-info
Writing C:\Python25\Lib\site-packages\pydasm-1.5-py2.5.egg-info
Then invoking python and try to import pydasm:
> C:\Python25\python.exe
Python 2.5.2 (r252:60911, Feb 21 2008, 13:11:45) [MSC v.1310 32 bit (Intel)] on win32
Type "help", "copyright", "credits" or "license" for more information.
>>> import pydasm
Traceback (most recent call last):
  File "<stdin>", line 1, in <module>
ImportError: DLL load failed: 指定されたモジュールが見つかりません。
>>> quit()
Oh-no, last "ImportError" says "specified module not found". And on my environment, "MSVCR90.dll not found" messagebox was shown.
Checking module dependencies:
> dumpbin /dependents C:\Python25\python.exe
...
   python25.dll
   MSVCR71.dll   <-- Python25 depends on MSVCR71.dll
   KERNEL32.dll
...
> dumpbin /dependents build\lib.win32-2.5\pydasm.pyd
...
   MSVCR90.dll    <-- pydasm depends on MSVCR90.dll !!
   python25.dll
   KERNEL32.dll
On my environment, MSVCR90.dll was installed to Visual Studio installed directory, but not to Windows system directory.If you've already installed VC-Runtime including MSVCR90.dll to your Windows system directory, those ImportError and
message box may not be shown, all works correctly.
How do that ? There're 2 ways to resolve this error.
- install VC-Runtime including MSVCR90.dll to Windows.
- This is straightforward, but Python uses MSVCR71.dll (compiled by older version VisualStudio). I'm afraid of conflict between runtime dlls.
- link VC-Runtime static.
- This makes portable module, but need to change compile options, module file size become big.
I'm afraid of conflits between runtime dlls strongly (may be another trap), so I delve into second way.
edit msvccompiler.py again, change compile option -> pydasm works correct!!
Then how to change compile option ? What option should we choose ?
msvccompiler.py setups compiler options in MSVCCompiler class's initialize method.
msvccompiler.py:
...
class MSVCCompiler (CCompiler) :
...
    def initialize(self):
        ...
        self.preprocess_options = None
        if self.__arch == "Intel":
            self.compile_options = [ '/nologo', '/Ox', '/MD', '/W3', '/GX' ,
                                     '/DNDEBUG']
            self.compile_options_debug = ['/nologo', '/Od', '/MDd', '/W3', '/GX',
                                          '/Z7', '/D_DEBUG']
"/MD" and "/MDd" indicates dynamic linking multithreaded library.
For more details about runtime library and compiler options, see following MSDN.
- C Run-Time Libraries
- http://msdn.microsoft.com/en-us/library/abx4dbyh.aspx
- "MSDN Library" > "Development Tools and Languages" > "Visual Studio 2010" > "Visual Studio" > "Visual Studio Languages" > "Visual C++" > "Visual C++ Reference" > "Visual C++ Libraries Reference" > "Run-Time Library" > "C Run-Time Libraries"
- http://msdn.microsoft.com/en-us/library/abx4dbyh.aspx
This time we want to link static multithreaded library, So we choose "/MT" and "/MTd".
Edit msvccompiler.py:
...
class MSVCCompiler (CCompiler) :
...
    def initialize(self):
        ...
        self.preprocess_options = None
        if self.__arch == "Intel":
            # change '/MD' => '/MT'
            self.compile_options = [ '/nologo', '/Ox', '/MT', '/W3', '/GX' ,
                                     '/DNDEBUG']
            # change '/MDd' => '/MTd'
            self.compile_options_debug = ['/nologo', '/Od', '/MTd', '/W3', '/GX',
                                          '/Z7', '/D_DEBUG']
Delete old msvccompiler.pyc and pydasm\build directory, and try build again.
> setup.py build_ext
> dumpbin /dependents build\lib.win32-2.5\pydasm.pyd
 Image has the following dependencies:

   python25.dll
   KERNEL32.dll
...
> setup.py install
...
> C:\Python25\python.exe
Python 2.5.2 (r252:60911, Feb 21 2008, 13:11:45) [MSC v.1310 32 bit (Intel)] on win32
Type "help", "copyright", "credits" or "license" for more information.
>>> import pydasm
>>> buffer = '\x90\x31\xc9\x31\xca\x31\xcb'
>>> offset = 0
>>> while offset < len(buffer):
...     i = pydasm.get_instruction(buffer[offset:], pydasm.MODE_32)
...     print pydasm.get_instruction_string(i, pydasm.FORMAT_INTEL, 0)
...     if not i:
...         break
...     offset += i.length
...
nop
xor ecx,ecx
xor edx,ecx
xor ebx,ecx
>>> quit()
All-right, pydasm seems to work correctly.
Next, try to install PaiMei, pydbg.
Installing pydbg step-by-step
checkout from SVN repositry and install -> "Python26.dll not found" !?
1st, checkout (or export) PaiMei latest source tree from SVN repositry. Use your favorite SVN tools.
Yesterday, I checkouted r248 trunk source tree.
2nd, open command prompt window, cd to PaiMei directory, and run setup.py.
> setup.py build
(...)
> setup.py install
(...)
3rd, try to import pydbg:
> C:\Python25\python.exe
Python 2.5.2 (r252:60911, Feb 21 2008, 13:11:45) [MSC v.1310 32 bit (Intel)] on win32
Type "help", "copyright", "credits" or "license" for more information.
>>> import pydbg
Traceback (most recent call last):
  File "<stdin>", line 1, in <module>
  File "pydbg\__init__.py", line 47, in <module>
    from pydbg                   import *
  File "C:\in_vitro\SVNWORK\paimei\pydbg\pydbg.py", line 32, in <module>
    import pydasm
ImportError: DLL load failed: 指定されたモジュールが見つかりません。
And message box was shown, saying "Python26.dll not found".
See carefully above python stacktrace. It is very strange that error has occurred at "import pydasm".
At previous section, we confirm "import pydasm" work correctly. What's happening?
remove bundled pydasm.pyd in pydbg -> success!!
The Answer is : "pydasm.pyd" is bundled in pydbg module directory, and it was compiled with Python 2.6.
> dumpbin /dependents C:\Python25\Lib\site-packages\pydbg\pydasm.pyd
                                                    ^^^^^^^^^^^^^^^^ pydasm.pyd was bundled!!
...
  Image has the following dependencies:

    MSVCR90.dll
    python26.dll
    KERNEL32.dll
...
Then, we simply remove bundled "pydbg\pydasm.pyd". Close command prompt, shutdown all python program, and re-open command prompt (clear loaded dlls).
Try-again:
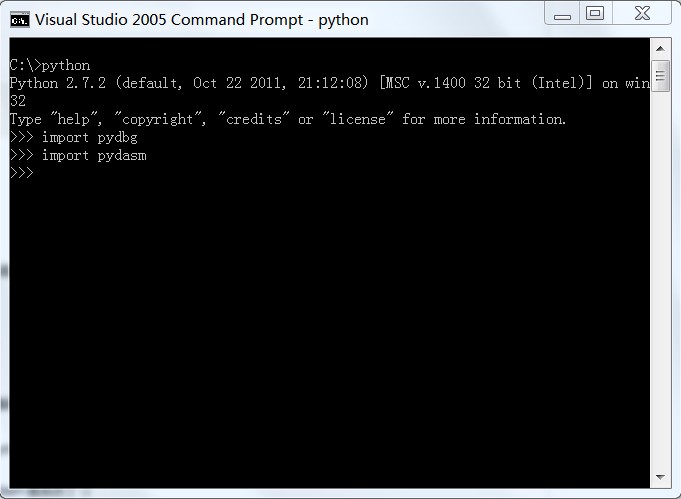
> C:\Python25\python.exe
Python 2.5.2 (r252:60911, Feb 21 2008, 13:11:45) [MSC v.1310 32 bit (Intel)] on win32
Type "help", "copyright", "credits" or "license" for more information.
>>> import pydbg
>>>
All-right, no errors!!
Finally, invoke calc.exe, get its PID, and test following example:
from pydbg import *
from pydbg.defines import *
def handler_breakpoint (pydbg):
  if pydbg.first_breakpoint:
    print "[*] Hit 1st breakpoint!"
    return DBG_CONTINUE
  print "[*] Hit breakpoint!"
  return DBG_CONTINUE
dbg = pydbg()
dbg.set_callback(EXCEPTION_BREAKPOINT, handler_breakpoint)
dbg.attach(XXXXX) # pid of calc.exe
recv = dbg.func_resolve("user32", "ShowWindow")
dbg.bp_set(recv)
dbg.debug_event_loop()
Example:
> C:\Python25\python.exe
Python 2.5.2 (r252:60911, Feb 21 2008, 13:11:45) [MSC v.1310 32 bit (Intel)] on win32
Type "help", "copyright", "credits" or "license" for more information.
>>> from pydbg import *
>>> from pydbg.defines import *
>>> def handler_breakpoint (pydbg):
...   if pydbg.first_breakpoint:
...     print "[*] Hit 1st breakpoint!"
...     return DBG_CONTINUE
...   print "[*] Hit breakpoint!"
...   return DBG_CONTINUE
...
>>> dbg = pydbg()
>>> dbg.set_callback(EXCEPTION_BREAKPOINT, handler_breakpoint)
>>> dbg.attach(5084)
<pydbg.pydbg.pydbg instance at 0x00BF8198>
>>> recv = dbg.func_resolve("user32", "ShowWindow")
>>> dbg.bp_set(recv)
<pydbg.pydbg.pydbg instance at 0x00BF8198>
>>> dbg.debug_event_loop()
[*] Hit 1st breakpoint!
[*] Hit breakpoint!
...
(minimize, or restore calc window)
...
[*] Hit breakpoint!
>>> quit()
note for other modules in PaiMei
In this article, we JUST ONLY want to install pydbg in PaiMei.This article ignored to setup other modules in PaiMei, like PIDA, GUI components.
If you want to setup these modules, PaiMei framework fullset, see documents in official site or "docs/index.html" in SVN source tree.
文章二:
這兩天在看《python灰帽子》,其中有章節提到pydbg的使用,於是安裝之,但是安裝過程中發現並沒有像其他的包一樣簡單,還需要修改一些東西才能正常使用,參照http://www.glamenv-septzen.net/en/view/13網頁方法順利安裝。現寫成日誌以記錄安裝過程, 以免日後重灌系統後忘記安裝方法。
OS:Windows XP Professional SP3
Python: Python 2.5
Visual Studio : 2005
1.在http://www.nologin.org/main.pl?action=codeView&codeId=49&下載libdasm,因為pydbg引用libdasm庫。
2.解壓libdasm庫到任意目錄。
3.使用VS命令列提示符(在開始選單的VS->VS TOOL目錄下),進入到"libdasm-1.5\pydasm",在命令列中鍵入
setup.py build_ext
螢幕會回顯
running build_ext error: Python was built with Visual Studio 2003; extensions must be built with a compiler than can generate compatible binaries. Visual Studio 2003 was not found on this system. If you have Cygwin installed, you can try compiling with MingW32, by passing "-c mingw32" to setup.py.
這是由於編譯器版本不一致導致的錯誤。
4.找到C:\Python25\Lib\distutils\msvccompiler.py檔案,修改其中class MSVCCompiler (CCompiler) :的self.__macros = MacroExp
這一行,將這行幹掉即可。修改
 self.compile_options = [ '/nologo', '/Ox', '/MD', '/W3', '/GX' ,                                      '/DNDEBUG']             self.compile_options_debug = ['/nologo', '/Od', '/MDd', '/W3', '/GX',                                           '/Z7', '/D_DEBUG']
這兩行中的MD和MDd為MT和MTd,這還是因為編譯器的版本不一致。
5.在命令列提示符下設定
set DISTUTILS_USE_SDK=1 set MSSdk=1
這兩個變數。
6.再次執行setup.py build_ext,再執行setup.py install,這樣就能在C:\Python25\Lib\site-packages下生成pydasm.pyd檔案了。
7.使用SVN,在http://paimei.googlecode.com/svn/trunk/pydbg地址下載整個的pydbg包,將該pydbg包放置在C:\Python25\Lib\site-packages資料夾下,刪除
刪除該包下的pydasm.pyd檔案。
之後import pydbg就可以使用啦,感謝那位外國作者,感謝pydbg的作者。


文章三:
安裝pydbg pydasm
var _gaq = _gaq || []; _gaq.push(['_setAccount', 'UA-33094566-1']); _gaq.push(['_trackPageview']);
(function() { var ga = document.createElement(‘script’); ga.type = ‘text/javascript’; ga.async = true; ga.src = (‘https:’ == document.location.protocol ? ‘https://ssl’ : ‘http://www’) + ‘.google-analytics.com/ga.js’; var s = document.getElementsByTagName(‘script’)[0]; s.parentNode.insertBefore(ga, s); })();
pydbg是著名的基於python 實現的偵錯程式,是作為著名的逆向架構paimei的除錯框架釋出的,其依賴於pydasm,同時這個pydasm庫存在於libdasm中。整個安裝過程還算順利,主要是Python distutils的使用不熟悉,說實話,我都沒怎麼用過python,怎麼可能熟呢?首先下載libdasm,連結如下:由於需要C 編譯器,所以安裝 VC2010(真是重量級啊),進入Visual Studio Command Prompt (2010),切換到下載下來的程式碼包中pydasm目錄下,執行 setup.py install,報錯無法找到vcvarsall.bat這個檔案,如下提示:unable to find vcvarsall.bat懷疑是環境變數的問題,所以將這個檔案所在路徑C:\Program Files\Microsoft Visual Studio 10.0\VC 加入到path,還是不行,開始google,發現有價值的連結如下:連結提示需要修改distutil 庫原始碼中的msvccompiler.py檔案,將刪除self.__macros = MacroExpander(self.__version),來繞過對編譯環境版本在登錄檔中值的驗證,就是必須是某個版本的編譯器如VS2008,且驗證本地環境VC++2008 Express Edision 的登錄檔鍵值是不是distutils 庫支援的但是在我正要實施時,發現該文中的報錯似乎與我不符,我的應該在這個的錯誤前面,我的錯誤是由於還沒有正確找到編譯環境,所以繼續搜尋,發現大多數連結都是用下載mingw來解決,包括很多國外的大牛網站,但是這隻能算是繞過,根本不是解決,再說我費那麼大勁裝的VS2010豈不是白費了嗎?繼續找了一會,終於發現一個有價值的連結:這個連結就與我所遇的問題一樣,採取的方法是修改檔案msvc9compiler.py,如下:修改MSVCCompiler函式:vc_env = query_vcvarsall(VERSION, plat_spec)為:vc_env = query_vcvarsall(8.0, plat_spec)//由於我的是VS2010,所以改為10.0,python預設是VS2008 即9.0還要加這句話:if VERSION < 8.0:raise DistutilsPlatformError(“VC %0.1f is not supported by this module” % VERSION)看來,python3.2中的distutils只支援vc8.0以上,即vs2005以上的編譯器。修改之後安裝成功!!接下來安裝pydbg,由於是paimei的除錯架構,所以先要下載paimei一開始還以為可以直接獨立安裝pydbg,後來發現其中原始碼中沒有安裝檔案,只是原始碼,參考下面連結windows下沒有裝SVN、git,所以直接瀏覽器下載安裝包,解壓paimei的安裝包,執行setup install,簡要看了下錯誤,像是報錯找不到 pydbg的原始碼檔案,所以發現paimei安裝包中的pydbg資料夾中是空的。將pydbg安裝包的檔案複製到其中,成功安裝!!!最後,檢測安裝結果發現,import pydbg時,仍然報錯,找不到pydasm這個庫,所以參考上個連結中的方法,將Lib\Site-packages\pydbg下的pydasam.pyd刪掉。因為在安裝pydasm之後,Lib\Site-packages\下已經存在庫檔案pydasam.pyd。之後執行python,呼叫這兩個庫,沒有報錯,如下:
ollydbg 雖然很強大, 還是無法滿足所有的需求, 比如找了很久也沒找到的功能就有:
1. 進入某個模組的斷點. 即相當於把某個 dll 的所有函式(不光是匯出的函式) 入口全部下上斷點.
2. 對 COM 元件的函式下斷點.
3. 記憶體斷點的條件限制.
...
要解決所有問題的唯一辦法就是寫自己的偵錯程式, 但是要從頭開始寫一個偵錯程式並不是一項簡單的工作. 這時, 利用 pydbg 庫來實現特定的除錯需求就非常方便了. 不過 pydbg 的安裝也並不容易, 你不光要有 python 還得有 C 編譯器才行. 下面是我安裝過程的記錄:
1. 下載 libdasm (pydbg 依賴於 pydasm, pydasm 又需要 libdasm)
2. 用 VC 的命令列進入解壓出來的 pydasm 目錄. 執行 setup.py install 自動編譯後安裝.
如果你從沒有編譯個 c 原始碼的 python 庫, 而且你安裝的 python 和你的 VC 編譯器版本不匹配的話, 可能會出現找不到 C 編譯器的錯誤. 這時就需要手動修改 python 的 Lib\distutils\msvccompiler.py 檔案.
3. 測試安裝的 pydasm. 進入 python 命令列, 輸入 import pydasm, 出現錯誤: ImportError: DLL load failed: 找不到指定的模組.
使用 dumpbin /DEPENDENTS pydasm.pyd 命令查詢它依賴的 dll, 發現有: MSVCR80.dll, python27.dll , KERNEL32.dll (根據你的 python 版本和 VC 版本可能有不同). 缺少的應該是 MSVCR80.dll 拷貝一份到 python 目錄下. 再次 import pydasm, 提示錯誤: ImportError: DLL load failed: %1 不是有效的 Win32 應用程式。
4. 沒辦法了, 只要用我自己用原始碼編譯出來的 python 版本了. 自己編譯出來的版本是把 VC 編譯器配置好了的. 直接編譯後 import pydasm 就成功了 :)
5. 下載 pydbg, 原始碼在 google code 上, 需要用 svn 下載: http://paimei.googlecode.com/svn/trunk/.
6. 進入原始碼目錄, 執行 setup.py install.
7. 安裝完成後直接 import pydbg 仍然是提示 pydasm 的 dll 無法載入. 需要把 site-packages\pydbg 目錄下那一份 pydasm.pyd 檔案刪除.
終於可以匯入 pydbg 了:
相關推薦
pydbg的安裝和編譯過程
文章一: http://www.glamenv-septzen.net/en/view/13 Yesterday I tried installing pydbg and pydasm on my notepc. pydasm is popular, famous libr
(一)在Linux上安裝和編譯OpenCV3.0.0
接口 mac os color 下載源 同時 beta c函數 install mkdir OpenCV的全稱是:Open Source Computer Vision Library。OpenCV是一個基於(開源)發行的跨平臺計算機視覺庫,可以運行在Linux、W
Tomcat安裝和配置過程
修改 除了 環境變量 文件 結構 apache 總結 1.8 必須 tomcat的下載、配置、啟動方法。網上教程亂七八糟,還是自己mark一下備用吧。 一、官網下載Tomcat的壓縮包 Tomcat是Apache軟件基金會的一個開源項目。登錄Apache官網即可找到下載的界
Ubuntu17.10下安裝和編譯caffe問題總結
心血來潮想玩玩caffe,看到官網的這句話果斷就用了Ubuntu17.10 沒錯,如果你使用的是Ubuntu17.04以上的版本,那麼安裝caffe的時候只要 sudo apt install caffe-cpu 去GitHub上clone
Ubuntu18.04LTS下基於 Anaconda3 安裝和編譯 Caffe-GPU
這篇部落格為在Ubuntu18.04上基於 Anaconda3 安裝編譯 Caffe-GPU的詳細教程中第三步。由於教程之詳細,放在一篇部落格中影響閱讀體驗,所以按照安裝順序分為了三個部分,具體每一部分點開連結即可訪問。 一、Ubuntu18.04下Anaconda3的安裝與配置 二
centos7下opencv3.4.1 的安裝和編譯全解
opencv是個跨平臺計算機視覺庫, 始於Intel的研究中心,並且在俄羅斯得到實現和優化,但intel現在似乎又是主要的維護者。 一、下載和安裝 1、下載網址:https://opencv.org/ 注意系統版本。 2、linux下依賴庫
Java安裝和編譯
安裝 下載jdk 安裝jdk或者解壓 配置環境變數或檔案 Windows系統下 下載jdk windows下下載類似 jdk-xuxxx-windows-x64.exe,如jdk-8u161-windows-x64.e
五.linux開發之uboot移植(五)——uboot配置和編譯過程詳解
一.uboot主Makefile分析1 1、uboot version確定(Makefile的24-29行) Makefile程式碼部分 (1)uboo
jdk動態代理(底層動態生成代理類和編譯過程)
Java動態代理,顧名思義,動態的生成代理物件。其實難點就在這裡—動態。到底怎麼動態生成。代理解決的問題就是增強類。其實,實現代理的方式很多種,比如繼承,子類對一個類增強,我們可以認為子類就是一個代理類,在比如組合,組合簡單理解就是在類中注入要增強類的物件。組合和繼
GAMS 23.9.5 安裝和破解過程(附連結)
GAMS是數學問題的高階建模,這些解決方案的程式設計和優化的有用應用。該軟體能夠解決各種線性,非線性和問題解決問題,幫助使用者從廣泛的角度探索複雜的問題。該應用程式對於高級別問題和複雜的域問題尤其有用。可以為各種主機平臺(包括個人計算機,工作站,小型計算機和超
window下protobuf3 的安裝和編譯
1、在GitHub上選擇protobuf,gmock,gtest原始碼 https://github.com/google/protobuf https://github.com/google/go
新版本的bettercap不好用, 如何安裝和編譯舊版本的bettercap
新版本的bettercap2.0以上是用go語言寫的, 各種功能感覺還不太完善, 沒有原來的用ruby寫的好, 想著回退安裝bettercap1.6舊版本 系統環境: kali 2017.2 下載原始碼: git clone https://github.com/sqqihao
Nginx的YUM安裝和編譯安裝
用Nginx官網YUM源來安裝Nginx和編譯安裝。環境:Centos 6.4 YUM安裝 首先建立nginx.repo檔案 vim /etc/yum.repos.d/nginx.repo 輸入以
Linux核心配置和編譯過程詳解
一、引言: 本文件的內容大部份內容都是從網上收集而來,然後配合一些新的截 圖(核心版本:V2.4.19)。在每一配置項後會有一個選擇指南的部份,用來指導大家怎麼樣 根據自己的情況來做相應的選擇;還有在每一個大項和文件的最後會有一個經驗談,它是一些高手們在應對問題和處理特有
window下docker的安裝和配置過程
說明 本文在騰訊內部門戶有分享,現在放在CSDN上,不存在任何涉及到騰訊內部機密的內容。 下載安裝檔案 這個和docker toolbox內容差不多是一致的,也帶有virtualbox的附加選項。 安裝的時候建議,選擇自帶的virtualbox,防止
Glib庫的安裝和編譯
Glib概述Glib是一個多種用途的工具庫,它提供許多有用的資料型別,巨集定義,型別變換,字串工具,檔案工具,主迴圈的抽象等等。它可以用於許多類-UNIX平臺、Windows,OS/2和BeOS中。GLib在GNU庫通用公共許可(GNU LGPL)下發布。 GLib的主要策
Eclipse for PHP安裝和配置過程
這學期學習PHP這門語言,因為以前一直在自學java,用慣了Eclipse和Myeclipse這兩種整合開發環境,所以就打算找找能不能在eclipse中編寫php程式碼,上網一查才知道原來早就可以了,用Eclipse for PHP就可以了,只需配置一下就行了,下面開始吧!
軟體安裝/程式編譯過程
原始碼要執行,必須先轉成二進位制的機器碼。這是編譯器的任務。 比如,下面這段原始碼(假定檔名叫做test.c)。 #include <stdio.h> int main(void) { fputs("Hello, world!\n", stdo
[hadoop系列]hadoop-gpl-compression的安裝和編譯
從Hadoop 0.20.X開始,由於lzo壓縮格式GPL形式授權的影響,lzo壓縮從hadoop釋出包中取消,轉而成為Google Code中的一個專案hadoop-gpl-compression 。本文介紹hadoop-gpl-compression的安裝和編譯。這裡
caffe2 Windows安裝和編譯
目前caffe2已經被廢棄併入pytorch,作為caffe和tensorflow的擁蹩,奉勸大家不要在不成熟的非主流技術上浪費時間了.相信你能搜到本文來也是想著caffe2能有一番作為的,很遺憾,它讓大家失望了. caffe2是caffe升級的版本,但和caffe並不