手機拍照及裁剪圖片
注:我是在上一篇部落格:“手機拍照及簡單的圖片壓縮”的基礎上改的,所以,許可權等,參考上一篇,這裡只對核心程式碼做說明
圖片被裁剪後,清晰度不夠,這個問題我沒解決
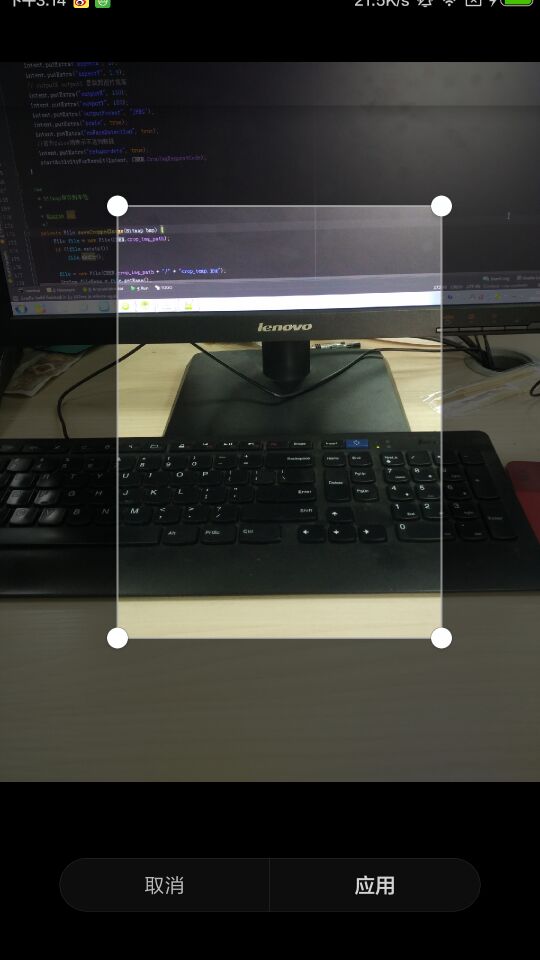
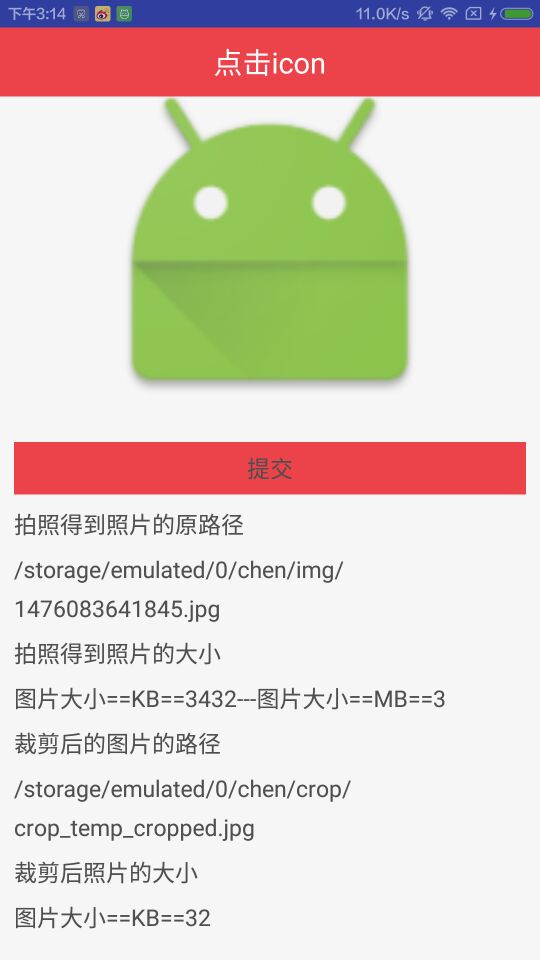
1、效果圖:
2、程式碼:
2.1:全域性變數:
/**
* 用於儲存全域性變數值
*/
public class CHEN {
/**
* 裁剪後圖片儲存的地址
*/
public static String crop_img_path = Environment.getExternalStorageDirectory() + "/chen/crop";
/**
* 拍照的返回請求碼
*/ 2.2:佈局:activity_main_22
<?xml version="1.0" encoding="utf-8"?>
<LinearLayout xmlns:android="http://schemas.android.com/apk/res/android"
android:layout_width 2.3:主程式碼:MainActivity_22_Photo_Crop_Img
/**
 * 拍照,並裁剪圖片
 */
public class MainActivity_22_Photo_Crop_Img extends BaseActivity implements View.OnClickListener, PopSelectListener {

    ImageView iv_image;
    TextView confirm_tv;
    TextView result_url_tv;
    TextView photo_src_size;

    TextView crop_img_path;
    TextView crop_img_size;

    PhotoFromSelectPop photoFromSelectPop;

    String url;
    String imageName;

    @Override
    void initview() {
        setContentView(R.layout.activity_main_22);

        iv_image = (ImageView) findViewById(R.id.iv_image);
        confirm_tv = (TextView) findViewById(R.id.confirm_tv);
        result_url_tv = (TextView) findViewById(R.id.result_url_tv);
        photo_src_size = (TextView) findViewById(R.id.photo_src_size);

        crop_img_path = (TextView) findViewById(R.id.crop_img_path);
        crop_img_size = (TextView) findViewById(R.id.crop_img_size);

        iv_image.setOnClickListener(this);
        confirm_tv.setOnClickListener(this);

        File file = new File(CHEN.img_path);
        if (!file.exists()) {
            try {
                file.mkdirs();
                Toast.makeText(this, "路徑建立成功", Toast.LENGTH_SHORT).show();
            } catch (Exception e) {
                Toast.makeText(this, "路徑建立失敗", Toast.LENGTH_SHORT).show();
            }
        }
    }

    @Override
    public void onClick(View v) {

        switch (v.getId()) {
            case R.id.iv_image:

                photoFromSelectPop = new PhotoFromSelectPop(this);
                photoFromSelectPop.initPopupWindow(this);

                break;
            case R.id.confirm_tv:

                break;
        }

    }

    @Override
    public void popSelect(int flag) {

        switch (flag) {
            case 0:

                Toast.makeText(this, "從相簿選取", Toast.LENGTH_SHORT).show();

                break;

            case 1:
                //拍照
                imageName = "/" + System.currentTimeMillis() + ".jpg";
                Intent intent_photo = new Intent(MediaStore.ACTION_IMAGE_CAPTURE);
                intent_photo.putExtra(MediaStore.EXTRA_OUTPUT, Uri.fromFile(new File(CHEN.img_path, imageName)));
                startActivityForResult(intent_photo, CHEN.TakePhotoRequestCode);
                break;

        }
    }

    @Override
    protected void onActivityResult(int requestCode, int resultCode, Intent data) {

        Log.e("requestCode", requestCode + "");
        Log.e("resultCode", resultCode + "");

        if (CHEN.TakePhotoRequestCode == requestCode) {
            url = CHEN.img_path + imageName;
            if (!TextUtils.isEmpty(url)) {
                result_url_tv.setText(url);
                File file = new File(url);
                photo_src_size.setText("圖片大小==KB==" + Utils.getNumAccuracy_2(file.length() / 1024f) + "---圖片大小==MB==" + Utils.getNumAccuracy_2(file.length() / (1024f * 1024f)));
                cropImage(file);

            }
        }

        if (CHEN.CropImgRequestCode == requestCode) {
            try {
                if (data != null) {
                    Bitmap bitmap_crop = data.getParcelableExtra("data");
                    //裁剪的圖片儲存到本地
                    File cropedfile = saveCroppedImage(bitmap_crop);
                    crop_img_path.setText(cropedfile.getPath());
                    crop_img_size.setText("圖片大小==KB==" + Utils.getNumAccuracy_2(cropedfile.length() / 1024f));
                } else {
                    Toast.makeText(this, "取消裁剪", Toast.LENGTH_SHORT).show();
                }
            } catch (Exception e) {
                e.printStackTrace();

            }
        }
        super.onActivityResult(requestCode, resultCode, data);
    }

    /**
     * 裁剪照片
     *
     * @param file
     */
    private void cropImage(File file) {
        Uri mUri = Uri.fromFile(file);
        if (null == mUri)
            return;
        Intent intent = new Intent("com.android.camera.action.CROP");
        intent.setDataAndType(mUri, "image/*");// mUri是已經選擇的圖片Uri
        intent.putExtra("crop", "true");// crop=true是設定在開啟的Intent中設定顯示的VIEW可裁剪
        //寬高比例
        intent.putExtra("aspectX", 2);
        intent.putExtra("aspectY", 1.9);
        // outputX outputY 是裁剪圖片寬高
        intent.putExtra("outputX", 150);
        intent.putExtra("outputY", 150);
        intent.putExtra("outputFormat", "JPEG");
        intent.putExtra("scale", true);
        intent.putExtra("noFaceDetection", true);
        //若為false則表示不返回資料
        intent.putExtra("return-data", true);
        startActivityForResult(intent, CHEN.CropImgRequestCode);
    }

    /**
     * bitmap儲存到本地
     *
     * @param bmp
     */
    private File saveCroppedImage(Bitmap bmp) {
        File file = new File(CHEN.crop_img_path);
        if (!file.exists())
            file.mkdir();

        file = new File(CHEN.crop_img_path + "/" + "crop_temp.jpg");
        String fileName = file.getName();
        String mName = fileName.substring(0, fileName.lastIndexOf("."));
        String sName = fileName.substring(fileName.lastIndexOf("."));

        Log.e("mName", mName);
        Log.e("sName", sName);

        //裁剪後的圖片的地址
        String newFilePath = CHEN.crop_img_path + "/" + mName + "_cropped" + sName;
        file = new File(newFilePath);
        try {
            file.createNewFile();
            FileOutputStream fos = new FileOutputStream(file);
            bmp.compress(Bitmap.CompressFormat.PNG, 100, fos);
            fos.flush();
            fos.close();
        } catch (IOException e) {
            e.printStackTrace();
        }
        return file;
    }
}
相關推薦
手機拍照及裁剪圖片
注:我是在上一篇部落格:“手機拍照及簡單的圖片壓縮”的基礎上改的,所以,許可權等,參考上一篇,這裡只對核心程式碼做說明 圖片被裁剪後,清晰度不夠,這個問題我沒解決 1、效果圖: 2、程式碼: 2.1:全域性變數: /** * 用於儲存
安卓手機拍照、裁剪、及相簿選擇圖片裁剪(適配7.0)
網上介紹安卓7.0呼叫系統拍照的部落格有很多,但感覺都不是很清晰,遂決定自己來寫。 Demo要實現的功能: 1.支援拍照並且可以對圖片進行裁剪 2.支援從相簿中選擇圖片並進行裁剪 3.無論是拍照的照片還是從相簿中選擇的照片(都是裁剪後的)統一儲存在同一個目錄下 問題
Android調用相機實現拍照並裁剪圖片,調用手機中的相冊圖片並裁剪圖片
!= findview create 圖片剪裁 顯示 parent 學會 true mfile 在 Android應用中,非常多時候我們須要實現上傳圖片,或者直接調用手機上的拍照功能拍照處理然後直接顯示並上傳功能,以下將講述調用相機拍照處理圖片然後顯示和調用手機相冊中的
手機拍照及簡單的圖片壓縮
tostring empty itl nts map amp ffffff manage 創建目錄 凝視都在代碼裏,這裏就不再說了。特別註意cnClick中的//TO
Android呼叫相機實現拍照並裁剪圖片,呼叫手機中的相簿圖片並裁剪圖片
在 Android應用中,很多時候我們需要實現上傳圖片,或者直接呼叫手機上的拍照功能拍照處理然後直接顯示並上傳功能,下面將講述呼叫相機拍照處理圖片然後顯示和呼叫手機相簿中的圖片處理然後顯示的功能,要想實現上傳功能,一般都是上傳到資料庫中,將imageView中的圖片取出來然
HTML5+Canvas+jQuery調用手機拍照功能實現圖片上傳(二)
customer mkdir 狀態保存 ont false lan else if 項目 action 上一篇僅僅講到前臺操作,這篇專門涉及到Java後臺處理。前臺通過Ajax提交將Base64編碼過的圖片數據信息傳到Java後臺,然後Java這邊進行接收處理。通過
H5實現拍照及相簿圖片上傳
最近在做一個H5的小型電商專案,其中有一個是現金刷卡之後需要上傳憑證圖片的,因此也就需要在H5中實現可以上傳圖片。 我們都知道,input標籤的type為file是可以上傳圖片的,本來想著這麼簡單,有啥難的,可是到後來這樣寫完,看效果的時候,缺發現這個東西它是有相容問題的,IOS和An
html手機拍照及上傳
手機如何實現拍照和上傳圖片? <input type="file">的accept 屬性 <!-- 選擇照片 --> <input type=file accept="image/*"> <!-- 選擇視訊 -->
HTML5+Canvas+jQuery呼叫手機拍照功能實現圖片上傳(二)
上一篇只講到前臺操作,這篇專門涉及到Java後臺處理,前臺通過Ajax提交將Base64編碼過的圖片資料資訊傳到Java後臺,然後Java這邊進行接收處理,通過對圖片資料資訊進行Base64解碼,之後使用流將圖片資料資訊上傳至伺服器進行儲存,並且將圖片的路徑地址存進資料庫。
Android拍照及裁剪實現
一.概述 拍照以及裁剪功能在有些專案中還是經常能遇到的,一般而言,使用拍照和裁剪功能基本上都是使用系統自帶的Intent來實現,看起來很簡單,但是其中還是有一些問題需要注意的。 這裡我們要實現一個功能,點選Button啟動系統相機,拍照後將照片顯示到按鈕下方
Android拍照及圖片裁剪、呼叫系統相簿(相容6.0以上許可權處理及7.0以上檔案管理)
前言: 最近工作修改較舊的專案時,涉及到了圖片相關功能 ,在使用安卓6.0手機及7.1手機拍照時,遇到了因許可權及檔案管理導致程式崩潰等問題。 剛好把功能修改完,把程式碼簡單地貼一下,方便以後使用。 本文demo包含以下要點: Android6.0執
安卓開發——拍照、裁剪並保存為頭像報錯:裁剪圖片無法保存的
結果 pen strong ica toa car 生命 detection xposed 在做學校大創項目的安卓開發時,需要從相冊獲取圖片或者拍照,然後裁剪保存為頭像。由於我是第一次弄安卓開發,也對Android現在越來越多的權限限制不了解,debug過程真的是異常心
Android 獲取手機模擬器sd卡圖片及擷取圖片
需把圖片儲存到找到手機模擬器(夜神模擬器)sd卡中的圖片路徑:檔案管理器/mnt/sdcard/images(images是自己創的資料夾) java程式碼: package com.example.android_07; import android.graphics.Bitmap
蘋果手機(ios)拍照上傳圖片旋轉90度問題---java後臺處理
需要先匯入包 metadata-extractor-2.3.1.jar 地址 https://github.com/drewnoakes/metadata-extractor/releases?after=2.7.0 xmpcore-5.1.2.jar 依賴包 maven下載 med
前端實現手機相簿或照相預覽圖片及壓縮圖片的方法
總體思路是: 1、FileReader.readAsDataURL將上傳的圖片檔案轉為Base64格式 2、將img繪製到canvas上,canvas.toDataURL壓縮圖片 3、new Blob將壓縮後的Base64轉為Blob格式 4、FormData.append將圖片檔案資料存入formdata
OpenCV圖片拍照及視訊錄製方法
一、概述 在視覺中通常需要對圖片及視訊等素材進行採集,為此準備下面的兩個程式碼作為常用小程式碼工具。 二、OpenCV圖片拍照方法 #include <iostream> #include <string> #include <sstr
IONIC拍照及圖片上傳
1.新增外掛 $ ionic cordova plugin add cordova-plugin-camera $ npm install --save @ionic-native/camera 2.拍照和從相簿獲取圖片只有一個引數的區別 //拍照或者從相簿獲
mono for android 獲取手機照片或拍照並裁剪儲存
using System; using Android.App; using Android.Content; using Android.Widget; using Android.OS; using Android.Graphics; using System.IO; names
開啟安卓手機相簿和相機並裁剪圖片上傳到unity
1、建立一個空的安卓工程 2、在unity安裝目錄下找到classes.jar檔案並匯入到工程中的libs資料夾下(classes.jar目錄為:unity安裝目錄\Editor\Data\PlaybackEngines\AndroidPlayer\Variations\il2cpp\Devel
Android拍照、相簿 獲取圖片後,裁剪圖片
最近在做的B2B的專案,圖片大部分來源於使用者自己上傳; 由於android尺寸的不一,使用者相機,相簿的圖片也是奇形怪狀; 所以在上傳之前對圖片做一次裁剪是很有必要的! 下面是按比例裁剪圖片的demo 資原始檔activity_main.xml


