Android 自定義控制元件之打造流佈局實現熱門搜尋標籤
阿新 • • 發佈:2019-01-22
最終效果
首先來看看效果圖:
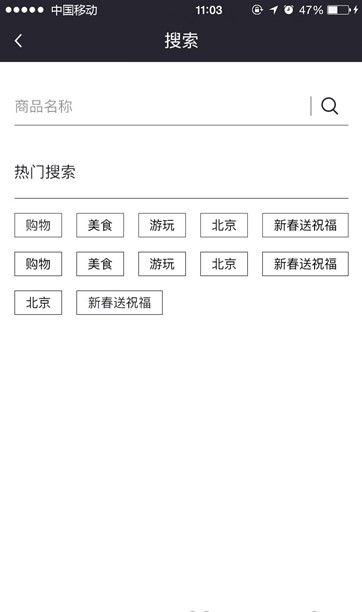
其他地方很好實現,就是熱門搜尋有點麻煩,由於資料的不確定性,那麼像GridView明顯不能滿足了,這時候就只能自己來定義一個佈局了。
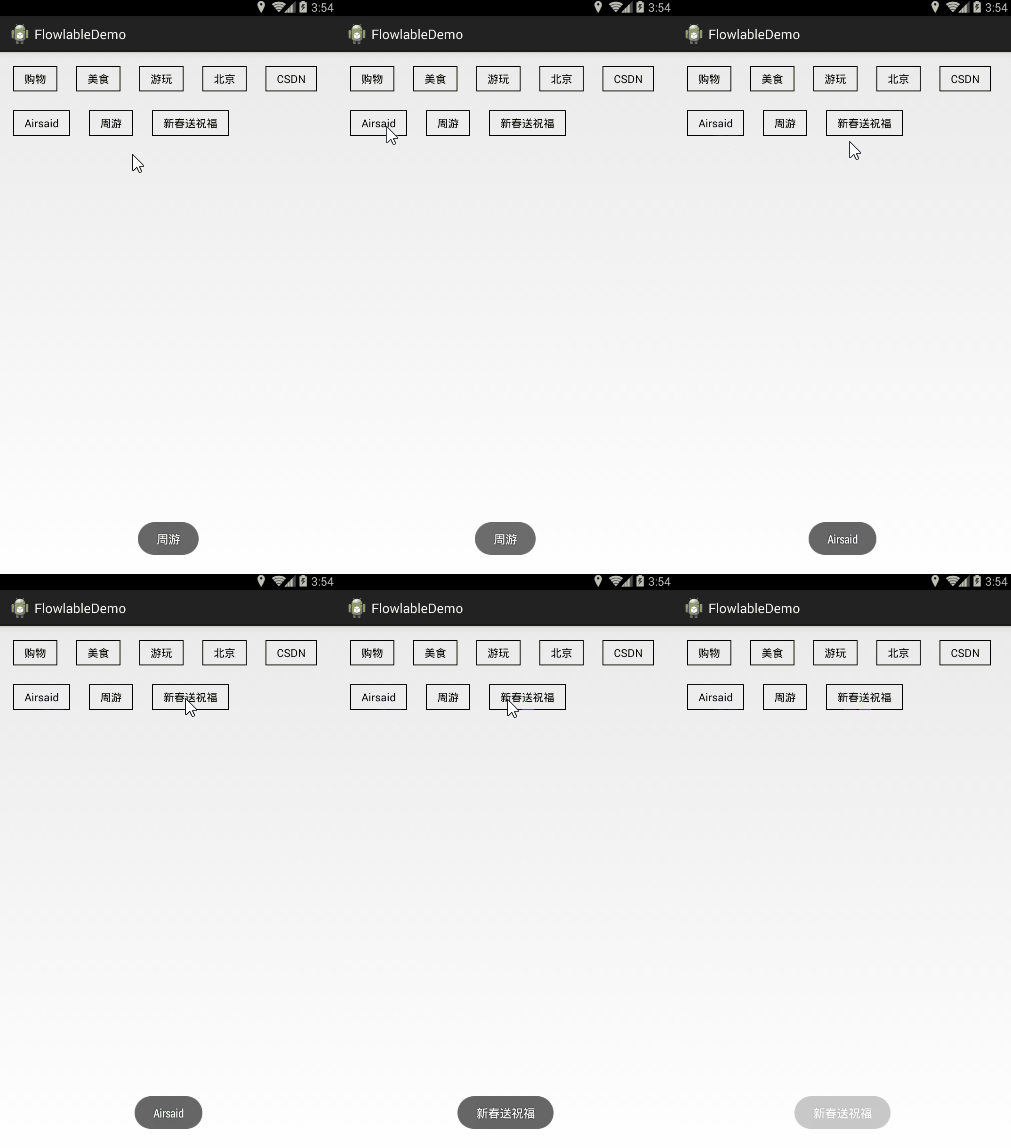
最終實現後的效果:
具體實現
1,自定義一個類繼承ViewGroup
/**
* 自定義流佈局
* @author zhouyou
*/
public class ZFlowLayout extends ViewGroup{
// 儲存所有子View
private List<List<View>> mAllChildViews = new ArrayList<>();
// 每一行的高度
private List<Integer> mLineHeight = new ArrayList<>();
public ZFlowLayout(Context context) {
this(context, null);
}
public ZFlowLayout(Context context, AttributeSet attrs) {
this(context, attrs, 0);
}
public ZFlowLayout(Context context, AttributeSet attrs, int defStyle) {
super(context, attrs, defStyle);
}
@Override
protected void onMeasure(int widthMeasureSpec, int heightMeasureSpec) {
// 父控制元件傳進來的寬度和高度以及對應的測量模式
int sizeWidth = MeasureSpec.getSize(widthMeasureSpec);
int modeWidth = MeasureSpec.getMode(widthMeasureSpec);
int sizeHeight = MeasureSpec.getSize(heightMeasureSpec);
int modeHeight = MeasureSpec.getMode(heightMeasureSpec);
// 如果當前ViewGroup的寬高為wrap_content的情況
int width = 0;// 自己測量的 寬度
int height = 0;// 自己測量的高度
// 記錄每一行的寬度和高度
int lineWidth = 0;
int lineHeight = 0;
// 獲取子view的個數
int childCount = getChildCount();
for(int i = 0;i < childCount; i++){
View child = getChildAt(i);
// 測量子View的寬和高
measureChild(child, widthMeasureSpec, heightMeasureSpec);
// 得到LayoutParams
MarginLayoutParams lp = (MarginLayoutParams) getLayoutParams();
// 子View佔據的寬度
int childWidth = child.getMeasuredWidth() + lp.leftMargin + lp.rightMargin;
// 子View佔據的高度
int childHeight = child.getMeasuredHeight() + lp.topMargin + lp.bottomMargin;
// 換行時候
if(lineWidth + childWidth > sizeWidth){
// 對比得到最大的寬度
width = Math.max(width, lineWidth);
// 重置lineWidth
lineWidth = childWidth;
// 記錄行高
height += lineHeight;
lineHeight = childHeight;
}else{// 不換行情況
// 疊加行寬
lineWidth += childWidth;
// 得到最大行高
lineHeight = Math.max(lineHeight, childHeight);
}
// 處理最後一個子View的情況
if(i == childCount -1){
width = Math.max(width, lineWidth);
height += lineHeight;
}
}
// wrap_content
setMeasuredDimension(modeWidth == MeasureSpec.EXACTLY ? sizeWidth : width,
modeHeight == MeasureSpec.EXACTLY ? sizeHeight : height);
}
@Override
protected void onLayout(boolean changed, int l, int t, int r, int b) {
mAllChildViews.clear();
mLineHeight.clear();
// 獲取當前ViewGroup的寬度
int width = getWidth();
int lineWidth = 0;
int lineHeight = 0;
// 記錄當前行的view
List<View> lineViews = new ArrayList<View>();
int childCount = getChildCount();
for(int i = 0;i < childCount; i ++){
View child = getChildAt(i);
MarginLayoutParams lp = (MarginLayoutParams) child.getLayoutParams();
int childWidth = child.getMeasuredWidth();
int childHeight = child.getMeasuredHeight();
// 如果需要換行
if(childWidth + lineWidth + lp.leftMargin + lp.rightMargin > width){
// 記錄LineHeight
mLineHeight.add(lineHeight);
// 記錄當前行的Views
mAllChildViews.add(lineViews);
// 重置行的寬高
lineWidth = 0;
lineHeight = childHeight + lp.topMargin + lp.bottomMargin;
// 重置view的集合
lineViews = new ArrayList();
}
lineWidth += childWidth + lp.leftMargin + lp.rightMargin;
lineHeight = Math.max(lineHeight, childHeight + lp.topMargin + lp.bottomMargin);
lineViews.add(child);
}
// 處理最後一行
mLineHeight.add(lineHeight);
mAllChildViews.add(lineViews);
// 設定子View的位置
int left = 0;
int top = 0;
// 獲取行數
int lineCount = mAllChildViews.size();
for(int i = 0; i < lineCount; i ++){
// 當前行的views和高度
lineViews = mAllChildViews.get(i);
lineHeight = mLineHeight.get(i);
for(int j = 0; j < lineViews.size(); j ++){
View child = lineViews.get(j);
// 判斷是否顯示
if(child.getVisibility() == View.GONE){
continue;
}
MarginLayoutParams lp = (MarginLayoutParams) child.getLayoutParams();
int cLeft = left + lp.leftMargin;
int cTop = top + lp.topMargin;
int cRight = cLeft + child.getMeasuredWidth();
int cBottom = cTop + child.getMeasuredHeight();
// 進行子View進行佈局
child.layout(cLeft, cTop, cRight, cBottom);
left += child.getMeasuredWidth() + lp.leftMargin + lp.rightMargin;
}
left = 0;
top += lineHeight;
}
}
/**
* 與當前ViewGroup對應的LayoutParams
*/
@Override
public LayoutParams generateLayoutParams(AttributeSet attrs) {
return new MarginLayoutParams(getContext(), attrs);
}
}
2,佈局引入自定義View
<RelativeLayout xmlns:android="http://schemas.android.com/apk/res/android"
xmlns:tools="http://schemas.android.com/tools"
android:layout_width="match_parent"
android:layout_height="match_parent"
tools:context="com.hkddy8.flowlabledemo.MainActivity" >
<com.hkddy8.flowlabledemo.view.ZFlowLayout
android:id="@+id/flowLayout"
android:layout_width="match_parent"
android:layout_height="wrap_content" />
</RelativeLayout>
3,使用
public class MainActivity extends Activity {
private ZFlowLayout mFlowLayout;
private String[] mLabels = {"購物","美食","遊玩","北京","CSDN", "Airsaid", "周遊", "新春送祝福"};
@Override
protected void onCreate(Bundle savedInstanceState) {
super.onCreate(savedInstanceState);
setContentView(R.layout.activity_main);
mFlowLayout = (ZFlowLayout) findViewById(R.id.flowLayout);
initLabel();
}
// 初始化標籤
private void initLabel() {
MarginLayoutParams layoutParams = new MarginLayoutParams(LayoutParams.WRAP_CONTENT, LayoutParams.WRAP_CONTENT);
layoutParams.setMargins(30, 30, 10, 10);// 設定邊距
for (int i = 0; i < mLabels.length; i++) {
final TextView textView = new TextView(MainActivity.this);
textView.setTag(i);
textView.setTextSize(15);
textView.setText(mLabels[i]);
textView.setPadding(24, 11, 24, 11);
textView.setTextColor(Color.BLACK);
textView.setBackgroundResource(R.drawable.lable_item_bg_normal);
mFlowLayout.addView(textView, layoutParams);
// 標籤點選事件
textView.setOnClickListener(new OnClickListener() {
@Override
public void onClick(View v) {
Toast.makeText(getApplicationContext(), mLabels[(int) textView.getTag()], Toast.LENGTH_SHORT).show();
}
});
}
}
}
其中背景的Shape程式碼:
<?xml version="1.0" encoding="utf-8"?>
<shape xmlns:android="http://schemas.android.com/apk/res/android" >
<stroke
android:width="1dp"
android:color="#000000" />
</shape>