WebService學習之旅(六)使用Apache Axis2實現WebService客戶端呼叫
阿新 • • 發佈:2019-01-23
上節介紹瞭如何使用Axis2 釋出一個WebService,Axis2除了為我們編寫WebService應用帶來了便利,也同樣簡化的客戶端呼叫的過程,本節在上節的基礎上使用Axis2自帶的工具生成客戶端呼叫輔助類,並實現客戶端呼叫程式碼的編寫。
1.將前面下載的axis2-1.7.1-bin.zip解壓,新建一個環境變數AXIS2_HOME,值為解壓後目錄路徑。接著在path變數中新增%AXIS2_HOME%/bin;。
2.Eclipse中新建一個Java Project,開啟Windows控制檯進入工程根目錄,輸入命令:
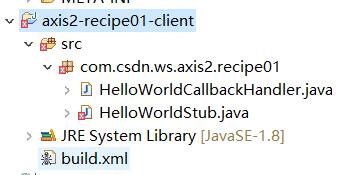
wsdl2java -uri http://localhost:8080/axis2/services/HelloWorld?wsdl 3.重新整理工程,可以看到axis2的wsdl2java工具為我們生成兩個類。
4.Java類中有錯誤,我們需要將axis2解壓後lib目錄下的所有Jar包新增到工程classpath下。
5.編寫客戶端呼叫程式碼,內容如下:
package com.csdn.ws.axis2.recipe01.client;
import java.rmi.RemoteException;
import org.apache.axis2.AxisFault;
import com.csdn.ws.axis2.recipe01.HelloWorldStub;
public class Client {
public static void main(String[] args) {
try {
HelloWorldStub stub = new HelloWorldStub();//建立HelloWorldStub物件 6.執行程式控制臺輸出WebService返回內容:
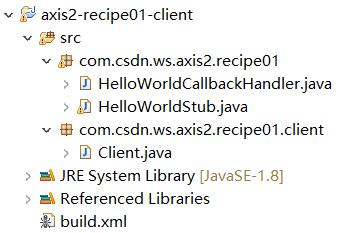
hello,Jane7.完整專案結構如下圖所示:
一個簡單的客戶端呼叫例項就演示完了,下節介紹Axis2釋出WebService的幾種方式。


