
Tensorflow Lite初探
轉載自:http://blog.csdn.net/bhneo/article/details/78835224
一、背景:
11月15日,谷歌正式釋出了TensorFlow Lite開發者預覽版。
TensorFlow Lite 是 Google I/O 2017 大會上的其中一個重要宣佈,有了TensorFlow Lite,應用開發者可以在移動裝置上部署人工智慧。
Google 表示 Lite 版本 TensorFlow 是 TensorFlow Mobile 的一個延伸版本。儘管是一個輕量級版本,依然是在智慧手機和嵌入式裝置上部署深度學習的一大動作。此前,通過TensorFlow Mobile API,TensorFlow已經支援手機上的模型嵌入式部署。TensorFlow Lite應該被視為TensorFlow Mobile的升級版。
TensorFlow Lite 目前仍處於“積極開發”狀態,目前僅有少量預訓練AI模型面世,比如MobileNet、用於計算機視覺物體識別的Inception v3、用於自然語言處理的Smart Reply,當然,TensorFlow Lite上也可以部署用自己的資料集定製化訓練的模型。
TensorFlow Lite可以與Android 8.1中釋出的神經網路API完美配合,即便在沒有硬體加速時也能呼叫CPU處理,確保模型在不同裝置上的執行。 而Android端版本演進的控制權是掌握在谷歌手中的,從長期看,TensorFlow Lite會得到Android系統層面上的支援。

其元件包括:
- TensorFlow 模型(TensorFlow Model):儲存在磁碟中的訓練模型。
- TensorFlow Lite 轉化器(TensorFlow Lite Converter):將模型轉換成 TensorFlow Lite 檔案格式的專案。
- TensorFlow Lite 模型檔案(TensorFlow Lite Model File):基於 FlatBuffers,適配最大速度和最小規模的模型。
二、環境:
Android Studio 3.0, SDK Version API26, NDK Version 14
三、原始碼分析:
整個demo的程式碼非常少,僅包含4個java檔案(相信隨著正式版的釋出,會有更加豐富的功能以及更多的預訓練模型):
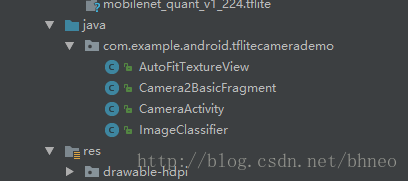
其中:
- AutoFitTextureView: 一個自定義View;
- CameraActivity: 整個app的入口activity,這個activity只做了一件事,就是載入了一個fragment;
- Camera2BasicFragment: 入口activity中載入的fragment,其中實現了所有跟UI相關的程式碼;首先在onActivityCreated中,初始化了一個ImageClassifier物件,此類是整個demo的核心,用於載入模型並實現推理運算功能。然後開啟了一個後臺執行緒,線上程中反覆地對從攝像頭獲取的影象進行分類操作。
/** Load the model and labels. */
  @Override
  public void onActivityCreated(Bundle savedInstanceState) {
    super.onActivityCreated(savedInstanceState);
    try {
      classifier = new ImageClassifier(getActivity());
    } catch (IOException e) {
      Log.e(TAG, "Failed to initialize an image classifier.");
    }
    startBackgroundThread();
  }
startBackgroundThread()中做的輪詢操作:
private Runnable periodicClassify =
      new Runnable() {
        @Override
        public void run() {
          synchronized (lock) {
            if (runClassifier) {
              classifyFrame();
            }
          }
          backgroundHandler.post(periodicClassify);
        }
      };
其中,classifyFrame()程式碼如下:
/** Classifies a frame from the preview stream. */
  private void classifyFrame() {
    if (classifier == null || getActivity() == null || cameraDevice == null) {
      showToast("Uninitialized Classifier or invalid context.");
      return;
    }
    Bitmap bitmap =
        textureView.getBitmap(ImageClassifier.DIM_IMG_SIZE_X, ImageClassifier.DIM_IMG_SIZE_Y);
    String textToShow = classifier.classifyFrame(bitmap);
    bitmap.recycle();
    showToast(textToShow);
  }
大致過程就是從控制元件textureView中以指定的長寬讀取一個Bitmap出來(也就是攝像頭的實時畫面),然後交給classifier的classifyFrame進行處理,返回一個結果,這個結果就是圖片分類的結果,然後顯示在手機螢幕上。
ImageClassifier:demo最重要的部分,但只有兩個函式比較重要,一個是建構函式:
/** Initializes an {@code ImageClassifier}. */
  ImageClassifier(Activity activity) throws IOException {
    tflite = new Interpreter(loadModelFile(activity));
    labelList = loadLabelList(activity);
    imgData =
        ByteBuffer.allocateDirect(
            DIM_BATCH_SIZE * DIM_IMG_SIZE_X * DIM_IMG_SIZE_Y * DIM_PIXEL_SIZE);
    imgData.order(ByteOrder.nativeOrder());
    labelProbArray = new byte[1][labelList.size()];
    Log.d(TAG, "Created a Tensorflow Lite Image Classifier.");
  }
其中Interpreter類非常關鍵,這是Android app與tensorflow lite之間的橋樑,位於org.tensorflow:tensorflow-lite-0.1.1中: 
這個包實現了對張量(tensor)的基本操作,而整個tensorflow就是以張量為單位處理各種運算。
tflite = new Interpreter(loadModelFile(activity))這裡通過loadModelFile將asset中的tflite格式的模型檔案載入並返回一個MappedByteBuffer傳給Interpreter。labelList = loadLabelList(activity)將asset中的labels檔案中的分類標籤載入到字串列表labelList中。imgData則是一個存放輸入張量的buffer,一個非常典型的(batch_size, x, y, channel)結構,在這裡可以理解為一個placeholder。
最後labelProbArray是一個1 x labelList.size()的張量,可以認為是一個向量,元素的個數就是模型輸出結果的總類別數,每一個元素代表模型判斷到圖片為某一類別的概率,對應於labels。
另一個是實現圖片分類的函式:
/** Classifies a frame from the preview stream. */
  String classifyFrame(Bitmap bitmap) {
    if (tflite == null) {
      Log.e(TAG, "Image classifier has not been initialized; Skipped.");
      return "Uninitialized Classifier.";
    }
    convertBitmapToByteBuffer(bitmap);
    // Here's where the magic happens!!!
    long startTime = SystemClock.uptimeMillis();
    tflite.run(imgData, labelProbArray);
    long endTime = SystemClock.uptimeMillis();
    Log.d(TAG, "Timecost to run model inference: " + Long.toString(endTime - startTime));
    String textToShow = printTopKLabels();
    textToShow = Long.toString(endTime - startTime) + "ms" + textToShow;
    return textToShow;
  }
首先convertBitmapToByteBuffer將bitmap中的畫素值讀出,並放入剛才初始化的imgData中,這裡相當於為placeholder填充了資料。然後是最關鍵的一行tflite.run(imgData, labelProbArray),喂資料,得出結果,分類的結果存入labelProbArray中。
#對於這行程式碼,有沒有似曾相識的感覺:
tf.Session().run(output, feed_dict={x:input})
最後labelProbArray轉換為需要顯示的文字,傳給UI層。
四、關於tflite模型
這裡總結一下,生成tflite有兩種方式,一種是直接在模型設計流程中,通過tflite提供的介面tf.contrib.lite.toco_convert將推理圖轉化為可供移動端直接使用的tflite檔案(由於目前是預覽版,這個介面在正式版的tensorflow中還無法使用):
import tensorflow as tf
img = tf.placeholder(name="img", dtype=tf.float32, shape=(1, 64, 64, 3))
val = img + tf.constant([1., 2., 3.]) + tf.constant([1., 4., 4.])
out = tf.identity(val, name="out")
with tf.Session() as sess:
  tflite_model = tf.contrib.lite.toco_convert(sess.graph_def, [img], [out])
  open("converteds_model.tflite", "wb").write(tflite_model)
還有就是將已經訓練好的模型檔案,轉化為tflite格式。由於涉及到模型檔案,這裡先科普一下tensorflow的模型持久化。
隨便下載一個,比如research/adv_imagenet_models當中的模型ens4_adv_inception_v3_2017_08_18.tar.gz,解壓後可以得到這些檔案: 
這些檔案儲存了模型的資訊,一般可通過如下程式碼生成:
import tensorflow as tf

...

saver = tf.train.Saver()
with tf.Session() as sess:
saver.save(sess, "/model/xxxx.ckpt") #在session中將計算圖和變數資訊儲存到ckpt檔案中雖然只指定了一個檔案路徑,但是這個目錄下會生成3個檔案,分別是xxx.ckpt.data,xxx.ckpt.meta,xxx.ckpt.index,正如上圖所示。其中,xxx.ckpt.meta儲存了計算圖結構,xxx.ckpt.data儲存了所有變數的取值,xxx.ckpt.index儲存了所有變數名。有了這三個檔案,就能得到模型的資訊並載入到其他專案中。
還有一種檔案需要介紹一下,*.pb,官方的描述是這樣的:
- GraphDef (.pb) - a protobuf that represents the TensorFlow training and or computation graph. This contains operators, tensors, and variables definitions.
- FrozenGraphDef - a subclass of GraphDef that contains no variables. A GraphDef can be converted to a frozen graphdef by taking a checkpoint and a graphdef and converting every variable into a constant with the value looked up in the checkpoint.
這裡可以簡單理解為*.pb檔案有兩種情況,一種是僅儲存了計算圖結構,不包含變數值,可以通過如下程式碼生成:
tf.train.write_graph()還有一種就是上面提到的FrozenGraphDef ,不僅包含計算圖結構,還包含了訓練產生的變數值,這類*.pb可以直接被載入用於推理運算,tensorflow mobile的一個android應用demo就是很好的例子:
https://github.com/tensorflow/tensorflow/tree/master/tensorflow/examples/android
這個demo裡,android應用正是通過FrozenGraphDef的*.pb檔案將模型載入到app中,從而實現模型的推理功能。
那麼如何使用現有的模型檔案生成tflite呢?正式需要這樣一個包含計算圖和變數值的凍結圖檔案(*.pb)。
如果已經有了這個凍結圖檔案,根據官方文件,可以使用如下命令生成tflite:
bazel build tensorflow/contrib/lite/toco:toco

bazel-bin/tensorflow/contrib/lite/toco/toco -- \
  --input_file=$(pwd)/mobilenet_v1_1.0_224/frozen_graph.pb \
  --input_format=TENSORFLOW_GRAPHDEF  --output_format=TFLITE \
  --output_file=/tmp/mobilenet_v1_1.0_224.lite --inference_type=FLOAT \
  --input_type=FLOAT --input_arrays=input \
  --output_arrays=MobilenetV1/Predictions/Reshape_1 --input_shapes=1,224,224,3
如果沒有凍結圖,也可以根據包含變數值的ckpt和僅包含計算圖結構的pb檔案生成一個凍結圖檔案:
bazel build tensorflow/python/tools:freeze_graph

bazel-bin/tensorflow/python/tools/freeze_graph\
    --input_graph=/tmp/mobilenet_v1_224.pb \
    --input_checkpoint=/tmp/checkpoints/mobilenet-10202.ckpt \
    --input_binary=true --output_graph=/tmp/frozen_mobilenet_v1_224.pb \
    --output_node_names=MobileNet/Predictions/Reshape_1