tf.depth_to_space和torch.nn.pixel_shuffle
阿新 • • 發佈:2019-01-26
最近做專案用到了這兩個函式,本人經過仔細對比,認為它們的功能應該是完全一樣的,都是將一個較多通道的特徵變成較少通道的特徵,具體定義如下:
def depth_to_space(input, block_size, name=None):block_size用來說明資料移動的方式。該函式的操作是將block_size x block_size數目的特徵圖轉換成一個不重疊的特徵,新的特徵高度為input_heigh x block_size,寬度為input_width x block_size,其中block_size大小一定是大於1的整數,為了觀察該函式的效果,本人寫了如下一段程式:
import tensorflow as tf
x = tf.constant([[[[1, 2, 3, 15], [4, 5, 6, 16]],
[[7, 8, 9, 17], [10, 11, 12, 13]]]])
print(x.shape)
y = tf.depth_to_space(x,2)
with tf.Session() as sess:
z = sess.run(y)
print(z)
輸出結果為:
[[[[ 1]
[ 2]
[ 4]
[ 5]]
[[ 3]
[15]
[ 6]
[16]]
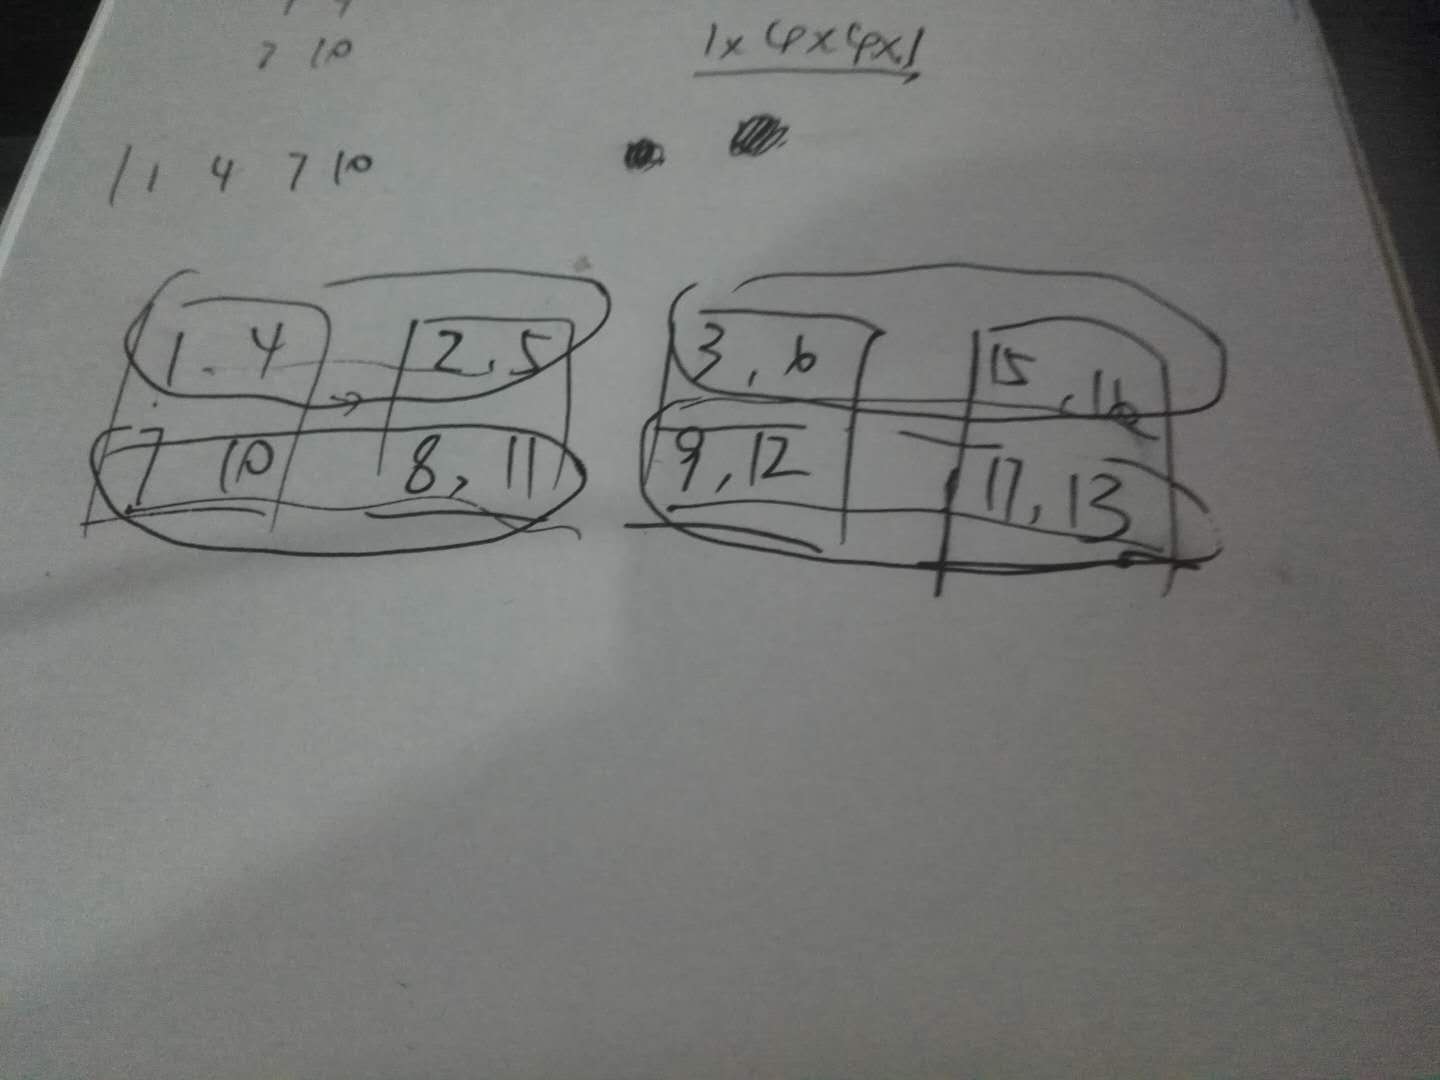
[[ 7 我做了一下模擬,大概是以下這樣的:

方塊是原來的特徵圖,該操作就是將圈裡的部分重新組合成一行,總共四行,從四個2x2特徵圖變成一個4x4的特徵圖。對於pixel_shuffle,效果完全一樣,其定義如下所示:
def pixel_shuffle(input, upscale_factor):
r"""Rearranges elements in a tensor of shape ``[*, C*r^2, H, W]`` to a
tensor of shape ``[C, H*r, W*r]``.
See :class:`~torch.nn.PixelShuffle` for details.
Args:
input (Variable): Input
upscale_factor (int): factor to increase spatial resolution by
Examples::
>>> ps = nn.PixelShuffle(3)
>>> input = autograd.Variable(torch.Tensor(1, 9, 4, 4))
>>> output = ps(input)
>>> print(output.size())
torch.Size([1, 1, 12, 12])
""" 順便也給了一個例子,這裡我就不贅述了。
這兩個函式在low_level問題裡用的地方挺多的,優點很明顯,不需要進行上取樣恢復原來的影象尺寸,從而避免資訊的損失,看來以後可以用這種方法做一下上取樣的嘗試。
