
opengl | openmesh 讀取顯示3d模型檔案
阿新 • • 發佈:2019-01-29
操作
滑鼠控制物體旋轉移動,滾輪縮放
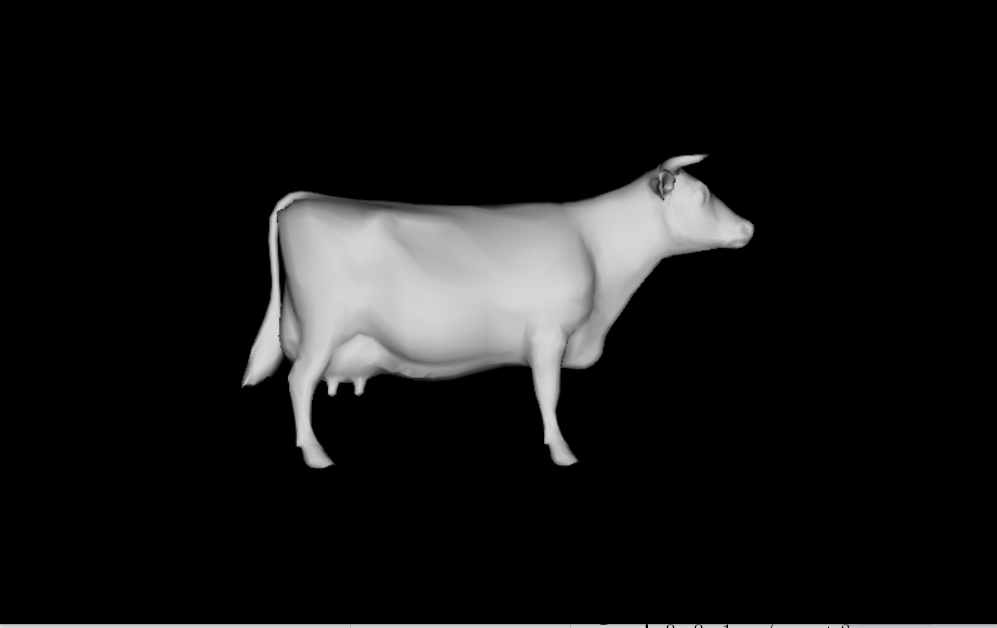
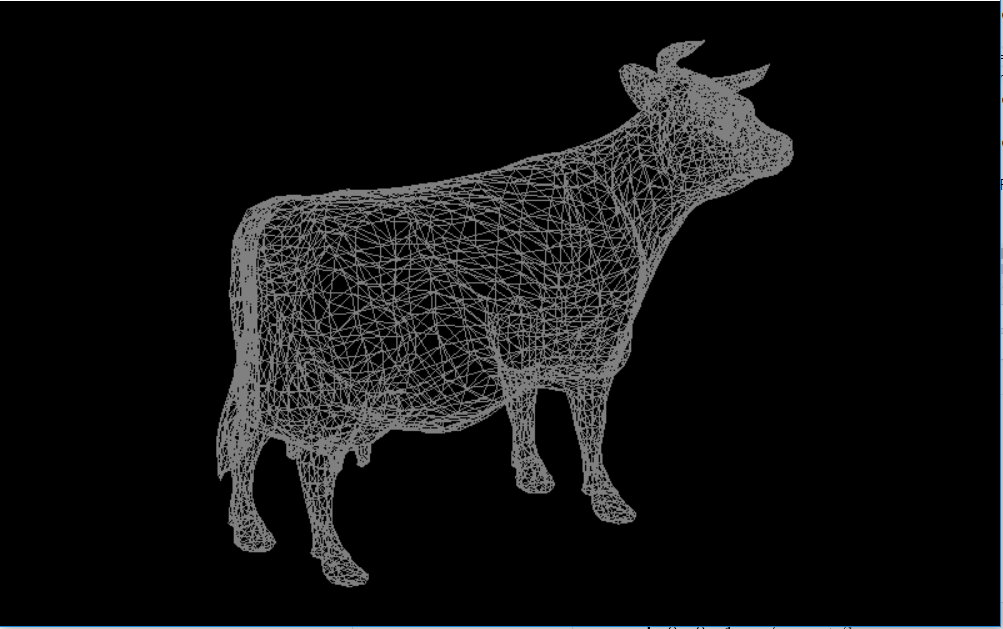
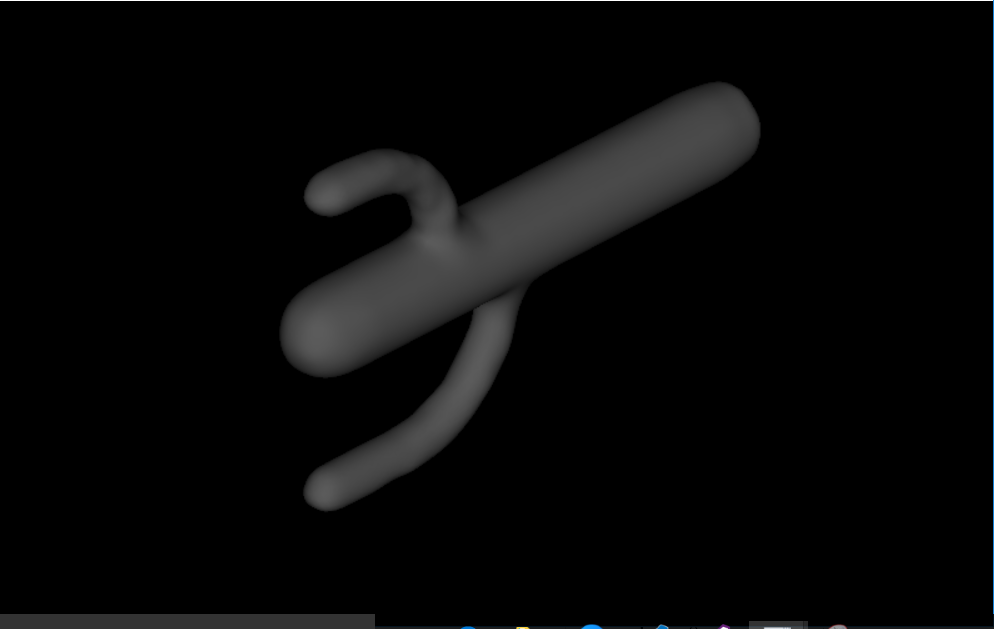
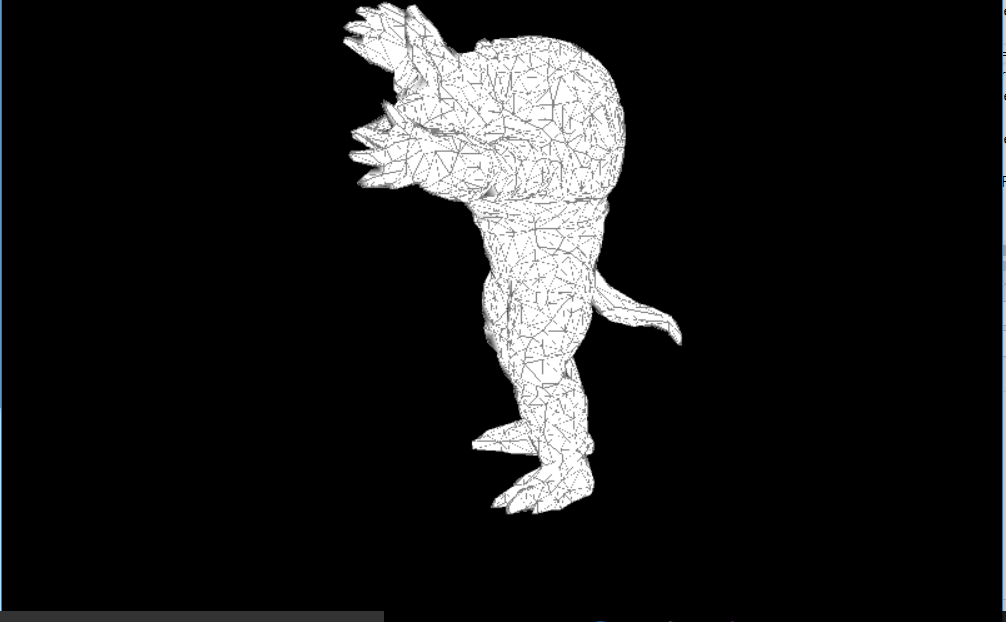
F1,F2,F3 可以更換顯示檔案 (file1:cow.obj file2:cactus.ply file3 : Armadillo.off)
F4 更換顯示模式 (wire,flat,flatlines)
截圖

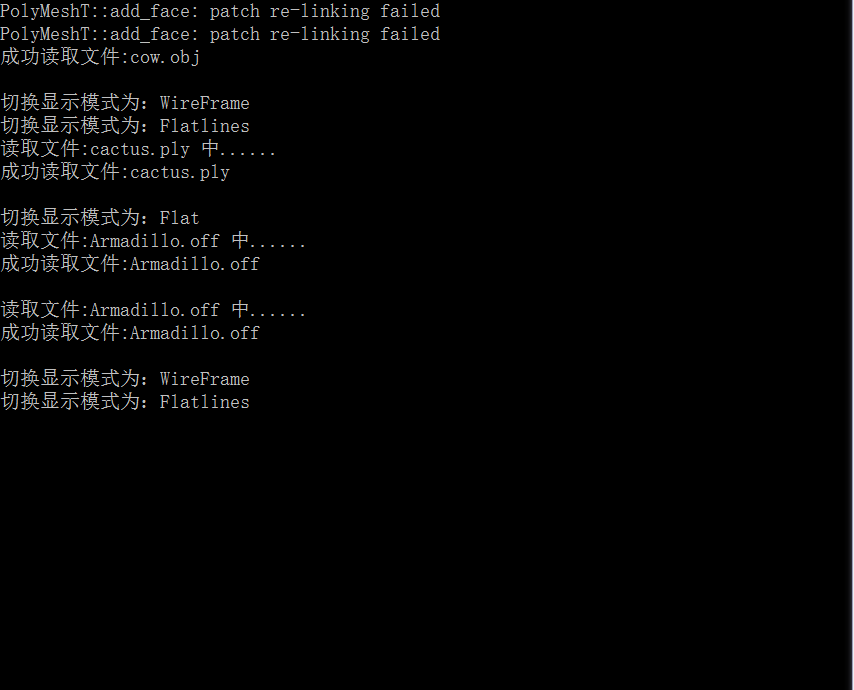
使用命令列顯示當前狀態
準備
openmesh的下載配置
- 下載最新的安裝包
- 安裝openmesh
配置vs
- 工具-》選項-》專案和解決方案-》VC++目錄 配置 包含檔案和庫檔案,分別是openmesh\include和openmesh\lib兩個路徑(比如:加C:\Program Files (x86)\OpenMesh 2.3\include和C:\Program Files (x86)\OpenMesh 2.3\lib目錄)
- 在所建工程上右鍵-》屬性-》前處理器-》前處理器定義新增_USE_MATH_DEFINE,同時在聯結器-》輸入-》附加依賴性中新增OpenMeshCored.lib和OpenMeshToolsd.lib
- 在我的配置時,還出現了一個問題就是:報錯 1>c:\program files (x86)\microsoft visual studio11.0\vc\include\xutility(2176): error C4996: ‘std::_Copy_impl’: Function callwith parameters that may be unsafe - this call relies on the caller to checkthat the passed values are correct. To disable this warning, use-D_SCL_SECURE_NO_WARNINGS. See documentation on how to use Visual C++ ‘CheckedIterators’這個的解決也是在前處理器重新增 _SCL_SECURE_NO_WARNINGS
- 工具-》選項-》專案和解決方案-》VC++目錄 配置 包含檔案和庫檔案,分別是openmesh\include和openmesh\lib兩個路徑(比如:加C:\Program Files (x86)\OpenMesh 2.3\include和C:\Program Files (x86)\OpenMesh 2.3\lib目錄)
openmesh使用和3d檔案的原理
新增標頭檔案即可:
#include <OpenMesh/Core/IO/MeshIO.hh>  // 讀取檔案
#include <OpenMesh/Core/Mesh/TriMesh_ArrayKernelT.hh> // 操作檔案 mesh中3個關鍵元素:Face 面,Edge 邊,Vertex 頂點
我們在繪圖中就是遍歷mesh檔案中的這三種資料繪製的
製作
第一步:讀取檔案
讀取檔案程式碼如下:
// 讀取檔案的函式 這個檔案讀取看起來比較繁瑣,但是對比網上其他實現讀取的方法,我覺的這樣寫檔案讀取更加安全一些
第二步:顯示
這裡我使用了 顯示列表 (Display list)進行顯示, 關於顯示列表是什麼,怎麼用,可以閱讀以下的部落格連結: link
其主要優勢就是 可以優化程式的效能
//初始化頂點和麵
void initGL()
{
glClearColor(0.0, 0.0, 0.0, 0.0);
glClearDepth(2.0);
glShadeModel(GL_SMOOTH);
glEnable(GL_DEPTH_TEST); //用來開啟深度緩衝區的功能,啟動後OPengl就可以跟蹤Z軸上的畫素,那麼它只有在前面沒有東西的情況下才會繪製這個畫素,在繪製3d時,最好啟用,視覺效果會比較真實
// ------------------- Lighting
glEnable(GL_LIGHTING); // 如果enbale那麼就使用當前的光照引數去推導頂點的顏色
glEnable(GL_LIGHT0); //第一個光源,而GL_LIGHT1表示第二個光源
// ------------------- Display List
showFaceList = glGenLists(1);
showWireList = glGenLists(1);
int temp = mesh.n_edges();
// 繪製 wire
glNewList(showWireList, GL_COMPILE);
glDisable(GL_LIGHTING);
glLineWidth(1.0f);
glColor3f(0.5f, 0.5f, 0.5f);
glBegin(GL_LINES);
for (MyMesh::HalfedgeIter he_it = mesh.halfedges_begin(); he_it != mesh.halfedges_end(); ++he_it) {
//連結這個有向邊的起點和終點
glVertex3fv(mesh.point(mesh.from_vertex_handle(*he_it)).data());
glVertex3fv(mesh.point(mesh.to_vertex_handle(*he_it)).data());
}
glEnd();
glEnable(GL_LIGHTING);
glEndList();
// 繪製flat
glNewList(showFaceList, GL_COMPILE);
for (MyMesh::FaceIter f_it = mesh.faces_begin(); f_it != mesh.faces_end(); ++f_it) {
glBegin(GL_TRIANGLES); //三角形模式
for (MyMesh::FaceVertexIter fv_it = mesh.fv_iter(*f_it); fv_it.is_valid(); ++fv_it) {
glNormal3fv(mesh.normal(*fv_it).data());
glVertex3fv(mesh.point(*fv_it).data());
}
glEnd();
}
glEndList();
}halfeage其實就是有向的邊,吧所有的有向邊的頭尾連結起來就是網格了
face 更好畫,使用繪製三角形的模式直接繪製每一個面就可以了
在以上檔案中,我將繪製了面和網格的模式。在顯示的時候,我會呼叫 glcalllist(list) 具體制定顯示哪一個顯示列表
第三步:良好的互動
在使用meshlab的過程中,可以可以用滑鼠移動其中的物體角度,滾輪放縮
// 滑鼠互動
void myMouse(int button, int state, int x, int y)
{
if (button == GLUT_LEFT_BUTTON && state == GLUT_DOWN) {
mousetate = 1;
Oldx = x;
Oldy = y;
}
if (button == GLUT_LEFT_BUTTON && state == GLUT_UP)
mousetate = 0;
//滾輪事件
if (state == GLUT_UP && button == 3) {
if (currentfile == 3)
scale -= 0.002;
else
scale -= 0.1;
}
if (state == GLUT_UP && button == 4) {
if (currentfile == 3)
scale += 0.002;
else
scale += 0.1;
}
glutPostRedisplay();
}
// 滑鼠運動時
void onMouseMove(int x, int y) {
if (mousetate) {
//x對應y是因為對應的是法向量
yRotate += x - Oldx;
glutPostRedisplay();
Oldx = x;
xRotate += y - Oldy;
glutPostRedisplay();
Oldy = y;
}
}以上函式在滑鼠每次按住移動後,記錄了當前位置相對於一開始按下點的移動位置,並轉化為物體應該旋轉的角度。滾輪事件也通過改變scale的大小來改變物體的縮放比
其他
以上就是要用到的主要技術:你還可以通過設定鍵盤事件來快速的更換顯示檔案,和顯示模式等
還有一個略坑的東西就是最後一個檔案極大,所以在更換檔案為 file3 之後,要改變 scale 和 滑輪 滾動的縮放改變 到對應大小
全部程式碼
#include <iostream>
#include <OpenMesh/Core/IO/MeshIO.hh>
#include <OpenMesh/Core/Mesh/TriMesh_ArrayKernelT.hh>
#include "GL\glut.h"
#include <math.h>
#include <Windows.h>
#include <string>
using namespace std;
typedef OpenMesh::TriMesh_ArrayKernelT<> MyMesh;
//滑鼠互動有關的
int mousetate = 0; //滑鼠當前的狀態
GLfloat Oldx = 0.0; // 點選之前的位置
GLfloat Oldy = 0.0;
//與實現角度大小相關的引數,只需要兩個就可以完成
float xRotate = 0.0f;
float yRotate = 0.0f;
float ty = 0.0f;
float scale = 1;
//檔案讀取有關的
MyMesh mesh;
const string file_1 = "cow.obj";
const string file_2 = "cactus.ply";
const string file_3 = "Armadillo.off";
int currentfile = 1;
GLuint showFaceList, showWireList;
int showstate = 1;
bool showFace = true;
bool showWire = false;
bool showFlatlines = false;
//初始化頂點和麵
void initGL()
{
glClearColor(0.0, 0.0, 0.0, 0.0);
glClearDepth(2.0);
glShadeModel(GL_SMOOTH);
glEnable(GL_DEPTH_TEST); //用來開啟深度緩衝區的功能,啟動後OPengl就可以跟蹤Z軸上的畫素,那麼它只有在前面沒有東西的情況下才會繪製這個畫素,在繪製3d時,最好啟用,視覺效果會比較真實
// ------------------- Lighting
glEnable(GL_LIGHTING); // 如果enbale那麼就使用當前的光照引數去推導頂點的顏色
glEnable(GL_LIGHT0); //第一個光源,而GL_LIGHT1表示第二個光源
// ------------------- Display List
showFaceList = glGenLists(1);
showWireList = glGenLists(1);
int temp = mesh.n_edges();
// 繪製 wire
glNewList(showWireList, GL_COMPILE);
glDisable(GL_LIGHTING);
glLineWidth(1.0f);
glColor3f(0.5f, 0.5f, 0.5f);
glBegin(GL_LINES);
for (MyMesh::HalfedgeIter he_it = mesh.halfedges_begin(); he_it != mesh.halfedges_end(); ++he_it) {
//連結這個有向邊的起點和終點
glVertex3fv(mesh.point(mesh.from_vertex_handle(*he_it)).data());
glVertex3fv(mesh.point(mesh.to_vertex_handle(*he_it)).data());
}
glEnd();
glEnable(GL_LIGHTING);
glEndList();
// 繪製flat
glNewList(showFaceList, GL_COMPILE);
for (MyMesh::FaceIter f_it = mesh.faces_begin(); f_it != mesh.faces_end(); ++f_it) {
glBegin(GL_TRIANGLES);
for (MyMesh::FaceVertexIter fv_it = mesh.fv_iter(*f_it); fv_it.is_valid(); ++fv_it) {
glNormal3fv(mesh.normal(*fv_it).data());
glVertex3fv(mesh.point(*fv_it).data());
}
glEnd();
}
glEndList();
}
// 當窗體改變大小的時候
void myReshape(GLint w, GLint h)
{
glViewport(0, 0, static_cast<GLsizei>(w), static_cast<GLsizei>(h));
glMatrixMode(GL_PROJECTION);
glLoadIdentity();
if (w > h)
glOrtho(-static_cast<GLdouble>(w) / h, static_cast<GLdouble>(w) / h, -1.0, 1.0, -100.0, 100.0);
else
glOrtho(-1.0, 1.0, -static_cast<GLdouble>(h) / w, static_cast<GLdouble>(h) / w, -100.0, 100.0);
glMatrixMode(GL_MODELVIEW);
glLoadIdentity();
}
// 讀取檔案的函式
void readfile(string file) {
    // 請求頂點法線 vertex normals
    mesh.request_vertex_normals();
    //如果不存在頂點法線,則報錯
    if (!mesh.has_vertex_normals())
    {
        cout << "錯誤:標準定點屬性 “法線”不存在" << endl;
        return;
    }
    // 如果有頂點發現則讀取檔案
    OpenMesh::IO::Options opt;
    if (!OpenMesh::IO::read_mesh(mesh, file, opt))
    {
        cout << "無法讀取檔案:" << file << endl;
        return;
    }
    else cout << "成功讀取檔案:" << file << endl;
    cout << endl; // 為了ui顯示好看一些
                  //如果不存在頂點法線,則計算出
    if (!opt.check(OpenMesh::IO::Options::VertexNormal))
    {
        // 通過面法線計算頂點法線
        mesh.request_face_normals();
        // mesh計算出頂點法線
        mesh.update_normals();
        // 釋放面法線
        mesh.release_face_normals();
    }
}
// 鍵盤互動 1. 切換檔案 2.切換顯示
void mySpecial(int key, int x, int y) {
switch (key) {
case GLUT_KEY_F1:
cout << "讀取檔案:" << file_1 << " 中......" << endl;
readfile(file_1);
scale = 1.0;
currentfile = 1;
initGL();
break;
case GLUT_KEY_F2:
cout << "讀取檔案:" << file_2 << " 中......" << endl;
readfile(file_2);
scale = 1.2;
currentfile = 2;
initGL();
break;
case GLUT_KEY_F3:
cout << "讀取檔案:" << file_3 << " 中......" << endl;
readfile(file_3);
scale = 0.01;
currentfile = 3;
initGL();
break;
case GLUT_KEY_F4:
if (showFace == true) {
showFace = false;
showWire = true;
cout << "切換顯示模式為:WireFrame" << endl;
}
else if (showWire == true)
{
showWire = false;
showFlatlines = true;
cout << "切換顯示模式為:Flatlines" << endl;
}
else if (showFlatlines == true) {
showFlatlines = false;
showFace = true;
cout << "切換顯示模式為:Flat" << endl;
}
break;
case GLUT_KEY_UP:
ty += 0.01;
break;
case GLUT_KEY_DOWN:
ty -= 0.01;
break;
default:
break;
}
glutPostRedisplay();
}
// 滑鼠互動
void myMouse(int button, int state, int x, int y)
{
    if (button == GLUT_LEFT_BUTTON && state == GLUT_DOWN) {
        mousetate = 1;
        Oldx = x;
        Oldy = y;
    }
    if (button == GLUT_LEFT_BUTTON && state == GLUT_UP)
        mousetate = 0;
    //滾輪事件
    if (state == GLUT_UP && button == 3) {
        if (currentfile == 3)
            scale -= 0.002;
        else
            scale -= 0.1;
    }
    if (state == GLUT_UP && button == 4) {
        if (currentfile == 3)
            scale += 0.002;
        else
            scale += 0.1;
    }
    glutPostRedisplay();
}

// 滑鼠運動時
void onMouseMove(int x, int y) {
    if (mousetate) {
        //x對應y是因為對應的是法向量
        yRotate += x - Oldx;
        glutPostRedisplay();
        Oldx = x;
        xRotate += y - Oldy;
        glutPostRedisplay();
        Oldy = y;
    }
}
void myDisplay()
{
//要清除之前的深度快取
glClear(GL_COLOR_BUFFER_BIT | GL_DEPTH_BUFFER_BIT);
glLoadIdentity();
//與顯示相關的函式
glRotatef(xRotate, 1.0f, 0.0f, 0.0f); // 讓物體旋轉的函式 第一個引數是角度大小,後面的引數是旋轉的法向量
glRotatef(yRotate, 0.0f, 1.0f, 0.0f);
glTranslatef(0.0f, 0.0f, ty);
glScalef(scale, scale, scale); // 縮放
//每次display都要使用glcalllist回撥函式顯示想顯示的頂點列表
if (showFace)
glCallList(showFaceList);
if (showFlatlines) {
glCallList(showFaceList);
glCallList(showWireList);
}
if (showWire)
glCallList(showWireList);
glutSwapBuffers(); //這是Opengl中用於實現雙快取技術的一個重要函式
}
int main(int argc, char** argv)
{
glutInit(&argc, argv);
glutInitDisplayMode(GLUT_RGB | GLUT_DOUBLE | GLUT_DEPTH); // GLUT_Double 表示使用雙快取而非單快取
glutInitWindowPosition(100, 100);
glutInitWindowSize(800, 500);
glutCreateWindow("Mesh Viewer");
//一開始預設讀取檔案1
readfile(file_1);
initGL();
glutMouseFunc(myMouse);
glutMotionFunc(onMouseMove); // 滑鼠移動的時候的函式
glutSpecialFunc(&mySpecial);
glutReshapeFunc(&myReshape);
glutDisplayFunc(&myDisplay);
glutMainLoop();
return 0;
}