NSight Eclipse Edition 下建立CUDA程式並執行遠端編譯及除錯
配置好NSight Eclipse Edition 的CUDA開發環境後就可以進行開發了。
(1)載入已寫好的sample
建立一個CUDA專案

選擇匯入CUDA Sample
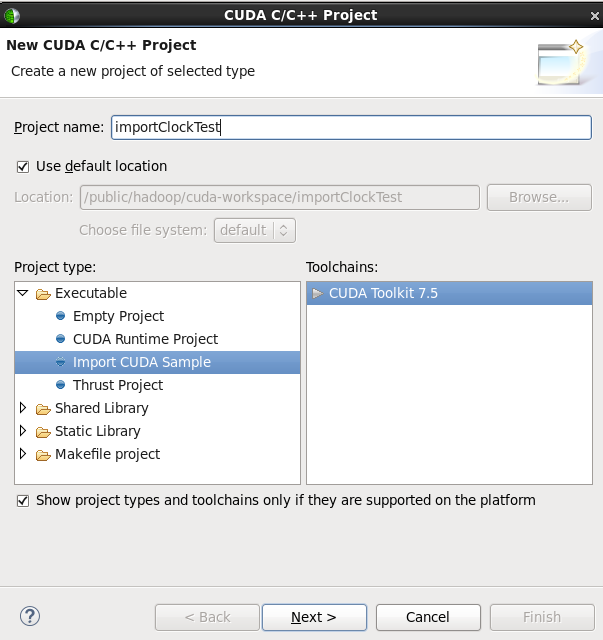
下一步(可以選擇全部例子,也可以選擇一個)
這裡我選擇了clock
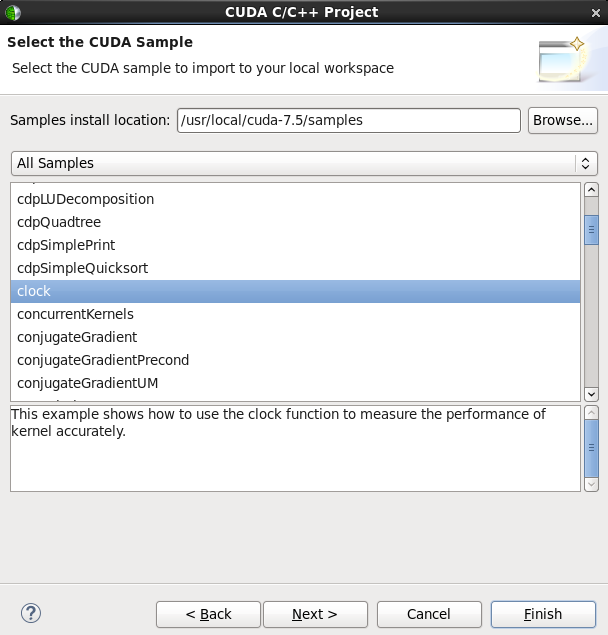
下一步
(略過,可根據自己的顯示卡計算能力選擇)
下一步(選擇目標系統)
(可在本機及遠端執行)
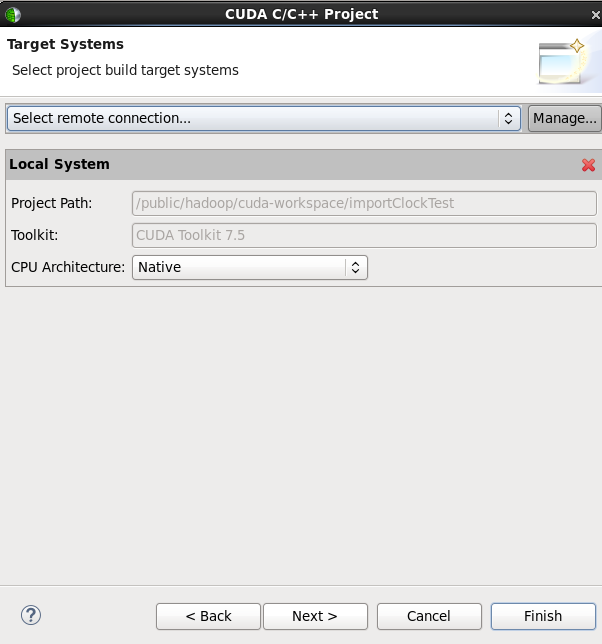
這裡由於我的Local System是沒有合適顯示卡的,故顯示灰色
我選擇了Remote Connections
配置好遠端連線
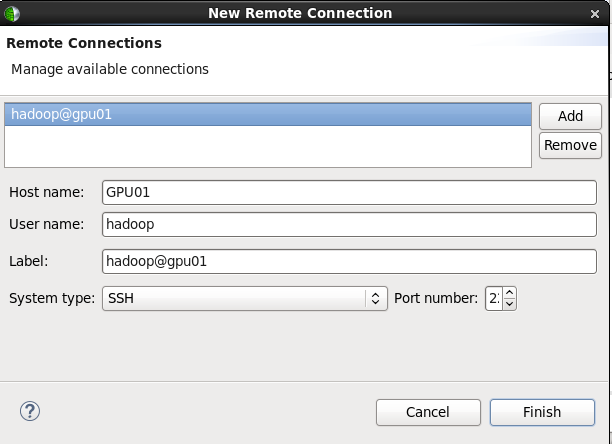
然後就可以點選Finish完成了
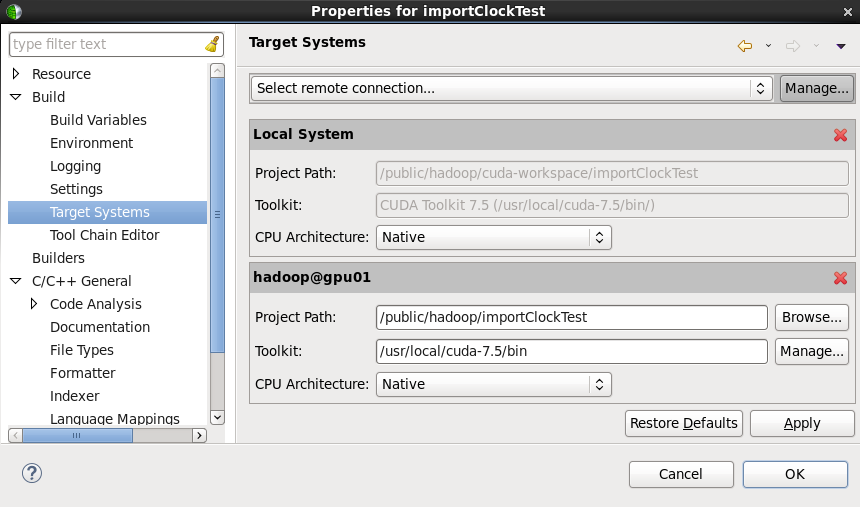
(當然也可以不在這裡配置遠端連線,可以在專案屬性裡配置)
在專案右鍵,點選Properties——》Build——》Target Systems
下面就可以進行編譯了
在工具欄的錘子下拉,選擇編譯目標
(如果本機沒有合適的顯示卡,只能選擇遠端機器)
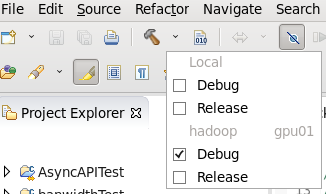
如果選擇了本地的Debug或者Release會報錯
(這個例子還好,只有警告,自己寫的直接不能通過)
Building target: importClockTest
Invoking: NVCC Linker
/usr/local/cuda-7.5/bin/nvcc –cudart static –relocatable-device-code=false -gencode arch=compute_35,code=compute_35 -gencode arch=compute_35,code=sm_35 -link -o “importClockTest” ./src/clock.o
Finished building target: importClockTest
make: warning: Clock skew detected. Your build may be incomplete.
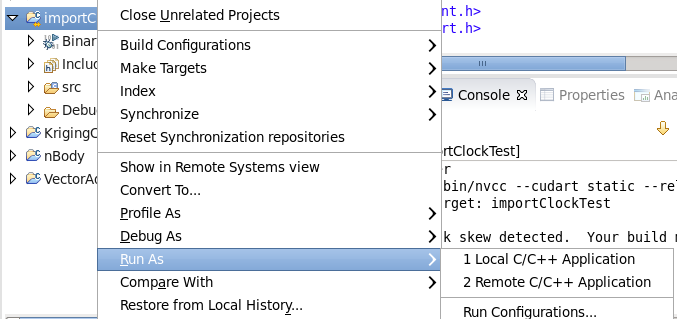
然後可以進行執行或者除錯分析(可以選擇工具欄上的圖示)
也可以右鍵選擇Debug As 。。。Run As。。。Profile As。。。
例子在這裡就執行成功了,喝彩!!!
(2)建立自己的CUDA程式
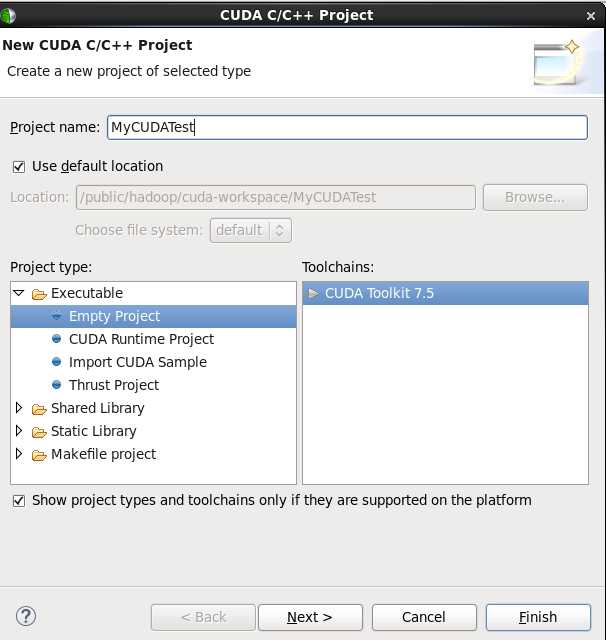
首先建立一個工程(跟載入例題是一樣的,只不過這次不是選擇Sample)
Empty Project 什麼也沒有(只是匯入了一下庫)
CUDA Runtime Project有一個XX.cu例子,可直接編譯執行
Thrust Project有一個XX.cu例子(需要包含Thrust庫檔案)
然後跟上面一樣,一步一步下去就完了
將上面例子工程下的clock.cu拷貝到自己的工程下
然後進行編譯(記住如果本機沒有合適顯示卡一定要選折遠端機器)
發現報錯了,helper找不到
21:14:13 * Build of configuration Debug for project MyCUDATest *
make all -C /public/hadoop/MyCUDATest/Debug
make: Entering directory /public/hadoop/MyCUDATest/Debug' /public/hadoop/MyCUDATest/Debug’
Building file: ../clock.cu
Invoking: NVCC Compiler
/usr/local/cuda-7.5/bin/nvcc -G -g -O0 -gencode arch=compute_35,code=sm_35 -odir "." -M -o "clock.d" "../clock.cu"
../clock.cu:28:30: error: helper_functions.h: No such file or directory
make: Leaving directory
../clock.cu:29:25: error: helper_cuda.h: No such file or directory
make: * [clock.o] Error 1
Shell Completed (exit code = 2)
原因是沒有匯入包含helper_cuda.h的庫檔案
解決辦法之一
右擊屬性Propertise——》C/C++ General——》Code Analysis——》Paths and Symbols
在Includes新增路徑/usr/local/cuda-7.5/samples/common/inc
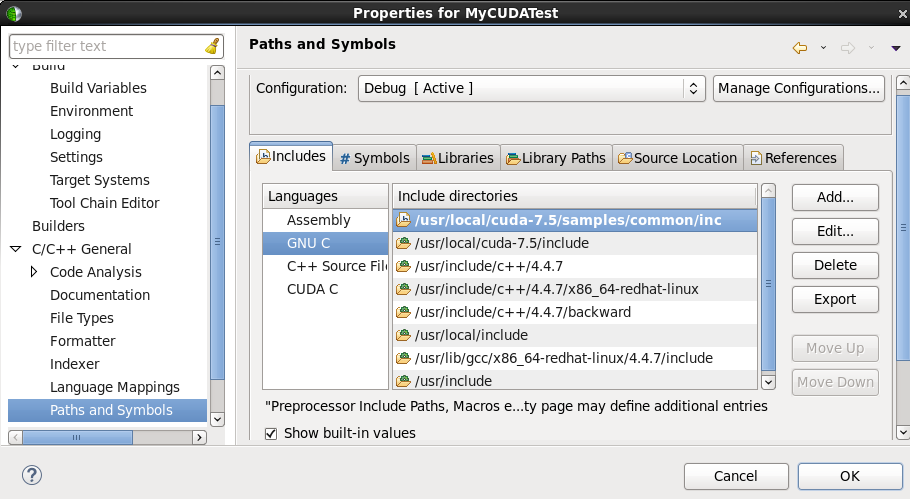
點選OK就可以了
重新編譯
執行
OK!!! Give me Five~~

