一個簡單操作解決protobuf版本問題,複製貼上你會吧
- 這個方法雖然簡單,但是我們有完美的利用anaconda的解決方案,能夠解決伺服器上大家版本衝突,你想要幾個環境就可以建立幾個完全不衝突的環境,算是一本萬利,教程在http://www.cnblogs.com/SweetBeens/p/8650460.html,推薦用這種方法。當然docker更好一些,但是老程式碼是沒有docker檔案的。
- 從頭說起:
如何看你的需要安裝的版本呢,上圖:
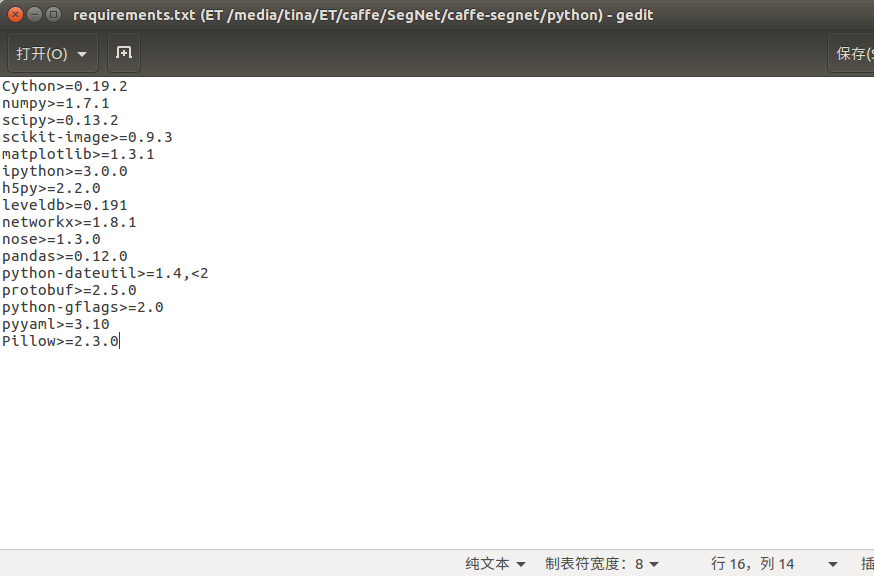
注意看我的檔案的路徑,這就是caffe官網上的那句命令列出處:
for req in $(cat requirements.txt); do pip install $req; done
鑑於我用的是segnet作者自己改的python版本的caffe,所以這是我的目錄,你可以窮搜,然後自己挑一個看看需要安裝什麼。按理說照著我這個txt,不論我什麼版本的都該好使,但是沒準我的txt找的不對,或者protobuf不向後相容了,或者caffe找的anaconda的protobuf,版本有問題,總之我越來越想看有沒有caffe配置更詳細的官方原文doc,或者我應該看看linux from scrach。這種盲人摸象式解決問題損失了很多樂趣。
- 我現在開始折騰我們實驗室的伺服器,裡面的protobuf版本比較高,所以我要用2.6.1的,我首先用下面連線的方法安裝了2.6.1:(你可以選擇跳過到最後開始解決,那是正題)
http://blog.csdn.net/whoamiyang/article/details/52947225
- 以下是提示我的路經:
libtool: install: (cd /usr/local/lib && { ln -s -f libprotoc.so.9.0.1 libprotoc.so.9 || { rm -f libprotoc.so.9 && ln -s libprotoc.so.9.0
/bin/mkdir -p '/usr/local/include/google/protobuf'
/usr/bin/install -c -m 644 google/protobuf/descriptor.proto '/usr/local/include/google/protobuf'
/bin/mkdir -p '/usr/local/include/google/protobuf/compiler'
/usr/bin/install -c -m 644 google/protobuf/compiler/plugin.proto '/usr/local/include/google/protobuf/compiler'
/bin/mkdir -p '/usr/local/include'
/bin/mkdir -p '/usr/local/include/google/protobuf/compiler/cpp'
但是依舊沒有改變版本,沒有覆蓋住。
- 以下是我的protobuf現狀:
[email protected]:~# whereis protoc
protoc: /usr/bin/protoc /usr/bin/X11/protoc /usr/local/bin/protoc /usr/share/man/man1/protoc.1.gz
[email protected]:~# pip show protobuf
Name: protobuf
Version: 3.4.1
Summary: Protocol Buffers
Home-page: https://developers.google.com/protocol-buffers/
Author: [email protected]
Author-email: [email protected]
License: 3-Clause BSD License
Location: /root/anaconda2/lib/python2.7/site-packages
Requires: six, setuptools
You are using pip version 9.0.1, however version 9.0.2 is available.
You should consider upgrading via the 'pip install --upgrade pip' command.
[email protected]:~# which protoc
/root/anaconda2/bin/protoc
[email protected]:~# protoc --version
libprotoc 3.4.0
[email protected]:~#
部落格一:http://blog.csdn.net/elysion122/article/details/64523339的說法只能改變使用sudo命令下的提取位置,而且我還不知道怎麼編我自己的路徑。
http://blog.csdn.net/whoamiyang/article/details/52947225我的安裝來源液體到了路徑,不過我懷疑其實我都沒有安裝上,由於我的版本比較新,所以我打算用pip把它解除安裝了,關鍵是我怎麼讓caffe聽我的話去找protobuf用
我懷疑我的caffe用的是電腦的protobuf,在我用sudo make all的時候提示我語言不通,因為我這時用的是2.5的protobuf,用的是部落格一的預設路徑Defaults secure_path = /sbin:/bin:/usr/sbin:/usr/bin:/usr/local/bin
當我用make all的時候提示我升級版本。如果我能夠知道我的caffe上哪裡找的protobuf就好了。
知乎上這個也許可用,前提是我找到了對的protobuf:
https://www.zhihu.com/question/58592005/answer/188884890
我用cmake出現了
incompatible with your Protocol Buffer headers. Please update
這個錯誤
--   Release CXX flags :   -O3 -DNDEBUG -fPIC -Wall -Wno-sign-compare -Wno-uninitialized
--   Debug CXX flags   :   -g -fPIC -Wall -Wno-sign-compare -Wno-uninitialized
--   Build type        :   Release
--
--   BUILD_SHARED_LIBS :   ON
--   BUILD_python      :   ON
--   BUILD_matlab      :   OFF
--   BUILD_docs        :   ON
--   CPU_ONLY          :   OFF
--
-- Dependencies:
--   BLAS              :   Yes (Atlas)
--   Boost             :   Yes (ver. 1.54)
--   glog              :   Yes
--   gflags            :   Yes
--   protobuf          :   Yes (ver. 2.6.1)
--   lmdb              :   Yes (ver. 0.9.16)
--   Snappy            :   Yes (ver. 1.1.0)
--   LevelDB           :   Yes (ver. 1.15)
--   OpenCV            :   Yes (ver. 2.4.8)
--   CUDA              :   Yes (ver. 8.0)
以下是make all的錯誤:
CXX tools/upgrade_net_proto_text.cpp
CXX/LD -o .build_release/tools/upgrade_net_proto_text.bin
.build_release/lib/libcaffe.so: undefined reference to `google::protobuf::internal::WireFormatLite::WriteStringMaybeAliased(int, std::string const&, google::protobuf::io::CodedOutputStream*)'
.build_release/lib/libcaffe.so: undefined reference to `google::protobuf::io::CodedOutputStream::WriteStringWithSizeToArray(std::string const&, unsigned char*)'
.build_release/lib/libcaffe.so: undefined reference to `google::protobuf::internal::AssignDescriptors(std::string const&, google::protobuf::internal::MigrationSchema const*, google::protobuf::Message const* const*, unsigned int const*, google::protobuf::MessageFactory*, google::protobuf::Metadata*, google::protobuf::EnumDescriptor const**, google::protobuf::ServiceDescriptor const**)'
.build_release/lib/libcaffe.so: undefined reference to `google::protobuf::Message::GetTypeName() const'
.build_release/lib/libcaffe.so: undefined reference to `google::protobuf::MessageLite::SerializeToString(std::string*) const'
.build_release/lib/libcaffe.so: undefined reference to `google::protobuf::MessageFactory::InternalRegisterGeneratedFile(char const*, void (*)(std::string const&))'
.build_release/lib/libcaffe.so: undefined reference to `google::protobuf::Message::DebugString() const'
.build_release/lib/libcaffe.so: undefined reference to `google::protobuf::internal::OnShutdownDestroyString(std::string const*)'
.build_release/lib/libcaffe.so: undefined reference to `google::protobuf::internal::WireFormatLite::WriteBytesMaybeAliased(int, std::string const&, google::protobuf::io::CodedOutputStream*)'
.build_release/lib/libcaffe.so: undefined reference to `google::protobuf::MessageLite::ParseFromString(std::string const&)'
.build_release/lib/libcaffe.so: undefined reference to `google::protobuf::internal::NameOfEnum(google::protobuf::EnumDescriptor const*, int)'
.build_release/lib/libcaffe.so: undefined reference to `google::protobuf::internal::fixed_address_empty_string'
.build_release/lib/libcaffe.so: undefined reference to `google::protobuf::internal::WireFormatLite::WriteString(int, std::string const&, google::protobuf::io::CodedOutputStream*)'
.build_release/lib/libcaffe.so: undefined reference to `google::protobuf::internal::WireFormatLite::ReadBytes(google::protobuf::io::CodedInputStream*, std::string*)'
.build_release/lib/libcaffe.so: undefined reference to `google::protobuf::Message::InitializationErrorString() const'
collect2: error: ld returned 1 exit status
make: *** [.build_release/tools/upgrade_net_proto_text.bin] Error 1
[email protected]:/dev/LT/SegNet/caffe-segnet#
http://blog.csdn.net/xiexievv/article/details/47396725
折騰了全部的路徑也不管用。
開始解決
本教程適用於折騰半天還不管事,無奈之舉。以及不能解除安裝(與別人共用伺服器)
中心思想,找到系統認準的protoc,用你想要的版本替換他。
你需要
1.你需要的protobuf版本
2.該版本被你安裝在哪
3.你係統認準的protobuf版本在哪
4.告訴你的系統,去哪裡找lib
1安裝你需要的protobuf
這個沒什麼好說的,不過提醒你最好用prefix裝在你指定的目錄,.configure --help看看怎麼用prefix
./configure --prefix=/root/LT
2.找到你剛安裝的protobuf
進入他的lib資料夾:
比如我就不同尋常的裝到了LT資料夾裡:不走尋常路,記住這個protoc。
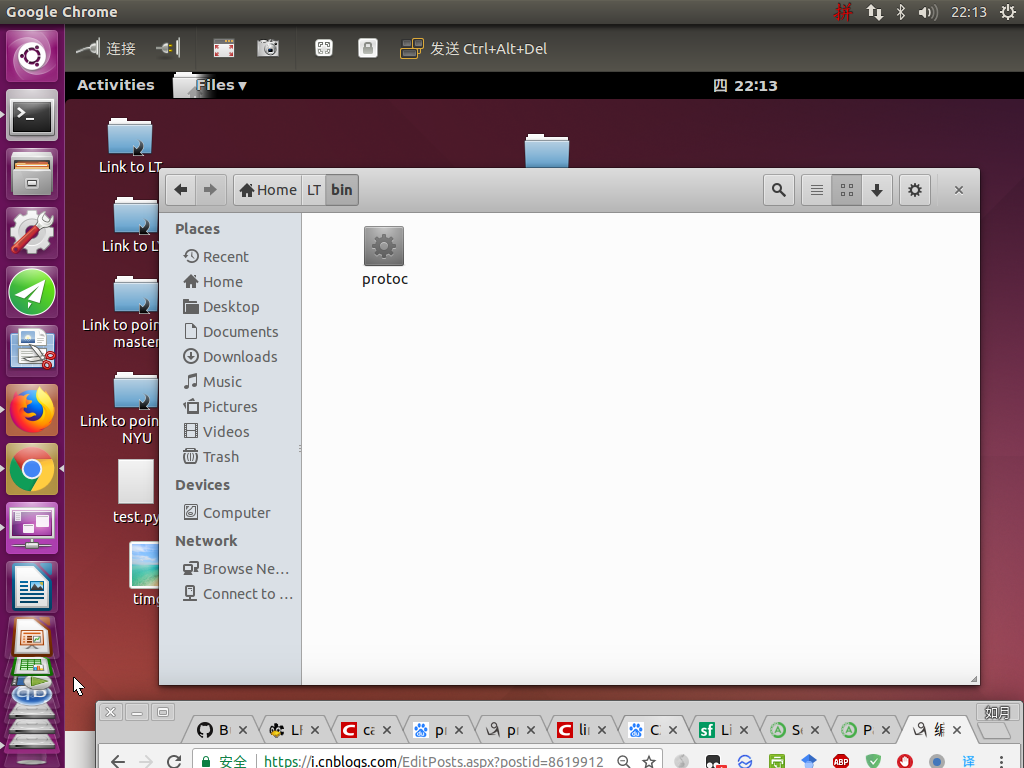
3.找到你係統認定的protoc在哪
終端輸入:
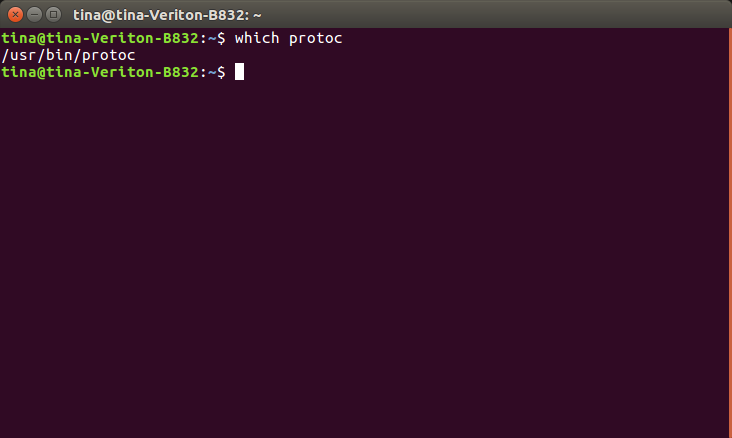
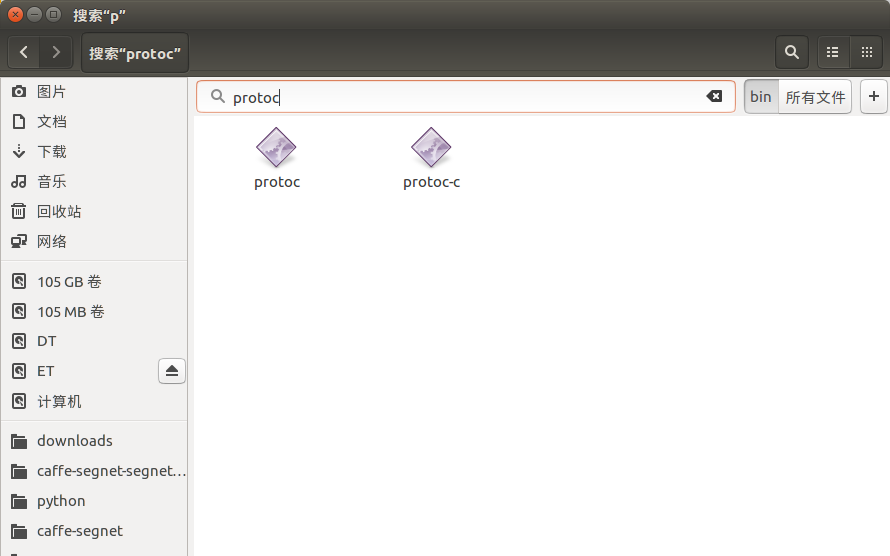
你也可以用命令列,找到這個protoc,給他改個名字,比如protoc_origin,然後把你想要的版本貼上過來.這時候再輸入
protoc --version
4.在/etc/ld.so.conf.d資料夾裡面建立libprotobuf.conf
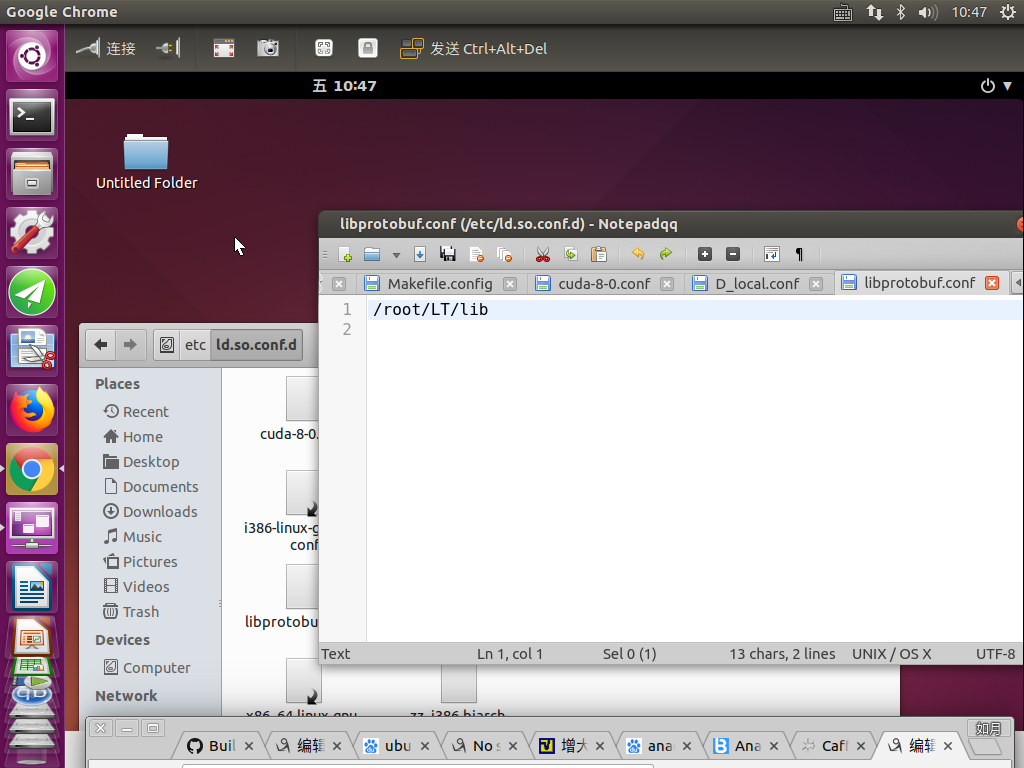
我在LT這麼一個奇葩資料夾裡面安裝的,前面已經說過,所以我的lib也在這。所以我要在裡面輸入/root/LT/lib
這時候版本就變了。由於不能解除安裝,所以我嘗試過各種辦法,然而都不好使。
如果你用caffe,請不要在makefile.config中用anaconda,要自己配置各種前置,不過沒準你就好使了呢。
為什麼說無奈之舉呢,因為這不是作者給的。而且是身首分離的,改變不了系統認準的地址,只能替換。我試過bashrc,命令列暫時的export也試過,都不能讓系統上LT找protobuf。不走常規的方式可能有風險。
相關推薦
一個簡單操作解決protobuf版本問題,複製貼上你會吧
這個方法雖然簡單,但是我們有完美的利用anaconda的解決方案,能夠解決伺服器上大家版本衝突,你想要幾個環境就可以建立幾個完全不衝突的環境,算是一本萬利,教程在http://www.cnblogs.com/SweetBeens/p/8650460.html,推薦用這種方法。
寫一個簡單的form表單,當光標離開表單的時候表單的值發送給後臺
bsp name clas blog var tex txt rip () 1 <body> 2 <form action="index.php"> 3 <input type="text" name="txt" id="txt
用一個簡單的例子比較SVM,MARS以及BRUTO(R語言)
err r語 模型訓練 n! 也有 kernel 訓練 tps mea 背景重述 本文是ESL: 12.3 支持向量機和核中表12.2的重現過程。具體問題如下: 在兩個類別中產生100個觀測值。第一類有4個標準正態獨立特征\(X_1,X_2,X_3,X_4\)。第二類也有四
一個簡單的shell小腳本,批量ping主機ip的存活狀態
proc ges echo col 垃圾 ces null The scrip #!bin/bash #ping host ip #2018年7月17日 #The shell script author xiaolong for hostip in {200..210}
Java 鏈表(LinkNode)的簡單操作:初始化,遍歷,插入,刪除等
代碼 初始化 結構體 class 如果 traverse linknode eth com 由於java中沒有結構體,所以用一個類來定義鏈表,代碼如下 主要包括一個data,還有一個指向後面一個節點的next 重寫了toString函數,返回你想要的數據 定義鏈表的類: p
pycharm2018最新啟用碼,複製貼上就能解決的事!
第一步:複製貼上找到hosts檔案 第二步:複製貼上修改hosts檔案 第三步:開啟pycharm啟用頁面輸入啟用碼 小白常見失敗原因!!
UIAutomator2 一個簡單的練手demo,自動刷東方頭條
UIAutomator2 一個簡單的練手demo,自動刷東方頭條 相容不是很好,還有情況沒有寫 import uiautomator2 as u2 import time n = 0 #連線裝置 # if u2.connect_usb(): # print("已連線USB
一個簡單的Form表單,簡單的留言板實現
<!DOCTYPE html> <html lang="en"> <head> <meta charset="UTF-8"> <title></title>
RapidJson(V1.1.0)的Value簡單操作(拼接json串,存取檔案中的json,解析json串)
#include <rapidjson/document.h> #include <rapidjson/stringbuffer.h> #include <rapidjson/pointer.h> #include <rapidjson/writer.h
pycharm2018.11最新啟用碼,複製貼上就能解決的事!
更新日誌:2018-11-01 第一步:複製貼上找到hosts檔案 先按下鍵盤的win + r ,然後複製c:\windows\system32\drivers\etc貼上到對話方塊回車開啟檔案管理器 第二步:複製貼上修改hosts檔案 開啟hosts檔
使用面向物件的程式設計思想寫一個簡單的控制檯計算器程式,放鬆一下
using System; using System.Collections.Generic; using System.Linq; using System.Text; namespace Calc
【Oracle】【FAQ】Oracle SQL Developer 編輯區不能刪除,後退,空格,複製貼上等功能都失效的解決辦法
解決辦法:開啟選單並選擇Tools-prefrence-Accelerators-Load Preset-Default(工具-首選項-加速器-載入預設-Default)即可! 載入預設在右下方, 另外注意,如果已經設定為Default的話,你可以設定成其他的,然後點選確定
linux下文字編輯器vim的使用,複製-貼上-替換-行號-撤銷-多檔案操作
文字檔案的編輯命令:vim 1、vim的三種狀態模式 1)命令模式(預設) 備註:命令模式下輸入“:q!”可以退出vim。 2)可編輯模式(通過命令模式下輸入小寫“i”進入可編輯模式;按Esc退出至命令模式) 備註:小寫i,在當前游標處插入;小寫a,在當前游標後插入
vue.js如何寫一個簡單的原生js模組,瀏覽器中的表現如何?
請點選此處輸入圖片描述瀏覽器正在逐步的支援原生JavaScript模組。Safari和Chrome的最新版本已經支援它們了,Firefox和Edge也將很快推出。如果您是一個vue.js使用者,那關於JavaScript模組一個很酷的事就是他們允許您編寫您的元件到自己的檔案中
一個簡單的自定義View,仿圓形進度條
一個很簡單的小例子,,整理一下 效果圖 上程式碼,程式碼中應該註釋很清楚了,就不再贅述,是模仿洋大神寫的,然後自己又加了一點兒自己的理解。 程式碼如下 package com.example.roundview; import android.content.Cont
Unity3d修煉之路:GUI按鈕簡單使用,完成對一個簡單物件Cube的移動,旋轉
#pragma strict private var m_pCubeObj : GameObject = null; private var m_pMeshFilter : MeshFilter = null; public var m_fTramslateSpeed :
怎麽把mp4轉換成gif格式?教你一個簡單的解決方法
roc shadow 視頻格式 mar 教你 在線 下載 找到 col 怎麽把mp4轉換成gif格式當我們有關於mp4格式的文檔怎麽轉換成gif格式的呢?下面小編就簡單給大家介紹一下。 輔助工具:迅捷PDF在線轉換器 步驟一:我們可以將需要轉換的mp4格式的文件進行保存到桌
一個簡單的php文件,實現微信網頁授權回調域名的代理轉發
host 代理 sco com 文件 lose mage 一個 time 一個簡單的php文件,實現微信網頁授權回調域名的代理轉發 <?php function is_HTTPS() { if (!isset($_SERVER[‘HTTPS‘
一個存儲過程實例,慢慢再加註釋吧!僅供自己學習
not in order datetime time 不顯示 top varchar union ide 1 USE [rfiddbHFKT] 2 GO 3 /****** Object: StoredProcedure [dbo].[ppque_tu] S
【轉】BBC解剖了一個200斤女子,看完你會用生命去減肥!
一個 是否 ID 中國 RM 過度 中國人口 理學 enter 此文有部分血腥的解剖畫面,如果無法忍受可以現在關掉頁面! 最近BBC有一部紀錄片震驚全球, 他們用最直觀的方式告訴你肥胖有對可怕, 紀錄片的名字叫——解剖肥胖!▼ 紀錄片中,兩位解剖病理學專家
