翻翻git之---豐富多樣的路由跳轉開源庫 ARouter
有一段時間沒更新部落格了,最近也沒學什麼新東西,正好組裡小夥在做路由跳轉的一個“公共庫“,然後正好最近這樣的輪子不少,我也就跟著看看,學習一下人家的思路,然後推薦給大家這個庫
什麼是路由跳轉?為什麼要用路由跳轉?
路由跳轉:
web開發框架一般支援使用者設定路由表,讓表內的頁面/層級,產生可互相跳轉,轉發等行為(如果理解不正確請指出)
要用的理由1:
專案大了就無法獲取到其他包的Activity.class了
要用的理由2:
邏輯清晰,比較語義化,清楚的知道跳轉路徑和目的地
要用的理由3:
不單單可以應用於普通Activity還可以與瀏覽器做一些業務邏輯。(如果有遺漏請指出)
ARouter所實現的功能:
支援直接解析URL進行跳轉、引數按型別解析,支援Java基本型別(*)
支援應用內的標準頁面跳轉,API接近Android原生介面
支援多模組工程中使用,允許分別打包,包結構符合Android包規範即可(*)
支援跳轉過程中插入自定義攔截邏輯,自定義攔截順序(*)
支援服務託管,通過ByName,ByType兩種方式獲取服務例項,方便麵向介面開發與跨模組呼叫解耦(*)
對映關係按組分類、多級管理,按需初始化,減少記憶體佔用提高查詢效率(*)
支援使用者指定全域性降級策略
支援獲取單次跳轉結果
豐富的API和可定製性
被ARouter管理的頁面、攔截器、服務均無需主動註冊到ARouter,被動發現 支援Android N推出的Jack編譯鏈
案例分析
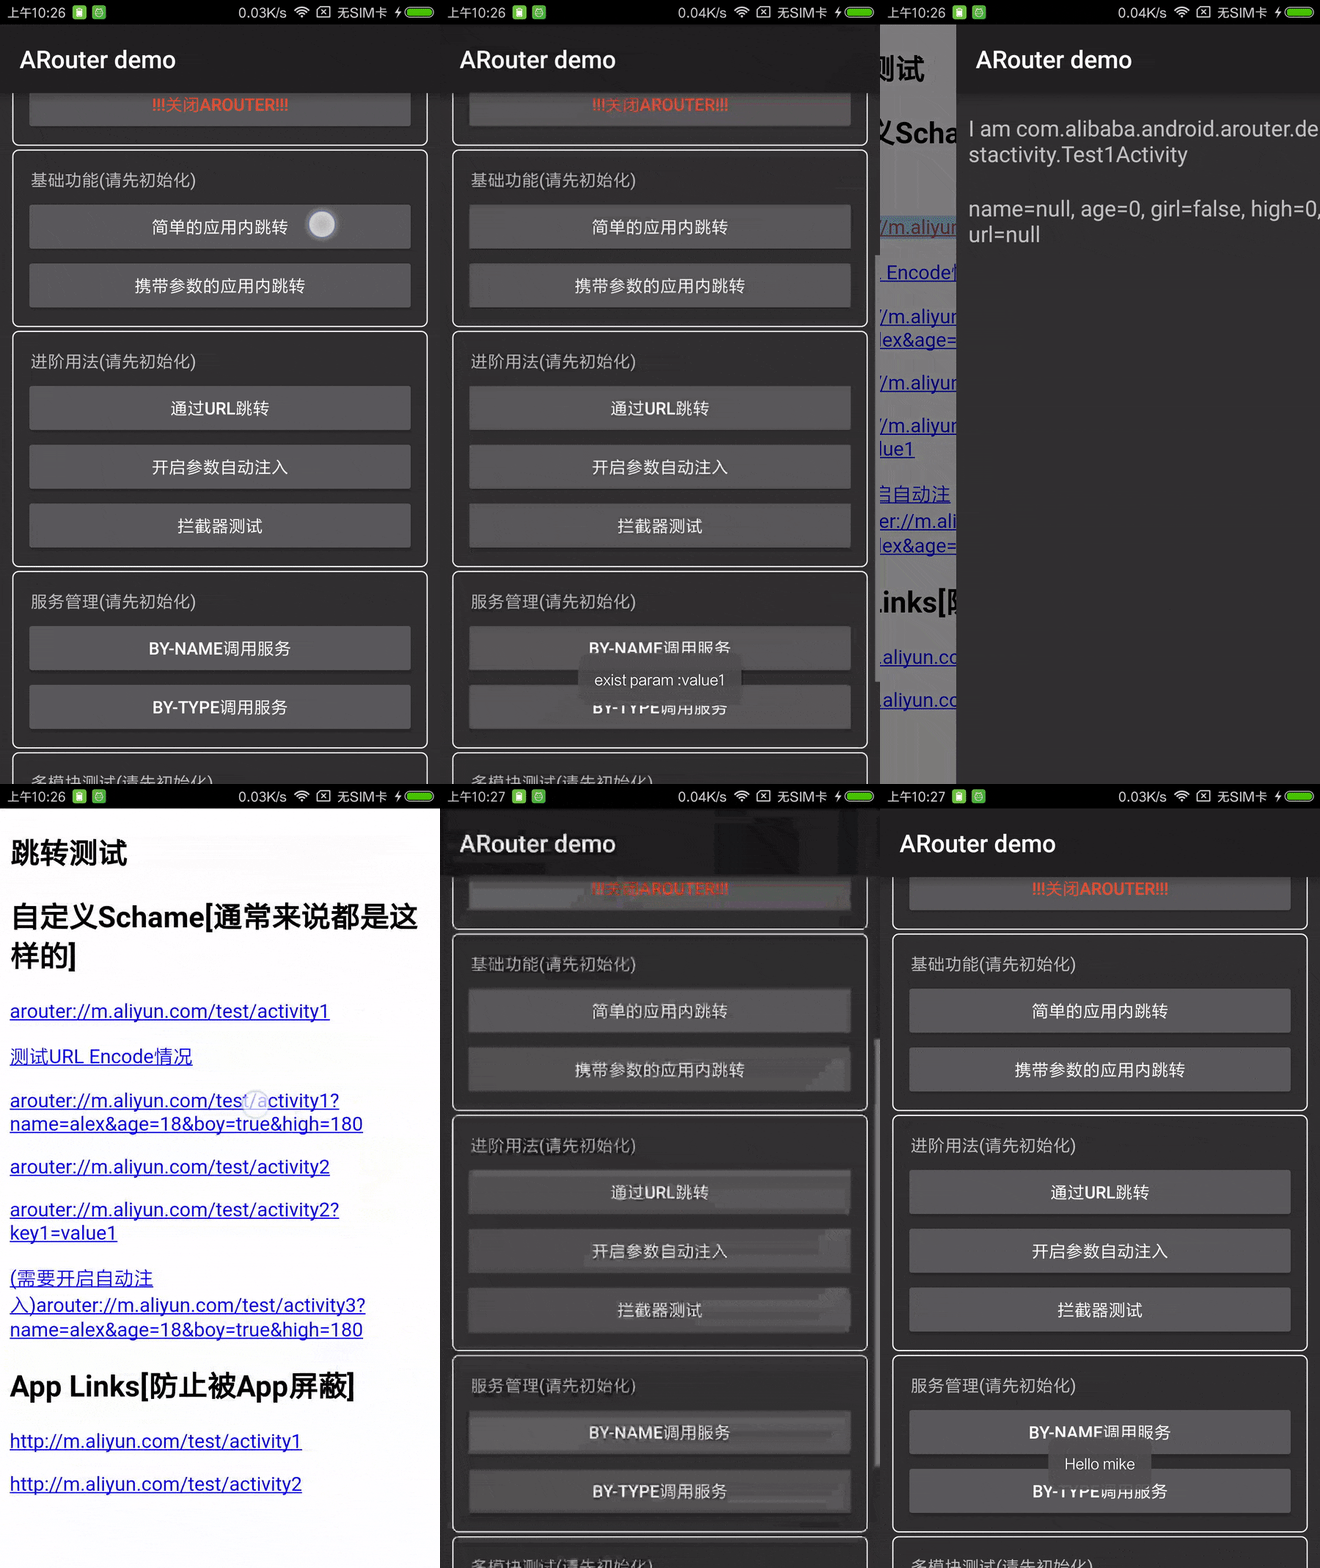
官方提供了一個demo.apk,下載下來跑了跑,長這樣

我們跟著demo去看他內部的實現,順道看下how to use?
初始化:
在你要使用這個庫之前,必須初始化,也就是呼叫
protected static synchronized boolean init(Application application) 其實這方法長這樣,他也沒叫你穿Context了,很直白直接叫你傳Application,那我們就要在自定義Application裡的onCreate裡把他給初始化了,不初始化的話會丟一個
throw new InitException("ARouterCore::Init::Invoke init(context) first!");
日誌:
內部維護了一個簡單的log類:ILogger,也就是一些簡單的打日誌的那些東西 .d .e .i 這些,主要是為了給予這個類一個狀態“是否列印日誌“
而是否列印日誌,呼叫
static synchronized void openLog() 在內部呼叫了
logger.showLog(true);然後就有log了,無論是跳轉過程還是拼接過程都可以看到具體內容,便與除錯
除錯:
因為log已經可以很好的幫你監控跳轉行為的各個流程,官方縮寫的除錯方法更簡便,當然首先你得開啟
static synchronized void openDebug()開完之後有什麼區別呢?
當你呼叫navigation()方法後,他會彈一個Toast,告訴使用者一些路由地址和分組的值。
路由地址很好理解,那組的概念又是什麼呢?
跳轉:
Activity之間的跳轉是最為常見的了,ARouter對其進行非常有效的封裝,像這樣
ARouter.getInstance().build("/test/1")
            .withLong("key1", 666L)
            .withString("key3", "888")
            .navigation();
我們來看一下他是如何實現的
首先先獲取ARouter的例項,內部沒有什麼複雜操作,首先判斷有沒有初始化,如果初始化了再盼空,如果為空就建立一個ARouter物件,然後將其返回。
獲取例項之後,先構建路徑build
 protected Postcard build(String path) {
        if (StringUtils.isEmpty(path)) {
            throw new HandlerException(Consts.TAG + "Parameter is invalid!");
        } else {
            PathReplaceService pService = ARouter.getInstance().navigation(PathReplaceService.class);
            if (null != pService) {
                path = pService.forString(path);
            }
            return build(path, extractGroup(path));
        }
    }
首先先判空,如果路徑沒東西就拋異常
不為空之後把時間邏輯交由PathReplaceService介面來處理
PathReplaceService 介面用於處理path相關邏輯,如果要自定義path處理方法可自行二次實現
分發完後呼叫了另外個build方法
  protected Postcard build(String path, String group) {
        if (StringUtils.isEmpty(path) || StringUtils.isEmpty(group)) {
            throw new HandlerException(Consts.TAG + "Parameter is invalid!");
        } else {
            PathReplaceService pService = ARouter.getInstance().navigation(PathReplaceService.class);
            if (null != pService) {
                path = pService.forString(path);
            }
            return new Postcard(path, group);
        }
    }
行為幾乎一致,但是這裡把我們的路徑分配到了預設組內並生成新的Postcard物件返回
看到這裡有點尷尬,Postcard是什麼鬼?
Postcard在com.alibaba.android.arouter.facade目錄下是一個包含路線圖的容器
裡面有一些我們一看就懂的欄位
    private Uri uri;
    private Object tag;
    private Bundle mBundle;
    private int flags = -1;
    private int timeout = 300;
    private IProvider provider;
    private boolean greenChannal;
很明顯他就是整個路由行為的一個載體,可分配url,group,path等等,既然是一個是載體,那我們就不管他幹啥,反正就是一個帶資訊傳遞用的“快遞小哥”
無論怎麼建立其實都是走的下面這個建構函式,字面就很好理解,設定的path和group,Bundle有就有沒有就建立,uri暫時是空
 public Postcard(String path, String group, Uri uri, Bundle bundle) {
        setPath(path);
        setGroup(group);
        setUri(uri);
        this.mBundle = (null == bundle ? new Bundle() : bundle);
    }
例子裡我們是傳參了,也就是對bundle進行了一系列的native的put操作。
navigation方法經過一系列的方法又回到了
ARouter.getInstance().navigation(context, this, -1, callback); protected Object navigation(final Context context, final Postcard postcard, final int requestCode, NavigationCallback callback)在呼叫之初
requestCode 是 -1
postcard 就是前面建立的Postcard物件
callback是個null
Context 是Application的context物件
 protected Object navigation(final Context context, final Postcard postcard, final int requestCode, NavigationCallback callback) {
        try {
            //註冊監聽,去拆物件裡的屬性,做包裝
            LogisticsCenter.completion(postcard);
        } catch (NoRouteFoundException ex) {
            logger.warning(Consts.TAG, ex.getMessage());
            //剛才提到的debuggable為true時候打出一些內容
            if (debuggable()) { // Show friendly tips for user.
                Toast.makeText(mContext, "There's no route matched!\n" +
                        " Path = [" + postcard.getPath() + "]\n" +
                        " Group = [" + postcard.getGroup() + "]", Toast.LENGTH_LONG).show(
            if (null != callback) {
                callback.onLost(postcard);
            } else {    // No callback for this invoke, then we use the global degrade service.
                DegradeService degradeService = ARouter.getInstance().navigation(DegradeService.class);
                    //因為ARouter例項不為空所以介面不為空所以把Lost⌚️分發了出去
                if (null != degradeService) {
                    degradeService.onLost(context, postcard);
                }
            }

            return null;
        }
        //如果回撥不為空就把監聽到的回撥進行分發
        if (null != callback) {
            callback.onFound(postcard);
        }
        //綠色非同步通道的處理
        if (!postcard.isGreenChannal()) {   // It must be run in async thread, maybe interceptor cost too mush time made ANR.
            LogisticsCenter.interceptions(postcard, new InterceptorCallback() {
                /**
                 * Continue process
                 *
                 * @param postcard route meta
                 */
                @Override
                public void onContinue(Postcard postcard) {
                    _navigation(context, postcard, requestCode);
                }

                /**
                 * Interrupt process, pipeline will be destory when this method called.
                 *
                 * @param exception Reson of interrupt.
                 */
                @Override
                public void onInterrupt(Throwable exception) {
                    logger.info(Consts.TAG, "Navigation failed, termination by interceptor : " + exception.getMessage());
                }
            });
        } else {
            return _navigation(context, postcard, requestCode);
        }

        return null;
    }
上面有一些新名詞,諸如綠色通道等,這部分可以去翻官方的readme,裡面有介紹
這裡看到,最後又呼叫了
private Object _navigation(final Context context, final Postcard postcard, final int requestCode)這是具體跳轉行為的一個方法,他支援 多種型別的postcard type,我們主要看下ACTIVITY相關的
 case ACTIVITY:

                // 構建 intent
                Intent intent = new Intent(currentContext, postcard.getDestination());
                intent.putExtras(postcard.getExtras());

                // 設定 flags.
                int flags = postcard.getFlags();
                if (-1 != flags) {
                    intent.setFlags(flags);
                } else {
                    intent.setFlags(Intent.FLAG_ACTIVITY_NEW_TASK);
                }

                // Judgment activity start type.
                if (requestCode > 0) {  // RequestCode exist, tell us user's want startActivityForResult, so this context must son of activity.
                    ((Activity) currentContext).startActivityForResult(intent, requestCode);
                } else {
                    currentContext.startActivity(intent);
                }

                break;
最終實現就是我們常用的 startActivity和startActivityForResult操作
總結:
其實它做的就是普通的跳轉的行為,但是對跳轉進行了很豐富的二次實現。
1.降低了協同開發的成本,因為你根本不在意跳轉目的地是否真的存在,按照預先定下來的url跳轉就好(包括傳引數)。
2.無論外部內部跳轉變得更簡單,反正初始化就會構建一個路由管理器,無需自己管理跳轉過程。
3.測試方便,跟web測轉發一樣,單元測試實現性更強。
本來還想介紹下ARouter的瀏覽器攔截和自定義url拼接,但是篇幅問題,這篇就不寫了,以後有機會再寫吧
類似實現的開源庫:

