
譯文:使用MVC5的Entity Framework 6入門(五)——MVC程式中實體框架的Code First遷移和部署
MVC程式中實體框架的Code First遷移和部署
這是微軟官方教程Getting Started with Entity Framework 6 Code First using MVC 5 系列的翻譯,裡是第五篇:MVC程式中實體框架的Code First遷移和部署
到目前為止,應用程式已經可以在您本地機器上正常地執行。但如果您想將它釋出在網際網路上以便更多的人來使用,您需要將程式部署到WEB伺服器。在本教程中你會將Contoso大學應用程式部署到Windows Azure網站的雲中。
本教程包含以下章節:
- 啟用Code First遷移。遷移功能能夠使您不必刪除並重新建立資料庫的資料架構而進行更改資料模型並部署你的更改到生產環境下。
- 將應用程式部署到Windows Azure。該步驟是可選的,你可以跳過本步驟繼續剩餘的教程。
啟用Code First遷移
當你進行新應用程式的開發時,你的資料模型會頻繁地變動。並且隨著每一次變動都會使資料模型與資料庫脫節。你已經成功配置了實體框架讓其在每一次你變更資料模型時自動刪除並重新建立資料庫。當您新增、刪除或更改實體類或者更改你的DbContext類時,重新執行應用程式會使它自動刪除已經存在的資料庫並建立一個和當前資料模型相匹配的資料庫。並且填充測試資料。
這種方法在保持資料模型和資料庫架構同步方面做得非常好,直到你準備將應用程式部署到生產環境。當應用程式開始生產並存儲生產資料,你當然不想因為資料模型的變更而丟失成產資料(比如新增一個新列)。 Code First Migrations 功能解決了這個問題。通過啟用Code First遷移來更新資料庫架構,而不是刪除和重建資料庫。在本教程中,您會部署該應用程式,並準備啟用遷移。
禁用之前教程中你在Web.Config中設定的初始設定項。
<entityFramework>
<!--<contexts>
<context type="ContosoUniversity.DAL.SchoolContext, ContosoUniversity">
<databaseInitializer type="ContosoUniversity.DAL.SchoolInitializer, ContosoUniversity" />
</context>
</contexts>--> 同樣在Web.config中,更改資料庫連線字串的名為成ContosoUniversity2。
<connectionStrings>
  <add name="SchoolContext" connectionString="Data Source=(LocalDb)\v11.0;Initial Catalog=ContosoUniversity2;Integrated Security=SSPI;" providerName="System.Data.SqlClient" />
</connectionStrings>
此更改設定該專案的第一次遷移將建立一個新的資料庫,這不是必須的,但您稍後將看到為這麼這樣做是一個不錯的主意。
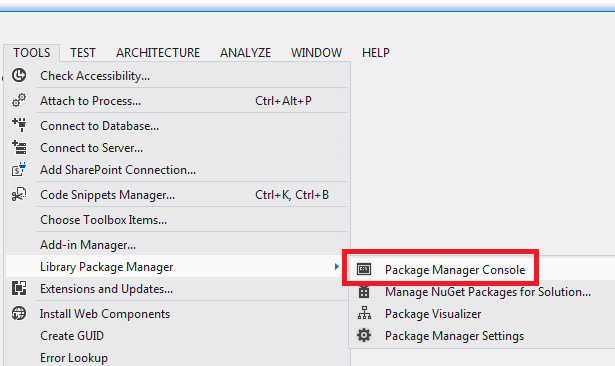
從工具選單上,單擊NuGet程式包管理器,單擊程式包管理器控制檯。
在控制檯中輸入以下命令:
enable-migrations
add-migration InitialCreate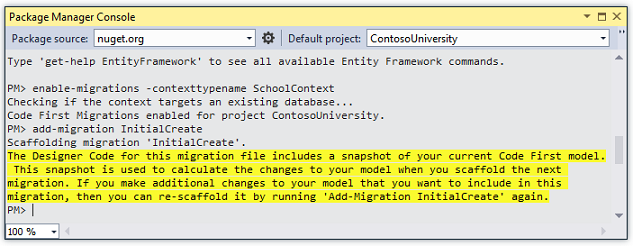
enable-migrations命令將在專案中建立一個遷移資料夾。同時資料夾中包含一個Configuration.cs檔案,你可以編輯該檔案來配置遷移。 如果你在上一步中沒有更改資料庫名稱,遷移將找到現有的資料庫並自動執行add-migration命令,這沒有關係。它只是意味著你不會在部署資料庫之前執行遷移程式碼的測試。之後當您執行update-database將不會做任何改變因為資料庫已經存在。

如同之前教程中,Configuration類中同樣包含Seed方法。
internal sealed class Configuration : DbMigrationsConfiguration<ContosoUniversity.DAL.SchoolContext>
{
    public Configuration()
    {
        AutomaticMigrationsEnabled = false;
    }

    protected override void Seed(ContosoUniversity.DAL.SchoolContext context)
    {
        //  This method will be called after migrating to the latest version.

        //  You can use the DbSet<T>.AddOrUpdate() helper extension method
        //  to avoid creating duplicate seed data. E.g.
        //
        //    context.People.AddOrUpdate(
        //      p => p.FullName,
        //      new Person { FullName = "Andrew Peters" },
        //      new Person { FullName = "Brice Lambson" },
        //      new Person { FullName = "Rowan Miller" }
        //    );
        //
    }
}
Seed方法的目的是使您在Code First建立或更新資料庫後插入或更新測試資料。當資料庫每次建立和更新資料庫架構時將呼叫該方法。
設定Seed方法
當您每次更改資料模型後,刪除和重新建立資料庫時你可以使用初始類的Seed方法來插入測試資料。因為每次模型更改資料庫後,資料庫將被刪除,所有的測試資料都將丟失。在Code First前一種,測試資料在資料庫更改後是保留的。所以在Seed方法中包含測試資料通常不是必要的。事實上,你並不想要在使用遷移部署資料庫到生產環境時讓Seed方法來插入測試資料,因為Seed方法會在生產環境中呼叫。在這種情況下,只有真正需要時,才使用Seed方法來在生產環境中插入資料。例如你可能想要在部署到生產環境時在Deparment表中包含實際部門的名稱。
對於本教程,您將使用遷移來部署。但為了讓你能夠跟容易地看到程式功能是如何無需人工操作而插入資料的,我們將使用Seed方法來插入測試資料。
使用下面的程式碼替換Configuration.cs檔案的內容:
namespace ContosoUniversity.Migrations
{
    using ContosoUniversity.Models;
    using System;
    using System.Collections.Generic;
    using System.Data.Entity;
    using System.Data.Entity.Migrations;
    using System.Linq;

    internal sealed class Configuration : DbMigrationsConfiguration<ContosoUniversity.DAL.SchoolContext>
    {
        public Configuration()
        {
            AutomaticMigrationsEnabled = false;
        }

        protected override void Seed(ContosoUniversity.DAL.SchoolContext context)
        {
            var students = new List<Student>
            {
                new Student { FirstMidName = "Carson",   LastName = "Alexander",
                    EnrollmentDate = DateTime.Parse("2010-09-01") },
                new Student { FirstMidName = "Meredith", LastName = "Alonso",
                    EnrollmentDate = DateTime.Parse("2012-09-01") },
                new Student { FirstMidName = "Arturo",   LastName = "Anand",
                    EnrollmentDate = DateTime.Parse("2013-09-01") },
                new Student { FirstMidName = "Gytis",    LastName = "Barzdukas",
                    EnrollmentDate = DateTime.Parse("2012-09-01") },
                new Student { FirstMidName = "Yan",      LastName = "Li",
                    EnrollmentDate = DateTime.Parse("2012-09-01") },
                new Student { FirstMidName = "Peggy",    LastName = "Justice",
                    EnrollmentDate = DateTime.Parse("2011-09-01") },
                new Student { FirstMidName = "Laura",    LastName = "Norman",
                    EnrollmentDate = DateTime.Parse("2013-09-01") },
                new Student { FirstMidName = "Nino",     LastName = "Olivetto",
                    EnrollmentDate = DateTime.Parse("2005-08-11") }
            };
            students.ForEach(s => context.Students.AddOrUpdate(p => p.LastName, s));
            context.SaveChanges();

            var courses = new List<Course>
            {
                new Course {CourseID = 1050, Title = "Chemistry",      Credits = 3, },
                new Course {CourseID = 4022, Title = "Microeconomics", Credits = 3, },
                new Course {CourseID = 4041, Title = "Macroeconomics", Credits = 3, },
                new Course {CourseID = 1045, Title = "Calculus",       Credits = 4, },
                new Course {CourseID = 3141, Title = "Trigonometry",   Credits = 4, },
                new Course {CourseID = 2021, Title = "Composition",    Credits = 3, },
                new Course {CourseID = 2042, Title = "Literature",     Credits = 4, }
            };
            courses.ForEach(s => context.Courses.AddOrUpdate(p => p.Title, s));
            context.SaveChanges();

            var enrollments = new List<Enrollment>
            {
                new Enrollment {
                    StudentID = students.Single(s => s.LastName == "Alexander").ID,
                    CourseID = courses.Single(c => c.Title == "Chemistry" ).CourseID,
                    Grade = Grade.A
                },
                 new Enrollment {
                    StudentID = students.Single(s => s.LastName == "Alexander").ID,
                    CourseID = courses.Single(c => c.Title == "Microeconomics" ).CourseID,
                    Grade = Grade.C
                 },
                 new Enrollment {
                    StudentID = students.Single(s => s.LastName == "Alexander").ID,
                    CourseID = courses.Single(c => c.Title == "Macroeconomics" ).CourseID,
                    Grade = Grade.B
                 },
                 new Enrollment {
                     StudentID = students.Single(s => s.LastName == "Alonso").ID,
                    CourseID = courses.Single(c => c.Title == "Calculus" ).CourseID,
                    Grade = Grade.B
                 },
                 new Enrollment {
                     StudentID = students.Single(s => s.LastName == "Alonso").ID,
                    CourseID = courses.Single(c => c.Title == "Trigonometry" ).CourseID,
                    Grade = Grade.B
                 },
                 new Enrollment {
                    StudentID = students.Single(s => s.LastName == "Alonso").ID,
                    CourseID = courses.Single(c => c.Title == "Composition" ).CourseID,
                    Grade = Grade.B
                 },
                 new Enrollment {
                    StudentID = students.Single(s => s.LastName == "Anand").ID,
                    CourseID = courses.Single(c => c.Title == "Chemistry" ).CourseID
                 },
                 new Enrollment {
                    StudentID = students.Single(s => s.LastName == "Anand").ID,
                    CourseID = courses.Single(c => c.Title == "Microeconomics").CourseID,
                    Grade = Grade.B
                 },
                new Enrollment {
                    StudentID = students.Single(s => s.LastName == "Barzdukas").ID,
                    CourseID = courses.Single(c => c.Title == "Chemistry").CourseID,
                    Grade = Grade.B
                 },
                 new Enrollment {
                    StudentID = students.Single(s => s.LastName == "Li").ID,
                    CourseID = courses.Single(c => c.Title == "Composition").CourseID,
                    Grade = Grade.B
                 },
                 new Enrollment {
                    StudentID = students.Single(s => s.LastName == "Justice").ID,
                    CourseID = courses.Single(c => c.Title == "Literature").CourseID,
                    Grade = Grade.B
                 }
            };

            foreach (Enrollment e in enrollments)
            {
                var enrollmentInDataBase = context.Enrollments.Where(
                    s =>
                         s.Student.ID == e.StudentID &&
                         s.Course.CourseID == e.CourseID).SingleOrDefault();
                if (enrollmentInDataBase == null)
                {
                    context.Enrollments.Add(e);
                }
            }
            context.SaveChanges();
        }
    }
}
Seed方法使用資料庫上下文物件作為輸入引數,並在程式碼中使用該物件來新增新實體到資料庫。對於每個實體型別,程式碼建立一個新實體的集合並將它們新增到適當的DbSet屬性,然後將更改儲存到資料庫。在每組實體後立刻呼叫SaveChanges方法並不是必須的,但這樣做可以在出現問題時讓你更容易地定位問題的根源。
大多數插入物件的語句是使用AddOrUpdate方法來執行”upsert”操作。因為你每次執行更新資料庫命令時Seed方法都會執行,通常在每個遷移後你不能只是插入資料。因為您試圖新增的行有可能在建立資料庫後的第一次遷移中已經存在。”upsert”操作可以防止你試圖新增一個已經存在的行,但是它會重寫你在測試階段對資料進行的修改。你或許不希望這種情況在某些資料表中發生:在某些情況下你可能希望保留你在測試階段對測試資料所進行的更改。在這種情況下,你需要做一個條件插入操作:僅當它不存在時插入行。Seed方法同時使用以上兩種方法。
第一個傳遞給AddOrUpdate方法的引數,一個指定的屬性是用來檢查否行已經存在。對於您提供的測試學生資料,LastName屬性可以被用作檢查在每個列表中實體是否是唯一的。
context.Students.AddOrUpdate(p => p.LastName, s)此程式碼假定LastName是唯一的。如果您手動新增具有重複LastName的學生,你就會得到一個“序列包含多個元素”的異常。 有關如何處理容易資料,請參閱 Seeding and Debugging Entity Framework (EF) DBs 。有關AddOrUpdate方法的更多資訊,請參閱 Take care with EF 4.3 AddOrUpdate Method 。 建立Enrollment實體的程式碼假定你在學生集合中的實體已經擁有ID值,雖然你沒有在建立集合的程式碼中設定該值。
new Enrollment {
    StudentID = students.Single(s => s.LastName == "Alexander").ID,
    CourseID = courses.Single(c => c.Title == "Chemistry" ).CourseID,
    Grade = Grade.A
},
你在這裡可以使用ID值,因為當你為學生集合呼叫SaveChanges方法時,ID值被設定。當實體被插入到資料庫時,實體框架會自動獲取該實體的主鍵值並且更新記憶體中實體上的ID屬性。 新增每個Enrollment實體到Enrollments實體集合的程式碼不會使用AddOrUpdate方法,它會檢查每一個實體是否存在,如果不存在,則插入該實體。這種方法將保留通過使用應用程式UI對成績所做的修改。程式碼遍歷Enrollment列表中的每個成員。如果在資料庫中沒有該成員,就向資料庫中新增它。當你第一次更新資料庫時,該資料庫是空的,所以集合中的每個enrollment實體都將被新增。
foreach (Enrollment e in enrollments)
{
    var enrollmentInDataBase = context.Enrollments.Where(
        s => s.Student.ID == e.Student.ID &&
             s.Course.CourseID == e.Course.CourseID).SingleOrDefault();
    if (enrollmentInDataBase == null)
    {
        context.Enrollments.Add(e);
    }
}
生成專案。
執行第一次遷移
當您執行add-migration命令時,遷移將生成程式碼用來建立資料庫。該程式碼同樣在Migrations資料夾中,在檔名為<時間戳>_InitalCreate.cs的檔案中。該類中的Up方法將按照資料模型實體集來建立資料庫表格,Down方法用來刪除它們。
public partial class InitialCreate : DbMigration
{
    public override void Up()
    {
        CreateTable(
            "dbo.Course",
            c => new
                {
                    CourseID = c.Int(nullable: false),
                    Title = c.String(),
                    Credits = c.Int(nullable: false),
                })
            .PrimaryKey(t => t.CourseID);

        CreateTable(
            "dbo.Enrollment",
            c => new
                {
                    EnrollmentID = c.Int(nullable: false, identity: true),
                    CourseID = c.Int(nullable: false),
                    StudentID = c.Int(nullable: false),
                    Grade = c.Int(),
                })
            .PrimaryKey(t => t.EnrollmentID)
            .ForeignKey("dbo.Course", t => t.CourseID, cascadeDelete: true)
            .ForeignKey("dbo.Student", t => t.StudentID, cascadeDelete: true)
            .Index(t => t.CourseID)
            .Index(t => t.StudentID);

        CreateTable(
            "dbo.Student",
            c => new
                {
                    ID = c.Int(nullable: false, identity: true),
                    LastName = c.String(),
                    FirstMidName = c.String(),
                    EnrollmentDate = c.DateTime(nullable: false),
                })
            .PrimaryKey(t => t.ID);

    }

    public override void Down()
    {
        DropForeignKey("dbo.Enrollment", "StudentID", "dbo.Student");
        DropForeignKey("dbo.Enrollment", "CourseID", "dbo.Course");
        DropIndex("dbo.Enrollment", new[] { "StudentID" });
        DropIndex("dbo.Enrollment", new[] { "CourseID" });
        DropTable("dbo.Student");
        DropTable("dbo.Enrollment");
        DropTable("dbo.Course");
    }
}
遷移呼叫Up方法來實現資料模型所做的更改。當你輸入一個命令回滾更新,遷移將呼叫Down方法。
這是您輸入add-migration InitialCreate命令時建立的初始遷移。引數(在該示例中是InitialCreate)用於檔案的名稱,當然也可以是任意你想要的其他名稱。通常你會選擇一個單詞或短語來總結遷移中所做的改變。例如您可以能會命名之後的遷移為”AddDeparmentTable”。
如果你建立了一個在資料庫已經存在的情況下的遷移,則生成的的資料庫建立程式碼不會執行。因為資料庫已經和資料模型匹配。將應用程式部署到另一個尚未建立資料庫的環境時,程式碼才會執行以建立資料庫。所以最好是提前測試一下。這就是為什麼之前你更改了連線字串中資料庫的名稱,以便遷移可以從零開始建立一個新的資料庫。
在程式包管理器控制檯中,輸入以下命令:
update-database
update-database命令執行Up方法來建立資料庫,然後執行Seed方法來填充資料庫。同樣的過程會在將程式部署到生產環境下發生,您將會在下一節看到。使用伺服器資管管理器來檢查資料庫,驗證裡面的資料和程式同之前一樣執行正常。
部署到Windows Azure
因為咱沒有Windows Azure的試用賬號,所以這部分翻譯就跳過了……反正也不影響學習的。
總結
在本節中你看到了如何使用Code First遷移,在下一節中你會開始進入高階主題,擴充套件資料模型。
作者資訊
Tom Dykstra- Tom Dykstra 是微軟Web平臺及工具團隊的高階程式設計師,作家。