Android --中間突出的底部導航欄佈局簡單實現
阿新 • • 發佈:2019-02-02
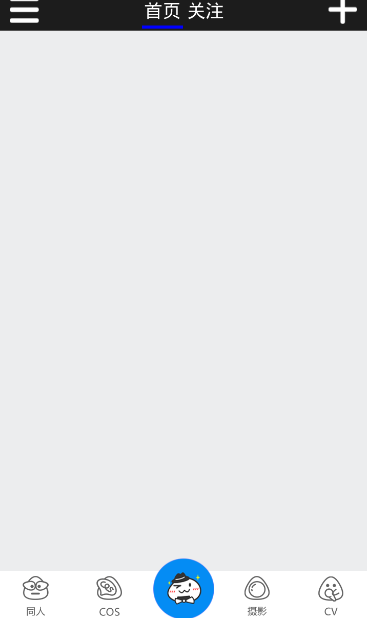
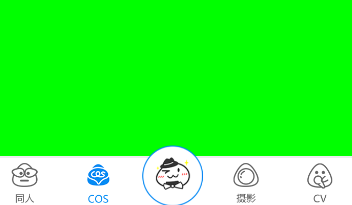
目前很多應用都加入了底部導航欄的功能,根據點選的具體Tab顯示不同的內容,前段時間,本人在學習實現這個功能的時候遇到了點問題,發現我要實現的底部導航是以下這種中間部件突出的複雜佈局(當時感覺算複雜啦)。
為了實現這個佈局,博主嘗試了各種佈局的巢狀,修正,仍然無法解決中間部件與其他控制元件的衝突問題,無法實現圖中效果,於是網上拜讀了各位大牛的相關文章,發現或使用已過時的TabHost或是更加複雜的佈局,於是各取所長,這裡採用radiobutton+frameLayout實現,具體如下:

res/layout下custom_tab.xml
<?xml version="1.0" encoding="utf-8"?> res/values/style radiobutton所對應的style
<style name="base_tab_style">
        <item name="android:gravity">center</item>
        <item name="android:layout_width">0.0dip</item>
        <item name="android:layout_height">fill_parent</item>
        <item name="android:button">@null</item>
        <item name="android:layout_weight">1.0</item>
    </style>
    <style name="main_bottom_tab_style" parent="@style/base_tab_style">
        <item name="android:layout_gravity">center</item>
        <item name="android:background">@null</item>
        <item name="android:layout_height">wrap_content</item>
    </style>
res/layout 下activity_main.xml中巢狀custom_tab
<?xml version="1.0" encoding="utf-8"?>
<RelativeLayout xmlns:android="http://schemas.android.com/apk/res/android"
    android:layout_width="match_parent"
    android:layout_height="match_parent" >

    <include
        android:id="@+id/tab"
        android:layout_width="match_parent"
        android:layout_height="wrap_content"
        android:layout_alignParentBottom="true"
        layout="@layout/custom_tab" />

    <FrameLayout
        android:id="@+id/FrameAct_FragmentGroup"
        android:layout_width="match_parent"
        android:layout_height="match_parent"
        android:layout_above="@id/tab"
         >
    </FrameLayout>

    <FrameLayout
        android:layout_width="60dp"
        android:layout_height="60dp"
        android:layout_alignParentBottom="true"
        android:layout_centerHorizontal="true" >

        <ImageView
            android:id="@+id/Iv_home_bg"
            android:layout_width="match_parent"
            android:layout_height="match_parent"
            android:layout_gravity="bottom"
            android:scaleType="fitXY"
            android:src="@drawable/home_sel" />
    </FrameLayout>

</RelativeLayout>
其中@id/FrameAct_FragmentGroup是用於之後填充多個具體fragment要使用的
下面所加framelayout 中imageview即為導航欄佈局中間突出部件。同樣如上面radiobutton一樣所有控制元件均使用了背景選擇器,以使得相應控制元件被點選之後切換不同狀態。
<?xml version="1.0" encoding="utf-8"?>
<selector
  xmlns:android="http://schemas.android.com/apk/res/android">
    <item android:state_checked="true" android:drawable="@drawable/icon_cos_sel" />
    <item android:state_pressed="true" android:drawable="@drawable/icon_cos_sel" />
    <item android:state_checked="false" android:state_pressed="false" android:drawable="@drawable/icon_cos" />
</selector>
同時點選之後切換相應fragment。
不足之處歡迎大家指正。
以上除drawable下原始圖片資源外均屬博主原創,轉載請知會博主並註明出處,謝謝!

