使用Dlib庫進行人臉檢測與對齊
阿新 • • 發佈:2019-02-03
簡介
上一篇中,講述瞭如何在windows上編譯dlib的靜態庫dlib.lib。現在來使用dlib.lib進行人臉檢測與對齊。例子中原始碼來自官方案例,進行稍微修改。準備
1.編譯好的靜態庫檔案,dlib.lib程式
1.新建win32控制檯程式,修改為 Release x64平臺,為了與lib庫保持一致 2.C/C++ -> 常規 -> 附加包含目錄中,將dlib-18.17和libjpeg包含進去 E:\dlib-18.17E:\dlib-18.17\dlib\external\libjpeg
3.C/C++ -> 前處理器 -> 前處理器定義,加入DLIB_PNG_SUPPORT 和DLIB_JPEG_SUPPORT 4.連結器 -> 輸入 -> 附加依賴項,新增 dlib.lib 5.為了便於方便,直接將dlib.lib檔案和對齊模型放入原始碼目錄下,整體結構如下所示:

6.原始碼,程式碼解釋見註釋中。
#include <dlib/image_processing/frontal_face_detector.h>
#include <dlib/image_processing/render_face_detections.h>
#include <dlib/image_processing.h>
#include <dlib/gui_widgets.h>
#include <dlib/image_io.h>
#include <iostream>

using namespace dlib;
using namespace std;

// ----------------------------------------------------------------------------------------

int main(int argc, char** argv)
{
	try
	{
		// 定義人臉檢測器,使用它來獲取一張圖片中,每個人臉的邊界位置
		frontal_face_detector detector = get_frontal_face_detector();

		//定義形狀預測器,用來預測給定圖片和臉邊界框時候的標記點的位置。
		//這裡我們從shape_predictor_68_face_landmarks.dat檔案載入模型
		shape_predictor sp;
		deserialize("shape_predictor_68_face_landmarks.dat") >> sp;

		image_window win, win_faces;

		// 迴圈所有圖片,為演示效果,只用了一張圖片
		for (int i = 0; i < 1; ++i)
		{
			cout << "processing image " << "2.jpg"  << endl;
			array2d<rgb_pixel> img;
			load_image(img, "2.jpg");

			// 放大圖片以便檢測到比較小的人臉.
			pyramid_up(img);

			//檢測人臉,獲得邊界框
			std::vector<rectangle> dets = detector(img);
			cout << "Number of faces detected: " << dets.size() << endl;

			// Now we will go ask the shape_predictor to tell us the pose of
			// each face we detected.
			//****呼叫shape_predictor類函式,返回每張人臉的姿勢
			std::vector<full_object_detection> shapes;//注意形狀變數的型別,full_object_detection
			for (unsigned long j = 0; j < dets.size(); ++j)
			{
				//預測姿勢,注意輸入是兩個,一個是圖片,另一個是從該圖片檢測到的邊界框
				full_object_detection shape = sp(img, dets[j]);
				cout << "number of parts: " << shape.num_parts() << endl;

				/*打印出全部68個點*/
				/*for (int i = 0; i < 68; i++)
				{
					cout << "第 " << i+1 << " 個點的座標: " << shape.part(i) << endl;
				}*/

				shapes.push_back(shape);
			}

			//顯示結果
			win.clear_overlay();
			win.set_image(img);
			win.add_overlay(dets, rgb_pixel(255, 0, 0));
			win.add_overlay(render_face_detections(shapes));

			//我們也能提取每張對齊剪裁後的人臉的副本,旋轉和縮放到一個標準尺寸
			dlib::array<array2d<rgb_pixel> > face_chips;
			extract_image_chips(img, get_face_chip_details(shapes), face_chips);
			win_faces.set_image(tile_images(face_chips));

			cout << "Hit enter to process the next image..." << endl;
			cin.get();
		}
	}
	catch (exception& e)
	{
		cout << "\nexception thrown!" << endl;
		cout << e.what() << endl;
	}

	return 0;
}

// ----------------------------------------------------------------------------------------
結果
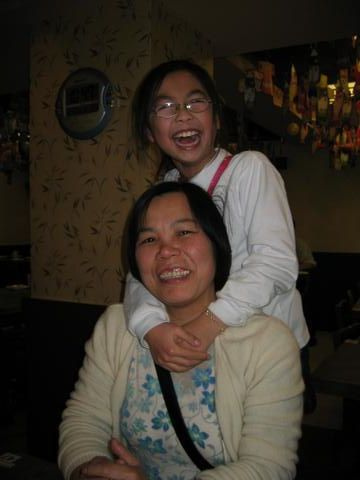
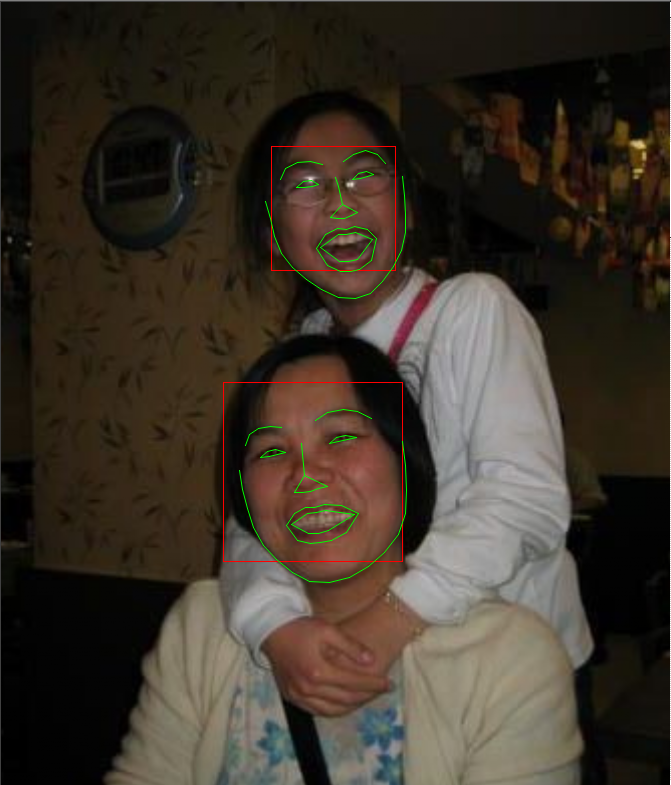
原圖 檢測效果
檢測效果

裁切對齊效果

