
使用dlib庫進行人臉識別
阿新 • • 發佈:2019-02-02
一、安裝opencv和dlib
我使用的anaconda,安裝比較方便。
安裝opencv,在指定環境下輸入:
conda install opencv安裝dlib:
conda install -c conda-forge dlib二、實現
1、專案結構介紹
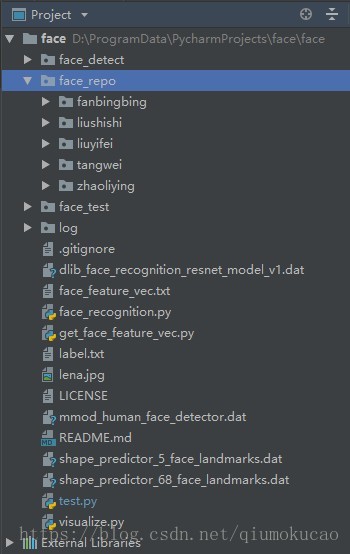
其中face_detect資料夾儲存檢查到的人臉,face_repo裡是待檢測的人臉照片,face_test裡是用來測試的照片。
2、人臉檢測
定義檢測器和識別模型:
detector = dlib.get_frontal_face_detector()
# detector = dlib.cnn_face_detection_model_v1('mmod_human_face_detector.dat')
sp = dlib.shape_predictor(FLAGS.shape_predictor)
facerec = dlib.face_recognition_model_v1(FLAGS.reco_model)
detector有兩種選擇,其中dlib.cnn_face_detection_model_v1使用的cnn進行檢測。
對於單張圖片的檢測如下:
def return_face_features(path_img):
    img = cv2.imread(path_img)
    if img.shape[0] * img.shape[1] > 400000:  # 對大圖可以進行壓縮,閾值可以自己設定
        img = cv2.resize(img, (0, 0), fx=0.5, fy=0.5)
    dets = detector(img, 1)  # 使用檢測運算元檢測人臉,返回的是所有的檢測到的人臉區域
    print("檢測的人臉影象:", path_img, "\n")
    d = dets[0]     # 預設處理第一個檢測到的人臉區域
    bb = np.zeros(4, dtype=np.int32)
    bb[0] = np.maximum(d.left(), 0)
    bb[1] = np.maximum(d.top(), 0)
    bb[2] = np.minimum(d.right(), img.shape[1])
    bb[3] = np.minimum(d.bottom(), img.shape[0])

    rec = dlib.rectangle(bb[0], bb[1], bb[2], bb[3])
    shape = sp(img, rec)  # 獲取landmark
    face_descriptor = facerec.compute_face_descriptor(img, shape)  # 使用resNet獲取128維的人臉特徵向量
    face_array = np.array(face_descriptor).reshape((1, 128))  # 轉換成numpy中的資料結構

    # 顯示人臉區域
    cv2.rectangle(img, (bb[0], bb[1]), (bb[2], bb[3]), (0, 255, 0), 2)
    cv2.waitKey(2)
    cropped = img[bb[1]:bb[3], bb[0]:bb[2], :]
    scaled = cv2.resize(cropped, (100, 100), interpolation=cv2.INTER_LINEAR)
    cv2.imwrite(os.path.join(FLAGS.detected_faces, path_img.split('\\')[-1]), scaled)
    cv2.imshow('image', img)
    cv2.waitKey(1000)

    return face_array
遍歷face_repo資料夾下所有人的所有圖片,呼叫上述方法進行檢測:
def main():
    data = np.zeros((1, 128))  # 定義一個128維的空向量data
    label = []  # 定義空的list存放人臉的標籤
    for file in os.listdir(FLAGS.input_faces):  # 遍歷目錄下的資料夾及檔案
        path = os.path.join(FLAGS.input_faces, file)
        if os.path.isdir(path):     # 如果是目錄
            feature_tmp = np.zeros((1, 128))
            label_name = file
            img_num = 0
            for image in os.listdir(path):
                if '.jpg' in image or '.png' in image:
                    img_num += 1
                    file_path = os.path.join(path, image)
                    print('current image: {}, current label: {}'.format(file_path, label_name))
                    feature_tmp += return_face_features(file_path)
            if img_num > 0:
                feature = feature_tmp / img_num
                data = np.concatenate((data, feature))  # 儲存每個人的人臉特徵
                label.append(label_name)  # 儲存標籤

    data = data[1:, :]  # 因為data的第一行是128維0向量,所以實際儲存的時候從第二行開始
    np.savetxt(FLAGS.feature_dir, data, fmt='%f')  # 儲存人臉特徵向量合成的矩陣到本地
    label_file = open(FLAGS.label_dir, 'w')
    json.dump(label, label_file)  # 使用json儲存list到本地
    label_file.close()
    cv2.destroyAllWindows()  # 關閉所有的視窗
該過程主要是檢測單張圖片中的人臉,並儲存其人臉特徵資料和其label。此時輸入的照片中應只有一個人臉,以便將不同人的人臉資料記錄下來,作為後續識別對比之用。在這裡將檢測到的人臉擷取並儲存到face_detect資料夾中,如下:
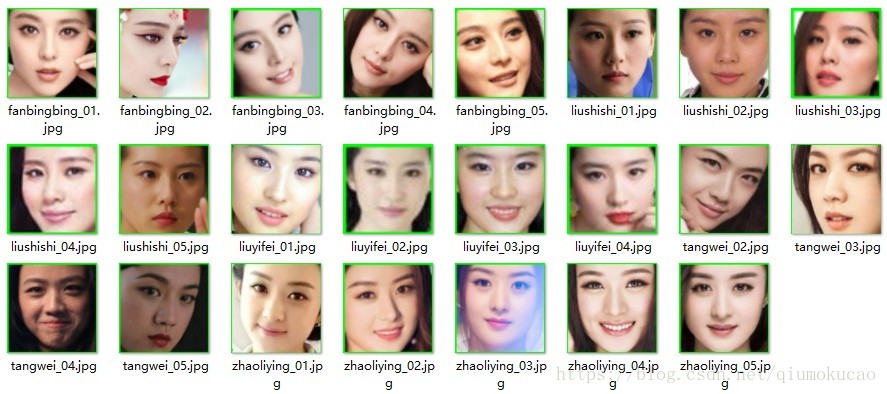
選擇了五個人,每人各有幾張照片,檢測區域還可以。
3、人臉識別
對於單張圖片的識別過程如下:
def recognition(img):
    dets = detector(img, 1)
    bb = np.zeros(4, dtype=np.int32)
    for k, d in enumerate(dets):
        print("Detection {}: Left: {} Top: {} Right: {} Bottom: {}".format(
            k, d.left(), d.top(), d.right(), d.bottom()))

        bb[0] = np.maximum(d.left(), 0)
        bb[1] = np.maximum(d.top(), 0)
        bb[2] = np.minimum(d.right(), img.shape[1])
        bb[3] = np.minimum(d.bottom(), img.shape[0])
        rec = dlib.rectangle(bb[0], bb[1], bb[2], bb[3])
        shape = sp(img, rec)
        face_descriptor = facerec.compute_face_descriptor(img, shape)

        class_pre = find_most_likely_face(face_descriptor)
        print(class_pre)
        cv2.rectangle(img, (rec.left(), rec.top()), (rec.right(), rec.bottom()), (0, 255, 0), 2)
        cv2.putText(img, class_pre, (rec.left(), rec.top()), cv2.FONT_HERSHEY_SIMPLEX, 0.7, (0, 255, 0), 2, cv2.LINE_AA)

    cv2.imshow('image', img)
    cv2.waitKey()
檢測圖片中的人臉(可以有多個),針對每個人臉,將其和儲存的人臉特徵資料進行對比,選擇距離最小的人臉特徵,如果最小距離大於設定閾值,說明該人臉不屬於已儲存的任何一個人。
我隨便找了幾張包含劉詩詩和劉亦菲的照片,測試一下識別效果,其中幾張結果如下:
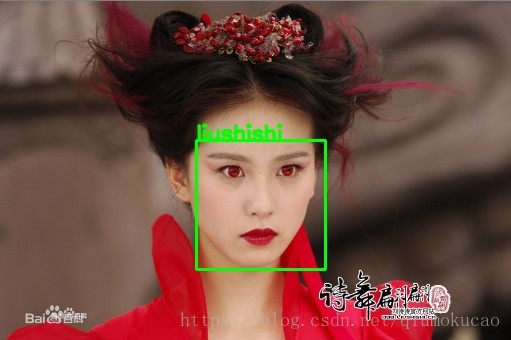
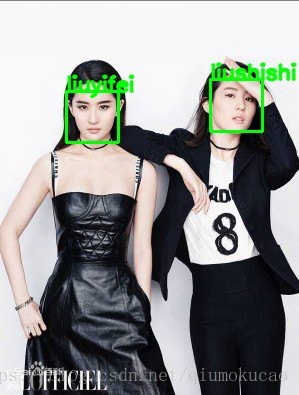

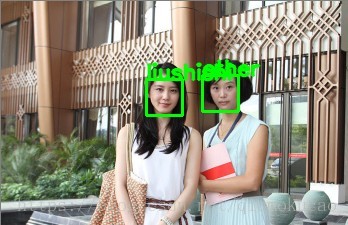

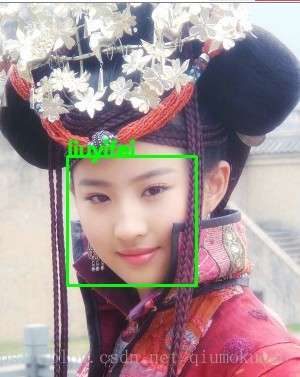

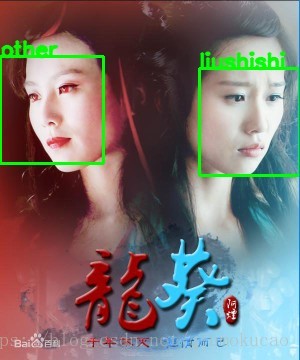
測試結果發現效果很一般,尤其對於遮擋和側臉。
4、視覺化
可以使用tensorboard對資料進行視覺化
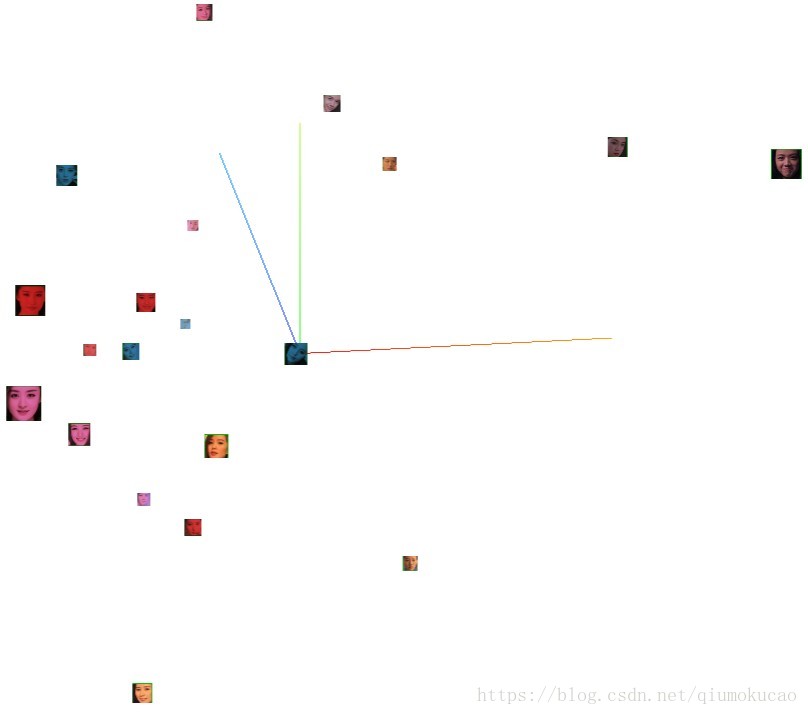
2D效果如下:
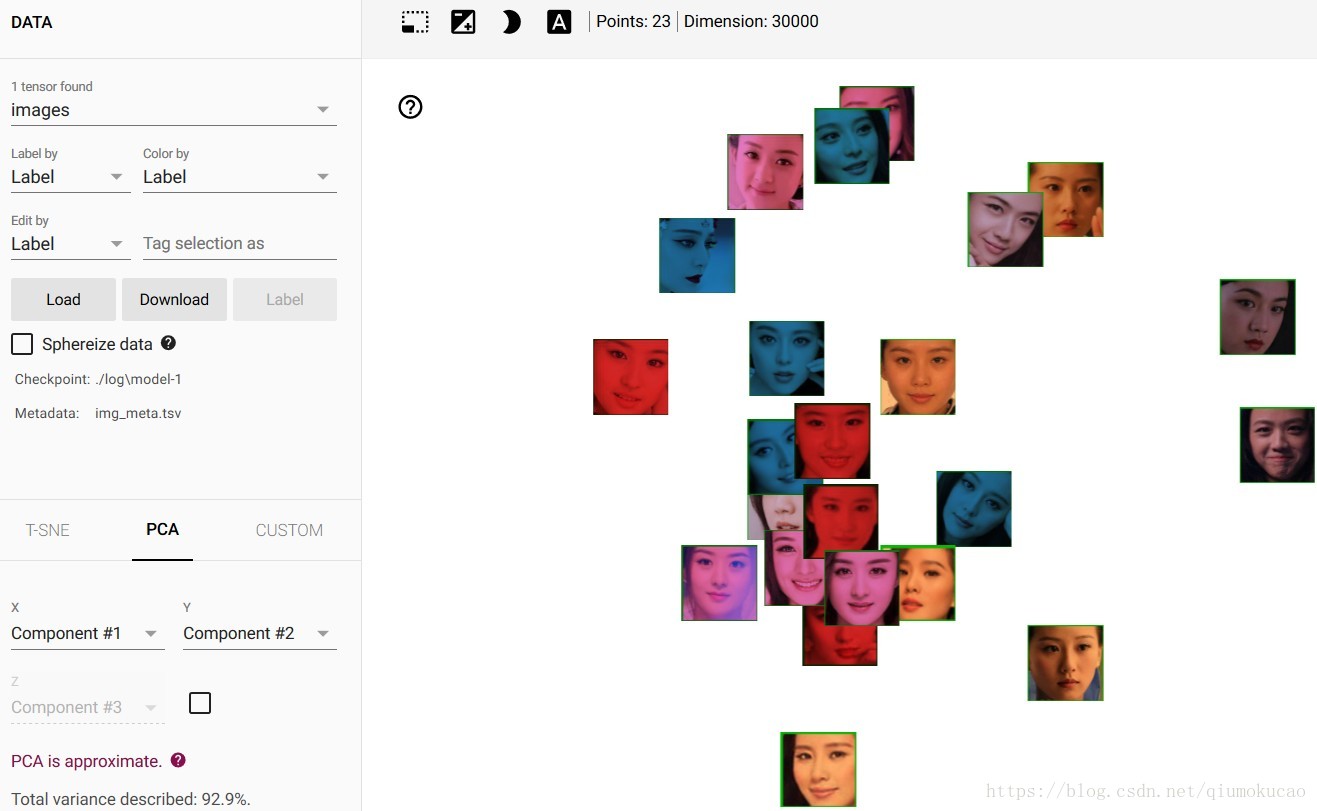
圖片資料太少,視覺化效果不好
後續會介紹一下基於face_net的人臉識別,那個效果要好很多。