
QT介面切換
應用場景
在開發桌面應用的時候,經常性的會在幾個介面之間切換
可以是區域性的,也可以是整個介面
以前我總是利用hide和show來完成
但是很缺乏動態的美感,使用者在使用的時候體驗不好
今天就來解決這個問題
下面進入正題:
QPropertyAnimation
在QT中使用這個類可以很容易的設定一般的動畫
淡入淡出
QPropertyAnimation *animation = new QPropertyAnimation(&w,"windowOpacity");
animation-> 上面這段程式碼首先繫結一個widget,這個動畫將接收widget的圖形部分
然後設定整個動畫的時長為1000ms
setStartValue和setEndValue這裡設定了從0到1
效果就是談入
start以後開始慢慢的出現
當然也可以設定從1到0,效果自然就是淡出了
效果是這樣的
介面平移
QLabel *label = new QLabel(this 上面的程式碼和淡入淡出不同
我使用了一個label來獲取整個介面的的大小和影象
然後使用QPropertyAnimation 繫結
重點來了,這次我在setStartValue和setEndValue的時候不是一般的整數,而是使用的整個集合圖形QRect
關於QRect簡單介紹下
QRect用來表示一個矩形的位置和大小
具體地說就是一個QPoint(左上角的點)、寬度和高度
有了這幾個引數,這個矩形的位置和大小就統一了
下圖來自官方文件
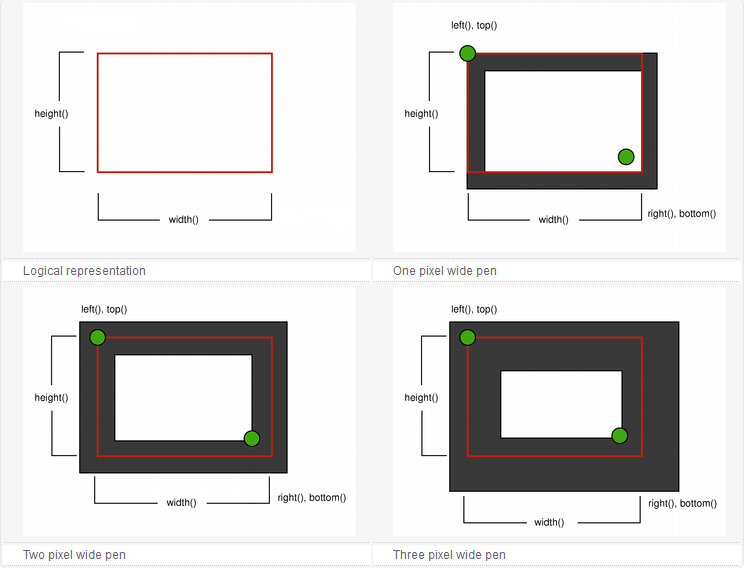
所以我們實際上我們setStartValue和setEndValue了一個矩形的位置和大小
這樣,如果我們的大小不變,只改變QPoint的橫座標,那麼平移的效果就出來了
如下圖,向左側移動

向上或者向下也是可以的
上面兩種情況是這個介面移走,下個介面不動
那麼我想讓這個介面移走的時候下個介面不是不動,而是跟著移動進來呢?
那麼我們就得同時擁有兩個動畫:
- 移出動畫
- 移入動畫
而且要動作一致才會有好的效果
    QLabel *label = new QLabel(this);
    label->resize(this->centralWidget()->size());
    label->setPixmap(this->centralWidget()->grab());
    label->show();

    QPropertyAnimation *animation= new QPropertyAnimation(label,"geometry");
    animation->setDuration(500);
    animation->setStartValue(this->centralWidget()->geometry());
    animation->setEndValue(QRect(this->centralWidget()->width(), 0, this->centralWidget()->width(), this->centralWidget()->height()));

    QPropertyAnimation *animation1= new QPropertyAnimation(this->centralWidget(),"geometry");
    animation1->setDuration(500);
    animation1->setStartValue(QRect(-this->centralWidget()->width(), 0, this->centralWidget()->width(), this->centralWidget()->height()));
    animation1->setEndValue(this->centralWidget()->geometry());

    QParallelAnimationGroup *group = new QParallelAnimationGroup;
    group->addAnimation(animation);
    group->addAnimation(animation1);
    group->start();
在上面我們使用了QParallelAnimationGroup 這個類
它就像容器一樣可以裝載很多個動畫,然後同時讓它們開始
達到的效果就是這樣的:
QPropertyAnimation 同時還支援線性插值操作
animation->setKeyValueAt(0, QRect(0, 0, 00, 00));
animation->setKeyValueAt(0.4, QRect(20, 250, 20, 30));
animation->setKeyValueAt(0.8, QRect(100, 250, 20, 30));
animation->setKeyValueAt(1, QRect(250, 250, 100, 30));
animation->setEndValue(QRect(250, 250, 100, 30));
動畫會在前40%由QRect(0, 0, 00, 00)移動改變到QRect(20, 250, 20, 30)
然後再40%由QRect(20, 250, 20, 30)移動改變到QRect(100, 250, 20, 30)
最後到QRect(250, 250, 100, 30)
是不是很方便?
回彈效果
QEasingCurve 類還提供了很多種線性插值,下面是使用方法
    animation->setStartValue(this->centralWidget()->geometry());
    animation->setEndValue(QRect(-this->centralWidget()->width(), 0, this->centralWidget()->width(), this->centralWidget()->height()));
    animation->setEasingCurve(QEasingCurve::OutBounce);
    animation->start();
下圖就是OutBounce的線性插值,會有一個回彈的效果

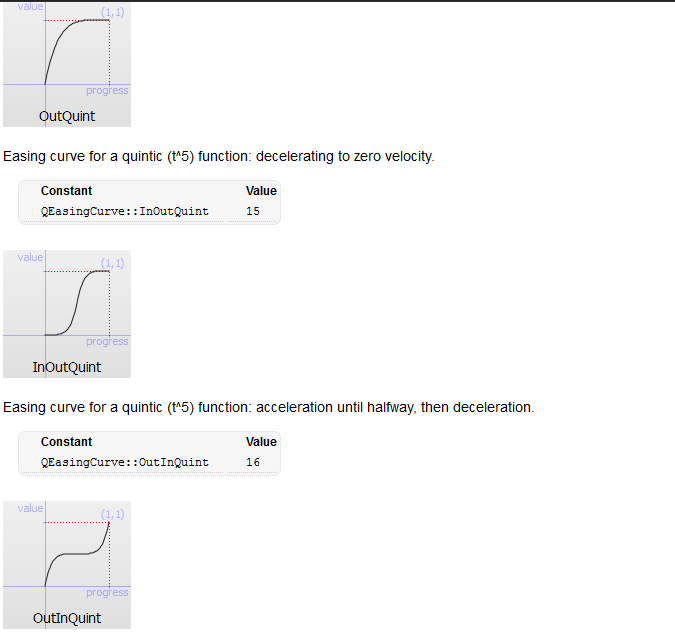
是不是很棒?還有很多的值可以一一試驗,下面是官方文件截圖
原始碼已經上傳,基於QT 5.5.1