
Android Fragment實現導航欄
阿新 • • 發佈:2019-02-04
一、嘮叨嘮叨
人生第一次寫部落格,也不求有什麼大神之作,就自己練練手,讓自己學會表達,學會把自己心裡的東西拿出來給人家看看,就像找女朋友一樣,你不說出來自己多愛她,甚至不表現出來,哪裡會有機會呢,是吧?讓她自己發現你,愛上你,可能性好小的樣子。。。
二、導航欄的實現方式
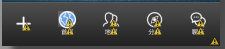
先上個圖
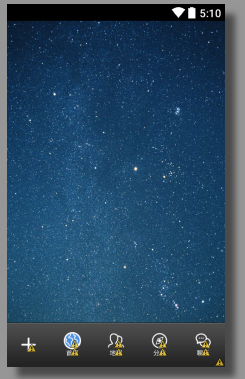
像這種導航欄的實現方式有很多,有FragmentTabHost、RadioGroup+Fragment、ViewPager等等各種,他們都有自己的優勢和方便之處,這是重點講一下利用Fragment+button的方式來實現,也是我常用的方式,比較底層,可能沒有其他方式簡單,高手不要見笑。
三、實現步驟
廢話不多說了,切重點。
1、 佈局出我們想要的底部導航按鈕、
節省空間,這裡只列出一項來
<RelativeLayout
android:layout_width="wrap_content"
android:layout_height="wrap_content"
android:layout_centerInParent="true" >
<ImageView
android:id 2 、 在Activity初始化的時候,設定首頁卡項,也就是setTabSelection(0);
這個方法的具體定義如下:
    public void setTabSelection(int index) {
        FragmentTransaction transaction = fragmentManager.beginTransaction();
        hideFragment(transaction);
        switch (index) {
        case 0:
            if (fragment_Main == null) {
                fragment_Main = new Fragment_Main(this, getWindowManager());
                transaction.add(R.id.layout_main_replace, fragment_Main);
            } else {
                transaction.show(fragment_Main);
            }
            setBottomButtonBgFalse();
            img_main_home.setImageResource(R.drawable.bg_bottom_home_down);
            setBottomClickTrue();
            btn_main_home.setClickable(false);
            break;
        case 1:
            if (fragment_identify == null) {
                fragment_identify = new Fragment_Map(this, getWindowManager());
                transaction.add(R.id.layout_main_replace, fragment_identify);
            } else {
                transaction.show(fragment_identify);
            }
            setBottomButtonBgFalse();
            img_main_friend.setImageResource(R.drawable.bg_bottom_friend_down);
            setBottomClickTrue();
            btn_main_friend.setClickable(false);
            break;
        case 2:
            if (fragment_sort == null) {
                fragment_sort = new Fragment_Sort(this,
                        getWindowManager());
                transaction.add(R.id.layout_main_replace, fragment_sort);
            } else {
                transaction.show(fragment_sort);
            }
            setBottomButtonBgFalse();
            img_main_explore.setImageResource(R.drawable.bg_bottom_explore_down);
            setBottomClickTrue();
            btn_main_explore.setClickable(false);
            break;
        case 3:
            if (fragment_Chat == null) {
                fragment_Chat = new Fragment_Chat(this, getWindowManager());
                transaction.add(R.id.layout_main_replace, fragment_Chat);
            } else {
                transaction.show(fragment_Chat);
            }
            setBottomButtonBgFalse();
            img_main_chat.setImageResource(R.drawable.bg_bottom_chat_down);
            setBottomClickTrue();
            btn_main_chat.setClickable(false);
            break;
        default:
            break;
        }
        transaction.commit();
    }
3 、 然後再點選下部導航按鈕的時候,我們就可以切換上方的Fragment
public void onClick(View v) {
        switch (v.getId()) {
        case R.id.btn_main_home:
            setTextColor();
            tvMainHome.setTextColor(Color.rgb(97, 164, 253));
            setTabSelection(0);
            break;
        case R.id.btn_main_friend:
            setTextColor();
            tvFind.setTextColor(Color.rgb(97, 164, 253));
            setTabSelection(1);
            break;
        case R.id.btn_main_explore:
            setTextColor();
            tvJolly.setTextColor(Color.rgb(97, 164, 253));
            setTabSelection(2);
            break;
        case R.id.btn_main_chat:
            setTextColor();
            tvChat.setTextColor(Color.rgb(97, 164, 253));
            setTabSelection(3);
            break;

        default:
            break;
        }
    }
其中顏色、背景以及fragment的顯示隱藏的切換,偷懶了一下,讓他們統一設定為初始狀態,然後根據點選的位置,單獨更換。
先統一
private void setTextColor() {
        tvMainHome.setTextColor(Color.WHITE);
        tvFind.setTextColor(Color.WHITE);
        tvJolly.setTextColor(Color.WHITE);
        tvChat.setTextColor(Color.WHITE);
    }
再單獨
tvMainHome.setTextColor(Color.rgb(97, 164, 253));顯示與隱藏也是同樣的道理,就不再累贅了。
其中Fragment的定義以及使用,我就不在詳述了,還有欠缺的同學自行百度腦補。
四、還有話說
做開發的時間也挺長的了,雖然沒有多牛的技術,但是身為一個數學人,感覺本科的數學還是沒有白學,至少在開發中遇到的各種邏輯,大部分可以從容的應付。還有一句不吐不快的話,所謂高手是經驗和邏輯都很強的人,那種只有經驗,而連自己的經驗都不知道是什麼邏輯的人,算個屁的高手。(注:此句話沒有任何攻擊性,只是強調做人還是不要太傲的好。)