
TensorFlow學習筆記(五)—— MNIST —— 資料下載,讀取
MNIST資料下載
本教程的目標是展示如何下載用於手寫數字分類問題所要用到的(經典)MNIST資料集。
教程 檔案
本教程需要使用以下檔案:
| 檔案 | 目的 |
|---|---|
| 下載用於訓練和測試的MNIST資料集的原始碼 |
備註:
input_data.py 檔案路徑為:tensorflow\examples\tutorials\mnist,

內容為:
"""Functions for downloading and reading MNIST data."""
from __future__ import absolute_import
from __future__ import division
from __future__ import print_function

# pylint: disable=unused-import
import gzip
import os
import tempfile

import numpy
from six.moves import urllib
from six.moves import xrange  # pylint: disable=redefined-builtin
import tensorflow as tf
from tensorflow.contrib.learn.python.learn.datasets.mnist import read_data_sets
# pylint: enable=unused-import
from tensorflow.contrib.learn.python.learn.datasets.mnist import read_data_sets
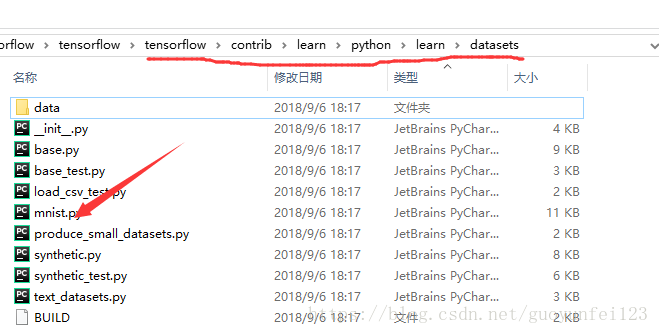
你會發現,該檔案主要引用該目錄下tensorflow\contrib\learn\python\learn\datasets\的mnist.py檔案裡面的read_data_sets函式
該目錄結構:
準備資料
MNIST是在機器學習領域中的一個經典問題。該問題解決的是把28x28畫素的灰度手寫數字圖片識別為相應的數字,其中數字的範圍從0到9.

下載
在 input_data.py 檔案中, maybe_download()
資料夾的名字在 fully_connected_feed.py 檔案的頂部由一個標記變數指定,你可以根據自己的需要進行修改。
解壓 與 重構
這些檔案本身並沒有使用標準的圖片格式儲存,並且需要使用input_data.py檔案中extract_images()和extract_labels()函式來手動解壓(頁面中有相關說明)。
圖片資料將被解壓成2維的tensor:[image index, pixel index] 其中每一項表示某一圖片中特定畫素的強度值, 範圍從 [0, 255] 到 [-0.5, 0.5]。 "image index"代表資料集中圖片的編號, 從0到資料集的上限值。"pixel index"代表該圖片中畫素點得個數, 從0到圖片的畫素上限值。
以train-*開頭的檔案中包括60000個樣本,其中分割出55000個樣本作為訓練集,其餘的5000個樣本作為驗證集。因為所有資料集中28x28畫素的灰度圖片的尺寸為784,所以訓練集輸出的tensor格式為[55000, 784]。
數字標籤資料被解壓稱1維的tensor: [image index],它定義了每個樣本數值的類別分類。對於訓練集的標籤來說,這個資料規模就是:[55000]。
資料集 物件
底層的原始碼將會執行下載、解壓、重構圖片和標籤資料來組成以下的資料集物件:
| 資料集 | 目的 |
|---|---|
data_sets.train |
55000 組 圖片和標籤, 用於訓練。 |
data_sets.validation |
5000 組 圖片和標籤, 用於迭代驗證訓練的準確性。 |
data_sets.test |
10000 組 圖片和標籤, 用於最終測試訓練的準確性。 |
執行read_data_sets()函式將會返回一個DataSet例項,其中包含了以上三個資料集。函式DataSet.next_batch()是用於獲取以batch_size為大小的一個元組,其中包含了一組圖片和標籤,該元組會被用於當前的TensorFlow運算會話中。
images_feed, labels_feed = data_set.next_batch(FLAGS.batch_size)MNIST資料讀取
在TensorFlow的原始碼中,MNIST資料集的讀取操作在contrib\learn\python\learn\datasets\data\mnist.py中,函式是read_data_sets。
read_data_sets函式:
def read_data_sets(train_dir,
    fake_data=False,
    one_hot=False,
    ype=dtypes.float32,
    reshape=True,
validation_size=5000):train_dir:為資料集在資料夾的位置,在這裡為tensorflow\examples\tutorials\mnist\MNIST_data;
fake_data: 在官方教程中提到fake_data標記是用於單元測試的,讀者可以不必理會;
one_hot:為one_hot編碼,即獨熱碼,作用是將狀態值編碼成狀態向量,例如,數字狀態共有0~9這10種,對於數字7,將它進行one_hot編碼後為[0 0 0 0 0 0 0 1 0 0],這樣使得狀態對於計算機來說更加明確,對於矩陣操作也更加高效。
dtype:的作用是將影象畫素點的灰度值從[0, 255]轉變為[0.0, 1.0]。
reshape:的作用是將影象的形狀從[num examples, rows, columns, depth]轉變為[num examples, rows*columns] (對於二維圖片,depth為1)。
validation_size:即為從訓練集中抽取這麼多來作為驗證集。
變數定義好之後,接下來提取資料集。
with open(local_file, 'rb') as f:
    train_images = extract_images(f)
看extract_images函式:
with gzip.GzipFile(fileobj=f) as bytestream:
    magic = _read32(bytestream)
    if magic != 2051:
      raise ValueError('Invalid magic number %d in MNIST image file: %s' %
                       (magic, f.name))
    num_images = _read32(bytestream)
    rows = _read32(bytestream)
    cols = _read32(bytestream)
    buf = bytestream.read(rows * cols * num_images)
    data = numpy.frombuffer(buf, dtype=numpy.uint8)
    data = data.reshape(num_images, rows, cols, 1)
    return data
如果這麼看程式碼可能很難理解,但是如果清楚MNIST資料集檔案的結構之後就好理解得多,對於MNIST的images檔案:
| offset | type | value | description |
| 0000 | 32 bit integer | 0x00000803(2051) | magic number |
| 0004 | 32 bit integer | 60000 | number of images |
| 0008 | 32 bit integer | 28 | number of rows |
| 0012 | 32 bit integer | 28 | number of columns |
| 0016 | unsigned byte | ?? | pixel |
| 0017 | unsigned byte | ?? | pixel |
| 0018 | unsigned byte | ?? | pixel |
| ...... | |||
| xxxx | unsigned byte | ?? | pixel |
程式碼中_read32()的作用是從檔案流中動態讀取4位資料並轉換為uint32的資料。
image檔案的前四位為魔術碼(magic number),只有檢測到這4位資料的值和2051相等時,才代表這是正確的image檔案,才會繼續往下讀取。接下來繼續讀取之後的4位,代表著image檔案中,所包含的圖片的數量(num_images)。再接著讀4位,為每一幅圖片的行數(rows),再後4位,為每一幅圖片的列數(cols)。最後再讀接下來的rows * cols * num_images位,即為所有圖片的畫素值。最後再將讀取到的所有畫素值裝換為[index, rows, cols, depth]的4D矩陣。這樣就將全部的image資料讀取了出來。
同理,對於MNIST的labels檔案:
| offset | type | value | description |
| 0000 | 32 bit integer | 0x00000801(2049) | magic number |
| 0004 | 32 bit integer | 60000 | number of items |
| 0008 | unsigned byte | ?? | label |
| 0009 | unsigned byte | ?? | label |
| ...... | |||
| xxxx | unsigned byte | ?? | label |
再看程式碼:
def extract_labels(f, one_hot=False, num_classes=10):
  """Extract the labels into a 1D uint8 numpy array [index].

  Args:
    f: A file object that can be passed into a gzip reader.
    one_hot: Does one hot encoding for the result.
    num_classes: Number of classes for the one hot encoding.

  Returns:
    labels: a 1D uint8 numpy array.

  Raises:
    ValueError: If the bystream doesn't start with 2049.
  """
  print('Extracting', f.name)
  with gzip.GzipFile(fileobj=f) as bytestream:
    magic = _read32(bytestream)
    if magic != 2049:
      raise ValueError('Invalid magic number %d in MNIST label file: %s' %
                       (magic, f.name))
    num_items = _read32(bytestream)
    buf = bytestream.read(num_items)
    labels = numpy.frombuffer(buf, dtype=numpy.uint8)
    if one_hot:
      return dense_to_one_hot(labels, num_classes)
    return labels
同樣的也是依次讀取檔案的魔術碼以及標籤總數,最後把所有圖片的標籤讀取出來,成一個長度為num_items的1D的向量。不過程式碼中還有一個one_hot的部分,dense_to_one_hot的程式碼為:
def dense_to_one_hot(labels_dense, num_classes):
  """Convert class labels from scalars to one-hot vectors."""
  num_labels = labels_dense.shape[0]
  index_offset = numpy.arange(num_labels) * num_classes
  labels_one_hot = numpy.zeros((num_labels, num_classes))
  labels_one_hot.flat[index_offset + labels_dense.ravel()] = 1
  return labels_one_hot
正如文章開頭提到one_hot的作用,這裡將1D向量中的每一個值,編碼成一個長度為num_classes的向量,向量中對應於該值的位置為1,其餘為0,所以one_hot將長度為num_labels的向量編碼為一個[num_labels, num_classes]的2D矩陣。
以上就是如何將MNIST資料檔案中的images和labels分別提取出來的過程。
備註:
以上函式都有,“@deprecated(None, 'Please use tf.data to implement this functionality.')”。
以後的新版本估計將沒有這些函式。