django專案部署到Linux
1. 下載apache原始碼
[[email protected] ~]# tar -zxvf httpd-2.4.33.tar.gz
[[email protected] httpd-2.4.33]# ./configure --prefix=/usr/local/apache2/
checking for chosen layout... Apache
checking for working mkdir -p... yes
checking for grep that handles long lines and -e... /bin/grep
checking for egrep... /bin/grep -E
checking build system type... x86_64-pc-linux-gnu
checking host system type... x86_64-pc-linux-gnu
checking target system type... x86_64-pc-linux-gnu
configure:
configure: Configuring Apache Portable Runtime library...
configure:
checking for APR... configure: WARNING: APR version 1.4.0 or later is required, found 1.3.9
configure: WARNING: skipped APR at apr-1-config, version not acceptable
no
configure: error: APR not found.  Please read the documentation.
2. 安裝APR
[[email protected] apr-1.6.3]# ./configure --prefix=/usr/local/apr/make&make install
3. 安裝apr-util
apr_util的安裝依賴於apr,所以需要指定apr的路徑
[[email protected] apr-util-1.5.1]# ./configure --prefix=/usr/local/apr-util/ --with-apr=/usr/local/apr/ make&make install
4. 安裝pcre
[[email protected] pcre-8.35]# ./configure --prefix=/usr/local/pcre/
make&make install
5. 安裝apache
[[email protected] httpd-2.4.33]# ./configure --prefix=/usr/local/apache2 --enable-so --enable-rewirte --enable-ssl --enable-cgi --enable-cgid --enable-modules=most --enable-mods-shared=most --enable-mpms-shared=all --with-apr=/usr/local/apr --with-apr-util=/usr/local/apr-util
make時有報錯
libtool:   error: cannot find the library '/usr/local/apache2//lib/libapr-1.la' or unhandled argument '/usr/local/apache2//lib/libapr-1.la'
make[2]: *** [htpasswd] Error 1
make[2]: Leaving directory `/root/httpd-2.4.33/support'
make[1]: *** [all-recursive] Error 1
make[1]: Leaving directory `/root/httpd-2.4.33/support'
make: *** [all-recursive] Error 1
在編譯前建立好目錄並把apr中的相應檔案複製到提示的目錄/usr/local/apache2/lib
[[email protected] lib]# cp libapr-1.la /usr/local/apache2/lib
[[email protected] lib]# cp libapr-1.so /usr/local/apache2/lib
刪除資料夾重新Make&make install即可
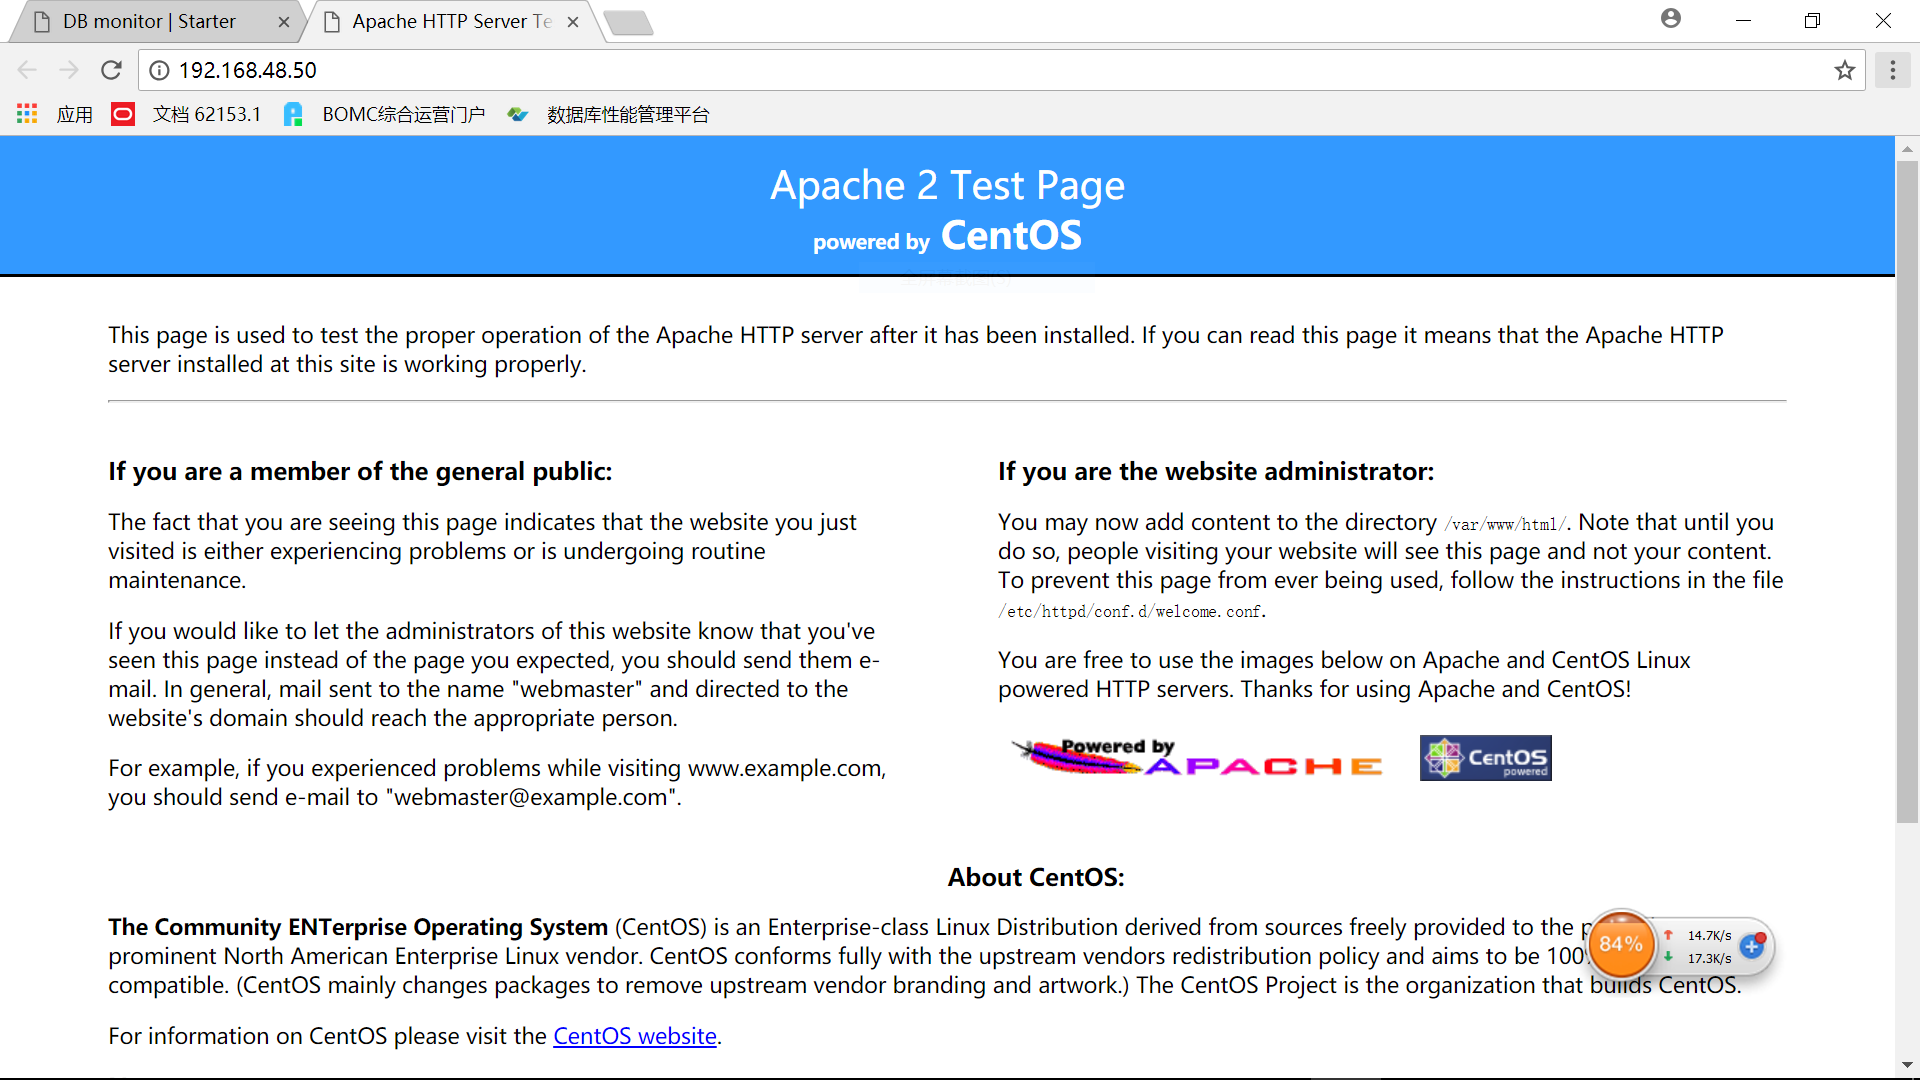
啟動apache
[[email protected] bin]# apachectl start
[[email protected] bin]# service httpd status
httpd (pid  103174) is running...
[[email protected] bin]# ps -ef|grep httpd
root     103174      1  0 14:06 ?        00:00:00 /usr/sbin/httpd -k start
apache   103176 103174  0 14:06 ?        00:00:00 /usr/sbin/httpd -k start
apache   103177 103174  0 14:06 ?        00:00:00 /usr/sbin/httpd -k start
apache   103178 103174  0 14:06 ?        00:00:00 /usr/sbin/httpd -k start
apache   103179 103174  0 14:06 ?        00:00:00 /usr/sbin/httpd -k start
apache   103180 103174  0 14:06 ?        00:00:00 /usr/sbin/httpd -k start
apache   103181 103174  0 14:06 ?        00:00:00 /usr/sbin/httpd -k start
apache   103182 103174  0 14:06 ?        00:00:00 /usr/sbin/httpd -k start
apache   103183 103174  0 14:06 ?        00:00:00 /usr/sbin/httpd -k start
root     103201   9310  0 14:06 pts/8    00:00:00 grep httpd
瀏覽器訪問
[[email protected] mod_wsgi-4.6.4]# ./configure --with-apxs=/usr/local/apache2/bin/apxs --with-python=/usr/bin/python報錯
/usr/local/python-2.7.14/lib/libpython2.7.a: could not read symbols: Bad value
collect2: ld returned 1 exit status
apxs:Error: Command failed with rc=65536
.
make: *** [src/server/mod_wsgi.la] Error 1這是由於安裝python2.7時沒有加入--enable-shared引數,安裝mod_wsgi時就會報如下錯誤:"recompile with -fPIC"
重新編譯安裝python2.7即可
./configure --prefix=/usr/local/python-2.7.14 -enable-shared CFLAGS=-fPIC
接著再安裝mod_wsgi成功
相關推薦
Linux Django專案部署
步驟 1.資料庫的處理 1.1 上傳bbs.sql 1.2 在mysql中建立bbs庫,並匯入資料庫SQL指令碼 mysql> create database bbs charset utf8mb4; mysql> use bbs mysql> source /opt/b
django專案部署到Linux
1. 下載apache原始碼[[email protected] ~]# tar -zxvf httpd-2.4.33.tar.gz [[email protected] httpd-2.4.33]# ./configure --prefix=/usr/
Django專案在linux系統中虛擬環境部署
1. Django web project deployment 1.1. 專案準備 準備打包好專案組開發的web專案,通過FTP上傳到指定的linux/unix伺服器 案例專案:mysite/ 1.2. 生產環境準備 Django生產環境伺服器,常規情況下使用Linux/Unix平臺作為伺服器平臺,需要準
Ubuntu下flask Django專案部署
Ubuntu下python框架 Django Flask 專案部署 使用nginx 一。下載安裝 nginx 方法1:https://blog.csdn.net/b_evan/article/details/72858149 方法2: 1.去nginx管網 2.選擇download
Django專案部署 3
建立APP 在Django中,專案是網站的框架和容器,APP是一個具體的WEB應用程式,用來實現具體的功能和完成具體的事項,一個專案裡可以有多個APP,就像一個網站可以有文章系統,論壇系統,後臺系統,每一個APP也可以剝離出來作為獨立的模組元件。 python manage.py startapp
Django專案部署 2
修改manage.py檔案中的python為python3 設定模板目錄 建立一個與專案同級的目錄(templates)用來放置以後需要使用到的HTML檔案 在setting.py檔案中,將新建立的目錄設為模板引擎的路徑 即在空的 DIRS 列表裡新增以下命令 os.path.joi
超詳細講解Django打造大型企業官網之Django專案部署
326-在開發機上的準備工作 327-在伺服器上安裝vim、MySQL、memcached等 328-在伺服器上安裝Python環境、Git、虛擬環境等 329-生產環境Django專案部署 330-用uWSGI部署Django專案 331-用Nginx+uWS
Django專案部署(django+guncorn+virtualenv+nginx)
一、說明 為了django專案部署到生產環境上,能夠穩定的執行,且能夠同時指出http和https的訪問,對django的部署進行了一些研究,決定採用django + gunicorn + virtualenv +nginx + mysql的方式進行部署,下面是本
Django專案部署()
一、安裝python3 1、安裝前準備 1)centos7的虛擬機器環境 2)環境初始化關閉防火牆systemctl stop firewalld #關閉防火牆iptables -F #清除預設表filter中所有規則鏈中的規則setenforce 0 #系統自帶防火牆也給關了
Django專案部署(nginx+uWSGI+django+virtualenv+supervisor釋出web伺服器 )
一、簡介 WSGI是Web伺服器閘道器介面。它是一個規範,描述了Web伺服器如何與Web應用程式通訊,以及Web應用程式如何連結在一起以處理一個請求,(接收請求,處理請求,響應請求) 基於wsgi執行的框架有bottle,DJango,Flask,用於解析動態HTTP請求 支援WSGI的伺服器
django專案部署到伺服器
如何在阿里雲上部署 Django 應用程式 概述與目的 此帖介紹瞭如何(利用 Ubuntu 作業系統)在阿里雲上啟動和部署 Django 應用程式。這兩個流程的詳細步驟說明如下所述:● 使用阿里雲管理控制檯啟動您的第一個 Linux 例項● 在此例項上安裝和部署 Django 應用程式 關
[學習筆記] Python 虛擬環境的安裝以及django專案部署到nginx伺服器
安裝Python虛擬環境 sudo apt install python3-pip python3-dev build-essential sudo pip3 install --upgrade pip sudo pip3 install virtualenv MySQL
Django專案部署:Python3+Django2+Nginx+Uwsgi
一.版本說明 系統:Ubuntu16.04(阿里雲) Python:Python3.7 Django:Django2 Nginx:Nginx1.10.3 二.安裝軟體 該操作使用的是root賬號,如果不是root賬號,那麼需要在命令前面加sudo.示例:sud
window與linux專案部署-linux下找不到檔案路徑
場景 專案在windows下訪問正常,linux下拋異常,找不到檔案。 分析 如果訪問的專案檔案是這樣的:abc/bcd/aa.jpg ,而系統中訪問檔案的路徑是:abc/Bcd/aa
Django專案部署:Nginx+uWSGI伺服器
在Django專案的開發中,Django框架集成了開發者的伺服器,但是在實際生產環境中並不能作為網站的伺服器。專案開發完成,需要將它放到伺服器上,這個伺服器有固定的ip,通過域名繫結,瀏覽器在訪問域名時就可以通過DNS解析出對應的伺服器ip地址。伺服器分為
node專案部署linux
一、伺服器購買 阿里雲、騰訊雲、百度雲等等都可以選擇,購買對應的雲伺服器或雲伺服器 ECS(選擇平臺不同名字可能會不一致),系統映象選擇CentOS7.2,其他頻寬、記憶體等自行配置。如果只是小型網站,建議配置最低即可。 1. CPU:1核 2. 記憶
把Django專案部署到Apache上
部署環境:本地為win10+python3+Mysql+Django自帶伺服器雲端為阿里雲Ubuntu+python2.7+Mysql+Apache①首先遇到的問題:瀏覽器直接訪問,沒有迴應,瀏覽器無限菊花,很明顯,這是雲伺服器沒有配置好安全組的原因,阿里雲預設的安全組為:裡
將一個Django專案部署到伺服器
環境:Ubuntu 16.04,Python3.5,此處資料庫使用sqlite 步驟: 1.安裝Python3 sudo apt install python3.5 sudo apt update sudo apt instal
django專案部署到apache2繫結域名後開啟域名顯示apache2預設主頁
要把網站繫結域名需要修改/etc/apache2/sites-available/sitename.conf檔案,將ServerName改為你的域名(如:www.yourdomain.com)。再把Django工程下的seeting.py檔案,將其ALLO
解決django專案部署到nginx+uwsgi伺服器admin後臺樣式消失的問題
摘要: uwsgi為主要伺服器,nginx為反向代理伺服器 部署完成之後發現django後臺admin訪問時無樣式 解決方法如下: 1.先開啟django專案中settings.py檔案(/bl

