
7.靜態檔案、模版、訊息閃現與Jinja2
一. 靜態檔案訪問原理
舉例:
新建資料夾 app/static, 並在該資料夾下放入圖片檔案。
執行flask, 訪問http://localhost:5000/static/圖片名。
發現可以訪問檔案
flask是如何做到訪問靜態檔案的呢? 我檢視app/init.py的create_app中 app=Flask(name),Flask的原始碼:
def __init__(
self,
import_name,
static_url_path=None,
static_folder='static', # 預設的static檔案的 路徑
static_host=None,
host_matching=False,
subdomain_matching=False,
template_folder='templates' 以及通過註冊檢視函式的方式實現通過url訪問static資料夾的:
if self.has_static_folder:
assert bool(static_host) == host_matching, 'Invalid static_host/host_matching combination'
self.add_url_rule( # 註冊檢視函式 二. 模版檔案的位置和修改方案
templates資料夾和static資料夾一樣, 都是有預設設定的。我們放入app/templates檔案下的html檔案,都可以在檢視函式中,通過render_template('html檔名')
修改預設預設templates資料夾或static資料夾的位置, 我們可以對app = Flask(__name__)新增引數來實現: 比如:
app = Flask(__name__, static_folder='static2', template_folder='tempaltes2')
# 這樣static預設資料夾就在  app/static
# 這樣templates預設資料夾就在  app/templates
我們可以對藍圖修改預設的static或templates資料夾位置
app/web/blueprint.py中這樣修改
web = Blueprint('web', __name__, static_folder='static', template_folder='templates')

# 這樣static資料夾在 app/web/static, 但static檔案不建議這樣, 因為static檔案很可能不同的藍圖都會使用
# 這樣templates資料夾在 app/web/templates
三. 使用Jinja2
1. 在Jinja2中讀取字典和物件
Jinja2模糊了物件和dict, 在jinja2中訪問他們方法是一樣的 假設有檢視函式:
@web.route('/test')
def test():
    r = {
        'name': 'cannon',
        'age': 25
    }
    return render_template('test.html', data=r)
對應的test.html程式碼中:
<!DOCTYPE html>
<html lang='en'>
<head>
    <meta charset='UTF-8'>
    <title></title>
</head>
<body>
    {{ data.age }}
    {{ data['age'] }}
</body>
</html>
2. 流程控制語句
if語句
test.html:
<body>
    {{ data.age }}
    {{ data['age'] }}
    {% if data.age < 18 %}
        {{ data.name }}
    {% elif data.age == 18 %}
        do something
    {% else %}
        {{ data.age }}
    {% endif %}
</body>
for in迴圈
test.html:
<body>
    {% for key, value in data.items() %}
        {{ key }}
        {{ value }}
    {% endfor %}
</body>
3. 使用模版繼承
layout.html:
<!DOCTYPE html>
<html lang='en'>
<head>
    <meta charset='UTF-8'>
    <title></title>
</head>
<body>
    {% block head %}
        <div> This is head </div>
    {% endblock %}
    {% block content %}
        This is content
    {% endblock %}
    {% block foot %}
        <div> This is foot </div>
    {% endblock %}
</body>
</html>
在別的html頁面繼承layout.html
test.html:
{% extends 'layout.html' %}
{% block content %}
    {{ super() }}
    {{ data.age }}
    {{ data['age'] }}
    {% if data.age < 18 %}
        {{ data.name }}
    {% elif data.age == 18 %}
        do something
    {% else %}
        {{ data.age }}
    {% endif %}
{% endblock %}
4. 過濾器與管道命令
過濾器
1. default
test.html:
{% extends 'layout.html' %}
{% block content %}
    {{ super() }}
    {{ data.age }}
    {{ data['age'] }}
    {% if data.age < 18 %}
        {{ data.name }}
    {% elif data.age == 18 %}
        {{ data.school | default('不存在') }}   {# 訪問不存在的變數,default才會生效 #}
    {% else %}
        {{ data.age }}
    {% endif %}
{% endblock %}
如果想data.school=None時,default也生效, 使用default('不存在', true) (加上一個true引數)
2. length
test.html:
{% extends 'layout.html' %}
{% block content %}
    {{ super() }}
    {{ data.age }}
    {{ data['age'] }}
    {% if data.age < 18 %}
        {{ data.name }}
    {% elif data.age == 18 %}
        {{ data | length() }}  {# 得到data的長度 #}
    {% else %}
        {{ data.age }}
    {% endif %}
{% endblock %}
四. urlfor 反向構建URL
以前註冊檢視函式的時候, 有個endpoint引數,我們並沒有說它的作用。endpoint其實是用來反向獲取url的。

新建app/static/test.css, 現在我想讓app/templates/layout.html去載入test.css:
<!DOCTYPE html>
<html lang='en'>
<head>
    <meta charset='UTF-8'>
    <title></title>
    <link rel="stylesheet" href="{{ url_for('static', filename='test.css') }}">
    {# url_for的使用方法 第一個引數是endpoint #}
    {#    <link rel="stylesheet" href="/static/test.css">#}
</head>
<body>
{% block head %}
    <div> This is head</div>
{% endblock %}
{% block content %}
    This is content
{% endblock %}
{% block foot %}
    <div> This is foot</div>
{% endblock %}
</body>
</html>
flask中能用url_for的, 儘量都用url_for
五. 訊息閃現、SecretKey與變數作用域with
1.訊息閃現 Messageing Flash
我們在app/web/book.py修改test檢視函式:
from flask import flash

@web.route('/test')
def test():
    r = {
        'name': None,
        'age': 18
    }

    flash('hello, cannon')   # 使用flash
    return render_template('test.html', data=r)
對app/templats/test.html做修改:
{% extends 'layout.html' %}
{% block content %}
    {{ super() }}
    {% if data.age < 18 %}
        {{ data.name }}
    {% elif data.age == 18 %}
        {{ data | length() }}
        {% set messages = get_flashed_messages() %}    {# 對應的使用get_flashed_messages #}
        {{ messages }}
    {% else %}
        {{ data.age }}
    {% endif %}
{% endblock %}
我們執行flask並訪問localhost:5000/test,報錯了:
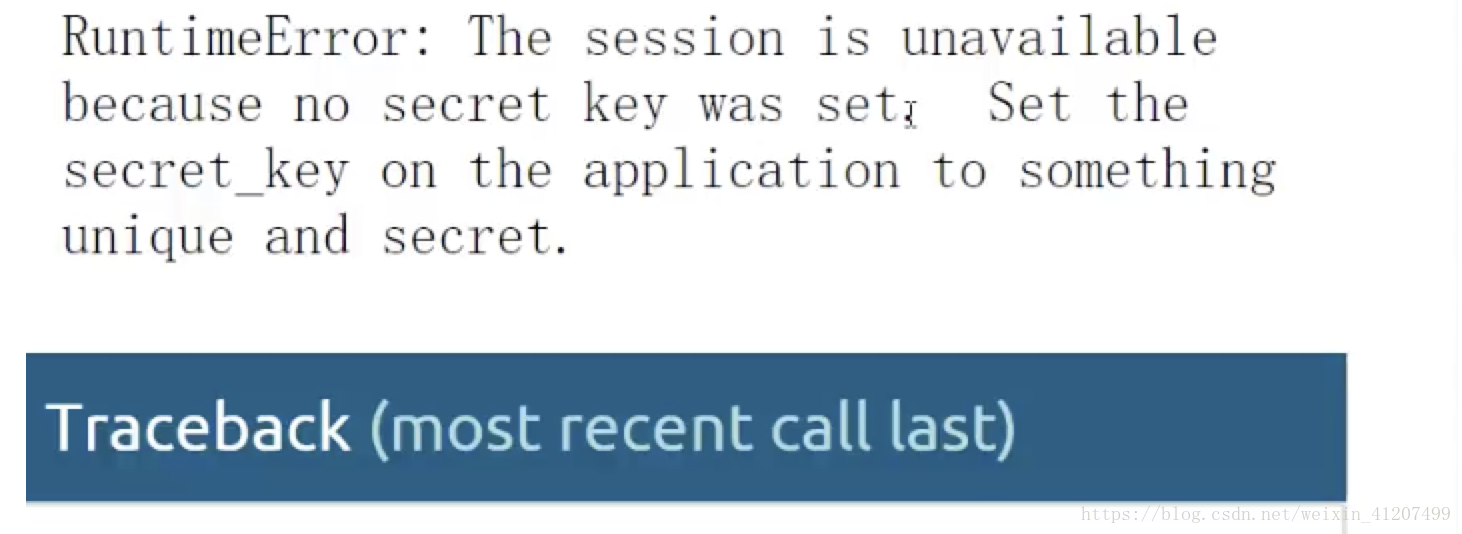
訊息閃現使用到了 session, 我們需要在配置檔案secure.py新增secretkey:
DEBUG = True
SQLALCHEMY_DATABASE_URI = 'mysql+cymysql://root:@localhost:3306/fisher'
SECRET_KEY = 'wjdiajsjkskcnndijqwiodjieijqijwiwqijfbryguhtrvwpqwqdnxjj'
執行後得到結果:
This is head
This is content
['hello, cannon']    # flash得到的資料
This is foot
2.category引數的使用
修改app/web/book.py的test檢視函式, 加入category引數:
from flask import flash

@web.route('/test')
def test():
    r = {
        'name': None,
        'age': 18
    }

    flash('hello, cannon', category='error')   # 使用flash
    flash('hello, cannon2', category='worning')   # 使用flash

    return render_template('test.html', data=r)
修改app/templats/test.html:
{% extends 'layout.html' %}
{% block content %}
    {{ super() }}
    {% if data.age < 18 %}
        {{ data.name }}
    {% elif data.age == 18 %}
        {{ data | length() }}
        {% set messages = get_flashed_messages(category_filter=['error']) %}
        {# category引數對應使用category_filter #}
        {{ messages }}
    {% else %}
        {{ data.age }}
    {% endif %}
{% endblock %}
這樣 只會顯示 category為error的flash傳遞的資料
3.with縮小變數作用域
在Jinja2中使用with語句, 則變數作用域只在with 和endwith之間:
修改app/templats/test.html:
{% extends 'layout.html' %}
{% block content %}
    {{ super() }}
    {% if data.age < 18 %}
        {{ data.name }}
    {% elif data.age == 18 %}
        {{ data | length() }}
        {% with messages = get_flashed_messages(category_filter=['error']) %}
        {{ messages }}     {# messages可以顯示 #}
        {% endwith %}
        {{ mesages }}      {# messages不能顯示 #}
    {% else %}
        {{ data.age }}
    {% endif %}
{% endblock %}