
Spring進階之路(8)-java程式碼與配置檔案中配置
阿新 • • 發佈:2019-02-07
實際開發中並不會需要你將程式碼轉為配置檔案的形式去呈現,但是,我寫著一系列博文的目的並不是教你如何去專案中進行開發,因為包括之前的幾篇博文中你會發現並不是在講專案的實踐的,我的想法是這樣的:為一些對Spring有所瞭解但是並不深入的朋友拓寬知識面,讓你不僅僅會用Spring而且要懂要知道他的更多的東西,我在接下來的日子裡會繼續拓展關於Spring的知識,同時可能會在適時的講解一些怎麼在專案中用的實踐篇,然後準備研究下設計模式,再回來繼續釋出關於Spring更深入的博文。也就意味著後面會有段時間我在研究設計模式,可能Spring這一塊的相關知識更新頻率會降低。在設計模式完成後,依然會繼續更新Spring相關博文。
例項一
下面看一個例子:
凡是有些程式設計基礎的,應該都可以看懂的,我三段程式碼不加說明了。
<strong>package com.siti.spring20160311;

public class WangYang {

	private int age;

	public int getAge() {
		return age;
	}

	public void setAge(int age) {
		this.age = age;
	}

	@Override
	public String toString() {
		return "WangYang [age=" + age + "]";
	}

}</strong>
<span style="font-size:14px;">package com.siti.spring20160311;

public class Person {

	private int age;
	private WangYang wy;

	public WangYang getWy() {
		return wy;
	}

	public void setWy(WangYang wy) {
		this.wy = wy;
	}

	public int getAge() {
		return age;
	}

	public void setAge(int age) {
		this.age = age;
	}

}</span><span style="font-size:18px;">
</span>
package com.siti.spring20160311;

public class MainTest {

	public static void main(String[] args) {
		WangYang wy = new WangYang();
		wy.setAge(10);
		Person person = new Person();
		person.setAge(20);
		person.setWy(wy);
		System.out.println(person.getWy());
	}
}
列印的資訊如圖:

下面我們通過配置檔案的形式將上面的程式碼實現
<span style="font-size:14px;"><?xml version="1.0" encoding="UTF-8"?>
<beans xmlns="http://www.springframework.org/schema/beans"
       xmlns:xsi="http://www.w3.org/2001/XMLSchema-instance"
       xsi:schemaLocation="
http://www.springframework.org/schema/beans http://www.springframework.org/schema/beans/spring-beans.xsd">

	  <!--
	  WangYang wy = new WangYang();
	  wy.setAge(10);
	      產生一個wy的例項物件,並設定age為10
	  -->
	  <bean id = "wy" class="com.siti.spring20160311.WangYang">
	  		<property name="age" value="10"></property>
	  </bean>

	  <!--
	  Person person = new Person();
	  person.setAge(20);
	  person.setWy(wy);
	      產生一個person的例項物件,並設定age為20,Wy物件為上面配置好的wy
	  -->
	  <bean id = "person" class="com.siti.spring20160311.Person">
	  		<property name="age" value="20"></property>
	  		<property name="wy" ref="wy"></property>
	  </bean>

	  <!-- 這裡需要注意了,我們在之前的程式碼中是用的person.getWy()這個方式得到的 -->
	  <!--
	  	PropertyPathFactoryBean用於獲取目標bean的屬性值
	  	使用它來獲取屬性的值即呼叫get方法的話需要制定幾個項:
	  	setPropertyPath(propertyPath);指定你使用哪個get方法。
	  	setTargetObject(Object targetObject); 指定獲取哪個物件的屬性值。
	  	這裡同樣是通過Spring容器為PropertyPathFactoryBean類中的屬性賦值。
	   -->
	  <bean name = "wyTest" class = "org.springframework.beans.factory.config.PropertyPathFactoryBean">
	  	 	<!-- 指定呼叫哪個get方法  -->
	  	 	<property name="propertyPath" value = "wy"></property>

	  	 	<!-- 指定去找哪個物件,呼叫哪個物件的屬性 -->
	  	 	<property name="targetBeanName" value = "person"></property>
	  </bean>
</beans></span>
測試類:
package com.siti.spring20160311;
import org.springframework.context.ApplicationContext;
import org.springframework.context.support.ClassPathXmlApplicationContext;
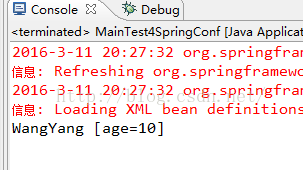
public class MainTest4SpringConf {
public static void main(String[] args) {
ApplicationContext context = new ClassPathXmlApplicationContext("applicationContext20160311.xml");
System.out.println(context.getBean("wyTest"));
}
}
輸出結果:
例項二
如下的一段程式碼
package com.siti.spring20160311;

import java.awt.BorderLayout;

import javax.swing.JButton;
import javax.swing.JFrame;
import javax.swing.JPanel;
import javax.swing.JScrollPane;
import javax.swing.JTextArea;

public class MainTest4Window {

	public static void main(String[] args) {
		JFrame frame = new JFrame("窗體");

		JTextArea textArea = new JTextArea(10,20);
		frame.add(new JScrollPane(textArea));

		JPanel panel = new JPanel();
		frame.add(panel, BorderLayout.SOUTH);

		JButton buttonYes = new JButton("Yes");
		panel.add(buttonYes);

		JButton buttonNo = new JButton("No");
		panel.add(buttonNo);

		frame.pack();
		frame.setVisible(true);
	}
}
執行結果如下圖

用配置檔案來實現上面的程式碼:
<pre name="code" class="java"><?xml version="1.0" encoding="UTF-8"?>
<beans xmlns="http://www.springframework.org/schema/beans"
       xmlns:xsi="http://www.w3.org/2001/XMLSchema-instance"
       xmlns:util="http://www.springframework.org/schema/util"
       xsi:schemaLocation="
		http://www.springframework.org/schema/beans
		http://www.springframework.org/schema/beans/spring-beans.xsd
		http://www.springframework.org/schema/util
		http://www.springframework.org/schema/util/spring-util-4.0.xsd">

	  <!--
	  	JFrame frame = new JFrame("窗體");
	  	frame.setVisible(true);
	   -->
	  <bean name = "frame" class = "javax.swing.JFrame">
	  		<constructor-arg value = "窗體"></constructor-arg>
	  		<property name="visible" value="true"></property>
	  </bean>

	  <!--
	  	JTextArea textArea = new JTextArea(10,20);
	   -->
	  <bean name = "textArea" class = "javax.swing.JTextArea">
	  		<constructor-arg value = "10"></constructor-arg>
	  		<constructor-arg value = "20"></constructor-arg>
	  </bean>

	  <!--
	    frame.add(new JScrollPane(textArea));
	  	通過MethodInvokingFactoryBean工廠Bean,可以將指定方法返回值注入成為目標Bean的屬性值,
	  	MethodInvokingFactoryBean用來獲得指定方法的返回值,該方法可以是靜態方法 也可以是例項方法。
		獲得的方法返回值既可以被注入到指定Bean例項的指定屬性,也可以直接定義成Bean例項。
		targetObject指定了目標物件
		targetMethod指定了目標方法
	  -->
	  <bean class = "org.springframework.beans.factory.config.MethodInvokingFactoryBean">
	  		<property name="targetObject" ref = "frame"></property>
	  		<property name="targetMethod" value="add"></property>
	  		<property name="arguments">
	  			<list>
	  				<bean class = "javax.swing.JScrollPane">
	  					<constructor-arg ref="textArea"></constructor-arg>
	  				</bean>
	  			</list>
	  		</property>
	  </bean>

	  <!--
	  	JPanel panel = new JPanel();
	   -->
	  <bean name = "panel" class = "javax.swing.JPanel"></bean>

	  <!-- frame.add(panel, BorderLayout.SOUTH); -->
	  <bean class = "org.springframework.beans.factory.config.MethodInvokingFactoryBean">
	  		<property name="targetObject" ref = "frame"></property>
	  		<property name="targetMethod" value="add"></property>
	  		<property name="arguments">
	  			<list>
	  				<ref bean = "panel"/>
	  				<util:constant static-field = "java.awt.BorderLayout.SOUTH"/>
	  			</list>
	  		</property>
	  </bean>

	  <!--
	    JButton buttonYes = new JButton("Yes");
	   -->
	  <bean name = "buttonYes" class = "javax.swing.JButton">
	  		<constructor-arg value="Yes" type="java.lang.String"></constructor-arg>
	  </bean>

	  <!-- panel.add(buttonYes); -->
	  <bean class = "org.springframework.beans.factory.config.MethodInvokingFactoryBean">
	  		<property name="targetObject" ref = "panel"></property>
	  		<property name="targetMethod" value="add"></property>
	  		<property name="arguments">
	  			<list>
	  				<ref bean = "buttonYes"/>
	  			</list>
	  		</property>
	  </bean>

	  <!--
	    JButton buttonNo = new JButton("No");
	   -->
	  <bean name = "buttonNo" class = "javax.swing.JButton">
	  		<constructor-arg value="No" type="java.lang.String"></constructor-arg>
	  </bean>

	  <!-- panel.add(buttonNo); -->
	  <bean class = "org.springframework.beans.factory.config.MethodInvokingFactoryBean">
	  		<property name="targetObject" ref = "panel"></property>
	  		<property name="targetMethod" value="add"></property>
	  		<property name="arguments">
	  			<list>
	  				<ref bean = "buttonNo"/>
	  			</list>
	  		</property>
	  </bean>

	  <!--
		frame.pack();
	  -->
	  <bean class = "org.springframework.beans.factory.config.MethodInvokingFactoryBean">
	  		<property name="targetObject" ref = "frame"></property>
	  		<property name="targetMethod" value="pack"></property>
	  </bean>


</beans>
測試類
package com.siti.spring20160311;

import org.springframework.context.ApplicationContext;
import org.springframework.context.support.ClassPathXmlApplicationContext;

public class MainTest4Swing {

	public static void main(String[] args) {
		ApplicationContext context = new ClassPathXmlApplicationContext("applicationContext201603114Swing.xml");
	}
}
輸出結果

這兩個例子用來體會下Spring的強大就好。