
python requests 爬取知乎使用者資訊
今天嘗試了爬取知乎使用者資訊來練習爬蟲,學到了很多東西,在這裡總結一下心得
我沒有使用爬蟲框架,就只用了requests模組,應為爬取的都是json資料,連BeautifulSoup都沒能用上
爬取知乎使用者資訊,可以不用模擬登入也能獲取使用者資訊,只有一些設定了隱私才需要登入,我們這裡不登入也能滿足需求了
1.首先我們可以從一位知乎使用者開始,先爬取他的關注列表的使用者url_token
2.遞迴爬取他關注列表使用者的關注列表,並存儲在文本里
3.根據文本里的使用者url_token一一爬取使用者資訊
4.寫入資料庫
5.搞一個代理ip池
import requests import json importpymysql num=0 #設定爬取次數 user_all=[] #存放本次執行的使用者
首先先用requests寫一個解析網頁的函式
新增
def get_url(url): #獲取連結內容 header_info = { "User-Agent": 'Mozilla/5.0 (Windows NT 10.0; WOW64) AppleWebKit/537.36 (KHTML, like Gecko) Chrome/66.0.3359.139 Safari/537.36', } user_url =url response =requests.get(user_url,headers=header_info) data = response.content data = data.decode('utf-8') #設定字符集 return data
然後我們需要獲取使用者的關注類別,我們可以從解析下面的api連結開始,右鍵檢查network可以找到
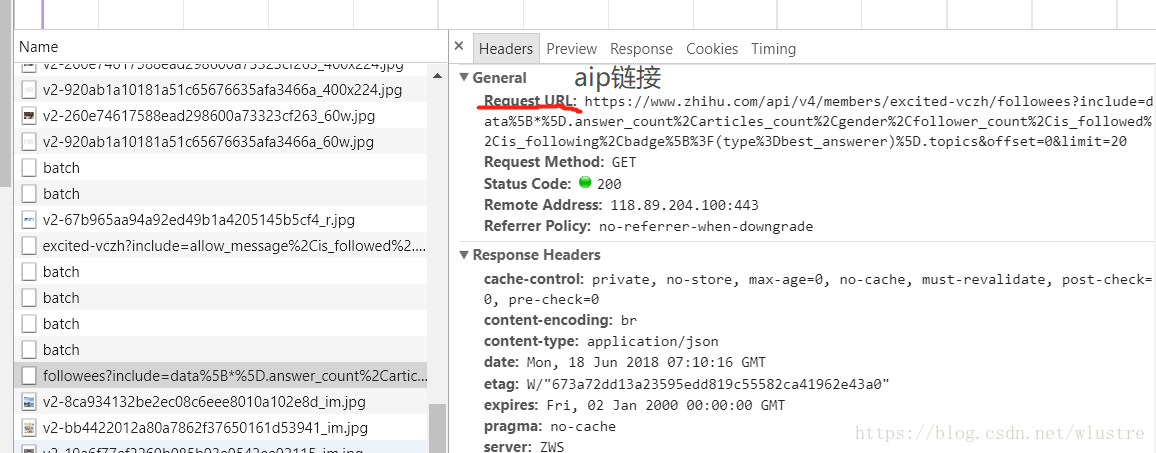
https://www.zhihu.com/api/v4/members/excited-vczh/followees?include=data%5B*%5D.answer_count%2Carticles_count%2Cgender%2Cfollower_count%2Cis_followed%2Cis_following%2Cbadge%5B%3F(type%3Dbest_answerer)%5D.topics&offset=0&limit=20
其中的變數為使用者的url_token,offest頁數,limit顯示的條數
我們從輪子哥的關注列表開始爬取
右鍵檢查network,可以看到返回的是json資料,我們只需要裡面的url_token
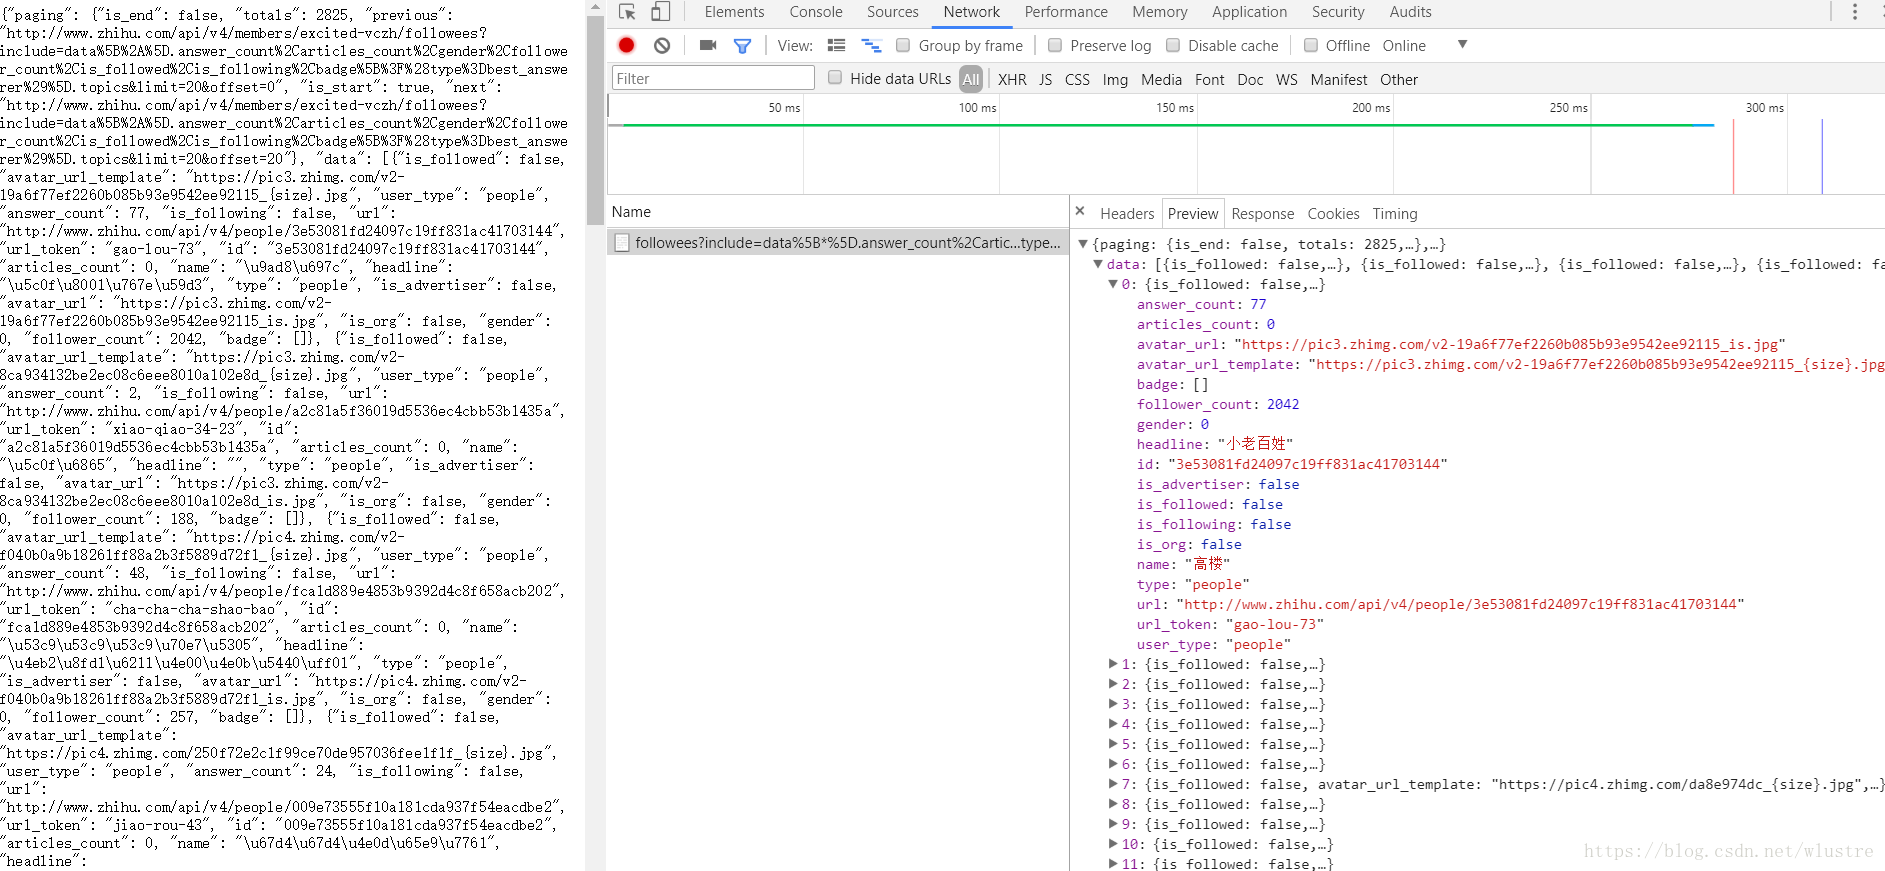
開始寫解析函式
def get_follower(userID):             #解析內容,獲取關注使用者
list=[]
    url = 'https://www.zhihu.com/api/v4/members/'+userID+'/followees?' \
          'include=data%5B*%5D.answer_count%2Carticles_count%2Cgender%2Cfollower_count%' \
          '2Cis_followed%2Cis_following%2Cbadge%5B%3F(type%3Dbest_answerer)%5D.topics&offset=0&limit=20'
data = get_url(url)
    data = json.loads(data)
    print(data)
    for user in data:
        list.append(user['url_token'])
    return list
其中我們需要構造使用者變數,頁數和顯示條數不變,我們獲取第一頁的資料就可以了。json資料我們可以使用python的陣列來解析,使用json模組的json.loads()轉為陣列
遞迴爬取使用者url_token
def digui(list):
        global num                   #全域性變數,爬取多少次
temporary = []               #存放本次爬取的使用者名稱
for url in list:
            if (num == 10):
                return 0
else:
                num = num + 1
print(num)
                list = get_follower(url)
                user_all.extend(list)             #全域性變數,存放所有爬取的使用者名稱
temporary.extend(list)           #存放本次爬取的使用者名稱
print(list)
        digui(temporary)                         #遞迴爬取
首先我們需要設定一個全域性變數來儲存本次執行所爬取的url_token,temporary儲存此次遞迴的url_token,然後以temporary為引數繼續遞迴
爬取結果如下

獲取了關注列表後,我們開始逐一獲取使用者資訊,同樣的方法我們通過以下api來獲取
https://www.zhihu.com/api/v4/members/excited_vczh?include=locations%2Cemployments%2Cgender%2Ceducations%2Cbusiness%2Cvoteup_count%2Cthanked_Count%2Cfollower_count%2Cfollowing_count%2Ccover_url%2Cfollowing_topic_count%2Cfollowing_question_count%2Cfollowing_favlists_count%2Cfollowing_columns_count%2Cavatar_hue%2Canswer_count%2Carticles_count%2Cpins_count%2Cquestion_count%2Ccolumns_count%2Ccommercial_question_count%2Cfavorite_count%2Cfavorited_count%2Clogs_count%2Cmarked_answers_count%2Cmarked_answers_text%2Cmessage_thread_token%2Caccount_status%2Cis_active%2Cis_bind_phone%2Cis_force_renamed%2Cis_bind_sina%2Cis_privacy_protected%2Csina_weibo_url%2Csina_weibo_name%2Cshow_sina_weibo%2Cis_blocking%2Cis_blocked%2Cis_following%2Cis_followed%2Cmutual_followees_count%2Cvote_to_count%2Cvote_from_count%2Cthank_to_count%2Cthank_from_count%2Cthanked_count%2Cdescription%2Chosted_live_count%2Cparticipated_live_count%2Callow_message%2Cindustry_category%2Corg_name%2Corg_homepage%2Cbadge%5B%3F(type%3Dbest_answerer)%5D.topics
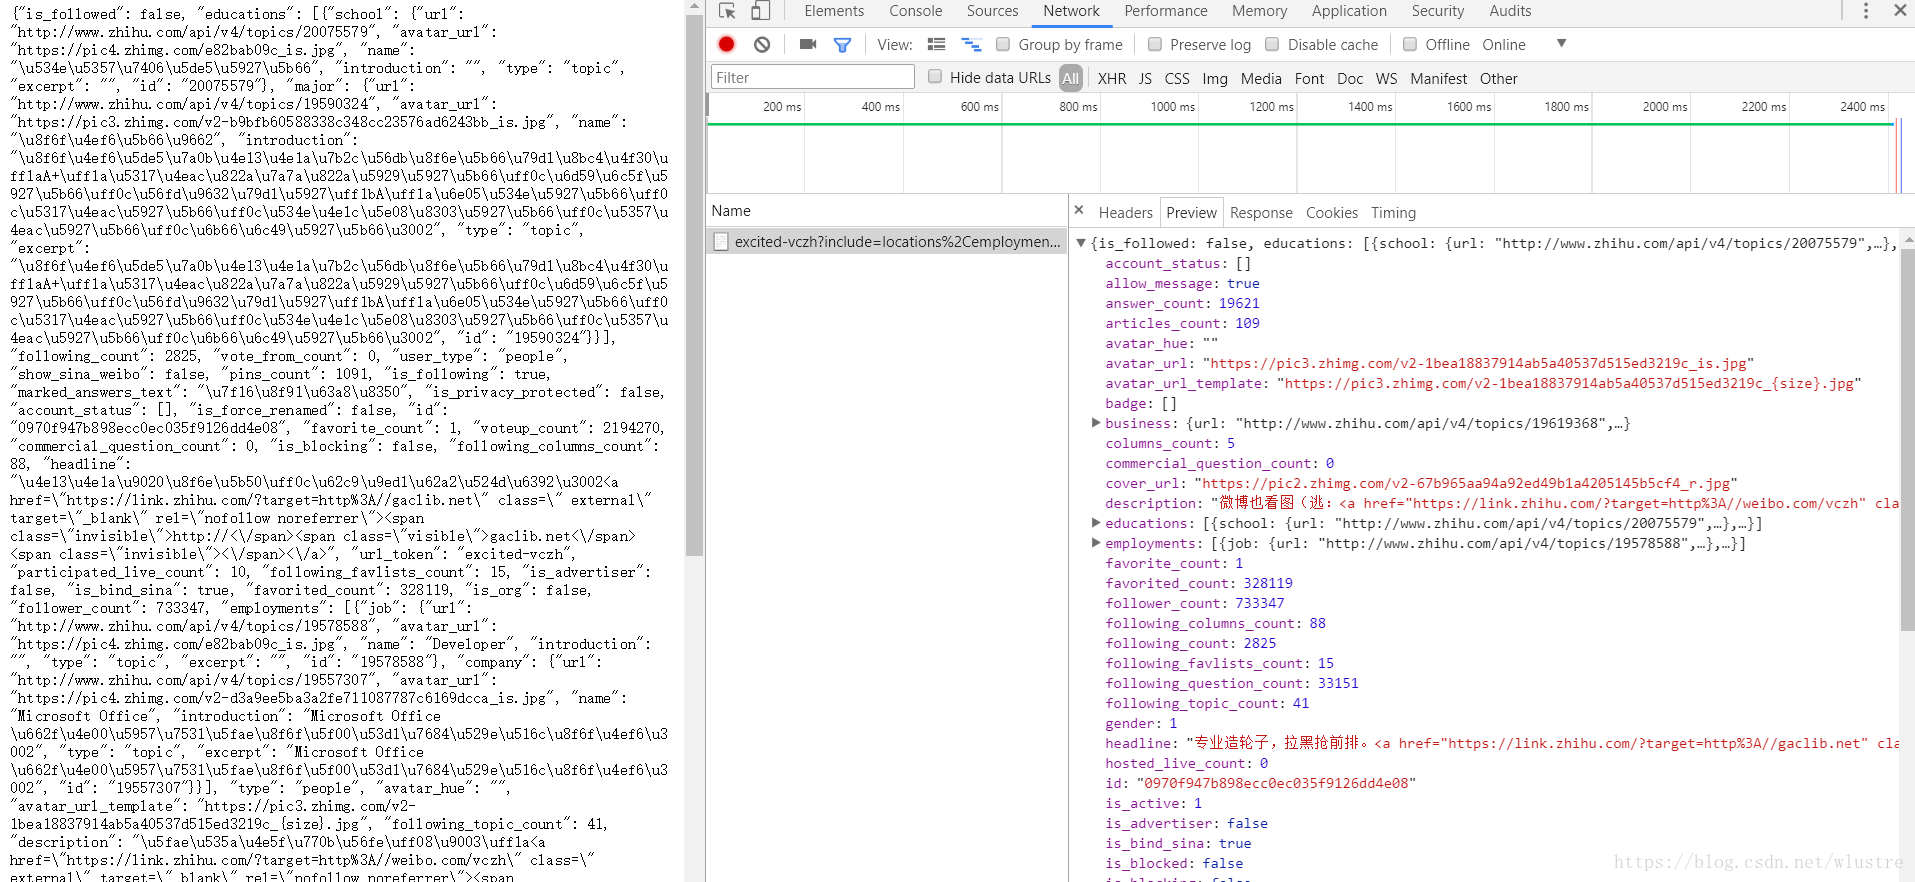
使用者資訊基本上就是在這裡啦,接下來我們只需要解析json資料就可以了
def get_userInfo(userID):
    info=[]
    url="https://www.zhihu.com/api/v4/members/"+userID+"?include=locations%2Cemployments%2Cgender%2Ceducations%2Cbusiness%2Cvoteup_count%2Cthanked_Count%2Cfollower_count%2Cfollowing_count%2Ccover_url%2Cfollowing_topic_count%2Cfollowing_question_count%2Cfollowing_favlists_count%2Cfollowing_columns_count%2Cavatar_hue%2Canswer_count%2Carticles_count%2Cpins_count%2Cquestion_count%2Ccolumns_count%2Ccommercial_question_count%2Cfavorite_count%2Cfavorited_count%2Clogs_count%2Cmarked_answers_count%2Cmarked_answers_text%2Cmessage_thread_token%2Caccount_status%2Cis_active%2Cis_bind_phone%2Cis_force_renamed%2Cis_bind_sina%2Cis_privacy_protected%2Csina_weibo_url%2Csina_weibo_name%2Cshow_sina_weibo%2Cis_blocking%2Cis_blocked%2Cis_following%2Cis_followed%2Cmutual_followees_count%2Cvote_to_count%2Cvote_from_count%2Cthank_to_count%2Cthank_from_count%2Cthanked_count%2Cdescription%2Chosted_live_count%2Cparticipated_live_count%2Callow_message%2Cindustry_category%2Corg_name%2Corg_homepage%2Cbadge%5B%3F(type%3Dbest_answerer)%5D.topics"
data=get_url(url)
    data = json.loads(data)
    if 'avatar_url' in data:
        info.append(data['avatar_url'])       #頭像
else:
        info.append('')
    if 'url_token' in data:
        info.append(data['url_token'])  # id
else:
        info.append('')
    if 'name' in data:
        info.append(data['name'])
    else:
        info.append('')
    if 'gender' in data:
        info.append(data['gender'])  # 性別
else:
        info.append('')
    try:
        if 'name' in data['locations'][0]:
            info.append(data['locations'][0]['name'])  # 居住地
else:
            info.append('')
    except:
        info.append('')

    if 'business' in data:
        info.append(data['business']['name'])  # 所在行業
else:
        info.append('')
    try:
        if "school" in data['educations'][0]:
            info.append(data['educations'][0]['school']['name'])  # 學校
else:
            info.append('')
    except:
        info.append('')
    try:
        if 'major' in data['educations'][0]:
            info.append(data['educations'][0]['major']['name'])      #專業
else:
            info.append('')
    except:
        info.append('')
    if 'follower_count' in data:
        info.append(data['follower_count'])  # 粉絲
else:
        info.append('')
    if 'following_count' in data:
        info.append(data['following_count'])  # 關注
else:
        info.append('')
    if 'voteup_count' in data:
        info.append(data['voteup_count'])  # 獲贊
else:
        info.append('')
    if 'thanked_count' in data:
        info.append(data['thanked_count'])  # 感謝
else:
        info.append('')
    if 'favorited_count' in data:
        info.append(data['favorited_count'])  # 收藏
else:
        info.append('')
    if 'answer_count' in data:
        info.append(data['answer_count'])  # 回答數
else:
        info.append('')
    if 'following_question_count' in data:
        info.append(data['following_question_count'])  # 關注的問題
else:
        info.append('')
    try:
        if 'company' in data['employments'][0]:
            info.append(data['employments'][0]["company"]['name'])  # 公司
else:
            info.append('')
    except:
        info.append('')

    try:
        if 'job' in data['employments'][0]:
            info.append(data['employments'][0]["job"]['name'])  # 職位
else:
            info.append('')
    except:
        info.append('')

    return info
因為有些使用者是填寫一些資訊的,所以我們應該先判斷json中是否有我們所需要的資料,如果沒有,就等於空字元,有些陣列不存時在會報錯,我們可以使用try:....except: 來解決異常問題
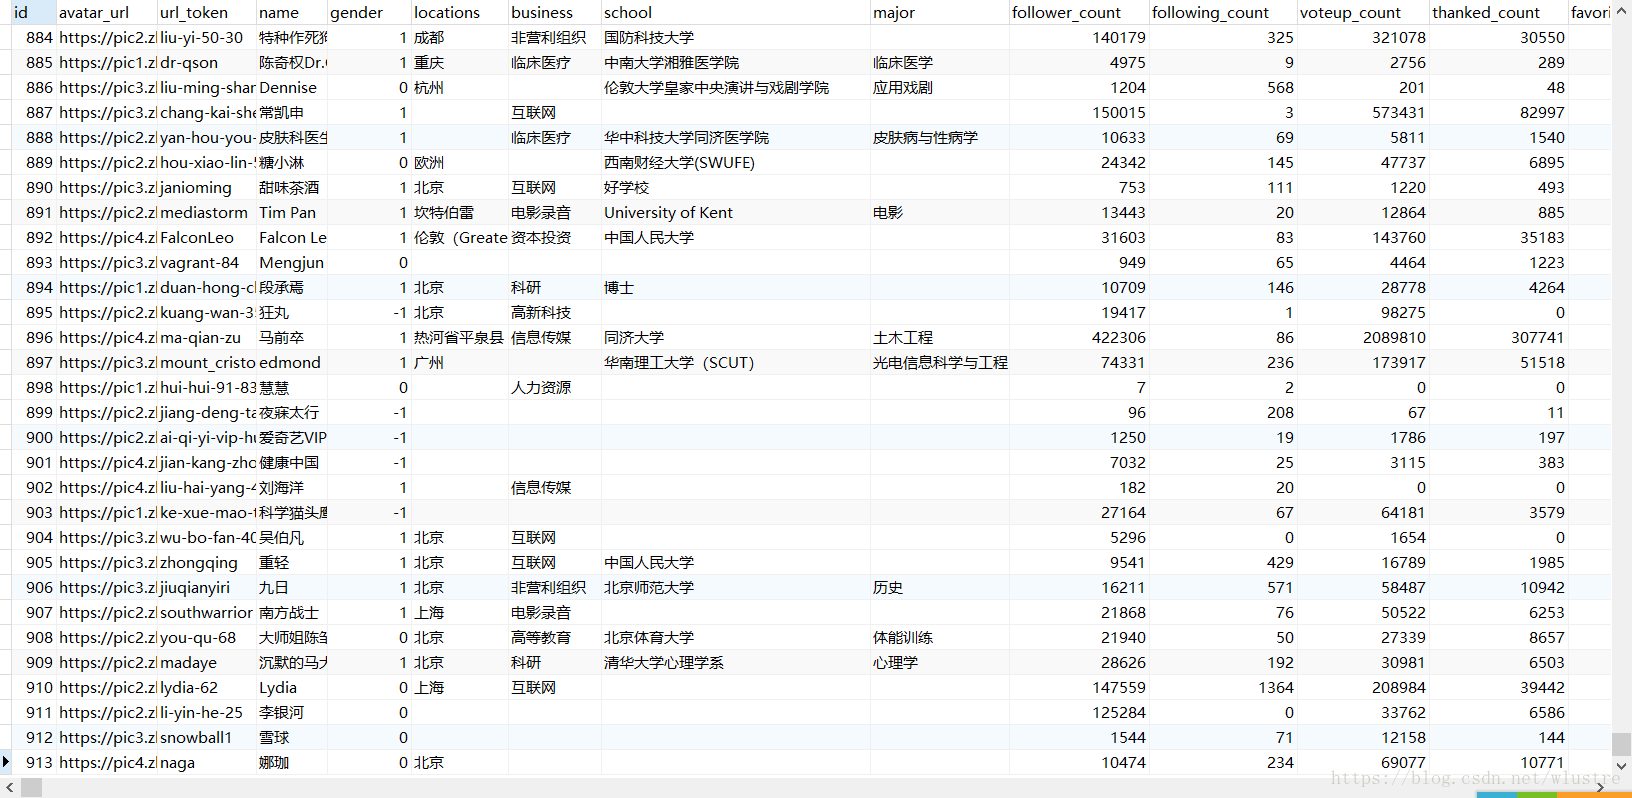
獲取了資料後就寫入資料庫,寫入資料庫我們用pymysql,沒有這個模組的使用者用pip安裝。
建立表
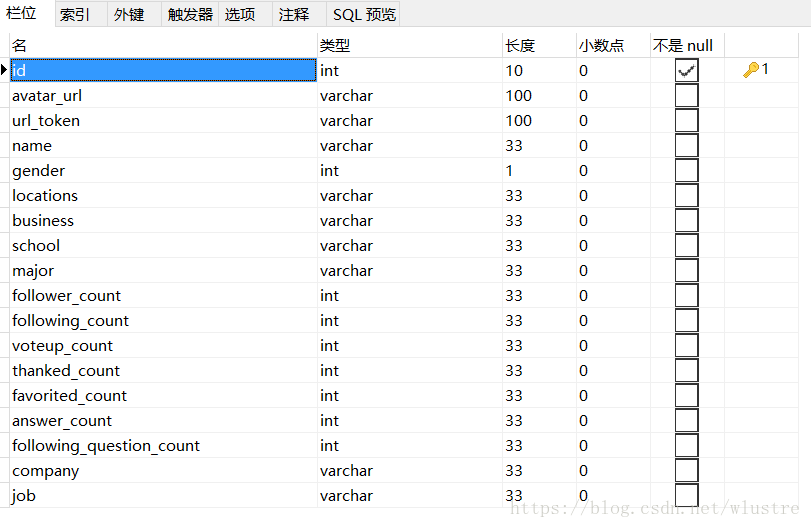
其中設url_token表段唯一,這樣在寫入的時候就不會出現重複的使用者了
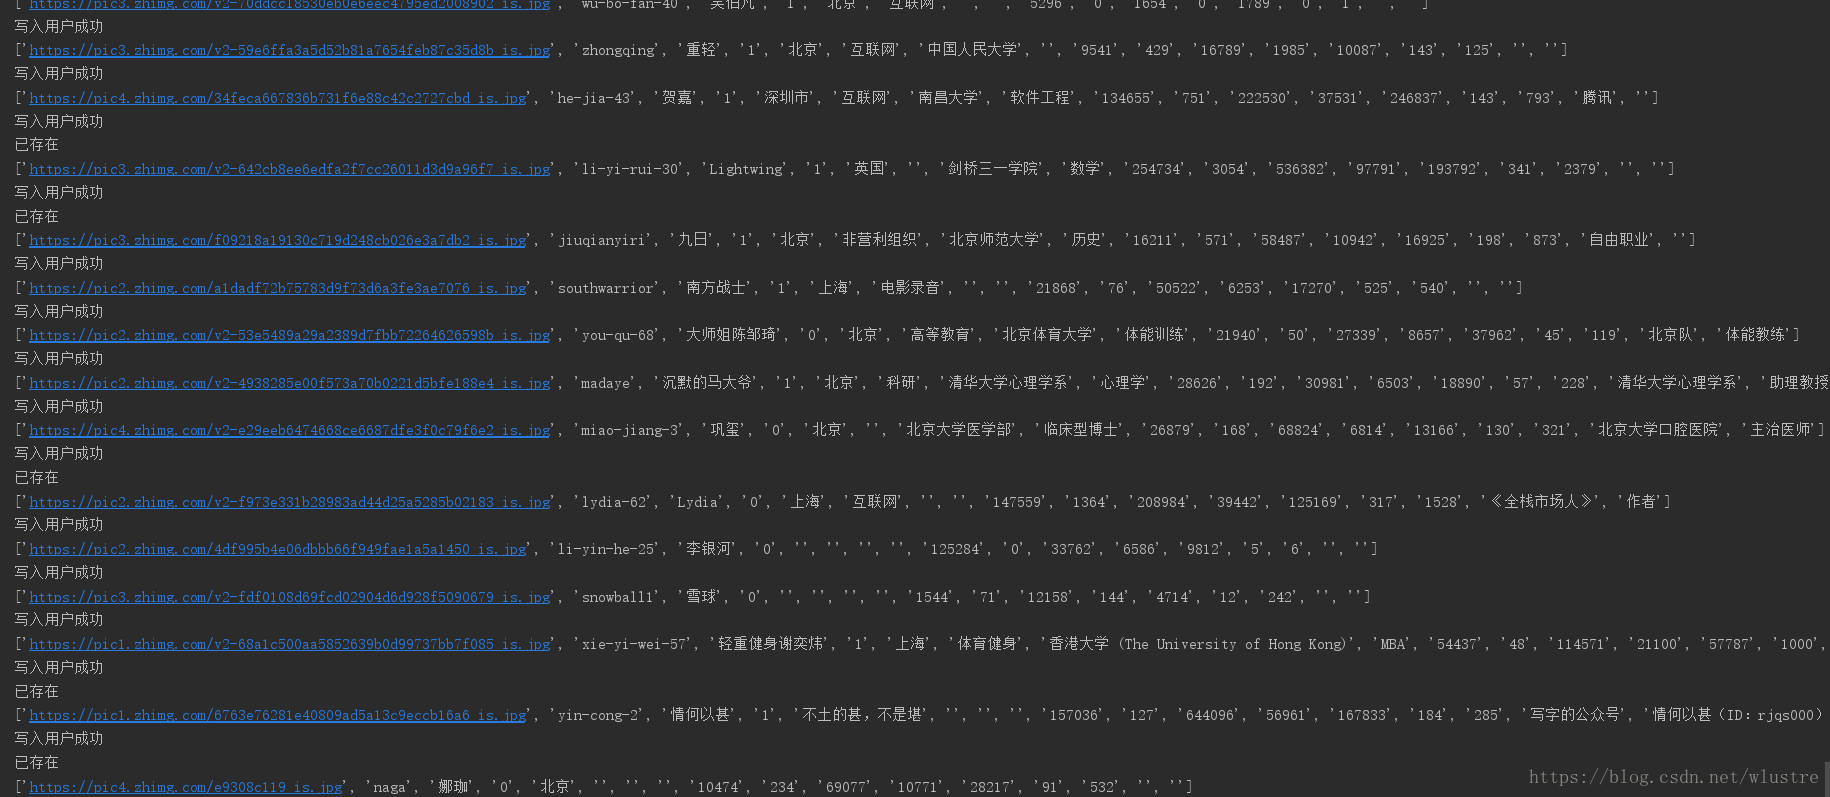
def write_sql_info(list):                #使用者資訊寫入資料庫
db = pymysql.connect("localhost","root","123456","zhihu_user",charset='utf8')
    # 使用cursor()方法獲取操作遊標
cursor = db.cursor()
    # SQL 插入語句
sql = """INSERT INTO user_info(avatar_url,url_token,name,gender,locations,business,school,major,follower_count,
following_count,voteup_count,thanked_count,favorited_count,answer_count,following_question_count,company,job)
                         VALUES ('""" + list[0] + """','""" + list[1] + """','""" + list[2] + """','""" + list[3] + """',
                         '""" + list[4] + """','""" + list[5] + """','""" + list[6] + """','""" + list[7] + """',
                         '""" + list[8] + """','""" + list[9] + """','""" + list[10] + """','""" + list[11] + """',
                         '""" + list[12] + """','""" +list[13] + """','""" + list[14] + """','""" + list[15] + """','""" + list[16] + """ ')"""
try:
        # 執行sql語句
print('寫入使用者成功')
        cursor.execute(sql)
        # 提交到資料庫執行
db.commit()
    except:
        print("已存在")
        # 如果發生錯誤則回滾info
db.rollback()
        # 關閉資料庫連線
db.close()
主函式
if __name__ == '__main__':

    with open('./url.txt', 'r') as f:
        lines = f.readlines()  # 讀取所有行
last_line = lines[-1]  # 取最後一行
user_id = last_line  # 繼續上一次的爬取
user = get_follower(user_id)
    if (user == None):
        print("沒有關注的人")
    else:
        digui(user)
    user_all = list(set(user_all))  # 去掉重複的使用者重
f = open('./url.txt', 'a')  # 寫入文字檔案
for text in user_all:
        f.write('\n' + text)
    user_list = user_all
    f.close()
    for id in user_list:
        user_id = id
        info = get_user_info(user_id)
        info = [str(i) for i in info]  # 轉為字串
print(info)
        write_sql_info(info)  # 寫入資料庫
主函式中我們使用一個文字檔案來存放使用者的url_token,每次執行時讀取最後一行,這樣就能從上次爬取的地方繼續爬取
執行結果
當我們爬到一定程度時,會發現返回錯誤

這就要考慮一個問題了,程式的執行速度是很快的,如果我們利用一個爬蟲程式在網站爬取東西,一個固定IP的訪問頻率就會很高,這不符合人為操作的標準,因為人操作不可能在幾ms內,進行如此頻繁的訪問。所以一些網站會設定一個IP訪問頻率的閾值,如果一個IP訪問頻率超過這個閾值,說明這個不是人在訪問,而是一個爬蟲程式。
我的解決辦法是弄一個代理ip池
如何建立一個爬蟲代理ip池
1、找到一個免費的ip代理網站(我這裡用的是https://www.kuaidaili.com/free/)
2、爬取ip
3、檢測ip可用性,移除不可用ip
4、隨機取ip使用
新建ip.py檔案
使用requests和BeautifulSoup爬取網站的ip
from bs4 import BeautifulSoup
import requests
import random
import urllib
ip_list=[]
def get_ip_list(url):
    headers = {
        'User-Agent': "Mozilla/5.0 (Windows NT 10.0; WOW64) AppleWebKit/537.36 (KHTML, like Gecko) Chrome/66.0.3359.139 Safari/537.36"}
    for i in range(10,30):           #設定頁數,這裡設定10到30頁
i=str(i)
        url_c=url+'/inha/'+i+'/'
web_data = requests.get(url,headers=headers)
        soup = BeautifulSoup(web_data.text, 'html.parser')
        ips = soup.find_all('tr')
        for i in range(1, len(ips)):
            ip_info = ips[i]
            tds = ip_info.find_all('td')
            ip_list.append(tds[0].text+':'+tds[1].text)       #ip加埠號
        #檢測ip可用性,移除不可用ip
for ip in ip_list:
        try:
          proxy_host = "https://" + ip
          proxy_temp = {"https": proxy_host}
          res = urllib.urlopen(url, proxies=proxy_temp).read()           #訪問一個網站,看看是否返回200
except Exception as e:
          ip_list.remove(ip)                  #去除無效的ip
continue
    return ip_list

def get_random_ip(ip_list):          #在ip池中隨機取一個ip使用
proxy_list = []
    for ip in ip_list:
        proxy_list.append('http://' + ip)
    proxy_ip = random.choice(proxy_list)
    proxies = {'http': proxy_ip}
    return proxies
if __name__ == '__main__':
    url = 'https://www.kuaidaili.com/free/'
ip_list = get_ip_list(url)
    proxies = get_random_ip(ip_list)
    print(ip_list)
    print(proxies)
爬取結果

request使用代理ip用proxies引數
response =requests.get(user_url, headers=header_info,proxies=proxies)匯入ip.py,然後使用我們爬到的ip作為引數寫進去就好啦
每輪爬取時會使用不同的ip,這樣ip被封的概率就減小了
使用pyecharts視覺化分析(具體用法百度)
由於爬的使用者是來自使用者關注列表,所以都是粉絲數比較多的使用者,使用者資料只有4000+,分析不能代表大範圍,僅參考練習
性別分佈

另外一篇正方系統爬取練習 點選開啟連結