
利用maven搭建一個小型SSM框架的web程式
阿新 • • 發佈:2019-02-09
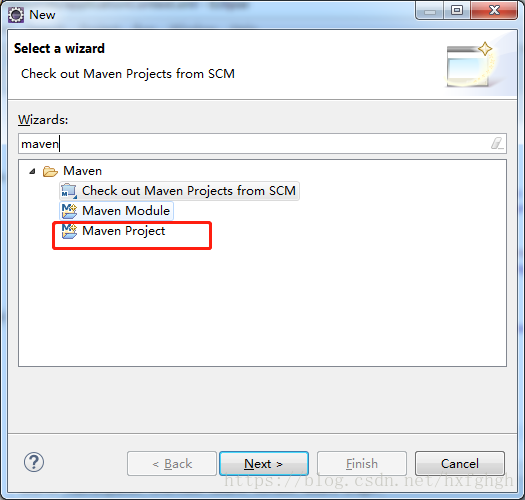
新建專案
新建maven project
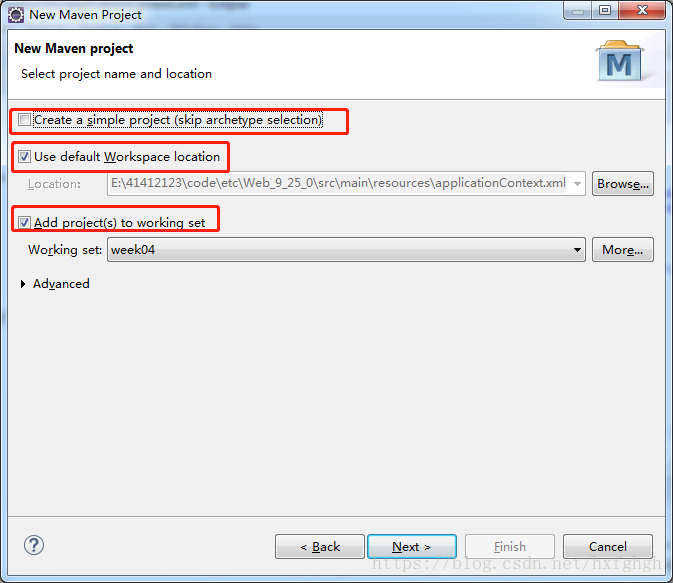
三者全部勾選,
第一個是:建立一個簡單的maven工程
第二個是:選擇儲存路徑,只要選擇預設即可
第三個是:選擇工作區,自己隨便建立一個 即可
然後一路finsh 直到建立完成即可
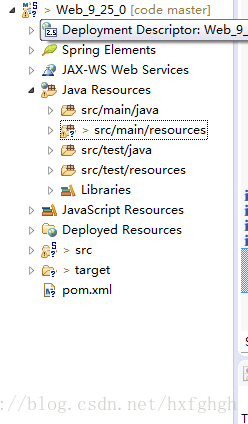
如果創建出來的程式有錯誤,可以右鍵專案->選擇java ee tools ->點選 generate deployment…這個選項即可
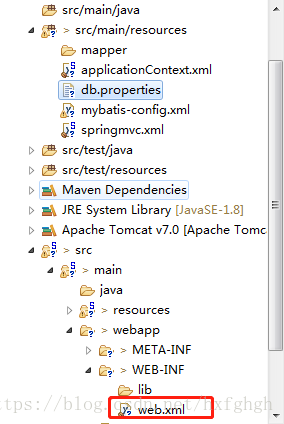
檢視webapp是否格式如下
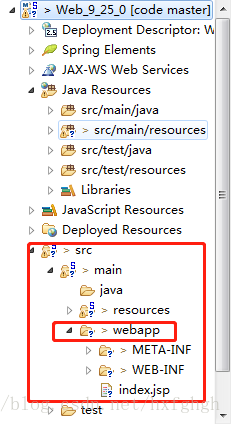
如果不是,則右鍵專案->選擇properties->選擇project facets
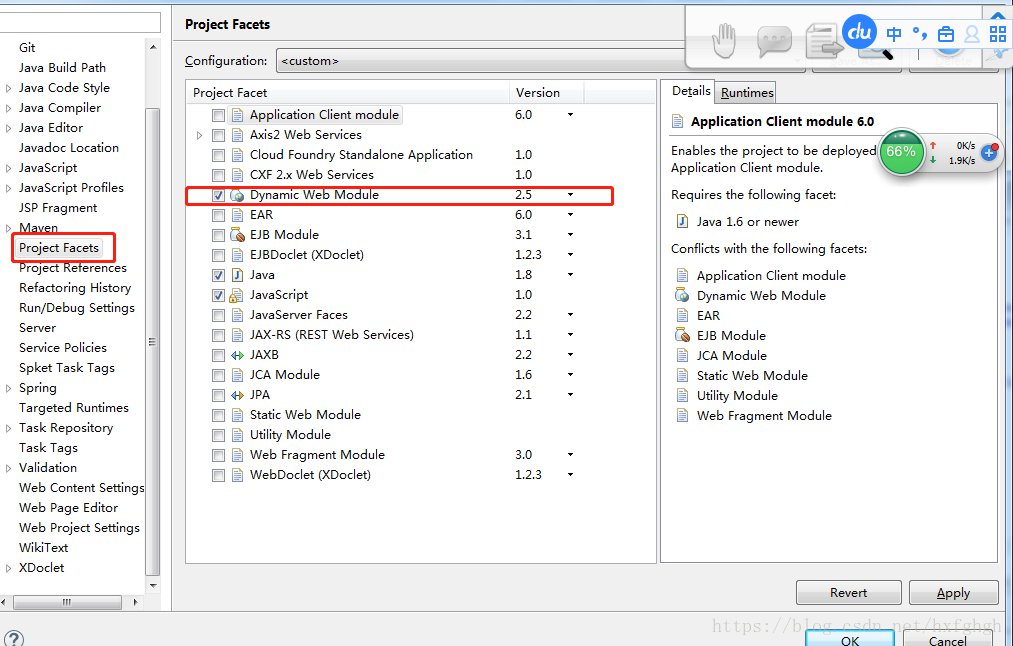
先取消紅框的地方,在勾選那個紅框
在彈出的地方進行修改如下 :
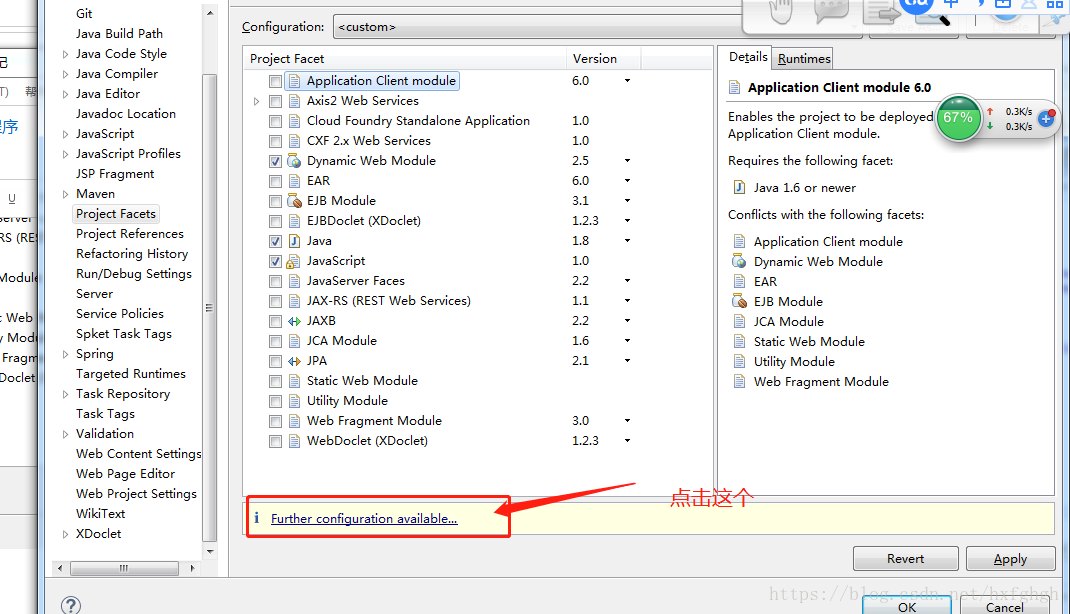
修改紅框內容如下即可

然後配置pom.xml檔案
maven工程的一個好處就是無需在自行下載匯入jar包,而是直接在pom.xml檔案寫上需要匯入的檔案即可完成匯入
原始碼如下
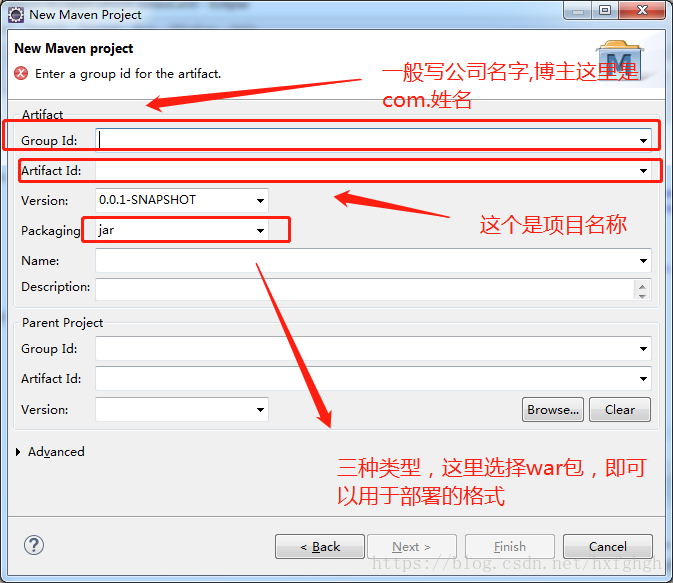
<project xmlns="http://maven.apache.org/POM/4.0.0" xmlns:xsi="http://www.w3.org/2001/XMLSchema-instance" xsi:schemaLocation="http://maven.apache.org/POM/4.0.0http://maven.apache.org/xsd/maven-4.0.0.xsd">
  <modelVersion>4.0.0</modelVersion>
  <groupId>com.hejie</groupId>
  <artifactId>Web_9_25_0</artifactId>
  <version>0.0.1-SNAPSHOT</version>
  <packaging>war</packaging>

  <dependencies>
  <!-- spring-webmvc   springmvc的包 -->
  <!-- https://mvnrepository.com/artifact/org.springframework/spring-webmvc -->
       <dependency>
           <groupId>org.springframework</groupId>
           <artifactId>spring-webmvc</artifactId>
           <version>4.3.7.RELEASE</version>
       </dependency>

       <!-- spring-jdbc   springjdbc的包-->
       <!-- https://mvnrepository.com/artifact/org.springframework/spring-jdbc -->
       <dependency>
           <groupId>org.springframework</groupId>
           <artifactId>spring-jdbc</artifactId>
           <version>4.3.7.RELEASE</version>
       </dependency>

       <!-- spring aspect -->
       <!-- https://mvnrepository.com/artifact/org.springframework/spring-aspects -->
       <dependency>
           <groupId>org.springframework</groupId>
           <artifactId>spring-aspects</artifactId>
           <version>4.3.7.RELEASE</version>
       </dependency>

       <!-- mybatis -->
       <!-- https://mvnrepository.com/artifact/org.mybatis/mybatis -->
       <dependency>
           <groupId>org.mybatis</groupId>
           <artifactId>mybatis</artifactId>
           <version>3.4.2</version>
       </dependency>

       <!-- mybatis和spring的整合包 -->
       <!-- https://mvnrepository.com/artifact/org.mybatis/mybatis-spring -->
       <dependency>
           <groupId>org.mybatis</groupId>
           <artifactId>mybatis-spring</artifactId>
           <version>1.3.1</version>
       </dependency>

       <!-- c3p0:jdbc 用於連線池的包 -->
       <!-- https://mvnrepository.com/artifact/c3p0/c3p0 -->
       <dependency>
           <groupId>c3p0</groupId>
           <artifactId>c3p0</artifactId>
           <version>0.9.1</version>
       </dependency>

       <!-- mysql-connect-java java的mysql驅動包 -->
       <!-- https://mvnrepository.com/artifact/mysql/mysql-connector-java -->
       <dependency>
           <groupId>mysql</groupId>
           <artifactId>mysql-connector-java</artifactId>
           <version>5.0.4</version>
       </dependency>

       <!-- jstl-jstl 驅動包 -->
       <!-- https://mvnrepository.com/artifact/jstl/jstl -->
       <dependency>
           <groupId>jstl</groupId>
           <artifactId>jstl</artifactId>
           <version>1.2</version>
       </dependency>

       <!-- servlet容器包 -->
       <!-- https://mvnrepository.com/artifact/javax.servlet/servlet-api -->
       <dependency>
           <groupId>javax.servlet</groupId>
           <artifactId>servlet-api</artifactId>
           <version>2.4</version>
           <scope>provided</scope>
       </dependency>


       <!-- junit測試包 -->
       <!-- https://mvnrepository.com/artifact/junit/junit -->
       <dependency>
           <groupId>junit</groupId>
           <artifactId>junit</artifactId>
           <version>4.12</version>
           <scope>test</scope>
       </dependency>

  </dependencies>
</project>
然後配置ssm相關的三個配置
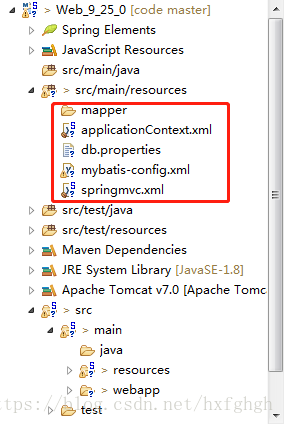
其中applicationContext.xml如下
<?xml version="1.0" encoding="UTF-8"?>
<beans xmlns="http://www.springframework.org/schema/beans"
       xmlns:xsi="http://www.w3.org/2001/XMLSchema-instance"
       xmlns:context="http://www.springframework.org/schema/context"
       xsi:schemaLocation="http://www.springframework.org/schema/beanshttp://www.springframework.org/schema/beans/spring-beans.xsd
http://www.springframework.org/schema/contexthttp://www.springframework.org/schema/context/spring-context-4.3.xsd">
<!-- 掃描包路徑,不掃controller -->
<context:component-scan base-package="com.hejie" use-default-filters="false">
       <context:exclude-filter type="annotation" expression="org.springframework.stereotype.Controller"/>
</context:component-scan>
<!-- 掃描c3p0配置 -->
<bean id="comboPooledDataSource" class="com.mchange.v2.c3p0.ComboPooledDataSource">
       <property name="jdbcUrl" value="${jdbcUrl}"></property>
       <property name="driverClass" value="${driverClass"></property>
       <property name="user" value="${user}"></property>
       <property name="password" value="${password}"></property>
</bean>
<!-- 掃描mybatis-config 以及配置mapper 掃描 -->
<bean class="org.mybatis.spring.SqlSessionFactoryBean">
       <property name="configLocation" value="classpath:mybatis-config.xml"></property>
       <property name="dataSource" ref="comboPooledDataSource"></property>
       <property name="mapperLocations" value="classpath:mapper/*.xml"></property>
</bean>
</beans>
mybatis-config.xml
<?xml version="1.0" encoding="UTF-8"?>
<!DOCTYPE configuration
PUBLIC "-//mybatis.org//DTD Config 3.0//EN"
"http://mybatis.org/dtd/mybatis-3-config.dtd">
<configuration>
</configuration>
springmvc.xml配置如下
<?xml version="1.0" encoding="UTF-8"?>
<beans xmlns="http://www.springframework.org/schema/beans"
       xmlns:xsi="http://www.w3.org/2001/XMLSchema-instance"
       xmlns:context="http://www.springframework.org/schema/context"
       xsi:schemaLocation="http://www.springframework.org/schema/beanshttp://www.springframework.org/schema/beans/spring-beans.xsd
http://www.springframework.org/schema/contexthttp://www.springframework.org/schema/context/spring-context-4.3.xsd">
<!-- 只掃controller層 -->
<context:component-scan base-package="com.hejie" use-default-filters="true">
       <context:include-filter type="annotation" expression="org.springframework.stereotype.Controller"/>
</context:component-scan>
<bean  class="org.springframework.web.servlet.view.InternalResourceViewResolver">
       <property name="prefix" value="/"></property>
       <property name="suffix" value=".jsp"></property>
</bean>
<!-- 解決maven無法載入css js圖片這些靜態資源 -->
<!-- 將SpringMVC不能處理的請求交給tomcat -->
<mvc:default-servlet-handler/>
<!-- 支援SpringMVC更高階的一些功能,JSR303校驗,快捷ajax請求 -->
<!-- 專門為controller分發請求使用的的! -->
<mvc:annotation-driven/>
</beans>
db.properties
jdbcUrl=jdbc:mysql://localhost/hejie
driverClass=com.mysql.jdbc.Driver
user=root
password=root
在配置好ssm的xml檔案之後,需要在相應專案的web.xml配置,即每次登入相應網頁,專案會按照web檔案的配置去掃描相應的ssm檔案,所以如果報錯某個ssm配置檔案沒有掃描到,就要排查是否是你的檔名字或者路徑配置錯誤了!
web.xml
相關程式碼:
<?xml version="1.0" encoding="UTF-8"?>
<web-app xmlns:xsi="http://www.w3.org/2001/XMLSchema-instance" xmlns="http://java.sun.com/xml/ns/javaee" xsi:schemaLocation="http://java.sun.com/xml/ns/javaeehttp://java.sun.com/xml/ns/javaee/web-app_2_5.xsd" version="2.5">
  <display-name>Web_9_25_0</display-name>
  <welcome-file-list>
    <welcome-file>index.html</welcome-file>
    <welcome-file>index.htm</welcome-file>
    <welcome-file>index.jsp</welcome-file>
    <welcome-file>default.html</welcome-file>
    <welcome-file>default.htm</welcome-file>
    <welcome-file>default.jsp</welcome-file>
  </welcome-file-list>

  <!-- The front controller of this Spring Web application, responsible for handling all application requests -->
       <servlet>
              <servlet-name>springDispatcherServlet</servlet-name>
              <servlet-class>org.springframework.web.servlet.DispatcherServlet</servlet-class>
              <init-param>
                     <param-name>contextConfigLocation</param-name>
                     <param-value>classpath:springmvc.xml</param-value>
              </init-param>
              <load-on-startup>1</load-on-startup>
       </servlet>
       <!-- Map all requests to the DispatcherServlet for handling -->
       <servlet-mapping>
              <servlet-name>springDispatcherServlet</servlet-name>
              <url-pattern>/</url-pattern>
       </servlet-mapping>


       <!-- needed for ContextLoaderListener -->
       <context-param>
              <param-name>contextConfigLocation</param-name>
              <param-value>classpath:applicationContext.xml</param-value>
       </context-param>
       <!-- Bootstraps the root web application context before servlet initialization -->
       <listener>
              <listener-class>org.springframework.web.context.ContextLoaderListener</listener-class>
       </listener>
</web-app>
匯入tomcat 執行沒有出錯即配置檔案成功!