
HTTPS雙向認證+USB硬體加密鎖(加密狗)配置
環境: Ubuntu14.04,apache2.4.7, openssl1.0.1f
安裝apache2
apt-get install apache2 -y
一般openssl預設已經安裝
開啟apache的ssl模組和ssl站點
a2enmod ssl
a2ensite default-ssl.conf
建立證書目錄
mkdir /etc/apache2/certs
進入目錄建立證書和祕鑰
cd /etc/apache2/certs
/usr/lib/ssl/misc/CA.sh -newca
[email protected]:/etc/apache2/certs# /usr/lib/ssl/misc/CA.sh -newca
CA certificate filename (or enter to create)
Making CA certificate ...
Generating a 2048 bit RSA private key
.............................................................................................+++
..+++
writing new private key to './demoCA/private/./cakey.pem'
Enter PEM pass phrase:
Verifying - Enter PEM pass phrase:
-----
You are about to be asked to enter information that will be incorporated
into your certificate request.
What you are about to enter is what is called a Distinguished Name or aDN.
There are quite a few fields but you can leave some blank
For some fields there will be a defaultvalue,
If you enter '.', the field will be left blank.
-----
Country Name (2 letter code) [AU]:CN
State or Province Name (full name) [Some-State]:Beijing
Locality Name (eg, city) []:Beijing
OrganizationName (eg, company) [Internet Widgits Pty Ltd]:PWRD
Organizational Unit Name (eg, section) []:OPS
Common Name (e.g. server FQDN or YOUR name) []:10.1.1.128
Email Address []:[email protected]
Please enter the following 'extra' attributes
to be sent with your certificate request
Achallenge password []:111111
An optional company name []:pwrd
Using configuration from /usr/lib/ssl/openssl.cnf
Enter pass phrase for ./demoCA/private/./cakey.pem:
Check that the request matches the signature
Signature ok
Certificate Details:
Serial Number: 14695213526817228816 (0xcbefe2d81474c810)
Validity
Not Before: Jan 5 05:30:34 2017 GMT
Not After : Jan 5 05:30:34 2020 GMT
Subject:
countryName = CN
stateOrProvinceName = Beijing
organizationName = PWRD
organizationalUnitName = OPS
commonName = 10.1.1.128
emailAddress = [email protected]
X509v3 extensions:
X509v3 Subject Key Identifier:
50:CA:37:3C:45:11:0E:E1:BA:E7:80:74:66:D0:98:B9:21:8E:13:BD
X509v3 Authority KeyIdentifier:
keyid:50:CA:37:3C:45:11:0E:E1:BA:E7:80:74:66:D0:98:B9:21:8E:13:BD
X509v3 Basic Constraints:
CA:TRUE
Certificate is to be certified until Jan 5 05:30:34 2020 GMT (1095 days)
Write out database with 1 new entries
Data Base Updated
tree命令檢視一下
[email protected]:/etc/apache2/certs# tree
.
└── demoCA
├── cacert.pem
├── careq.pem
├── certs
├── crl
├── index.txt
├── index.txt.attr
├── index.txt.old
├── newcerts
│ └── CBEFE2D81474C810.pem
├── private
│ └── cakey.pem
└── serial
5directories, 8 files
生成伺服器證書(密碼全部設定為111111)
a) 生成私鑰: openssl genrsa -des3 -out server.key2048
b) 生成csr檔案: openssl req -new -keyserver.key -out server.csr
c) 生成證書&簽名: openssl ca -in server.csr-out server.crt
#遇到下列不成功時修改vim demoCA/index.txt.attr中unique_subject =no
failed to update database
TXT_DB error number 2
上述執行結果
[email protected]:/etc/apache2/certs# openssl genrsa -des3 -out server.key 2048
Generating RSA private key, 2048 bit long modulus
........................................+++
............................+++
eis 65537 (0x10001)
Enter pass phrase for server.key:
Verifying - Enter pass phrase for server.key:
[email protected]:/etc/apache2/certs# openssl req -new -key server.key -outserver.csr
Enter pass phrase for server.key:
You are about to be asked to enter information that will be incorporated
into your certificate request.
What you are about to enter is what is called a Distinguished Name or aDN.
There are quite a few fields but you can leave some blank
For some fields there will be a default value,
If you enter '.', the field will be left blank.
-----
Country Name (2 letter code) [AU]:CN
State or Province Name (full name) [Some-State]:Beijing
Locality Name (eg, city) []:Beijing
Organization Name (eg, company) [Internet Widgits Pty Ltd]:PWRD
Organizational Unit Name (eg, section) []:OPS
Common Name (e.g. server FQDN or YOUR name) []:10.1.1.128
Email Address []:[email protected]
Please enter the following 'extra' attributes
to be sent with your certificate request
Achallenge password []:111111
An optional company name []:pwrd
[email protected]:/etc/apache2/certs# openssl ca -in server.csr -out server.crt
Using configuration from /usr/lib/ssl/openssl.cnf
Enter pass phrase for ./demoCA/private/cakey.pem:
Check that the request matches the signature
Signature ok
Certificate Details:
Serial Number: 14695213526817228817 (0xcbefe2d81474c811)
Validity
Not Before: Jan 5 05:39:32 2017 GMT
Not After : Jan 5 05:39:32 2018 GMT
Subject:
countryName = CN
stateOrProvinceName = Beijing
organizationName = PWRD
organizationalUnitName = OPS
commonName = 10.1.1.128
emailAddress = [email protected]
X509v3 extensions:
X509v3 Basic Constraints:
CA:FALSE
Netscape Comment:
OpenSSL GeneratedCertificate
X509v3 Subject Key Identifier:
FB:32:4F:A6:6D:01:D3:00:98:00:BF:0A:2E:E5:E6:90:CC:E0:E4:8B
X509v3 Authority KeyIdentifier:
keyid:50:CA:37:3C:45:11:0E:E1:BA:E7:80:74:66:D0:98:B9:21:8E:13:BD
Certificate is to be certified until Jan 5 05:39:32 2018 GMT (365 days)
Sign the certificate? [y/n]:y
1out of 1 certificate requests certified, commit? [y/n]y
Write out database with 1 new entries
Data Base Updated
生成客戶端證書(密碼全部設定為111111)
a) 生成私鑰: openssl genrsa -des3 -out client.key2048
b) 生成csr檔案: openssl req -new -keyclient.key -out client.csr
c) 生成證書&簽名: openssl ca -in client.csr-out client.crt
上述命令執行結果:
[email protected]:/etc/apache2/certs# openssl genrsa -des3 -out client.key 2048
Generating RSA private key, 2048 bit long modulus
...........................................................................................+++
............................+++
eis 65537 (0x10001)
Enter pass phrase for client.key:
Verifying - Enter pass phrase for client.key:
[email protected]:/etc/apache2/certs# openssl req -new -key client.key -outclient.csr
Enter pass phrase for client.key:
You are about to be asked to enter information that will be incorporated
intoyour certificate request.
What you are about to enter is what is called a Distinguished Name or aDN.
There are quite a few fields but you can leave some blank
For some fields there will be a default value,
If you enter '.', the field will be left blank.
-----
Country Name (2 letter code) [AU]:CN
State or Province Name (full name) [Some-State]:Beijing
Locality Name (eg, city) []:Beijing
Organization Name (eg, company) [Internet Widgits Pty Ltd]:PWRD
Organizational Unit Name (eg, section) []:OPS
Common Name (e.g. server FQDN or YOUR name) []:10.1.1.128
Email Address []:[email protected]
Please enter the following 'extra' attributes
to be sent with your certificate request
Achallenge password []:111111
An optional company name []:pwrd
[email protected]:/etc/apache2/certs# openssl ca -in client.csr -out client.crt
Using configuration from /usr/lib/ssl/openssl.cnf
Enter pass phrase for ./demoCA/private/cakey.pem:
Check that the request matches the signature
Signature ok
Certificate Details:
Serial Number: 14695213526817228818 (0xcbefe2d81474c812)
Validity
Not Before: Jan 5 05:43:35 2017 GMT
Not After : Jan 5 05:43:35 2018 GMT
Subject:
countryName = CN
stateOrProvinceName = Beijing
organizationName = PWRD
organizationalUnitName = OPS
commonName = 10.1.1.128
emailAddress = [email protected]
X509v3 extensions:
X509v3 Basic Constraints:
CA:FALSE
Netscape Comment:
OpenSSL GeneratedCertificate
X509v3 Subject Key Identifier:
78:4C:B0:9E:BA:EE:BD:E2:88:55:F4:06:B4:57:5E:74:71:E0:1B:2D
X509v3 Authority KeyIdentifier:
keyid:50:CA:37:3C:45:11:0E:E1:BA:E7:80:74:66:D0:98:B9:21:8E:13:BD
Certificate is to be certified until Jan 5 05:43:35 2018 GMT (365 days)
Sign the certificate? [y/n]:y
1out of 1 certificate requests certified, commit? [y/n]y
Write out database with 1 new entries
Data Base Updated
檢視上述兩步生成的證書和祕鑰
[email protected]:/etc/apache2/certs# ls
client.crt client.key server.crt server.key
client.csr demoCA server.csr
*生成瀏覽器支援的.pfx(.p12)證書
a) openssl pkcs12 -export -clcerts -in client.crt -inkey client.key -outclient.p12
執行結果
[email protected]:/etc/apache2/certs# openssl pkcs12 -export -clcerts -inclient.crt -inkey client.key -out client.p12
Enterpass phrase for client.key:
EnterExport Password:
Verifying- Enter Export Password:
生成不帶密碼驗證的client/server.key.unsecure
如果你想要把數字證書用於Nginx、Apache等Web伺服器,你會發現啟動nginx伺服器時會要求你輸入數字證書密碼,
這是因為在設定私鑰key時將密碼寫入了key檔案,導致Nginx/Apache等系列伺服器在啟動時要求Enter PEM pass phrase。
我們需要做的是剝離這個密碼,利用如下OpenSSL命令生成server.key.unsecure檔案
openssl rsa -in server.key -outserver.key.unsecure
最終的結果:
[email protected]:/etc/apache2/certs# tree
.
├──client.crt
├──client.csr
├──client.key
├──client.p12
├──demoCA
│??├── cacert.pem
│??├── careq.pem
│??├── certs
│??├── crl
│??├── index.txt
│??├── index.txt.attr
│??├── index.txt.attr.old
│??├── index.txt.old
│??├── newcerts
│??│?? ├── CBEFE2D81474C810.pem
│??│?? ├── CBEFE2D81474C811.pem
│??│?? └── CBEFE2D81474C812.pem
│??├── private
│??│?? └── cakey.pem
│??├── serial
│??└── serial.old
├──server.crt
├──server.csr
└──server.key
5directories, 19 files
配置apache2 https
vim/etc/apache2/sites-enabled/default-ssl.conf
<IfModule mod_ssl.c>
<VirtualHost_default_:443>
DocumentRoot/var/www/html
ErrorLog${APACHE_LOG_DIR}/error.log
CustomLog${APACHE_LOG_DIR}/access.log combined
SSLEngineon
SSLCertificateFile /etc/apache2/certs/server.crt
SSLCertificateKeyFile/etc/apache2/certs/server.key
SSLCACertificateFile/etc/apache2/certs/demoCA/cacert.pem
SSLVerifyClientrequire
SSLVerifyDepth 10
<FilesMatch"\.(cgi|shtml|phtml|php)$">
SSLOptions+StdEnvVars
</FilesMatch>
<Directory/usr/lib/cgi-bin>
SSLOptions+StdEnvVars
</Directory>
BrowserMatch"MSIE [2-6]" \
nokeepalivessl-unclean-shutdown \
downgrade-1.0force-response-1.0
BrowserMatch"MSIE [17-9]" ssl-unclean-shutdown
</VirtualHost>
</IfModule>
serviceapache2 restart
[email protected]:/etc/apache2/sites-enabled#service apache2 restart
*Restarting web server apache2 Apache needs to decrypt your SSL Keys for bogon.localdomain:443 (RSA)
Pleaseenter passphrase:
輸入密碼啟動
證書匯出到本地準備寫入加密鎖
[email protected]:/etc/apache2/certs# szclient.p12
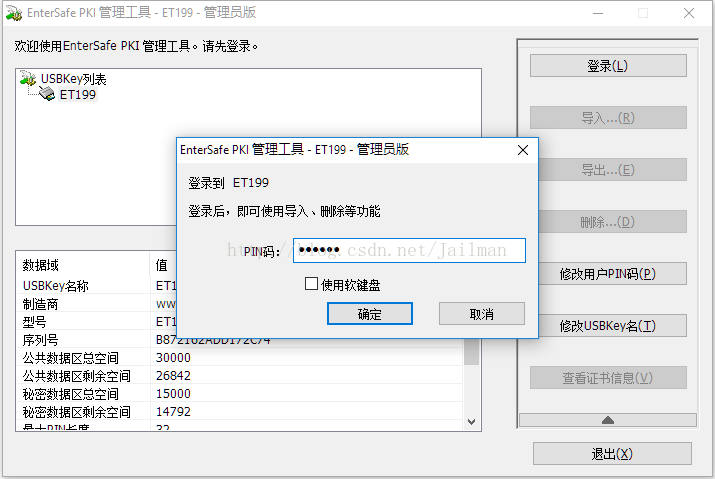
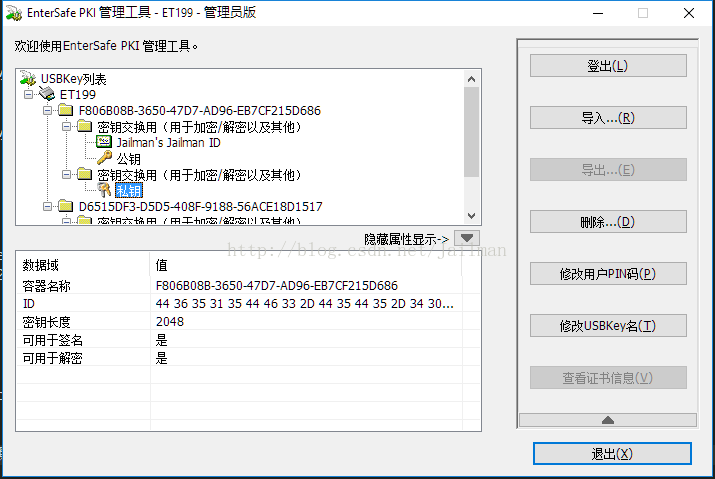
開啟USB鎖管理軟體
輸入PIN登入
這裡實際上我們已經提前將加密鎖初始化為了PKI鎖
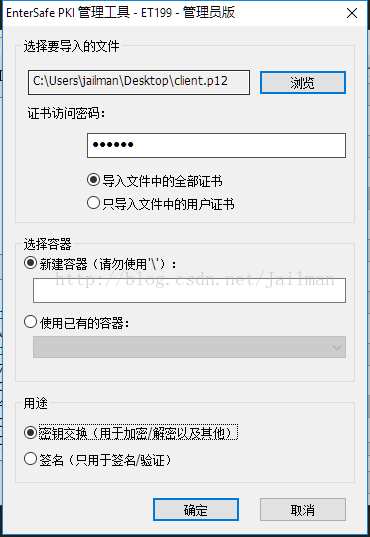
點選匯入,選擇證書,輸入證書密碼,其他預設
Win10提示匯入成功
匯入後的效果
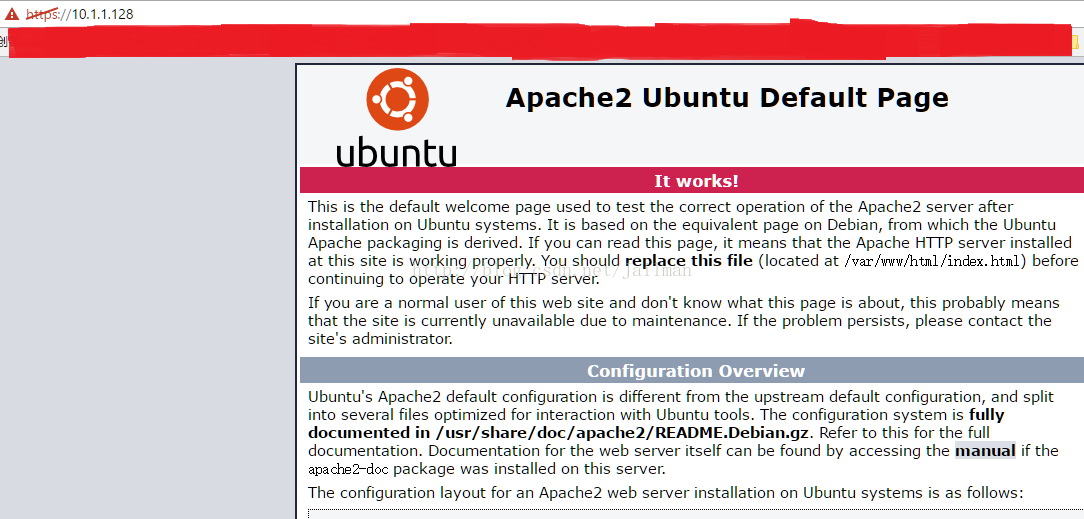
USB加密鎖保持插入,訪問測試站點https://10.1.1.128,有證書提示
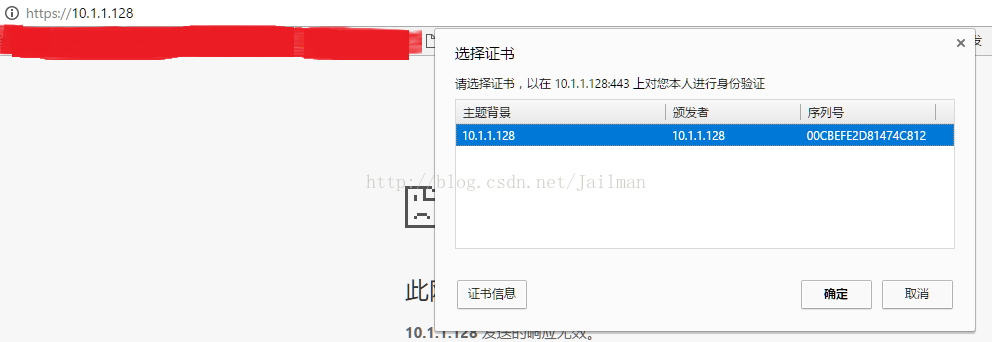
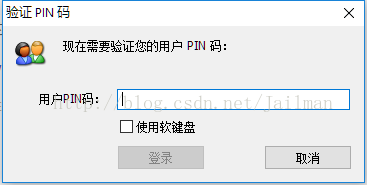
點選確定輸入PIN碼
忽略安全提示
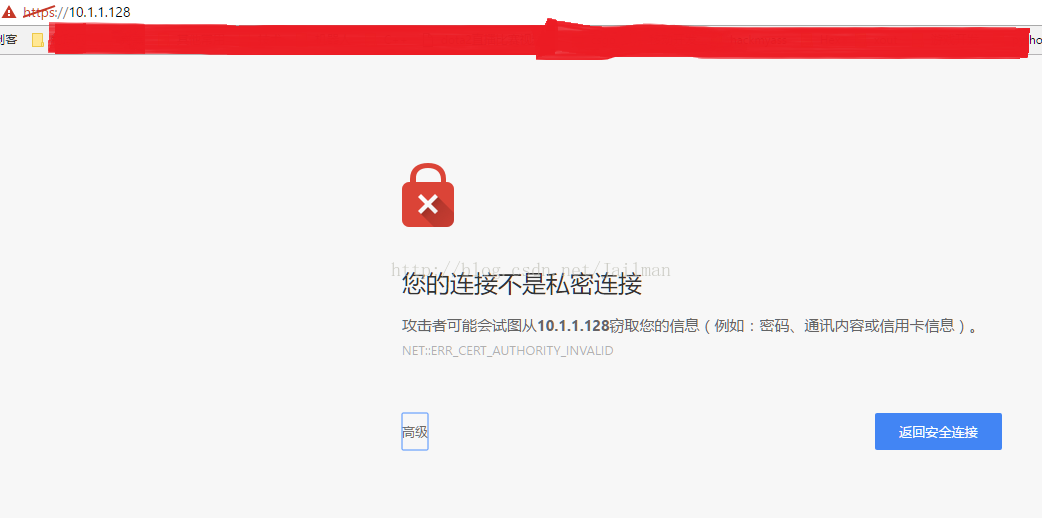
成功訪問
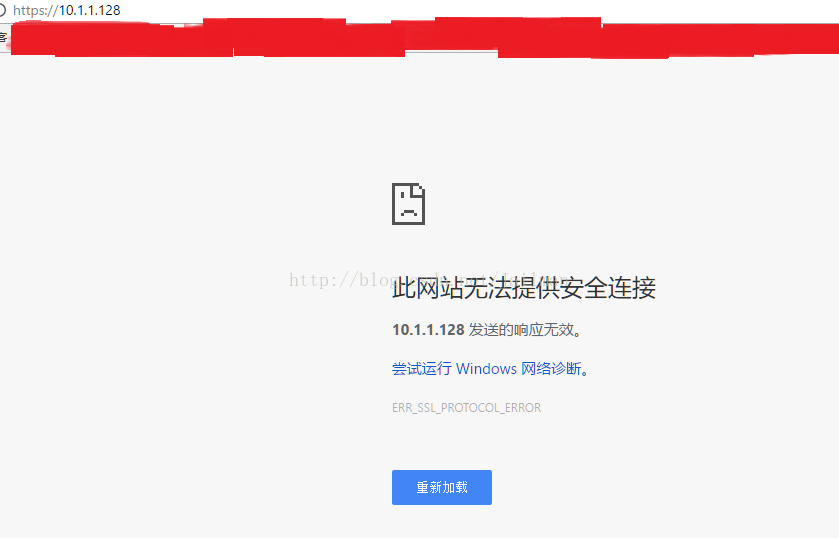
不插key的情況下訪問結果
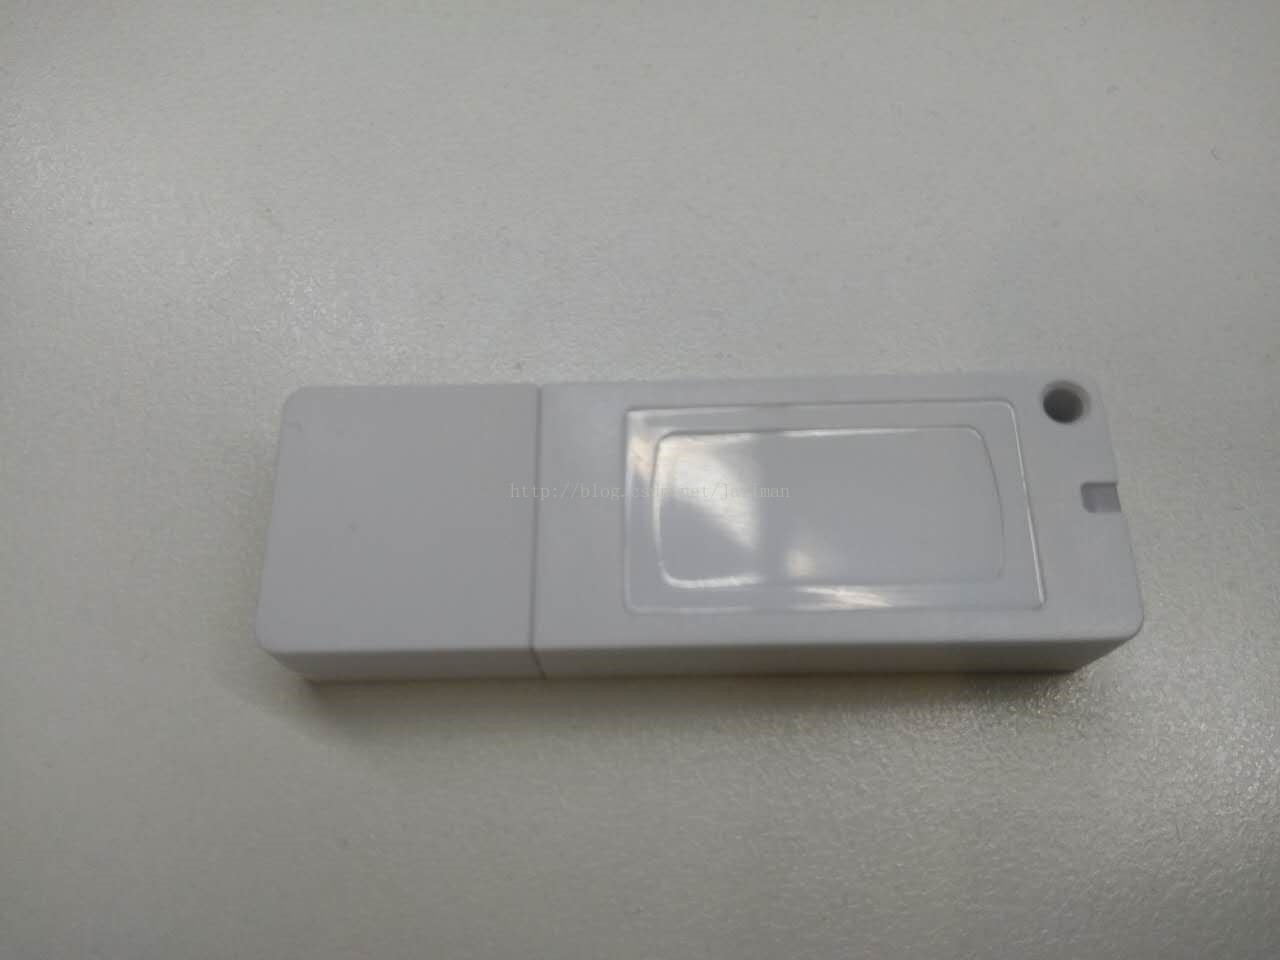
我使用的是ET199加密鎖,加上運費一共花了29元
相關推薦
HTTPS雙向認證+USB硬體加密鎖(加密狗)配置
環境: Ubuntu14.04,apache2.4.7, openssl1.0.1f 安裝apache2 apt-get install apache2 -y 一般openssl預設已經安裝 開啟apache的ssl模組和ssl站點 a2enmod ssl a2ensi
ESXI 5.1/5.5 主機添加或映射USB設備(加密狗)
esxi 5.1/5.5 主機添加或映射將USB設備插入ESXI主機(我截圖使用的是U盤),我通過vsphere client進行演示。通過vsphere client登錄ESXI主機或者vCenter,編輯設置需要添加USB設備的虛擬機;添加usb控制器:控制器類型:EHCI+UHCI和xHCI。EHCI+
Java 與 Tomcat 搭配的加密連線:HTTPS 雙向認證
今天遇到的任務是要讓Tomcat 7 支援ssl, schema 從 http 改走 https. Step 1: 為伺服器產生簽章庫 keytool -genkey -v -alias tomcat -keyalg RSA -validity 10000 -keystore ./tomcat.keys
如何用Tomcat和Openssl構建HTTPS雙向認證環境(HTTPS客戶端認證)
本文將介紹如何利用Tomcat的HTTPS功能,和一個自己建立的CA,來構建WEB伺服器證書和個人數字證書,最終建成一個HTTPS雙向認證環境(可以用於測試目的)。本文構建HTTPS雙向認證的業務流程大致如下: 1. 建立WEB伺服器公鑰金鑰,並生成伺服器證書請求。 2.
HTTPS雙向認證
recv failed https雙向認證 如果需要只支持https可參照 版本說明 httpclinet:4.3.1jdk:1.6tomcat:6 https雙向認證 參考文章 https://blog.csdn.net/zhongming_software/article/details/8592
https雙向認證、證書製作過程
1、生成伺服器證書庫 輸入命令: keytool -validity 365 -genkey -v -alias server -keyalg RSA -keystore D:\jks\server.keystore -dname "CN=127.0.0.1,OU=icesoft,O=ices
Tomcat在Apr模式下的Https雙向認證
當tomcat使用Apr模式的時候,如果按照老方法配置https: 控制檯會出現如下錯誤 Connector attribute SSLCertificateFile must be defined when using SSL with APR 直接Google,很多
Tomcat伺服器配置https雙向認證
一,HTTPS原理 1,HTTP、HTTPS、SSL、TLS介紹與相互關係 (1) HTTP:平時瀏覽網頁時候使用的一種協議。HTTP協議傳輸的資料都是未加密的(明文),因此使用HTTP協議傳輸隱私資訊非常不安全。 (2)
C# https雙向認證,"請求被中止: 未能建立 SSL/TLS 安全通道"解決辦法
最近的專案中用到了呼叫https的介面的功能,編寫出程式後在我自己的電腦上執行沒有問題,但是在同事的電腦上和服務上都沒有辦法正常執行,提示“請求被中止: 未能建立 SSL/TLS 安全通道”,最後在專案經理的幫助下和網上查找了大量的資料,以及做了大量的測試下終於解決了問題,所
JAX-RS RESTful webservice 服務端及客戶端實現(基於HTTPS雙向認證)
在ApacheCXF的Sample裡以及網上很多有關RESTful HTTPS雙向認證的文章介紹僅僅是理論,沒有涉及實際環境的實現(客戶端和服務端都是localhost);這幾天使用Apache的CXF以及 Apache portable HttpClient實現跨IP的J
Https雙向認證Android客戶端配置
Https雙向認證啊 做了兩遍,第一遍懵懂狀態處於 好不容易做好了,換伺服器,一下子懵了,使出渾身解數又找了一遍,這下終於好了 快哭啦,必須滴要記錄一下,以免以後遇到繼續懵,這裡用retrofit2+okhttp3為例子來簡單說明下 先來說說證書: 服務端提供的證書有四
Apache下配置https雙向認證
1.Apache安裝並開啟ssl 略 2.建立證書 建立證書的步驟如下 2.1建立相關目錄 這裡apache目錄位於/data/webapps/apache 在apache目錄下建立ca目錄(方便管理,可自定義) mkdi
Android Https雙向認證 + GRPC
() pla pan sting ase 根證書 認證 hand cli keywords:android https 雙向認證android GRPC https 雙向認證 ManagedChannel channel = OkHttpChannelBuilder.
tomcat8配置https雙向認證
工具準備:keytool(JDK自帶證書生成工具),tomcat8 利用JDK中keyStore生成證書。 前言: 關於HTTPS介紹文章請看此博文,我也是看了他的博文才搞懂的,真心感謝。 博文地址:http://www.cnblogs.com/JeffreySun/ar
SSL--用Tomcat伺服器配置https雙向認證過程實戰
什麼是https? 百度百科足夠解釋它:http://baike.baidu.com/view/14121.htm 概述 A、 什麼是HTTPS在說HTTPS之前先說說什麼是HTTP,HTTP就是我們平時瀏覽網頁時候使用的一種協議。HTTP協議傳輸的資料都是未加密的,
ASIHTTPRequest實現https雙向認證請求
什麼是雙向認證呢?簡而言之,就是伺服器端對請求它的客戶端要進行身份驗證,客戶端對自己所請求的伺服器也會做身份驗證。服務端一旦驗證到請求自己的客戶端為不可信任的,服務端就拒絕繼續通訊。客戶端如果發現服務端為不可信任的,那麼也中止通訊。 雙向認證的演算法
用Tomcat伺服器配置https雙向認證過程實戰
什麼是https? 百度百科足夠解釋它:http://baike.baidu.com/view/14121.htm工具:keytool (Windows下路徑:%JAVA_HOME%/bin/keytool.exe)環境:Windows8.1企業版、Tomcat-7.0.2
C#中將字符串轉成 Base64 編碼 (加密--解密)
odin .html ctype cte bytes webp ase nba bsp 1 <%@ Page Language="C#" AutoEventWireup="true" CodeFile="Base64.aspx.cs" Inherits="Base
WiFi-ESP8266入門http(3-1)網頁認證上網-post請求(原教程)
nts 時空 logo 全能 targe work sig html urn 教程:http://geek-workshop.com/thread-37484-1-1.html 源碼:鏈接:https://pan.baidu.com/s/1yuYYqsM-WSOb0Aby
C語言雙向連結串列的實現(簡單實現)
最近有時間看了資料結構的雙向連結串列,其實和單向連結串列的規則是一樣的,只不過在定義節點的時候比單向連結串列多定義i一個指向前一個節點的指標就可以了,在插入節點和刪除節點的時候要注意,畫圖是最好的方法。 雙向使用的時候重要的是獲得連結串列頭和連結串列尾,下面有獲取的相關函式。 // copy