
從一個app裡面 跳轉到另一個 app
阿新 • • 發佈:2019-02-12
文章目錄
####1、功能介紹
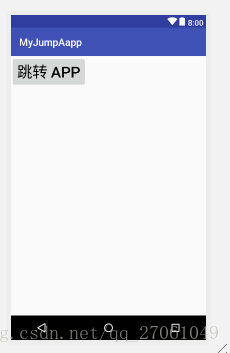
從一個 app 裡,點選跳轉按鈕,跳轉到另一個app 裡的 某一個介面
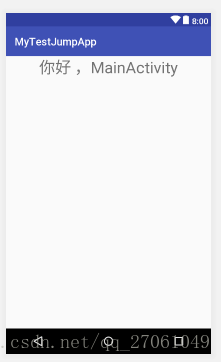
跳轉的 app 介面還可以接受傳輸過來的資料
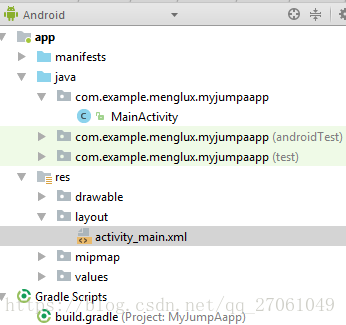
####2、跳轉的實現 MyJumpApp主要程式碼結構
#####2.1 xml 檔案
<?xml version="1.0" encoding="utf-8"?>
<LinearLayout xmlns:android="http://schemas.android.com/apk/res/android"
    xmlns:app="http://schemas.android.com/apk/res-auto"
    xmlns:tools="http://schemas.android.com/tools"
    android:layout_width="match_parent"
    android:layout_height="match_parent"
    tools:context="com.example.menglux.myjumpaapp.MainActivity">

    <Button
        android:id="@+id/button_id"
        android:layout_width="wrap_content"
        android:layout_height="wrap_content"
        android:text="跳轉 app"
        android:textSize="30dp" />

</LinearLayout>
#####2.2 MainActivity.java 檔案
package com.example.menglux.myjumpaapp;

import android.content.ComponentName;
import android.content.Context;
import android.content.Intent;
import android.content.pm.PackageManager;
import android.net.Uri;
import android.support.v7.app.AppCompatActivity;
import android.os.Bundle;
import android.view.View;
import android.widget.Button;

public class MainActivity extends AppCompatActivity implements View.OnClickListener {
    private String TAG = "MainActivity: ";
    private String  appPackageName = "com.example.menglux.mytestjumpapp";
    private Button buttonId;

    @Override
    protected void onCreate(Bundle savedInstanceState) {
        super.onCreate(savedInstanceState);
        setContentView(R.layout.activity_main);

        initView();
    }

    //初始化元件
    private void initView() {
        buttonId = (Button) findViewById(R.id.button_id);
        buttonId.setOnClickListener(this);
    }


    public boolean isInstalledApp(Context myContext) {
        PackageManager myPackageMgr = myContext.getPackageManager();
        try {
            myPackageMgr.getPackageInfo(appPackageName, PackageManager.GET_ACTIVITIES);
        } catch (PackageManager.NameNotFoundException e) {
            System.out.println(TAG + "沒有安裝 app: " + appPackageName);
            return (false);
        }
        return true;
    }

    @Override
    public void onClick(View v) {
        switch (v.getId()) {
            case R.id.button_id:

                boolean isInstallApp = isInstalledApp(this);
                if (isInstallApp) {

                    //跳轉到app 指定的介面,並且傳遞引數
                    ComponentName componentName = new ComponentName(appPackageName,"com.example.menglux.mytestjumpapp.MainActivity");
                    Intent intent = new Intent();
                    intent.putExtra("test", "你好 ,MainActivity");
                    intent.setComponent(componentName);
                    intent.setFlags(Intent.FLAG_ACTIVITY_NEW_TASK);
                    startActivity(intent);
                    System.out.println(TAG + "跳轉 app");


                    //根據包名來跳轉  不能指定跳轉介面
/*                    Intent intent = getPackageManager().getLaunchIntentForPackage(appPackageName);
                        intent.setFlags(Intent.FLAG_ACTIVITY_NEW_TASK);
                        intent.putExtra("test", "你好 ,MainActivity");
                        startActivity(intent);*/

                } else {
                    goToMarket(this);
                }

                break;
                default:
                    break;
        }
    }


    public void goToMarket(Context myContext) {
        System.out.println(TAG  +  "沒有安裝 app  市場下載");
        Uri marketUri = Uri.parse("market://details?id=" + appPackageName);
        Intent myIntent = new Intent(Intent.ACTION_VIEW, marketUri);
        myIntent.setFlags(Intent.FLAG_ACTIVITY_NEW_TASK);
        myContext.startActivity(myIntent);
        return;
    }
}
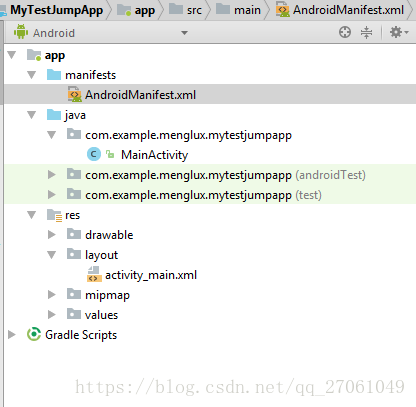
####3 、被跳轉的app 一些設定 myTestJumpApp
#####3.1、程式碼結構
在 AnroidManifest 檔案中給 activity 節點設定 Android:exported=“true”,該屬性表示當前 activity 能否被另外一個Application 的元件啟動,true允許啟動,false不允許。預設是false。注意:該屬性是四大元件都擁有的。
#####3.2、 AndroidManifest.xml 檔案
<?xml version="1.0" encoding="utf-8"?>
<manifest xmlns:android="http://schemas.android.com/apk/res/android"
    package="com.example.menglux.mytestjumpapp">

    <application
        android:allowBackup="true"
        android:icon="@mipmap/ic_launcher"
        android:label="@string/app_name"
        android:roundIcon="@mipmap/ic_launcher_round"
        android:supportsRtl="true"
        android:theme="@style/AppTheme">
        <activity android:name=".MainActivity"
            android:exported="true"> <!--該屬性表示當前 activity 能否被另外一個Application 的元件啟動,true允許啟動,false不允許-->
            <intent-filter>
                <action android:name="android.intent.action.MAIN" />

                <category android:name="android.intent.category.LAUNCHER" />
            </intent-filter>
        </activity>
    </application>

</manifest>
#####3.2、 xml 檔案
<?xml version="1.0" encoding="utf-8"?>
<LinearLayout xmlns:android="http://schemas.android.com/apk/res/android"
    xmlns:app="http://schemas.android.com/apk/res-auto"
    xmlns:tools="http://schemas.android.com/tools"
    android:layout_width="match_parent"
    android:layout_height="match_parent"
    tools:context="com.example.menglux.mytestjumpapp.MainActivity">

    <TextView
        android:layout_width="match_parent"
        android:layout_height="wrap_content"
        android:id="@+id/textView_id"
        android:gravity="center"
        android:text="Hello World!"
        android:textSize="30dp" />

</LinearLayout>
#####3.3、ManiActivity.java 檔案
package com.example.menglux.mytestjumpapp;

import android.content.Intent;
import android.support.v7.app.AppCompatActivity;
import android.os.Bundle;
import android.widget.TextView;

public class MainActivity extends AppCompatActivity {
    private String TAG = "MainActivity: ";
    private TextView textViewId;

    @Override
    protected void onCreate(Bundle savedInstanceState) {
        super.onCreate(savedInstanceState);
        setContentView(R.layout.activity_main);


        initView();

        getIntentData();
    }


    //獲取傳入的資料
    private void getIntentData() {
        Intent intent = getIntent();
        String  str = intent.getStringExtra("test");
        textViewId.setText(str);
        System.out.println(TAG + "傳入的資料是: " + str);
    }


    //初始化元件
    private void initView() {
        textViewId = (TextView) findViewById(R.id.textView_id);
    }
}