vue.js移動端app實戰3:從一個購物車入門vue
什麼是vuex?
官方的解釋是:Vuex 是一個專為 Vue.js 應用程式開發的狀態管理模式。它採用集中式儲存管理應用的所有元件的狀態,並以相應的規則保證狀態以一種可預測的方式發生變化。簡單來說就是集中管理所有的狀態。
為什麼要用vuex?
-
對於父子元件之前的通訊,父元件通過porps傳遞到子元件,子元件通過$emit傳送事件都到父元件;
-
對於元件與元件之間的通訊,可以new一個新的Vue例項,專門用來做event bus進行通訊。
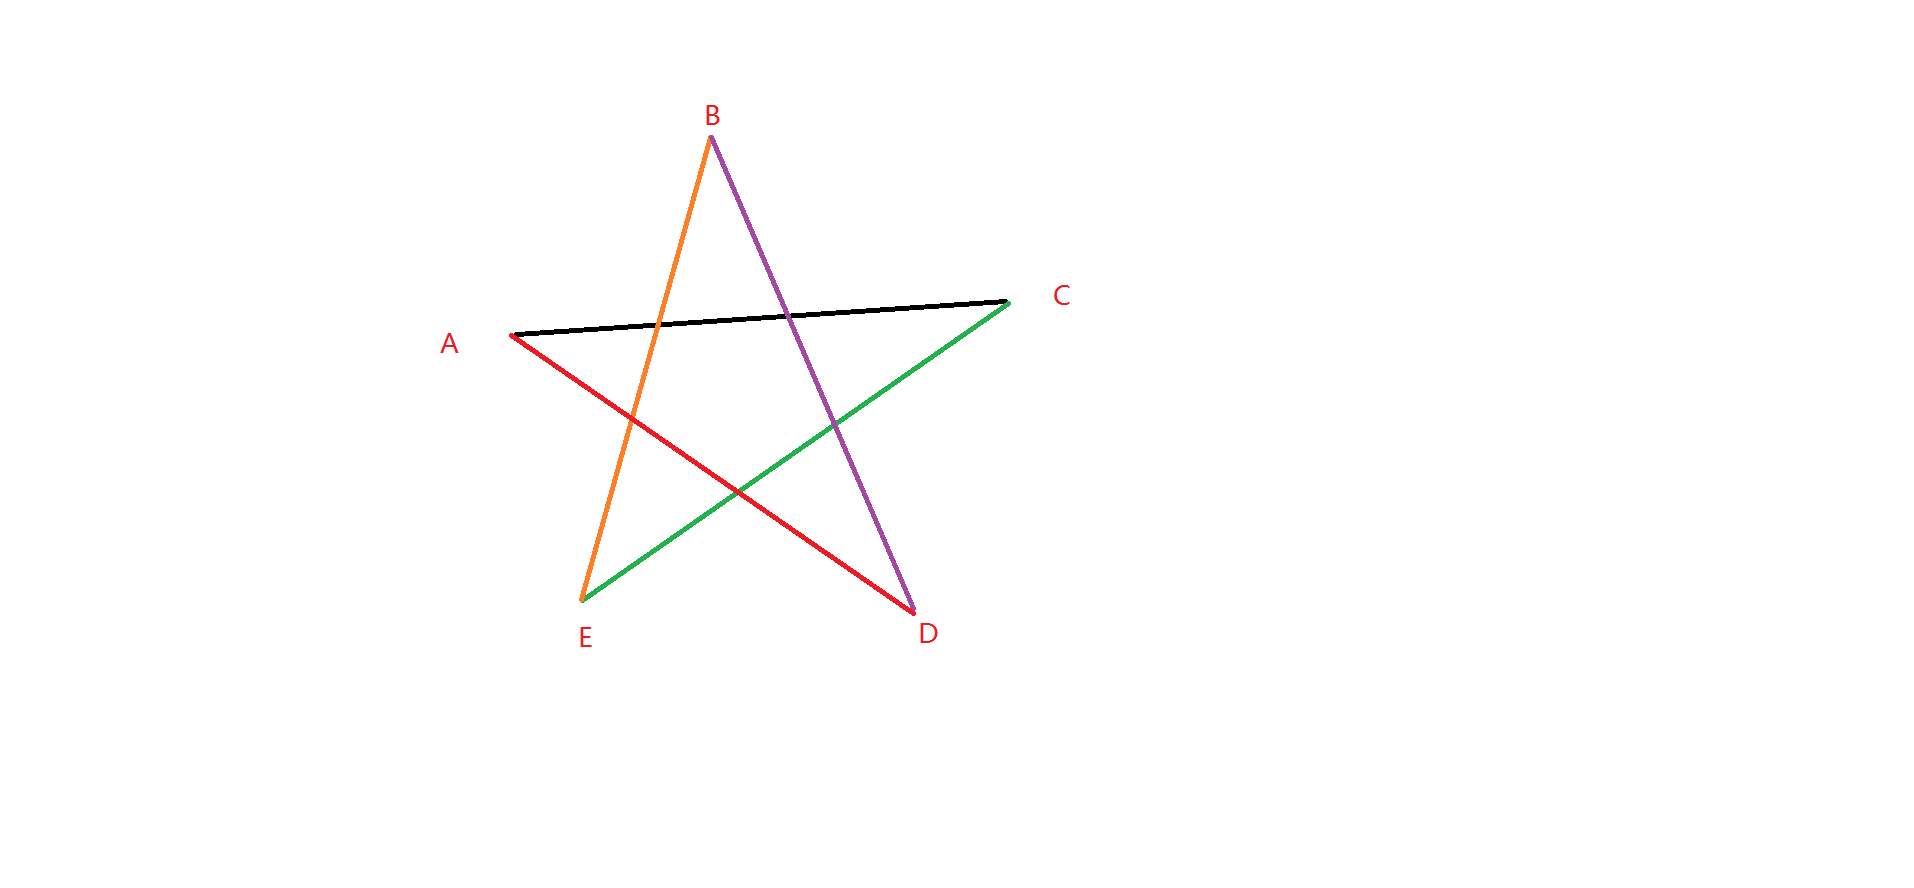
當多個元件之間共享一個狀態時,event bus可能就變成這樣。
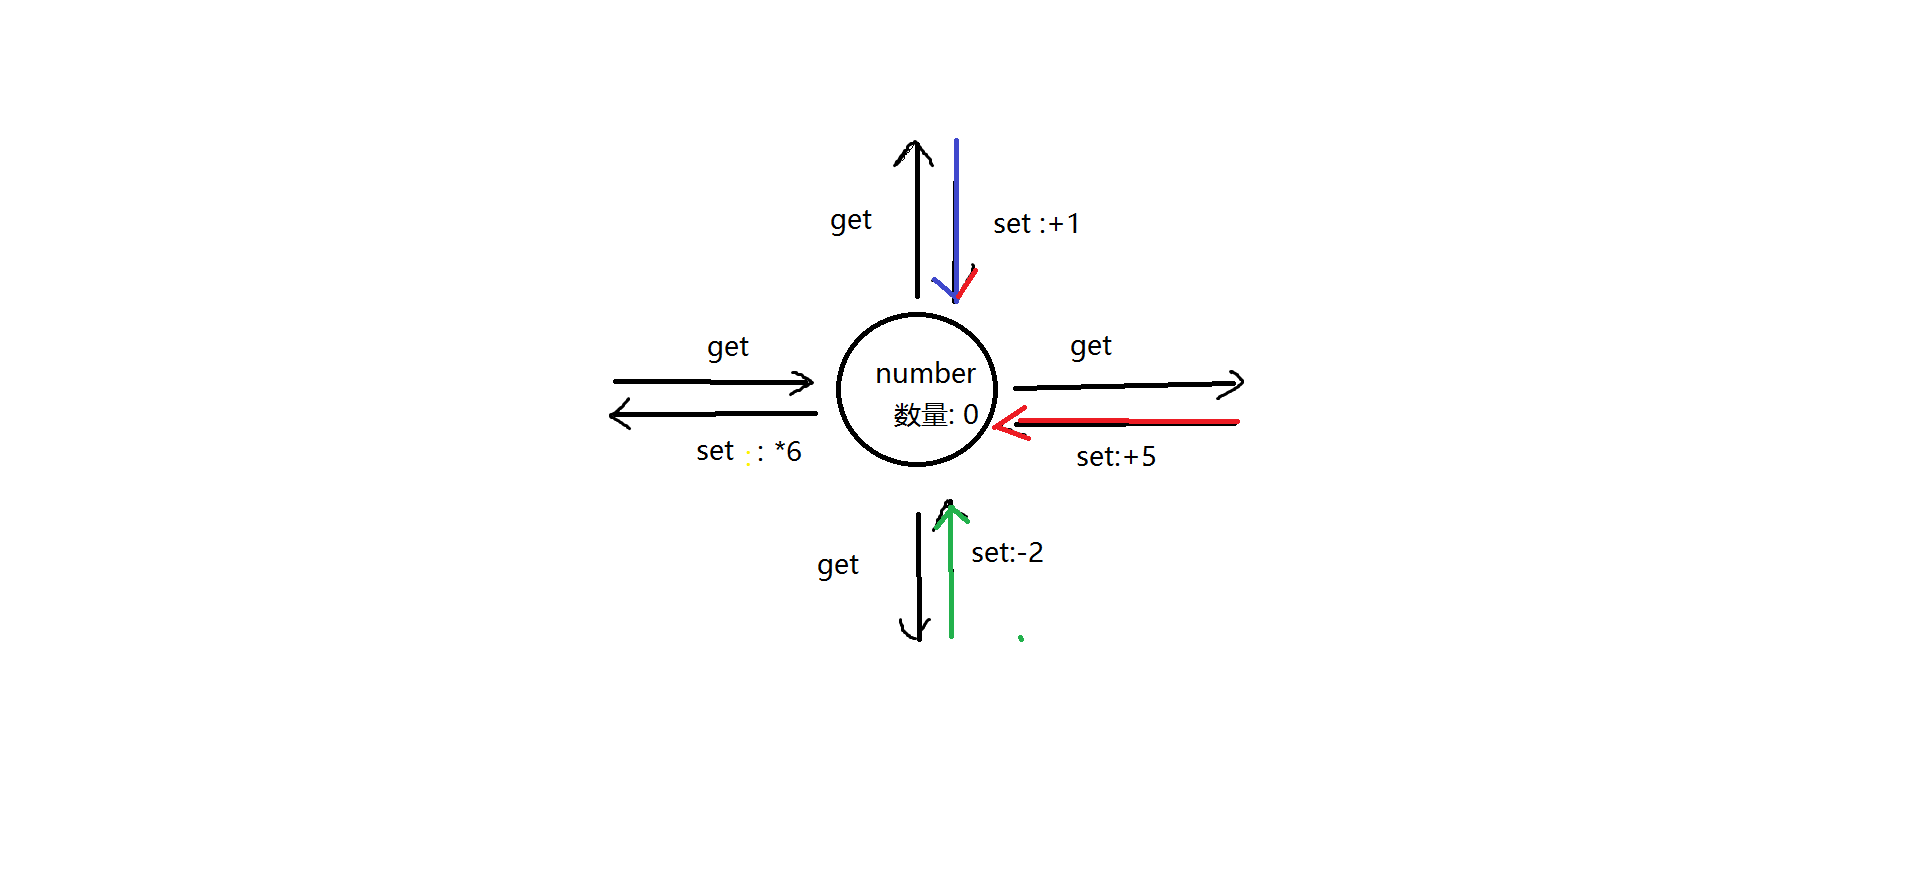
而使用vuex,可以變成這樣。
回到我們的專案,需要共享狀態的總共有3元件:
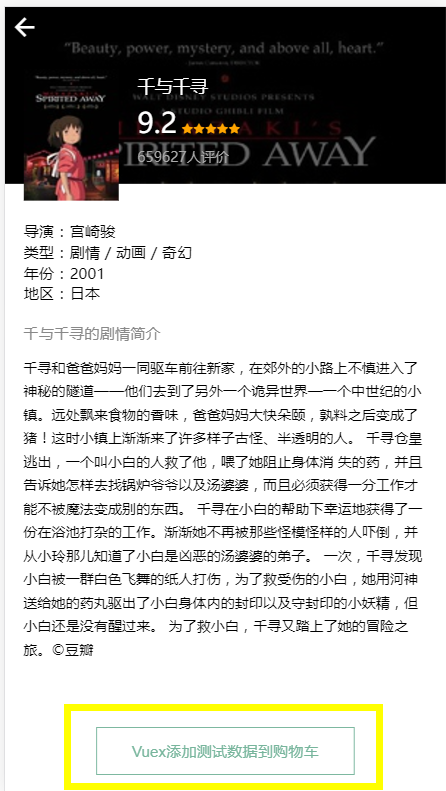
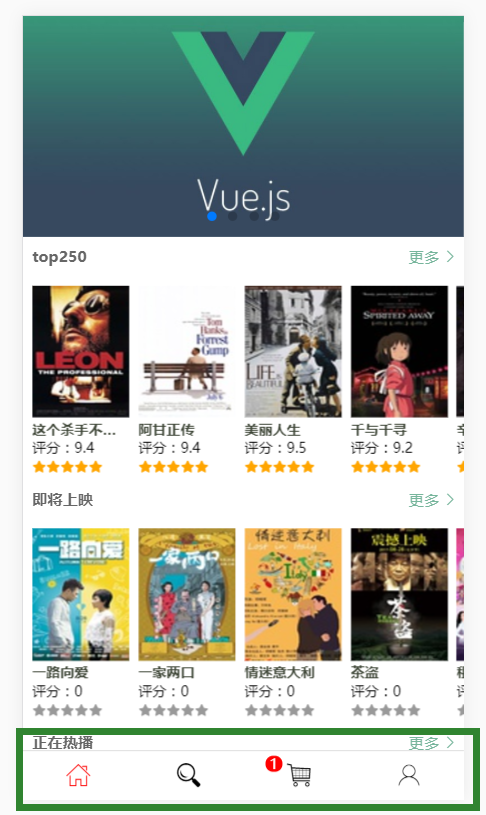
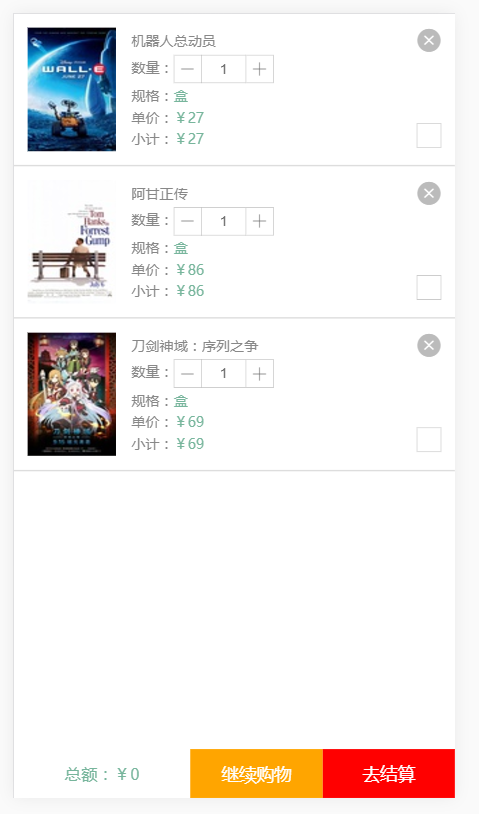
這三個元件都需要用到購物車列表goodsList
- 對於詳情頁面,需要判斷當前點選的電影是否已加入購物車,如果goodsList中已存在,則不再加入;
- 對於底部導航,當goodsList數量>0時需要顯示數字。
- 購物車元件就不用說了,基本所有的狀態都需要。
如何使用
首先安裝:cnpm install vuex --save安裝好後,新建一個store檔案同時新建index.js檔案,引用並且使用vuex
import Vue from 'vue'
import Vuex from 'vuex'
Vue.use(Vuex);
其次,匯出一個vuex.Store例項,可接受一個物件作為引數:
{
state, <!-- 我們先只傳入state
export const store= new Vuex.Store({
    state:{
        goodsList:[]
    }
})
接著,在main.js中引入並掛載到Vue例項上
...
import {store} from './store/index.js' 在購物車 car.vue元件通過一個計算屬性獲取vuex的狀態goodsList
 computed:{
         goodsList(){
            return this.$store.state.goodsList
        }
    }
這樣我們就可以通過v-for將購物車列表迴圈出來了,不過現在是陣列空的,我把新增的按鈕放到電影詳情裡面去了。
我們在首頁的電影列表套了一層router-link,並將電影的id作為引數,所以點選時就會入到詳情頁面。

<router-link tag="li" v-for="(v,i) in array" :key="v.id" :to='{path:"/film-detail/"+v.id}'>
在詳情頁面js中,我們通過this.$route.params.id獲取(引數key為id取自我們路由的配置)。
獲取到id後,接下來就是在某個生命週期(通常是mounted)傳送請求獲取該電影的data,然後就是賦值操作讓資料顯示出來了。這裡主要講一下 activated生命週期,由於我們在App.vue使用了keep-alive,所以film-detail元件在第一次進入後就會被快取,由於該元件不會被銷燬,所以之後我們每次進來都會保持第一次進來獲取的資料。
因此,我們將傳送請求的時間點由之前的mounted(已掛載)改變為activated(元件啟用時),這樣既能複用元件,又能保證每次進入時都獲取最新的資料。
回到vuex,點選詳情裡面的按鈕時,要將該電影加入到購物車,也就是說要改變state的狀態。vuex規定改變store中的狀態的唯一方法是提交mutation,雖然你也可以直接改變,比如點選某個按鈕時 this.$store.state.number++,不過最好時通過mutation觸發。通常我們走路都是正著走的,假如你非要倒立著走,也沒辦法攔著你。
定義mutation
mutations:{
    add:state=>state.number++
}
使用mutation
<!-- 在某個元件裡面使用mutation -->
this.$store.commit("add");
為了將電影加入購物車,在匯出的例項的引數中新增 mutationsexport const store= new Vuex.Store({
state:{
goodsList:[]
},
mutations:{
addGoods:(state,data)=>{
state.goodsList.push(data);
},
}
})點選按鈕時,首先判斷該電影是否在購物車已存在,如果存在則不再加入。var idExist=this.$store.state.goodsList.find((item)=>{
return item.id==id
})使用es6陣列新增find函式來實現,該函式返回滿足條件的第一個元素。如果不存在該id,則將對應的資料存入。
    if(!idExist){
        var data={
           url:this.smallPic,
           title:this.title,
           price:Math.floor(Math.random()*100),
           stock:"盒",
           number:1,
           select:false,
           id:this.id
        }
        this.$store.commit("addGoods",data);
        this.addSuccess=true;

    }else{
        return alert("已加入購物車")
}為了給加入購物車成功一個反饋,寫個簡單的效果,讓+1緩緩移動並且透明度慢慢消失```html
+1
span{
animation:move 1.6s forwards;
}
@keyframes move{
from{
opacity: 1;
transform:translateY(0);
    }

    to{
        opacity: 0;
        transform:translateY(-100%);
    }
}
```
詳情頁面搞定後,來看底部導航 。
當購物車數量大於0時,底部導航需要顯示當前購物車的數量,也即是goodsList.length;可以通過this.$store.state.goodsList.length來取得,不過最好的辦法是通過vuex的getters來獲取。因為假如你有多個頁面需要用到這個length時,你可能就會在每個需要用到的地方複製這段程式碼過來“this.$store.state.goodsList.length”。
在配置引數中加一個gettersexport const store= new Vuex.Store({
state:{
goodsList:[]
},
getters:{
goddsNumber:state=>{
return state.goodsList.length
}
},
mutations:{
addGoods:(state,data)=>{
state.goodsList.push(data);
},
}
})使用的方法跟獲取state基本一致,只不過是由state.xx改為getters.xxcomputed:{
number(){
return this.$store.getters.number
}
}我們希望當number>0才顯示,無非就是一個v-show="number>0"接著是購物車頁面。
購物車涉及到的操作有:數量加,數量減,是否選中,刪除,
看起來需要4個方法,實際上總結一下2個方法就夠了:
-
1個是delete
-
1個是update
delete時:獲取index後通過splice(index,1);
update時:同樣的需要獲取index,之後只需要判斷哪個狀態需要改變進行操作即可。比如number+1,或者number-1,或者選中狀態為true變為false,由false變為true。我們只需要將要改變和key和要設定的value都作為引數,就可以實現1個方法進行多個操作。
在mutation中再加2個方法:```javascript
mutations:{
deleteGoods(state,index){
    state.goodsList.splice(index,1);
},

updateGoods(state,data){
   <!--index為操作第幾個元素,key為要改變的key,value為新的值 -->

    const {index,key,value}=data;
    state.goodsList[index][key]=value;
}
}
```
2個方法都需要知道index即需要操作哪一個元素。雖然在購物車這個陣列中,我們在迴圈時已經知道index了,但這不一定就是你需要的那個,除非購物車不分頁,一次展示所有資料。假如購物車有100個商品,而且進行了分頁,每次取20條資料,那麼你點選列表的第一個元素,分頁後則會分別對應陣列的0,20,40,。。。180,而不分頁的第一個元素的index永遠是0。因此,我們需要獲取元素真正的位置。每個電影都有自己唯一的ID,通過es6陣列的findIndex並傳入對應的ID,可以返回元素的位置。
寫一個方法:
findPosition(id){
      return this.goodsList.findIndex(item=>{
          return item.id==id
       })
 },
點選刪除時:
 del(id){
      var i=this.findPosition(id);
      this.$store.commit("deleteGoods",i);
  },
點選切換選中時:
toggleSelect(id){
     var i=this.findPosition(id);
     var select=this.goodsList[i].select;
     this.$store.commit("updateGoods",{
          index:i,
          key:"select",
          value:!select
     });
}
點選加減號時,傳入+1或者-1:
 changeNumber(id,val){
      var i=this.findPosition(id);
      var number=this.goodsList[i].number;
        this.$store.commit("updateGoods",{
            index:i,
            key:"number",
            value:number+val<=0?1:number+val
       })
  }
vuex提供了mapMutations 輔助函式將元件中的 methods 對映為 store.commit 呼叫,當有多個mutation需要使用時,使用mapMutations可以讓程式碼更為簡潔。import { mapMutations } from 'vuex'
//在methos中使用展開運算子混入到原有方法中,比如:
methods:{
...mapMutations(
["deleteGoods","updateGoods"](向methods混入2個方法)
),
changeNumber(){
...(原有1個方法)
}
}混入後,現在就有3個方法了,可以通過this.deleteGoods和this.updateGoods呼叫。假如你不想使用原有的名字,想起一個更酷的名字,可以這麼寫
...mapMutations({
      coolDelete: 'deleteGoods',
      coolUpdate,'updateGoods'
})這樣一來,點選刪除時:(更新的也同理)del(id){
var i=this.findPosition(id);
this.coolDelete(i);
}除了mutaion有mapMutation外,state,getters和actions也都有輔助的map函式,可以使用Mutation,可以一次獲取多個狀態和方法。至此,基本上已經實現了用vuex進行購物車的增刪改。不過每次重新整理後,購物車的資料都被清空了。可以配合Localstorage儲存到本地。 實現也很簡單,每次mutation操作後將state中的goodsList存入到localstorage即可。每次啟動服務後,判斷localstorage是否有值,有值得話用json.parse轉化為陣列賦值給state.goodList,沒有值得話則為state.goodsList設定預設值為空陣列[ ];
完整檔案如下:store.js
import Vue from 'vue'
import Vuex from 'vuex'
Vue.use(Vuex);

export const store= new Vuex.Store({
    state:{
        goodsList:localStorage["goodsList"]?JSON.parse(localStorage["goodsList"]): []
    },
    getters:{
        sum:state=>{
            var total=0;
            state.goodsList.forEach((item)=>{
                if(item.select){
                    total+=item.price*item.number
                }
            })
            return total
        },
        goddsNumber:state=>{
            return state.goodsList.length
        }
    },
    mutations:{
        addGoods:(state,data)=>{
            state.goodsList.push(data);
            localStorage.setItem("goodsList",JSON.stringify(state.goodsList));
        },
        deleteGoods(state,index){
            state.goodsList.splice(index,1);
            localStorage.setItem("goodsList",JSON.stringify(state.goodsList));
        },
        updateGoods(state,data){
            const {index,key,value}=data;
            state.goodsList[index][key]=value;
            localStorage.setItem("goodsList",JSON.stringify(state.goodsList));
        }
    }
})
car.vue
<template>
   <div class="car-list-container">
        <ul>
            <li class="car-list" v-for="(v,i) in goodsList">
                <div class="car-list__img">
                    <img :src="v.url">
                </div>
                <div class="car-list__detail">
                    <p class="car-list__detail__title">{{v.title}}</p>
                    <p class="car-list__detail__number">數量:<button class="number--decrease iconfont icon-jianhao" @click="changeNumber(v.id,-1)"></button><input type="text" readonly="" v-model="v.number"><button class="number--increase iconfont icon-iconfont7" @click="changeNumber(v.id,1)"></button></p>
                    <p class="car-list__detail__type">規格:<span>{{v.stock}}</span></p>
                    <p class="car-list__detail__price">單價:<span>¥{{v.price}}</span></p>
                    <p class="car-list__detail__sum">小計:<span>¥{{v.price*v.number}}</span></p>
                </div>
                <div class="car-list__operate">
                    <span class="iconfont icon-shanchu delete-goods" @click="del(v.id)"></span>
                    <label >
                        <input type="checkbox" name="goods" :checked="v.select==true" @change="toggleSelect(v.id)">
                        <span></span>
                    </label>
                </div>
            </li>
        </ul>
        <div class="car-foot-nav">
            <button class="sum-price">總額:¥{{sum}}</button>
            <router-link :to='{name:"index"}' class="continue-shopping" tag="button">繼續購物</router-link>
            <button class="to-pay">去結算</button>
        </div>
   </div>
</template>

<script>
import { mapMutations } from 'vuex'
import { mapGetters } from 'vuex'
export default {
    name: 'car',
    data () {
        return {

        }
    },

    methods:{
        ...mapMutations(
            ["deleteGoods","updateGoods"]
        ),
        findPosition(id){
            return this.goodsList.findIndex(item=>{
                return item.id==id
             })
        },

        changeNumber(id,val){
            var i=this.findPosition(id);
            var number=this.goodsList[i].number;
            this.updateGoods({
                  index:i,
                  key:"number",
                  value:number+val<=0?1:number+val
             })
        },

        del(id){
             var i=this.findPosition(id);
            this.deleteGoods(i);
        },

        toggleSelect(id){
            var i=this.findPosition(id);
             var select=this.goodsList[i].select;
             this.updateGoods({
                  index:i,
                  key:"select",
                  value:!select
             })
        }
    },
    computed:{
        ...mapGetters(
            [ "sum"]
        ),
         goodsList(){
            return this.$store.state.goodsList
        }
    },
    mounted(){
      this.$ajax.get("/api/car",function(res){
        console.log(res)
      })
    }
};
</script>
程式碼已上傳到github,點選檢視
專案地址:https://github.com/linrunzheng/vueApp
