
EventBus使用詳解(二)——EventBus使用進階
前言:這段時間感覺自己也有點懶了,真是內心有點自責呢,除了工作,也沒做點什麼,EventBus也是一週前總結出來的,只能以寫部落格為名來彌補內心的罪惡感了,集合同事們做的專案,雖然上週開動了,但總感覺大家積極性不高,如何才能做一個合格的管理者,還真是一個考驗。follow your heart!! just do it!
相關文章:
一、概述
前一篇給大家裝簡單演示了EventBus的onEventMainThread()函式的接收,其實EventBus還有另外有個不同的函式,他們分別是:
1、onEvent
2、onEventMainThread
3、onEventBackgroundThread
4、onEventAsync
這四種訂閱函式都是使用onEvent開頭的,它們的功能稍有不同,在介紹不同之前先介紹兩個概念:
告知觀察者事件發生時通過EventBus.post函式實現,這個過程叫做事件的釋出,觀察者被告知事件發生叫做事件的接收,是通過下面的訂閱函式實現的。
onEvent:如果使用onEvent作為訂閱函式,那麼該事件在哪個執行緒釋出出來的,onEvent就會在這個執行緒中執行,也就是說釋出事件和接收事件執行緒在同一個執行緒。使用這個方法時,在onEvent方法中不能執行耗時操作,如果執行耗時操作容易導致事件分發延遲。
onEventMainThread:如果使用onEventMainThread作為訂閱函式,那麼不論事件是在哪個執行緒中釋出出來的,onEventMainThread都會在UI執行緒中執行,接收事件就會在UI執行緒中執行,這個在Android中是非常有用的,因為在Android中只能在UI執行緒中跟新UI,所以在onEvnetMainThread方法中是不能執行耗時操作的。
onEventBackground:如果使用onEventBackgrond作為訂閱函式,那麼如果事件是在UI執行緒中釋出出來的,那麼onEventBackground就會在子執行緒中執行,如果事件本來就是子執行緒中釋出出來的,那麼onEventBackground函式直接在該子執行緒中執行。
onEventAsync:使用這個函式作為訂閱函式,那麼無論事件在哪個執行緒釋出,都會建立新的子執行緒在執行onEventAsync.
二、實戰
1、解析
上面列出的這四個函式,關鍵問題在於,我們怎麼指定呼叫哪個函式呢?
我們先研究一下,上一篇中是怎麼呼叫的onEventMainThread函式,除了在接收端註冊與反註冊以後,關鍵問題在於新建的一個類:
新建一個類:
package com.harvic.other;

public class FirstEvent {

	private String mMsg;
	public FirstEvent(String msg) {
		// TODO Auto-generated constructor stub
		mMsg = msg;
	}
	public String getMsg(){
		return mMsg;
	}
}EventBus.getDefault().post(new FirstEvent("FirstEvent btn clicked")); public void onEventMainThread(FirstEvent event) {
……
} 沒錯,傳送時傳送的是這個類的例項,接收時引數就是這個類例項。
所以!!!!!!當發過來一個訊息的時候,EventBus怎麼知道要調哪個函式呢,就看哪個函式傳進去的引數是這個類的例項,哪個是就調哪個。那如果有兩個是呢,那兩個都會被呼叫!!!!
為了證明這個問題,下面寫個例子,先看下效果
2、例項
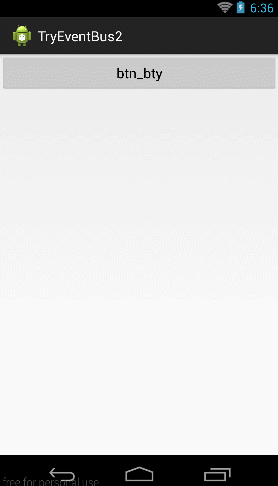
先看看我們要實現的效果:
這次我們在上一篇的基礎上,新建三個類:FirstEvent、SecondEvent、ThirdEvent,在第二個Activity中傳送請求,在MainActivity中接收這三個類的例項,接收時的程式碼為:
public void onEventMainThread(FirstEvent event) {

	Log.d("harvic", "onEventMainThread收到了訊息:" + event.getMsg());
}

public void onEventMainThread(SecondEvent event) {

	Log.d("harvic", "onEventMainThread收到了訊息:" + event.getMsg());
}

public void onEvent(ThirdEvent event) {
	Log.d("harvic", "OnEvent收到了訊息:" + event.getMsg());
}
Log輸出結果:

可以看到,在傳送FirstEvent時,在MainActiviy中雖然有三個函式,但只有第一個onEventMainThread函式的接收引數是FirstEvent,所以會傳到它這來接收。所以這裡識別呼叫EventBus中四個函式中哪個函式,是通過引數中的例項來決定的。
因為我們是在上一篇例子的基礎上完成的,所以這裡的程式碼就不詳細寫了,只寫改動的部分。
1、三個類
package com.harvic.other;

public class FirstEvent {

	private String mMsg;
	public FirstEvent(String msg) {
		// TODO Auto-generated constructor stub
		mMsg = msg;
	}
	public String getMsg(){
		return mMsg;
	}
}
package com.harvic.other;
public class SecondEvent{
private String mMsg;
public SecondEvent(String msg) {
// TODO Auto-generated constructor stub
mMsg = "MainEvent:"+msg;
}
public String getMsg(){
return mMsg;
}
}package com.harvic.other;
public class ThirdEvent {
private String mMsg;
public ThirdEvent(String msg) {
// TODO Auto-generated constructor stub
mMsg = msg;
}
public String getMsg(){
return mMsg;
}
}2、傳送
然後在SecondActivity中新建三個按鈕,分別傳送不同的類的例項,程式碼如下:
package com.harvic.tryeventbus2;

import com.harvic.other.FirstEvent;
import com.harvic.other.SecondEvent;
import com.harvic.other.ThirdEvent;

import de.greenrobot.event.EventBus;
import android.app.Activity;
import android.os.Bundle;
import android.view.View;
import android.widget.Button;

public class SecondActivity extends Activity {
	private Button btn_FirstEvent, btn_SecondEvent, btn_ThirdEvent;

	@Override
	protected void onCreate(Bundle savedInstanceState) {
		super.onCreate(savedInstanceState);
		setContentView(R.layout.activity_second);
		btn_FirstEvent = (Button) findViewById(R.id.btn_first_event);
		btn_SecondEvent = (Button) findViewById(R.id.btn_second_event);
		btn_ThirdEvent = (Button) findViewById(R.id.btn_third_event);

		btn_FirstEvent.setOnClickListener(new View.OnClickListener() {

			@Override
			public void onClick(View v) {
				// TODO Auto-generated method stub
				EventBus.getDefault().post(
						new FirstEvent("FirstEvent btn clicked"));
			}
		});

		btn_SecondEvent.setOnClickListener(new View.OnClickListener() {

			@Override
			public void onClick(View v) {
				// TODO Auto-generated method stub
				EventBus.getDefault().post(
						new SecondEvent("SecondEvent btn clicked"));
			}
		});

		btn_ThirdEvent.setOnClickListener(new View.OnClickListener() {

			@Override
			public void onClick(View v) {
				// TODO Auto-generated method stub
				EventBus.getDefault().post(
						new ThirdEvent("ThirdEvent btn clicked"));

			}
		});

	}

}
3、接收
在MainActivity中,除了註冊與註冊,我們利用onEventMainThread(FirstEvent event)來接收來自FirstEvent的訊息,使用onEventMainThread(SecondEvent event)接收來自SecondEvent 例項的訊息,使用onEvent(ThirdEvent event) 來接收ThirdEvent 例項的訊息。package com.harvic.tryeventbus2;
import com.harvic.other.FirstEvent;
import com.harvic.other.SecondEvent;
import com.harvic.other.ThirdEvent;
import de.greenrobot.event.EventBus;
import android.app.Activity;
import android.content.Intent;
import android.os.Bundle;
import android.util.Log;
import android.view.Menu;
import android.view.MenuItem;
import android.view.View;
import android.widget.Button;
import android.widget.TextView;
public class MainActivity extends Activity {
Button btn;
TextView tv;
EventBus eventBus;
@Override
protected void onCreate(Bundle savedInstanceState) {
super.onCreate(savedInstanceState);
setContentView(R.layout.activity_main);
EventBus.getDefault().register(this);
btn = (Button) findViewById(R.id.btn_try);
btn.setOnClickListener(new View.OnClickListener() {
@Override
public void onClick(View v) {
// TODO Auto-generated method stub
Intent intent = new Intent(getApplicationContext(),
SecondActivity.class);
startActivity(intent);
}
});
}
public void onEventMainThread(FirstEvent event) {
Log.d("harvic", "onEventMainThread收到了訊息:" + event.getMsg());
}
public void onEventMainThread(SecondEvent event) {
Log.d("harvic", "onEventMainThread收到了訊息:" + event.getMsg());
}
public void onEvent(ThirdEvent event) {
Log.d("harvic", "OnEvent收到了訊息:" + event.getMsg());
}
@Override
protected void onDestroy() {
// TODO Auto-generated method stub
super.onDestroy();
EventBus.getDefault().unregister(this);
}
}
在MainActivity中接收時,我們在接收SecondEvent時,在上面onEventMainThread基礎上另加一個onEventBackgroundThread和onEventAsync,即下面的程式碼:
	//SecondEvent接收函式一
	public void onEventMainThread(SecondEvent event) {

		Log.d("harvic", "onEventMainThread收到了訊息:" + event.getMsg());
	}
	//SecondEvent接收函式二
	public void onEventBackgroundThread(SecondEvent event){
		Log.d("harvic", "onEventBackground收到了訊息:" + event.getMsg());
	}
	//SecondEvent接收函式三
	public void onEventAsync(SecondEvent event){
		Log.d("harvic", "onEventAsync收到了訊息:" + event.getMsg());
}package com.harvic.tryeventbus2;
import com.harvic.other.FirstEvent;
import com.harvic.other.SecondEvent;
import com.harvic.other.ThirdEvent;
import de.greenrobot.event.EventBus;
import android.app.Activity;
import android.content.Intent;
import android.os.Bundle;
import android.util.Log;
import android.view.Menu;
import android.view.MenuItem;
import android.view.View;
import android.widget.Button;
import android.widget.TextView;
public class MainActivity extends Activity {
Button btn;
TextView tv;
EventBus eventBus;
@Override
protected void onCreate(Bundle savedInstanceState) {
super.onCreate(savedInstanceState);
setContentView(R.layout.activity_main);
EventBus.getDefault().register(this);
btn = (Button) findViewById(R.id.btn_try);
btn.setOnClickListener(new View.OnClickListener() {
@Override
public void onClick(View v) {
// TODO Auto-generated method stub
Intent intent = new Intent(getApplicationContext(),
SecondActivity.class);
startActivity(intent);
}
});
}
public void onEventMainThread(FirstEvent event) {
Log.d("harvic", "onEventMainThread收到了訊息:" + event.getMsg());
}
//SecondEvent接收函式一
public void onEventMainThread(SecondEvent event) {
Log.d("harvic", "onEventMainThread收到了訊息:" + event.getMsg());
}
//SecondEvent接收函式二
public void onEventBackgroundThread(SecondEvent event){
Log.d("harvic", "onEventBackground收到了訊息:" + event.getMsg());
}
//SecondEvent接收函式三
public void onEventAsync(SecondEvent event){
Log.d("harvic", "onEventAsync收到了訊息:" + event.getMsg());
}
public void onEvent(ThirdEvent event) {
Log.d("harvic", "OnEvent收到了訊息:" + event.getMsg());
}
@Override
protected void onDestroy() {
// TODO Auto-generated method stub
super.onDestroy();
EventBus.getDefault().unregister(this);
}
}

好啦,這篇就到了,講來講去就是說一個問題:訊息的接收是根據引數中的類名來決定執行哪一個的;
參考文章:
如果我的文章有幫到你,記得關注哦!