
Qml 拖拽事件處理
阿新 • • 發佈:2019-02-13
下面的例子程式碼來自官方文件:
import QtQuick 2.0

Item {
    width: 200; height: 200

    DropArea {
        x: 75; y: 75
        width: 50; height: 50

        Rectangle {
            anchors.fill: parent
            color: "green"

            visible: parent.containsDrag
        }
    }

    Rectangle {
        x: 10; y: 10
        width: 20; height: 20
        color: "red"

        Drag.active: dragArea.drag.active
        Drag.hotSpot.x: 10
        Drag.hotSpot.y: 10

        MouseArea {
            id: dragArea
            anchors.fill: parent

            drag.target: parent
        }
    }
}
執行一下:
$ ~/Qt5.2.0/5.2.0/gcc_64/bin/qmlscene ./try.qml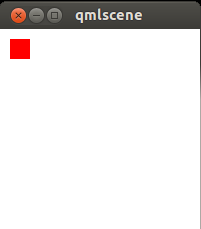
這個紅色的方塊是可以被拖拽的,當拖到視窗中間的時候,會出現綠色大方塊。
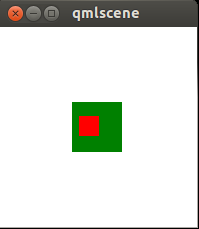
這個綠色的區域就是DropArea,裡面定義了一個Rectangle,當containsDrag被設定為true時就顯示。
Drag.active需要繫結到MouseArea.drag.active,也就是允許拖拽的區域。當用戶開始在MouseArea區域拖拽時,內部的startDrag方法會被呼叫。
現在測試一下兩個事件,一個是當拖進DropArea的onEntered事件,一個是當拖拽結束(鬆開滑鼠)的onDropped事件。
注意,要想第二個onDropped事件發生,DrapArea(也就是MouseArea)必須顯示的呼叫drop方法。
import QtQuick 2.0

Item {
    width: 200; height: 200

    DropArea {
        x: 75; y: 75
        width: 50; height: 50
        onEntered: console.log("entered")
        onDropped: console.log("dropped")

        Rectangle {
            id: x
            anchors.fill: parent
            color: "green"
            visible: parent.containsDrag
        }
    }

    Rectangle {
        x: 10; y: 10
        width: 20; height: 20
        color: "red"

        Drag.active: dragArea.drag.active
        Drag.hotSpot.x: 10
        Drag.hotSpot.y: 10

        MouseArea {
            id: dragArea
            anchors.fill: parent
            onReleased: parent.Drag.drop()
            drag.target: parent
        }
    }
}
現在可以在控制檯上看到拖拽的日誌了。
entered
dropped
entered
entered
dropped