
Geth + mist+私有鏈部署智慧合約-5.2
genesis.json檔案
{
    "config":{
        "chainId":13,
        "homesteadBlock":0,
        "eip155Block":0,
        "eip158Block":0
    },
    "nonce":"0x0000000000000033",
    "mixhash":"0x0000000000000000000000000000000000000000000000000000000000000000",
    "difficulty": "0x0300",
    "alloc": {},
    "coinbase":"0x0000000000000000000000000000000000000000",
    "timestamp": "0x00",
    "parentHash":"0x0000000000000000000000000000000000000000000000000000000000000000",
    "extraData": "",
    "gasLimit":"0xffffffff"
}
據此建立創世塊,並開始挖礦miner.start(1) ,再停止挖礦後,eth.coinbase主賬戶中就有了ether,這次得到以太的挖礦到底打包了什麼交易?
配置如下命令
geth --identity "TestNode2" --datadir "data1" --rpc --rpcapi "db,eth,net,web3" --rpcaddr "127.0.0.1" --ipcpath "data1\geth\geth.ipc" --rpcport "8487" --port "30305" --networkid "29382" consoleUDP listener up self=enode://c00f076d0bee45cbfbc5d301ce90c31f1cc55bbbfe5b85619e46804570013ddd1 每允許使用一個socket地址。
然鵝,使用參考連結給出的命令就可以成功啟動節點,dont know why...
geth --identity "TestNode2" --datadir "data1" --rpc --rpcapi "db,eth,net,web3" --rpcaddr "127.0.0.1" --ipcpath "data1\geth\geth.ipc" --rpcport "8487" --port "30305" --networkid "29382" console
JS控制檯已經啟動
instance: Geth/TestNode2/v1.8.11-stable-dea1ce05/windows-amd64/go1.10.2
 modules: admin:1.0 debug:1.0 eth:1.0 miner:1.0 net:1.0 personal:1.0 rpc:1.0 txpool:1.0 web3:1.0
在主節點上新增新節點失敗
> admin.addpeer("enode://5de4cb1aa4aaa9f2e1feb40c0a6745e1ec729313497489466509e7ed2058550c7[email protected][::]:30305")


TypeError: 'addpeer' is not a function
    at <anonymous>:1:1

> web3.admin.addpeer("enode://5de4cb1aa4aaa9f2e1feb40c0a6745e1ec729313497489466509e7ed2058550c76292e630ed0e2a283a992ff7b
[email protected][::]:30305")
TypeError: 'addpeer' is not a function
    at <anonymous>:1:1
這個是因為admin.addpeer應該是admin.addPeer
與參考連結不同的地方在於主節點,重新啟動一個主節點
geth --identity "TestNode1" --datadir "data0" --rpc --rpcapi "db,eth,net,web3" --rpcaddr "127.0.0.1" --rpcport "8486" --port "30304" --networkid "29382" console==========================================分割線===============================================
用上面的genesis.json檔案參考連結新建兩個節點
分別啟動兩個節點
#dos視窗1
geth --identity "testNode1" --datadir "data0" --rpc --rpcapi "db,eth,net,web3" --rpcaddr "127.0.0.1" --rpcport "8486" --port "30304" --networkid "29382" console
#dos視窗2
geth --identity "testNode2" --datadir "data1" --rpc --rpcapi "db,eth,net,web3" --rpcaddr "127.0.0.1" --ipcpath "data1\geth\geth.ipc" --rpcport "8487" --port "30305" --networkid "29382" console
admin.nodeInfo
{
enode: "enode://6f7d8a0caa1d40c04c8c9b9b4e0a42ac4591b815b17f2ea16d2c1e460287e8fbb[email protected][::]:30304",
id: "6f7d8a0caa1d40c04c8c9b9b4e0a42ac4591b815b17f2ea16d2c1e460287e8fbb81e1c96e4f739331cce0df278e3487b91e0640908b522ccf9e10892b35a708e",
ip: "::",
listenAddr: "[::]:30304",
name: "Geth/testNode1/v1.8.11-stable-dea1ce05/windows-amd64/go1.10.2",
ports: {
discovery: 30304,
listener: 30304
},
protocols: {
eth: {
config: {
chainId: 13,
eip150Hash: "0x0000000000000000000000000000000000000000000000000000000000000000",
eip155Block: 0,
eip158Block: 0,
homesteadBlock: 0
},
difficulty: 768,
genesis: "0x9de6c673941ebfa13a4494828e24cb206556386ef81249a65e203588be457315",
head: "0x9de6c673941ebfa13a4494828e24cb206556386ef81249a65e203588be457315",
network: 29382
}
}
}
> personal.newAccount("123456")
"0xa86c4c8864edf91fe0be416f7e252e90ade98a60"
> personal.newAccount("123456")
"0x642b43d11fe2cdf725a8970b7342c530bcc363f2"
> personal.newAccount("123456")
"0xaf07e1acba2194de5636a65e3df84b8bfc328431"
> eth.coinbase
INFO [07-31|22:44:24] Etherbase automatically configured address=0xA86C4C8864Edf91fe0bE416f7e252e90ADE98A60
"0xa86c4c8864edf91fe0be416f7e252e90ade98a60"
> eth.getBalance(eth.accounts[0])
0
> miner.start()
INFO [07-31|22:44:56] Updated mining threads threads=0
INFO [07-31|22:44:56] Transaction pool price threshold updated price=18000000000
nuIlNlF
O > [07-31|22:44:56] Starting mining operation
INFO [07-31|22:44:56] Commit new mining work number=1 txs=0 uncles=0 elapsed=0s
INFO [07-31|22:44:57] Successfully sealed new block number=1 hash=990403…0f3b42
INFO [07-31|22:44:57] testNode2節點
 admin.nodeInfo
{
  enode: "enode://c539b7f91a709d9590121fbf4518ee1632d2999f1d67408c864bd2fab968376b3[email protected][::]:30305",
  id: "c539b7f91a709d9590121fbf4518ee1632d2999f1d67408c864bd2fab968376b39d1167871ccd1a2468bbdb89681404f2f2686722830897c75c13e45acc94a07",
  ip: "::",
  listenAddr: "[::]:30305",
  name: "Geth/testNode2/v1.8.11-stable-dea1ce05/windows-amd64/go1.10.2",
  ports: {
    discovery: 30305,
    listener: 30305
  },
  protocols: {
    eth: {
      config: {
        chainId: 13,
        eip150Hash: "0x0000000000000000000000000000000000000000000000000000000000000000",
        eip155Block: 0,
        eip158Block: 0,
        homesteadBlock: 0
      },
      difficulty: 19416440,
      genesis: "0x9de6c673941ebfa13a4494828e24cb206556386ef81249a65e203588be457315",
      head: "0x444e9e4878a105b396d1caebdbf5c56023f88bf3874c7bd9528fc3e2ec2082fb",
      network: 29382
    }
  }
}
>
分別註冊3個賬戶後,分別miner.start(1),會確認一些交易得到以太幣;在testNode2視窗新增testNode1節點
testNode1節點的賬戶,賬戶密碼設定成123456
> admin.nodeInfo
{
  enode: "enode://6f7d8a0caa1d40c04c8c9b9b4e0a42ac4591b815b17f2ea16d2c1e460287e8fbb[email protected][::]:30304",
  id: "6f7d8a0caa1d40c04c8c9b9b4e0a42ac4591b815b17f2ea16d2c1e460287e8fbb81e1c96e4f739331cce0df278e3487b91e0640908b522ccf9e10892b35a708e",
  ip: "::",
  listenAddr: "[::]:30304",
  name: "Geth/testNode1/v1.8.11-stable-dea1ce05/windows-amd64/go1.10.2",
  ports: {
    discovery: 30304,
    listener: 30304
  },
  protocols: {
    eth: {
      config: {
        chainId: 13,
        eip150Hash: "0x0000000000000000000000000000000000000000000000000000000000000000",
        eip155Block: 0,
        eip158Block: 0,
        homesteadBlock: 0
      },
      difficulty: 26119992,
      genesis: "0x9de6c673941ebfa13a4494828e24cb206556386ef81249a65e203588be457315",
      head: "0xccc4b409a7d29a6bf224acadf33dd9c581b3fba2b2460e2cc42b865200d0524c",
      network: 29382
    }
  }
}
> eth.accounts
["0xa86c4c8864edf91fe0be416f7e252e90ade98a60", "0x642b43d11fe2cdf725a8970b7342c530bcc363f2", "0xaf07e1acba2194de5636a65e3df84b8bfc328431", "0xe82a61eb05bd2048fc91c9065e0757f119033f75"]
testNode2節點的賬戶,賬戶密碼都設定成123456
> admin.nodeInfo
{
  enode: "enode://c539b7f91a709d9590121fbf4518ee1632d2999f1d67408c864bd2fab968376b3[email protected][::]:30305",
  id: "c539b7f91a709d9590121fbf4518ee1632d2999f1d67408c864bd2fab968376b39d1167871ccd1a2468bbdb89681404f2f2686722830897c75c13e45acc94a07",
  ip: "::",
  listenAddr: "[::]:30305",
  name: "Geth/testNode2/v1.8.11-stable-dea1ce05/windows-amd64/go1.10.2",
  ports: {
    discovery: 30305,
    listener: 30305
  },
  protocols: {
    eth: {
      config: {
        chainId: 13,
        eip150Hash: "0x0000000000000000000000000000000000000000000000000000000000000000",
        eip155Block: 0,
        eip158Block: 0,
        homesteadBlock: 0
      },
      difficulty: 26119992,
      genesis: "0x9de6c673941ebfa13a4494828e24cb206556386ef81249a65e203588be457315",
      head: "0xccc4b409a7d29a6bf224acadf33dd9c581b3fba2b2460e2cc42b865200d0524c",
      network: 29382
    }
  }
}
> eth.accounts
["0x4ff80c7a558f9d81912c2815390191528918f0a1", "0x1512435267caa2e09ee4b13d373efb2bf68a872e", "0xf79cf5378e8c9728fcfdc33d155186059fbf0084"]admin.addPeer("enode://6f7d8a0caa1d40c04c8c9b9b4e0a42ac4591b815b17f2ea16d2c1e460287e8fbb[email protected][192.168.0.101]:30304")在testNode1節點啟動挖礦,在testNode2節點會看到同步資訊
#testNode1
miner.start(1)


INFO [08-01|07:41:20] Updated mining threads                   threads=1
INFO [08-01|07:41:20] Transaction pool price threshold updated price=18000000000
nulIlN
FO>  [08-01|07:41:20] Starting mining operation
INFO [08-01|07:41:20] Commit new mining work                   number=148 txs=0 uncles=0 elapsed=0s
INFO [08-01|07:41:20]
說明節點通訊成功。
開啟mist v0.11.1會自動連線到testNode1主節點,testNode1節點的三個賬戶
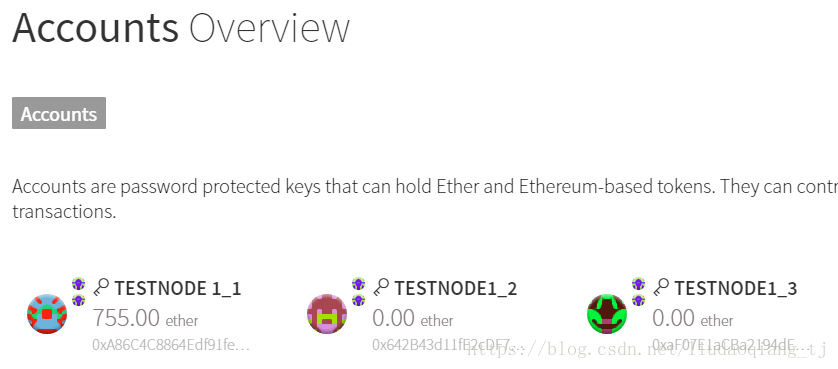
部署合約,合約程式碼來自https://ethereum.org/token;從testNode1節點的testNode1_1賬戶向testNode1_2賬戶轉賬以太和代幣,向合約轉賬代幣,但是不能向合約轉賬以太,合約可以持有以太嗎?
看以太坊網站上的其他合約都沒有持有以太,合約應該是不能持有以太的。
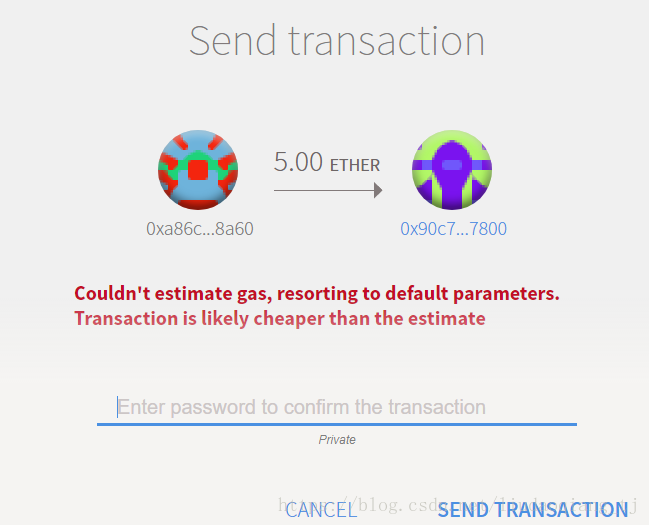
從testNode1_1賬戶向testNode2_2賬戶發起一筆交易後輸入密碼進入待確認狀態
mist視窗顯示待確認交易

testNode1視窗顯示待確認交易
> INFO [08-01|08:18:05] Submitted transaction fullhash=0xf5ee21b8541118427d7fff2c7f520decc9886d98577195e6297fb8d5c9b0e3b6 recipient=0x642B43d11fE2cDF725a8970b7342c530bcc363F2miner.start(1)testNode1發起確認交易後
mist視窗開始同步確認

testNode1視窗開始挖礦
true
> INFO [08-01|08:18:05] Submitted transaction                    fullhash=0xf5ee21b8541118427d7fff2c7f520decc9886d98577195e6297fb8d5c9b0e3b6 recipient=0x642B43d11fE2cDF725a8970b7342c530bcc363F2
> miner.start(1)
INFO [08-01|08:20:10] Updated mining threads                   threads=1
INFO [08-01|08:20:10] Transaction pool price threshold updated price=18000000000
InNuFlOl [08-
0> 1|08:20:10] Starting mining operation
INFO [08-01|08:20:10] Commit new mining work                   number=186 txs=1 uncles=0 elapsed=0s
INFO [08-01|08:20:11] Successfully sealed new block            number=186 hash=8e3ddb…f38977
INFO [08-01|08:20:11]
testNode2同步區塊
> INFO [08-01|08:12:49] Imported new chain segment               blocks=1 txs=1 mgas=0.021 elapsed=9.978ms   mgasps=2.104   number=172 hash=bb64fd…de7f66 cache=63.33kB
INFO [08-01|08:12:50] Imported new chain segment               blocks=1 txs=0 mgas=0.000 elapsed=4.984ms   mgasps=0.000   number=173 hash=5494f6…d91b10 cache=63.63kB
INFO [08-01|08:12:53] Imported new chain segment               blocks=1 txs=0 mgas=0.000 elapsed=6.976ms   mgasps=0.000   number=174 hash=5a29ac…129393 cache=63.94kB
INFO [08-01|08:12:55] Imported new chain segment               blocks=1 txs=0 mgas=0.000 elapsed=12.965ms  mgasps=0.000   number=175 hash=5d3c54…b9a549 cache=64.25kB
INFO [08-01|08:12:58] Imported new chain segment               blocks=1 txs=0 mgas=0.000 elapsed=5.985ms   mgasps=0.000   number=176 hash=1f47ff…8b3abd cache=64.56kB
INFO [08-01|08:13:02] Imported new chain segment               blocks=1 txs=0 mgas=0.000 elapsed=24.94ms   mgasps=0.000   number=177 hash=4b6895…ff3a27 cache=64.87kB
INFO [08-01|08:13:02] Imported new chain segment               blocks=1 txs=0 mgas=0.000 elapsed=16.974ms  mgasps=0.000   number=178 hash=d45468…fd8c04 cache=65.18kB
INFO [08-01|08:13:04] Imported new chain segment               blocks=1 txs=0 mgas=0.000 elapsed=5.981ms   mgasps=0.000   number=179 hash=68b564…e7ae27 cache=65.49kB
INFO [08-01|08:13:14] Imported new chain segment               blocks=1 txs=0 mgas=0.000 elapsed=8.976ms   mgasps=0.000   number=180 hash=8a5586…feeb28 cache=65.80kB
INFO [08-01|08:13:18] Imported new chain segment               blocks=1 txs=0 mgas=0.000 elapsed=10.968ms  mgasps=0.000   number=181 hash=93a7e5…c27eb9 cache=66.11kB
INFO [08-01|08:13:18] Imported new chain segment               blocks=1 txs=0 mgas=0.000 elapsed=8.973ms   mgasps=0.000   number=182 hash=5e10c3…af0d42 cache=66.42kB
INFO [08-01|08:13:22] Imported new chain segment               blocks=1 txs=0 mgas=0.000 elapsed=11.969ms  mgasps=0.000
交易完成之後挖礦還是進行,需要進一步確認這些被確認的交易是什麼交易?這些交易也是最testNode1賬戶最初以太的來源。
相關推薦
Geth + mist+私有鏈部署智慧合約-5.2
genesis.json檔案 { "config":{ "chainId":13, "homesteadBlock":0, "eip155Block":0, "eip158Block":0 },
以太坊學習(9)關於geth搭建私有鏈下呼叫合約遇到require (false)會消耗完所有gas的解決方案【國內首發】
關於geth搭建私有鏈下呼叫合約遇到require (false)會消耗完所有gas的解決方案 如果你沒遇到過這個問題,你會覺得很奇怪,Solidity的關鍵字require,根據用法解釋:https://ethfans.org/posts/when-to-use-revert-as
以太坊私有鏈搭建,建立節點叢集,部署智慧合約,攻擊智慧合約
本文目的: 1.搭建Ethereum私有鏈和節點叢集; 2.熟悉以太坊智慧合約的部署和使用流程; 3.瞭解以太坊智慧合約的應用和常見安全性問題; 一、以太坊私有鏈搭建 參考:https://blog.csdn.net/sportshark/article
mist連線私有網路除錯智慧合約
環境 ubuntu 16.04, 64位 首先確保私有網路已經搭建好,可以參考以前的文章。 安裝mist 安裝依賴項 $ sudo curl https://install.meteor.com/ | sh $ sudo curl -o
以太坊智慧合約學習筆記:使用Truffle框架開發部署智慧合約
truffle是一個智慧合約的開發框架,具體的就不介紹了,我們主要是說說怎麼使用這個框架來進行智慧合約的開發,官網戳這裡。 文章目錄 #安裝 首先我們要先安裝npm和truffle,安裝命令如下 sudo apt install npm sudo n
solidity智慧合約[5]——一筆交易詳解
在之前,我們已經寫好了一個最簡單的helloworld合約,如下: 1234567891011121314151617 pragma solidity ^0.4.23;contract HelloWorld{ string public name
部署智慧合約
部署智慧合約 合約部署需要挖礦才能成功,我們新開一個視窗用與挖礦,新開一個控制檯,輸入命令:geth attach 連線到控制檯,執行miner.start(1),開始挖礦。 智慧合約的部署需要編譯,這裡用線上編譯 https://remix.ethereum.org 合約DEMO如下:
Eth 部署智慧合約
首先要開發以太坊的智慧合約,需要EVM(以太坊虛擬機器),也就是需要執行的環境,我們可以通過 geth 來設定開發環境: geth --datadir testNet --dev console 2>> test.log 命令引數說明(更多命令詳解可閱讀Geth命令用法-引數詳解篇)
以太坊學習(一):利用Geth搭建私有鏈
在以太坊的多種語言實現的客戶端中,推薦使用go語言版本的,也是使用最廣的一個版本go-ethereum。geth是go-ethereum的縮寫。 本次開發平臺為Ubuntu 16.04版本64位的虛擬
geth搭建私有鏈,remix連接出現的問題
首先使用單引號geth --datadir ./data/00 --networkid 314590 --port 61910 --rpc --rpcapi 'web3,eth,debug' --rpccorsdomain '* --rpcport 8200 console
區塊鏈(智慧合約、DApp)
一、智慧合約智慧合約的演變先鋪墊一下,大家看看從比特幣到以太坊,智慧合約是如何演變而來的。注意下方智慧合約的位置,這個位置表明上方的應用(APP)必須通過智慧合約來實現對應區塊鏈網路的功能。那麼,我們看一個簡單的例子,就是A轉賬給B,在比特幣和以太坊中大概都怎麼實現的:以太坊
基於星雲鏈的智慧合約與Dapp(二)——執行星雲鏈
上一篇文章講了搭建星雲私鏈的基本環境,接著我們來講講如何配置和執行星雲鏈。這裡講的只是一些基礎的介紹,為智慧合約和Dapp做準備,後期我們分析星雲鏈原始碼的時候再詳細講解。 創世區塊 在啟動星雲鏈之前,我們必須定義創世區塊的配置檔案。 創世區塊配置
區塊鏈入門三部曲(二) (最全最詳細 )以太坊Geth搭建私有鏈
1. Geth的搭建私有鏈搭建私有鏈首先需要配置一個創業區塊。下圖是創世區塊genesis.jsonConfig:config必不可少,否則建立不成功。ChildId不能為0。Alloc:用來預置賬號以及賬號的以太幣數量,因為私有鏈挖礦比較容易,所以我們不需要預置有幣
私有鏈部署、挖礦、轉賬
總結一下以太坊私有鏈搭建的過程,已經遇到的問題。 我們使用了LINUX,MAC OSX,WINDOWS三種平臺,執行go-ethereum。 一、go語言安裝 配置環境變數 命令列輸入sudo gedit ~/.bashrc 在開啟
基於星雲鏈的智慧合約與Dapp(四)——編寫並執行智慧合約
一般智慧合約需要以下幾個步驟: 1.編寫智慧合約 2.部署智慧合約 3.呼叫智慧合約,驗證合約執行結果 編寫智慧合約 Nebulas實現了NVM虛擬機器來執行智慧合約,NVM的實現使用了JavaScript V8引擎,所以我們可以使用JavaScr
存在漏洞的智慧合約(2)
2018年11月08日 11:04:27 weixin_43354545 閱讀數:7 個人分類: 合約漏洞
區塊鏈入門(5)Truffle 專案實戰,Solidity IDE, 智慧合約部署
在上一張我們學習了Truffle專案的建立,部署等相關內容,今天我們就來實戰一下. 今天我們要做3件事: 1) 學習搭建一個Solidity IDE(Remix). 2) 使用這個Solidity Ide編寫一份智慧合約. 3) 在我們前面第1,2
remix——智慧合約部署到私有鏈上
編寫簡單的合約 智慧合約的程式碼(簡單的資料存取) pragma solidity ^0.4.0; contract SimpleStorage { uint storedData; function set(uint x) public {
如何在私有區塊鏈上編寫、部署以及與以太坊進行互動的智慧合約
摘要:本文作者以極長的篇幅給出了在私有區塊鏈上編寫、部署以及與以太坊進行互動的智慧合約的較為完整的程式碼、相關細節步驟、使用者介面等。作者是希望藉助他這篇文章,大家可以自行在私有以太坊區塊鏈上編寫並部署一個智慧合約,以下是譯文。 這裡的規則是:如果通讀本文
以太坊私有鏈下智能合約部署
配置文件 臺電腦 問題: != 第一步 attribute int lock asc 上一篇文章實現了搭建私有鏈,以下進行智能合約的部署 一、 編寫合約 簡單的乘法例子: pragma solidity ^0.4.2; contract test { functio