
Python Flask學習_確認賬戶(使用電子郵件)
使用者的狀態可以分為:未登入,登入但賬戶未確認和登入且賬戶確認。
目標是:
1.未登入。顯示一個歡迎的頁面:

2.登入但未確認。顯示一個需要確認賬戶的頁面和連結。

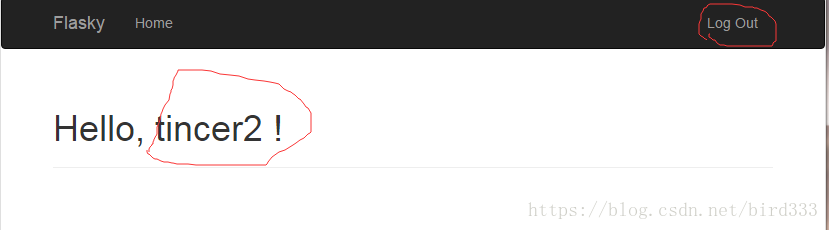
3.登入且賬戶確認:顯示歡迎XXX的頁面:
一、使用者登入
# app/main/views.py

@main.route('/',methods=['GET','POST'])
def index():
    '''
    檢視函式。主頁。
    :return: 渲染後的模板
    '''
    return render_template('index.html')
# app/templates/index.html {% extends "base.html" %} {% import "bootstrap/wtf.html" as wtf %} {% block title %}Flasky{% endblock %} {% block page_content %} <div class="page-header"> <h1>Hello, {% if current_user.is_authenticated %} #flask-login提供的current_user物件可用來確認狀態 {{ current_user.username }} {% else %} Stranger {% endif %} ! </h1> </div> {% endblock %}
還記得我們之前說,要想使用flask-login擴充套件,必須實現的4個方法裡就包括is_authenticated:如果使用者已登入返回True,否則返回False。
這樣,主頁就分別針對是否登入,顯示不同內容。
使用者想要登入,需要點選右上角Log In。Log In的連結是在app/templates/base.html中實現的,用來被其他模板繼承的。
# app/templates/base.html
{% block navbar %}
<div class="navbar navbar-inverse" role="navigation">
<div class="container">
<div class="navbar-header">
<button type="button" class="navbar-toggle" data-toggle="collapse" data-target=".navbar-collapse">
<span class="sr-only">Toggle navigation</span>
<span class="icon-bar"></span>
<span class="icon-bar"></span>
<span class="icon-bar"></span>
</button>
<a class="navbar-brand" href="{{ url_for('main.index') }}">Flasky</a>
</div>
<div class="navbar-collapse collapse">
<ul class="nav navbar-nav">
<li><a href="{{ url_for('main.index') }}">Home</a></li>
</ul>
<ul class="nav navbar-nav navbar-right">
{% if current_user.is_authenticated %}
<li><a href="{{ url_for('auth.logout') }}">Log Out</a> </li>
{% else %}
<li><a href="{{ url_for('auth.login') }}">Log In</a> </li>
{% endif %}
</ul> 但是,有一點不同:需要在log in的頁面,加入註冊的連結。
# app/templdates/auth/login.html
{% extends "base.html" %}
{% import "bootstrap/wtf.html" as wtf %}
{% block title %}Flasky - Login{% endblock %}
{% block page_content %}
<div class="page-header">
<h1>Login</h1>
</div>
<div class="col-md-4">
{{ wtf.quick_form(form) }}
<p>
New User?
<a href="{{ url_for('auth.register') }}">
Click Here to register
</a>
</p> 二、使用者註冊
# app/auth/views.py

@auth.route('/register', methods=['GET', 'POST'])
def register():
    '''註冊。資料庫更新,傳送確認郵件。'''
    form = RegistrationForm()
    if form.validate_on_submit():
        user = User(email=form.email.data, username=form.username.data, password=form.password.data)
        db.session.add(user)
        db.session.commit()
        token = user.generate_confirmation_token()  # 生成token必須要用到user.id,因此必須要先提交到資料庫
        send_mail(user.email, '註冊', 'auth/mail/confirm', user=user, token=token)
        flash('一份確認的郵件需要您到郵箱確認.')
        return redirect(url_for('main.index'))
return render_template('auth/register.html', form=form)register接受GET和POST兩種請求。GET請求,則返回空表單的這也頁面給使用者;POST請求,則更新到資料庫,生成令牌,把令牌傳送到註冊郵箱,讓使用者點選包含令牌的連結進行確認,返回主頁。
三、使用者登入郵箱,進行確認
郵件的內容
# app/templates/auth/mail/confirm.html

<p>Dear {{ user.username }},</p>
<p>Welcome to <b>Flasky</b>!</p>
<p>To confirm your account please <a href="{{ url_for('auth.confirm', token=token, _external=True) }}">click here</a>.</p>
<p>Alternatively, you can paste the following link in your browser's address bar:</p>
<p>{{ url_for('auth.confirm', token=token, _external=True) }}</p>
<p>Sincerely,</p>
<p>The Flasky Team</p>
<p><small>Note: replies to this email address are not monitored.</small></p>
url_for('auth.confirm', token=token, _external=True : 帶有token(令牌)的URL被髮給使用者,_external引數為True則返回的是完整的URL,其中包含協議(http://或https://)、主機名和埠。
處理的檢視函式是auth.confirm。
四、伺服器進行使用者確認
# app/auth/views.py

@auth.route('/confirm/<token>')
@login_required
def confirm(token):
    '''確認使用者 帶token的URL
    保護路由:只能在登入狀態下執行'''
    if current_user.confirmed:
        return redirect(url_for('main.index'))
    if current_user.confirm(token):
        db.session.commit()
        flash('you have confirmed your account. thanks!')
    else:
        flash('the confirmation link is invalid or has expired.')
    return redirect(url_for('main.index'))
if current_user.confirmed: 如果使用者已經確認過(使用者多次點選連結),則什麼也不幹,返回主頁。
current_user.confirm(token)進行使用者確認。改動提交到資料庫,顯示一條flash訊息。返回主頁。
Flask-Login提供的@login_required修飾器會保護這個路由(只有登入狀態下才能訪問這個路由)。因此,使用者點選確認郵件中的連結後,要先登入,然後才能執行這個檢視函式。
五、決定為確認賬戶的許可權
每個程式都可以決定使用者未確認賬戶之前可以做哪些操作。比如 ,允許未確認的賬戶登入,但只顯示一個頁面,這也頁面要求使用者確認賬戶。
我們的想法是:有一個針對全域性請求的鉤子,使用者登入但是未確認的任何訪問都將被重定向至確認的頁面。
# app/auth/views.py

@auth.before_app_request
def before_request():
    '''過濾未確認的賬戶'''
    if current_user.is_authenticated \
            and not current_user.confirmed \
            and request.endpoint[:5] != 'auth.' \
            and request.endpoint != 'static':
        return redirect(url_for('auth.unconfirmed'))

@auth.route('/unconfirmed')
def unconfirmed():
    '''處理未確認的使用者'''
    if current_user.is_anonymous or current_user.confirmed:
        return redirect(url_for('main.index'))
    return render_template('auth/unconfirmed.html')
@auth.before_app_request : 這是可以應用到全域性請求的鉤子(只能應用到藍本的是before_request),在訪問其它檢視函式前,都要經過此函式只需針對特定的情況(登入未確認)重定向到確認的頁面即可。
if current_user.is_authenticated and not current_user.confirmed \ :current_user登入但是沒有確認
and request.endpoint[:5] != 'auth.' \ #請求的端點不在此藍本中(auth)
and request.endpoint != 'static': #
return redirect(url_for('auth.unconfirmed'))
return redirect(url_for('auth.unconfirmed')) : 重定向至unconfrimed
來看 unconfirm
if current_user.is_anonymous or current_user.confirmed:
return redirect(url_for('main.index')) :如果使用者是管理員或者使用者已經確認,直接返回主頁。
return render_template('auth/unconfirmed.html') :其他情況返回unconfirmed.html
在unconfirmed.html中提供重新確認賬戶的連結:
# app/templates/auth/unconfirmed.html

{% extends "base.html" %}

{% block title %}Flasky - Confirm your account{% endblock %}

{% block page_content %}
<div class="page-header">
    <h1>
        Hello, {{ current_user.username }}                                                      <!--current_user可以直接用-->
    </h1>
    <h3>You have not confirmed your account yet.</h3>
    <p>
        Before you can access this site you need to confirm your account.
        Check your inbox, you should have received an email with a confirmation link.
    </p>
    <p>
        Need another confirmation email?
        <a href="{{ url_for('auth.resend_confirmation') }}">Click here</a>                    #連結到auth.resend_confirmation
    </p>
</div>
{% endblock %}
# app/auth/views.py
@auth.route('/confirm')
@login_required
def resend_confirmation():
'''保護路由。處理未認證的使用者重新進行認證'''
token = current_user.generate_confirmation_token()
send_mail(current_user.email, '確認您的賬戶', 'auth/mail/confirm', user=current_user, token=token)
flash('一封確認郵件已經發送到您的郵箱,請確認。')
return redirect(url_for('main.index'))