
Android 使用SwipeActionAdapter開源庫實現簡單列表的左右滑動操作
阿新 • • 發佈:2019-02-16
我們做listview左右滑動操作時,一般中情況下,都是像QQ那樣,左滑彈出操作選單(刪除、編輯),然後選擇選單操作; 這樣的效果不可謂不好,算是非常經典。 另外,有少數的APP,尤其是任務管理類的APP,更加註重listview的操作互動,例如ToDoList及滴答清單,這兩個APP對任務的操作是直接通過滑動列表進行操作的;效果圖如下:
1. 使用Android Studio新建專案匯入該開源庫:
匯入該庫,可以在build.gradle中新增:
當然,我更建議直接把該專案的library直接匯入到專案中,這樣會更加方便對程式碼進行修改。dependencies { compile 'com.wdullaer:swipeactionadapter:2.0.0' }
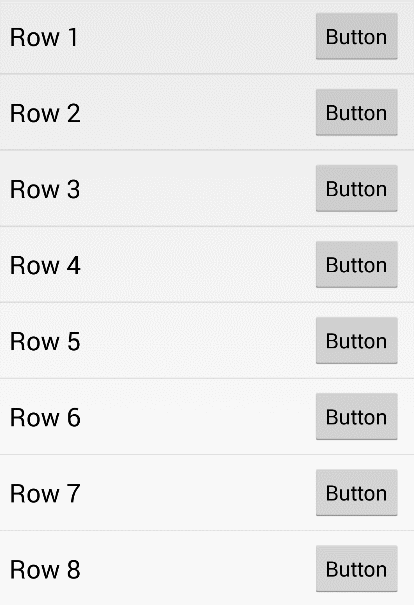
2. 首先,設定ListView顯示:
上面的程式碼很簡單,只是比正常使用ListView多了一步:SwipeActionAdapter mAdapter = new SwipeActionAdapter(stringAdapter); 就是在普通Adapter的基礎上包裹上一層SwipeActionAdapter。protected void onCreate(Bundle savedInstanceState) { super.onCreate(savedInstanceState); // Create an Adapter for your content String[] content = new String[20]; for (int i=0;i<20;i++) content[i] = "Row "+(i+1); ArrayAdapter<String> stringAdapter = new ArrayAdapter<String>( this, R.layout.row_bg, R.id.text, new ArrayList<String>(Arrays.asList(content)) ); // Wrap your content in a SwipeActionAdapter mAdapter = new SwipeActionAdapter(stringAdapter); // Pass a reference of your ListView to the SwipeActionAdapter mAdapter.setListView(getListView()); // Set the SwipeActionAdapter as the Adapter for your ListView setListAdapter(mAdapter); }
3. 為ListView的Item新增滑動時的背景色
protected void onCreate(Bundle savedInstanceState) {
    super.onCreate(savedInstanceState);

    // Create an Adapter for your content
    String[] content = new String[20];
    for (int i=0;i<20;i++) content[i] = "Row "+(i+1);
    ArrayAdapter<String> stringAdapter = new ArrayAdapter<String>(
            this,
            R.layout.row_bg,
            R.id.text,
            new ArrayList<String>(Arrays.asList(content))
    );

    // Wrap your content in a SwipeActionAdapter
    mAdapter = new SwipeActionAdapter(stringAdapter);

    // Pass a reference of your ListView to the SwipeActionAdapter
    mAdapter.setListView(getListView());

    // Set the SwipeActionAdapter as the Adapter for your ListView
    setListAdapter(mAdapter);

    // Set backgrounds for the swipe directions
    mAdapter.addBackground(SwipeDirection.DIRECTION_FAR_LEFT,R.layout.row_bg_left_far)
            .addBackground(SwipeDirection.DIRECTION_NORMAL_LEFT,R.layout.row_bg_left)
            .addBackground(SwipeDirection.DIRECTION_FAR_RIGHT,R.layout.row_bg_right_far)
            .addBackground(SwipeDirection.DIRECTION_NORMAL_RIGHT,R.layout.row_bg_right);
}
上述程式碼最後,既是新增背景的程式碼,程式碼很明瞭,在為不同的滑動過程,新增不同的背景,該背景其實就是一個佈局,例如row_bg_left_far.xml檔案:
<LinearLayout xmlns:android="http://schemas.android.com/apk/res/android"
    android:orientation="vertical" android:layout_width="match_parent"
    android:layout_height="?android:listPreferredItemHeight"
    android:background="@android:color/holo_blue_bright">
</LinearLayout>
此處,可以檢視下SwipeDirection.java類原始碼:
public enum SwipeDirection {
    // Constants
    DIRECTION_NORMAL_LEFT,
    DIRECTION_FAR_LEFT,
    DIRECTION_NORMAL_RIGHT,
    DIRECTION_FAR_RIGHT,
    DIRECTION_NEUTRAL;

    @NonNull
    public static List<SwipeDirection> getAllDirections(){
        return Arrays.asList(
                DIRECTION_FAR_LEFT,
                DIRECTION_FAR_RIGHT,
                DIRECTION_NEUTRAL,
                DIRECTION_NORMAL_LEFT,
                DIRECTION_NORMAL_RIGHT
        );
    }

    public boolean isLeft() {
        return this.equals(DIRECTION_NORMAL_LEFT) || this.equals(DIRECTION_FAR_LEFT);
    }

    public boolean isRight() {
        return this.equals(DIRECTION_NORMAL_RIGHT) || this.equals(DIRECTION_FAR_RIGHT);
    }
}
我們可以看出,主要的操作有四個: DIRECTION_NORMAL_LEFT(左滑一小段距離),DIRECTION_FAR_LEFT(左滑較長距離), DIRECTION_NORMAL_RIGHT(右滑一小段距離),DIRECTION_FAR_RIGHT(右滑較長距離)。
4. 新增ListView左右滑動監聽:
protected void onCreate(Bundle savedInstanceState) {
    super.onCreate(savedInstanceState);

    // Create an Adapter for your content
    String[] content = new String[20];
    for (int i=0;i<20;i++) content[i] = "Row "+(i+1);
    ArrayAdapter<String> stringAdapter = new ArrayAdapter<String>(
            this,
            R.layout.row_bg,
            R.id.text,
            new ArrayList<String>(Arrays.asList(content))
    );

    // Wrap your content in a SwipeActionAdapter
    mAdapter = new SwipeActionAdapter(stringAdapter);

    // Pass a reference of your ListView to the SwipeActionAdapter
    mAdapter.setListView(getListView());

    // Set the SwipeActionAdapter as the Adapter for your ListView
    setListAdapter(mAdapter);

    // Set backgrounds for the swipe directions
    mAdapter.addBackground(SwipeDirection.DIRECTION_FAR_LEFT,R.layout.row_bg_left_far)
            .addBackground(SwipeDirection.DIRECTION_NORMAL_LEFT,R.layout.row_bg_left)
            .addBackground(SwipeDirection.DIRECTION_FAR_RIGHT,R.layout.row_bg_right_far)
            .addBackground(SwipeDirection.DIRECTION_NORMAL_RIGHT,R.layout.row_bg_right);

    // Listen to swipes
    mAdapter.setSwipeActionListener(new SwipeActionListener(){
        @Override
        public boolean hasActions(int position, SwipeDirection direction){
            if(direction.isLeft()) return true; // Change this to false to disable left swipes
            if(direction.isRight()) return true;
            return false;
        }

        @Override
        public boolean shouldDismiss(int position, SwipeDirection direction){
            // Only dismiss an item when swiping normal left
            return direction == SwipeDirection.DIRECTION_NORMAL_LEFT;
        }

        @Override
        public void onSwipe(int[] positionList, SwipeDirection[] directionList){
            for(int i=0;i<positionList.length;i++) {
                int direction = directionList[i];
                int position = positionList[i];
                String dir = "";

                switch (direction) {
                    case SwipeDirection.DIRECTION_FAR_LEFT:
                        dir = "Far left";
                        break;
                    case SwipeDirection.DIRECTION_NORMAL_LEFT:
                        dir = "Left";
                        break;
                    case SwipeDirection.DIRECTION_FAR_RIGHT:
                        dir = "Far right";
                        break;
                    case SwipeDirection.DIRECTION_NORMAL_RIGHT:
                        AlertDialog.Builder builder = new AlertDialog.Builder(this);
                        builder.setTitle("Test Dialog").setMessage("You swiped right").create().show();
                        dir = "Right";
                        break;
                }
                Toast.makeText(
                        this,
                        dir + " swipe Action triggered on " + mAdapter.getItem(position),
                        Toast.LENGTH_SHORT
                ).show();
                mAdapter.notifyDataSetChanged();
            }
        }
    });
}
· public boolean hasActions(int position, SwipeDirection direction) : 該方法主要判斷滑動方向:左滑還是右滑。
· public boolean shouldDismiss(int position, SwipeDirection direction):該方法主要判斷list item滑動後是否有消失的動畫。
· public void onSwipe(int[] positionList, SwipeDirection[] directionList): 主要在該方法中處理滑動邏輯。
以上,就是SwipeActionAdapter的基本使用方式,相信善用該庫,一定會給APP增添幾分色彩,提高使用者體驗!