
Android studio之簽名配置
在上一篇教程中,我講解了Android studio多渠道打包的相關配置,在這一篇部落格中,我們將繼續講解Android studio的簽名配置。如果還沒有看過上一篇的朋友,或者還不瞭解多渠道打包的,可以先看這一篇部落格
Let’s go,讓我們開始新的教程。
我們可以新建一個專案,然後生成一個新的簽名檔案。
一般來說,經過這些操作之後,我們便可以通過點選左上角的Build->Generate Signed APK->Next,然後選擇對應的Build Type進行打包。
那對一些人來說,這樣也太麻煩了,每次都得輸入相關資訊,還得進行選擇,這怎麼能忍!
那麼有更簡單快捷的方法嗎?答案是有的。
我們可以在專案的app目錄下的build.gradle中進行簽名的配置。
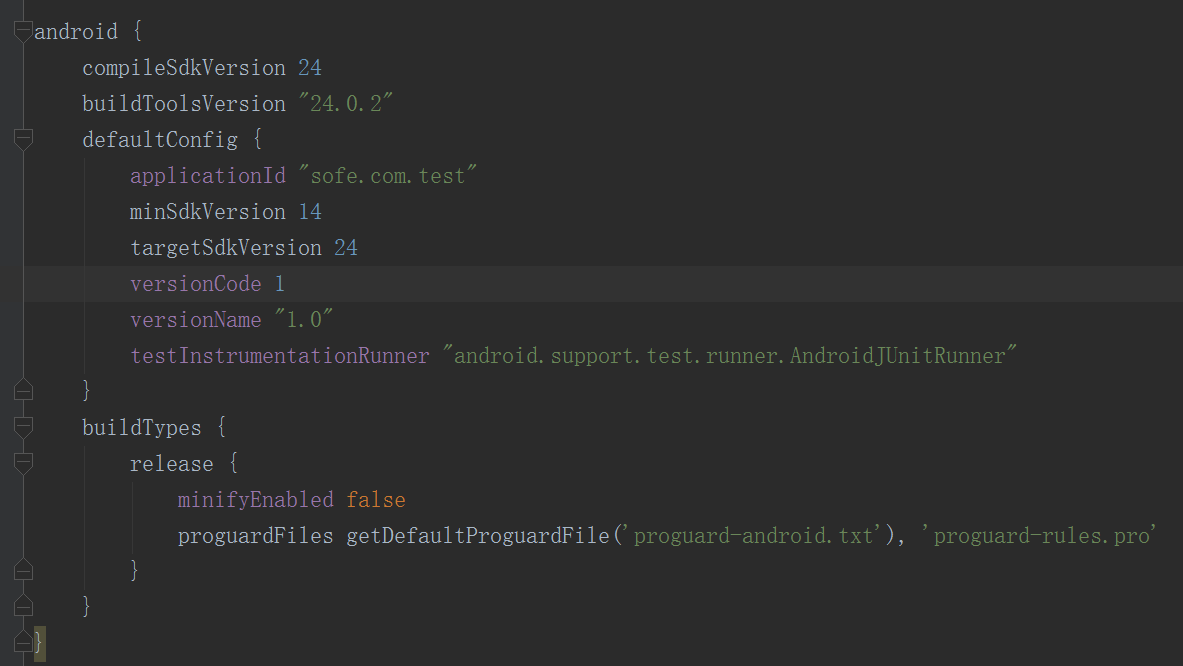
首先我們找到build.gradle下的android{},預設配置如下所示
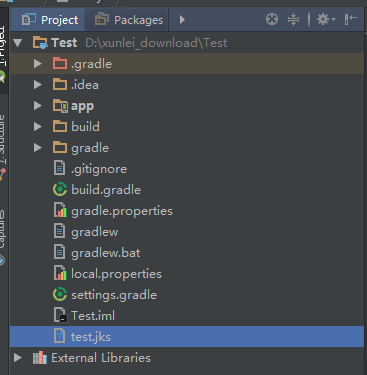
接下來呢,我們可以把專案的預覽模式調成Project,不調也行,只需把剛才生成的簽名檔案放至到對應的目錄下即可。我的做法是直接放至到專案下,如圖所示
然後,回到app下的build.gradle,在裡面增加這段程式碼
signingConfigs {
debug {
storeFile file('../test.jks')//簽名檔案路徑
storePassword "123456" 我來解釋一下,storeFile file對應的就是簽名檔案key的路徑,我們的簽名放在專案的直接子路徑下,而build.gradle在test/app下,所以我們要用 .. 找到專案的根路徑,再通過 / 找到對應的簽名檔案所在路徑。當然,你也可以自己配置簽名檔案的地址,只要能找到即可。
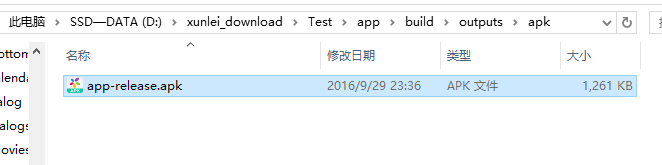
此時,我們在專案路徑下的app/build/outputs可以看到我們打包的apk,從名字可以看出,該APK是已經簽名的。那麼就是說,用程式碼配置,可以達到和使用圖形介面一樣的效果。
對了,這裡有一點需要注意,就是signingConfigs程式碼塊一定要寫在buildTypes前面,否則會報下面這種錯: Could not find property ‘debugConfig’ on SigningConfig container.
至此,我們的buildTypes的配置可以這樣:
buildTypes {
        debug {
            println("====== buildTypes.debug ======")
            signingConfig signingConfigs.debug
        }
        release {
            //是否混淆
            minifyEnabled false
            //是否移除無用資源
            zipAlignEnabled true
            println("====== buildTypes.release ======")
            signingConfig signingConfigs.release
            //混淆的配置檔案
            proguardFiles getDefaultProguardFile('proguard-android.txt'), 'proguard-rules.pro'
        }
    }
大家現在便可以通過命令列進行任意操縱,或者進行多渠道打包。
不過,上述的配置雖然配置簡單,但是存在不安全性,假如你的專案是開源的,你把簽名檔案的配置密碼之類的資訊用明文寫在build.gradle裡面,那是不是很不安全呢?
所以,我們可以這麼做。在專案路徑下新建一個.properties的檔案,或者直接local.properties下直接新增相關資訊即可。
我們可以直接在該檔案下新增:(填寫相關資訊)
keystore.path=../test.jks              //替換成自己的簽名路徑
keystore.password=123456
keystore.alias=test
keystore.alias_password=123456
那麼,在build.gradle下面,為了不用明文顯示,我們首先要獲得key的相關配置,所以我們可以在app的build.gradle下面新增該程式碼
def keystoreFilepath = ''
def keystorePSW = ''
def keystoreAlias = ''
def keystoreAliasPSW = ''
// default keystore file, PLZ config file path in local.properties
def keyfile = file('s.keystore.temp')

Properties properties = new Properties()
// local.properties file in the root director
properties.load(project.rootProject.file('local.properties').newDataInputStream())
keystoreFilepath = properties.getProperty("keystore.path")

if (keystoreFilepath) {
    keystorePSW = properties.getProperty("keystore.password")
    keystoreAlias = properties.getProperty("keystore.alias")
    keystoreAliasPSW = properties.getProperty("keystore.alias_password")
    keyfile = file(keystoreFilepath)
}
首先,便是給key賦預設值,然後根據Properties的配置檔案,然後根據我們在local.properties下的配置引數keystore.password等獲取簽名檔案的配置資訊。
這裡有一點需要強調,在git版本控制的專案中,我們可以看到我們專案下有一個.gitignore的檔案,裡面的配置大概如下所示
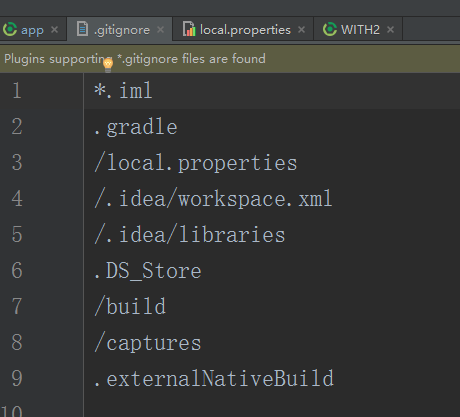
我們可以看到/local.properties,意思就是說local.properties預設是不新增到版本控制裡面的,因為local.properties儲存的是我們環境資源的一些相關資訊,如sdk的路徑。故我們可以在local.properties下配置簽名信息而不用擔心金鑰外洩。對於開源專案來說,是非常好的。
那麼,此時此刻,我們app/build.gradle下的signingConfigs可以改為:
signingConfigs {
        debug {
            storeFile keyfile
            storePassword keystorePSW
            keyAlias keystoreAlias
            keyPassword keystoreAliasPSW
            println("====== signingConfigs.debug ======")
        }
        myConfig {
            storeFile keyfile
            storePassword keystorePSW
            keyAlias keystoreAlias
            keyPassword keystoreAliasPSW
            println("====== signingConfigs.release ======")
        }
 }
相應的,buildTypes也可以配置成這樣
buildTypes {
        debug {
            println("====== buildTypes.debug ======")
            signingConfig signingConfigs.debug
        }
        release {
            //是否混淆
            minifyEnabled false
            //是否移除無用資源
            zipAlignEnabled true
            //混淆配置
            proguardFiles getDefaultProguardFile('proguard-android.txt'), 'proguard-rules.pro'
            //簽名檔案存在,則簽名
            if (keyfile.exists()) {
                println("WITH -> buildTypes -> release: using jks key")
                signingConfig signingConfigs.myConfig
            }else {
                println("WITH -> buildTypes -> release: using default key")
            }
            applicationVariants.all { variant ->
                variant.outputs.each { output ->
                    def outputFile = output.outputFile
                    if (outputFile != null && outputFile.name.endsWith('.apk')) {
                        // 輸出apk名稱為ruijie_v1.0_wandoujia.apk
                        def fileName = "ruijie_v${defaultConfig.versionName}_${variant.productFlavors[0].name}.apk"
                        output.outputFile = new File(outputFile.parent, fileName)
                    }
                }
            }
        }
這樣的話,當我們的專案是開源的,那麼我們不會上傳簽名檔案,我們通過上述程式碼keyfile.exists()進行判斷是否有簽名,那麼其他人打包出來的apk是未簽名的。所以能夠保證apk簽名的安全性。
附加一下:build.gradle的相關配置:
有時候我們打包會顯示lint報錯,那麼我們可以新增
    lintOptions {
        abortOnError false
    }
dx工具(android將jar包轉成dex格式二進位制jar包工具)
這將應用所有使用dex的task。解決65535的配置
dexOptions {
        incremental true
        javaMaxHeapSize "4g"
        //關閉預編譯
        preDexLibraries = false
    }
或者指定JDK的編譯版本
compileOptions {
        sourceCompatibility JavaVersion.VERSION_1_8
        targetCompatibility JavaVersion.VERSION_1_8
    }
打包忽略掉第三方jar相同的檔案
 packagingOptions {
        exclude 'META-INF/DEPENDENCIES.txt'
        exclude 'META-INF/LICENSE.txt'
        exclude 'META-INF/NOTICE.txt'
        exclude 'META-INF/NOTICE'
        exclude 'META-INF/LICENSE'
        exclude 'META-INF/DEPENDENCIES'
        exclude 'META-INF/notice.txt'
        exclude 'META-INF/license.txt'
        exclude 'META-INF/dependencies.txt'
        exclude 'META-INF/LGPL2.1'
    }
最後,附上build.gradle部分配置的相關程式碼:
apply plugin: 'com.android.application'
apply plugin: 'me.tatarka.retrolambda'
apply plugin: 'android-apt'

def keystoreFilepath = ''
def keystorePSW = ''
def keystoreAlias = ''
def keystoreAliasPSW = ''
// default keystore file, PLZ config file path in local.properties
def keyfile = file('s.keystore.temp')

Properties properties = new Properties()
// local.properties file in the root director
properties.load(project.rootProject.file('local.properties').newDataInputStream())
keystoreFilepath = properties.getProperty("keystore.path")

if (keystoreFilepath) {
    keystorePSW = properties.getProperty("keystore.password")
    keystoreAlias = properties.getProperty("keystore.alias")
    keystoreAliasPSW = properties.getProperty("keystore.alias_password")
    keyfile = file(keystoreFilepath)
}

android {
    compileSdkVersion 24
    buildToolsVersion "24.0.2"
    defaultConfig {
        applicationId "com.example.vizax.with"
        minSdkVersion 15
        targetSdkVersion 24
        versionCode 1
        versionName "1.0"
        testInstrumentationRunner "android.support.test.runner.AndroidJUnitRunner"
        multiDexEnabled true
    }
    compileOptions {
        sourceCompatibility JavaVersion.VERSION_1_8
        targetCompatibility JavaVersion.VERSION_1_8
    }
    // 這個是解決lint報錯的程式碼
    lintOptions {
        abortOnError false
    }

    dexOptions {
        incremental true
        javaMaxHeapSize "4g"
        //關閉預編譯
        preDexLibraries = false
    }
    /*android {
        productFlavors {
            kuan {
                manifestPlaceholders = [UMENG_CHANNEL_VALUE: "kuan"]
            }
            xiaomi {
                manifestPlaceholders = [UMENG_CHANNEL_VALUE: "xiaomi"]
            }
            qh360 {
                manifestPlaceholders = [UMENG_CHANNEL_VALUE: "qh360"]
            }
            baidu {
                manifestPlaceholders = [UMENG_CHANNEL_VALUE: "baidu"]
            }
            wandoujia {
                manifestPlaceholders = [UMENG_CHANNEL_VALUE: "wandoujia"]
            }
        }
    }*/
    android {
        productFlavors {
            kuan {}
            xiaomi {}
            qh360 {}
            baidu {}
            wandoujia {}
            yingyongbao {}
        }

        productFlavors.all {
            flavor -> flavor.manifestPlaceholders = [UMENG_CHANNEL_VALUE: name]
        }
    }

    signingConfigs {
        debug {
            storeFile keyfile
            storePassword keystorePSW
            keyAlias keystoreAlias
            keyPassword keystoreAliasPSW
            println("====== signingConfigs.debug ======")
        }
        myConfig {
            storeFile keyfile
            storePassword keystorePSW
            keyAlias keystoreAlias
            keyPassword keystoreAliasPSW
            println("====== signingConfigs.release ======")
        }
        /*release {
            storeFile file('../with.jks') //簽名檔案路徑
            storePassword "with123456"
            keyAlias "with"
            keyPassword "with123456"  //簽名密碼
        }*/
    }

    //打包忽略掉第三方jar相同的檔案
    packagingOptions {
        exclude 'META-INF/DEPENDENCIES.txt'
        exclude 'META-INF/LICENSE.txt'
        exclude 'META-INF/NOTICE.txt'
        exclude 'META-INF/NOTICE'
        exclude 'META-INF/LICENSE'
        exclude 'META-INF/DEPENDENCIES'
        exclude 'META-INF/notice.txt'
        exclude 'META-INF/license.txt'
        exclude 'META-INF/dependencies.txt'
        exclude 'META-INF/LGPL2.1'
    }

    /*signingConfigs程式碼塊一定要寫在buildTypes前面,否則會報下面這種錯:
    Could not find property 'debugConfig' on SigningConfig container.
    簽名密碼寫在gradle中不安全,故最好在打包上線的時候將相關程式碼註釋掉。*/
    buildTypes {
        debug {
            println("====== buildTypes.debug ======")
            signingConfig signingConfigs.debug
        }
        release {
            //是否混淆
            minifyEnabled false
            zipAlignEnabled true
            proguardFiles getDefaultProguardFile('proguard-android.txt'), 'proguard-rules.pro'
            if (keyfile.exists()) {
                println("WITH -> buildTypes -> release: using jks key")
                signingConfig signingConfigs.myConfig
            }else {
                println("WITH -> buildTypes -> release: using default key")
            }
            applicationVariants.all { variant ->
                variant.outputs.each { output ->
                    def outputFile = output.outputFile
                    if (outputFile != null && outputFile.name.endsWith('.apk')) {
                        // 輸出apk名稱為ruijie_v1.0_wandoujia.apk
                        def fileName = "ruijie_v${defaultConfig.versionName}_${variant.productFlavors[0].name}.apk"
                        output.outputFile = new File(outputFile.parent, fileName)
                    }
                }
            }
        }
    }

    /*  左下角開啟Terminal,輸入命令列
        如果我們想打包wandoujia渠道的release版本,執行如下命令就好了:
        gradlew assembleWandoujiaRelease
        如果我們想打包wandoujia渠道的debug版本,執行如下命令就好了:
        gradlew assembleWandoujiaDebug
        如果我們只打wandoujia渠道版本,則:
        gradlew assembleWandoujia
        此命令會生成wandoujia渠道的Release和Debug版本
        同理我想打全部Release版本:
        gradlew assembleRelease*/
}
至於混淆的相關配置,稍後我在下一篇部落格進行詳細講解。
如果有任何疑問,歡迎留言。謝謝。