ns-allinone-3.X(simulator模擬器)簡單配置
一,引言:
談談NS-3的用途吧。我們知道在網際網路資料的暴增之後,面對來自資料壓力的不僅僅是伺服器,對我們來說是對大資料的操作。而我們可以充分ns-3對網路資料進行優化和整合,想想它的用處以及對網路的熱愛,筆者瞬間就路轉粉了。似乎飛蛾撲火般的撲到這個行當之中了。
以下是執行ns-3庫的基本條件:
1)環境:虛擬機器+Ubuntu14.04+ns-allinone-3.X+Subversion管理工具
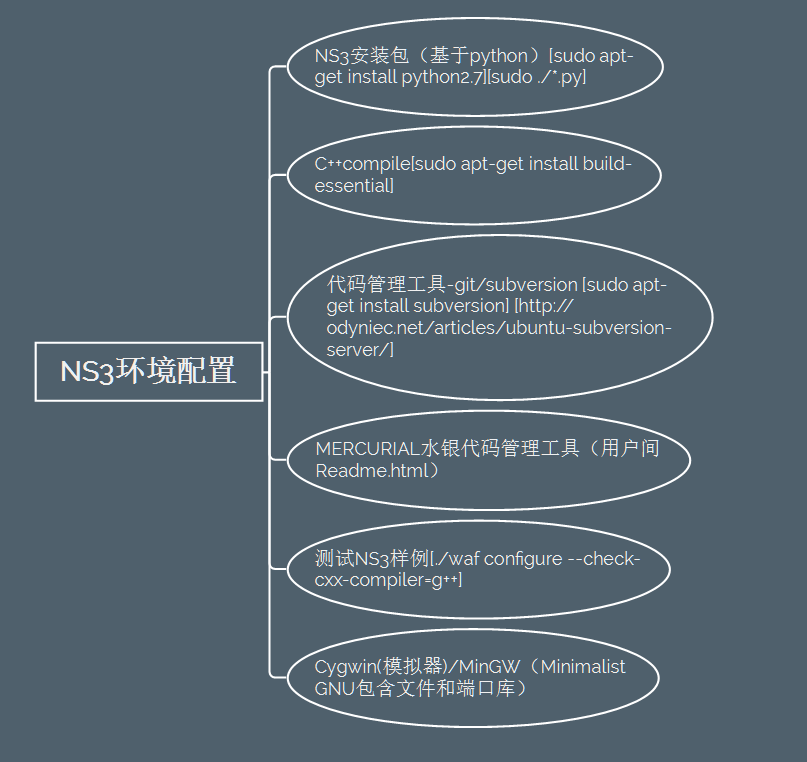
2)導圖如下,本文以此作為講解的順序。
二,正文:
疑問請參考官網:https://www.nsnam.org/support/faq
NS3官方文件:https://www.nsnam.org/ns-3-25/documentation
1)在Ubuntu系統中利用APT下載NS3安裝包,命令如下:
sudo apt-get install python2.7;(下載編譯器)
sudo ./build.py;(執行build檔案,安裝ns包)
2)因為ns3中有庫檔案涉及到gcc++編譯,因此需要下載內建庫,命令如下:
sudo apt-get install build-essential
5)在安裝好了NS3庫之後,以及配置完成之後,我們可以執行一下NS3包當中的測試樣例,NS3庫module的基本組成參考官網module:
https://www.nsnam.org/developers/maintainers/
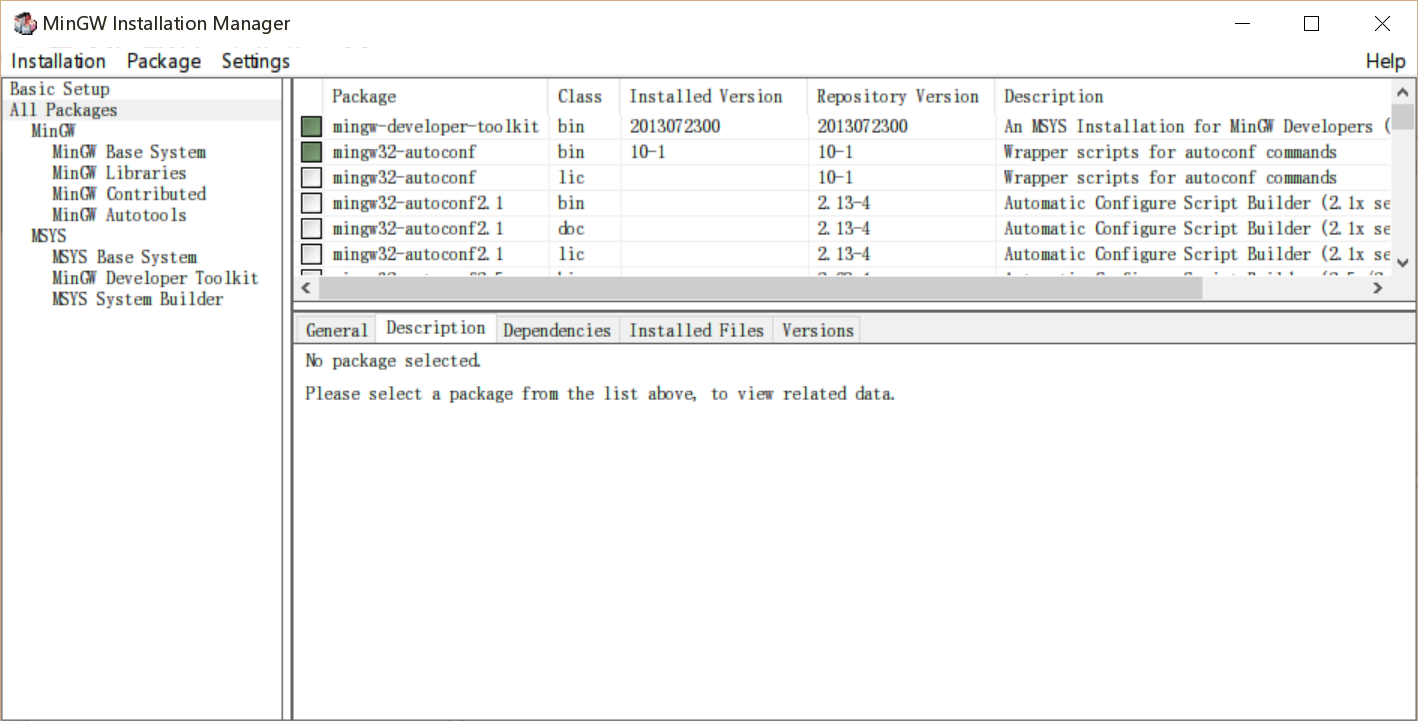
6)windows環境下的Unix模擬器Cygwin,以及簡單的CNU庫MinGW下載及安裝

三,正文部分詳解:
1)安裝NS3:
筆者在此之前通過samba伺服器建立了(Linux+Windows)的網路共享, 以及apt下載外掛;
1.Downloading development tree(命令):
hg clone http://code.nsnam.org/ns-3-allinone
cd ns-3-allinone
./download.py
2.你會得到以下檔案
build.py* dist.py* ns-3-dev/ pybindgen/ util.py 2)程式碼管理工具介紹以及安裝:
    1.“Setting Up an Ubuntu Subversion Server”Subversion安裝的基本方法
    下載:
    $ sudo apt-get install subversion
    建立庫目錄:
    $ sudo mkdir /usr/local/svn
    建立庫檔案目錄:
    $ sudo mkdir /usr/local/svn/repos
    使用者獲得庫目錄的許可權:
    $ sudo groupadd svn
    使用者組許可權的修改:
    $ sudo chgrp svn /usr/local/svn/repos
    修改管理員讀寫許可權:
    $ sudo chmod g+w /usr/local/svn/repos
    修改新增庫檔案的許可權:
    $ sudo chmod g+s /usr/local/svn/repos
    指定庫檔案使用者
    $ sudo usermod -a -G svn xxxx
    登出使用者之後測試時候成功:
    $ groups
    xxxx adm dialout cdrom plugdev lpadmin admin sambashare svn
    新增其他使用者:
    $ sudo usermod -a -G svn jimmy
    $ sudo usermod -a -G svn craig

   2.測試管理工具Test
    提前修改建立檔案的許可權:
    $ umask 002
    通過subversion建立測試樣例:
    $ svnadmin create /usr/local/svn/repos/test
    還原umask:
    $ umask 022
    測試庫是否建立成功:
    $ svn checkout file:///usr/local/svn/repos/test
    Checked out revision 0.
    建立庫樣例:
    $ cd test
    $ echo 'Hello, World!' > hello.txt
    通過svn新增hello.txt:
    $ svn add hello.txt
    A         hello.txt
    將庫樣例指派到Test庫目錄當中:
    $ svn commit -m "Added a 'hello world' text file."
    Adding         hello.txt
    Transmitting file data .
    Committed revision 1.

    3.使用者通過protocol SSH加密/不加密 方式訪問庫目錄(以SSH加密為樣例)
    svn檢驗:
    $ svn checkout svn+ssh://192.168.10.11/usr/local/svn/repos/test --username XXXX
    登陸密碼:
    XXXX@192.168.10.11's password:
    返回庫目錄資訊:
    A test/hello.txt
    Checked out revision 2.

    4.SVNserve初始化指令碼:
    自定義建立svnserve服務:
    $ sudo chmod +x /etc/init.d/svnserve
    通過update-rc.d初始化svnserve服務:
    $ sudo update-rc.d svnserve defaults
 Adding system startup for /etc/init.d/svnserve ...
   /etc/rc0.d/K20svnserve -> ../init.d/svnserve
   /etc/rc1.d/K20svnserve -> ../init.d/svnserve
   /etc/rc6.d/K20svnserve -> ../init.d/svnserve
   /etc/rc2.d/S20svnserve -> ../init.d/svnserve
   /etc/rc3.d/S20svnserve -> ../init.d/svnserve
   /etc/rc4.d/S20svnserve -> ../init.d/svnserve
   /etc/rc5.d/S20svnserve -> ../init.d/svnserve
   開啟服務:
   $ sudo /etc/init.d/svnserve start
   svnserve程式碼請參考:
    [http://odyniec.net/articles/ubuntu-subversion-server/svnserve]
3.NS3樣例測試:
進入NS-3資料夾,裡面會有一些樣例,直接執行即可。
四,後續:
以後會根據自身的學習逐步講解和分析其中的例項。
Module模組:
- antenna aodv applications bake-build-system bridge buildings click
config-store core csma csma-layout dsdv dsr energy fd-net-device
flow-monitor internet (IP, ICMP, UDP) internet (routing) internet
(TCP) internet (NSC TCP) internet-apps lte (PHY and MAC) lte (RLC
and above, core, EPC) lte (general) mesh mobility mpi netanim
network nix-vector olsr openflow point-to-point point-to-point-layout
propagation spectrum stats tap-bridge test framework tools
topology-read traffic-control uan virtual-net-device visualizer wifi
(lead) wifi (802.11n aspects) wifi (sleep/energy aspects) wifi
(rate control aspects) wimax python bindings tutorial tutorial-pt-br
manuals Doxygen waf build system wiki
Tools工具:
- Bugzilla Mercurial Waf Rietveld Mailing-Lists Jenkins-CI
IRC


