Media Player音樂播放器 的學習
阿新 • • 發佈:2019-02-18
佈局:
<LinearLayout xmlns:android="http://schemas.android.com/apk/res/android"
xmlns:tools="http://schemas.android.com/tools"
android:layout_width="match_parent"
android:layout_height="match_parent"
tools:context=".MainActivity"
android:orientation="horizontal">
<Button
android:layout_width 程式碼實現:
步驟:
public class MainActivity extends Activity{
    @Override
    protected void onCreate(Bundle savedInstanceState) {
        super.onCreate(savedInstanceState);
    }
    public  void play(View view){

    }
    public  void pause(View view){

    }
    public  void continuePlay(View view){

    }
    public  void stop(View view){

    }
}
這時候需要一個服務類:
建立服務類MusicService繼承service
public class SSSMusicService extends Service {
    @Override
    public IBinder onBind(Intent intent) {
        return null;
    }
}
並配置服務
<service android:name=".MusicService"/>自然就需要幾個方法:
public class SSSMusicService extends Service {
    @Override
    public IBinder onBind(Intent intent) {
        return null;
    }
    private void play(){

    }
    private void pause(){

    }
    private void continuePlay(){

    }
    private void stop(){

    }
}
在MainActivity中呼叫的方法其實是service裡面的4個方法,
這個時候需要一個充當中間人的物件;
public class SSSMusicService extends Service {
    @Override
    public IBinder onBind(Intent intent) {
        return new MusicBinder();
    }
    class  MusicBinder extends Binder{

    }
    private void play(){

    }
    private void pause(){

    }
    private void continuePlay(){

    }
    private void stop(){

    }
}
這裡需要一個介面:
新建一個介面MusicInterface.java
public interface MusicInterface {
     void play();

     void pause();

     void stop();

     void continuePlay();
}
實現介面:
class MusicBinder extends Binder implements MusicInterface{
    @Override
    public void play() {

    }

    @Override
    public void pause() {

    }

    @Override
    public void stop() {

    }

    @Override
    public void continuePlay() {

    }
}
因為它會呼叫服務的方法所以填充程式碼如下:
 class MusicBinder extends Binder implements MusicInterface {

        @Override
        public void play() {
            MusicService.this.play();
        }

        @Override
        public void pause() {
            MusicService.this.pause();
        }

        @Override
        public void stop() {
            MusicService.this.stop();
        }

        @Override
        public void continuePlay() {
            MusicService.this.continuePlay();
        }
    }
然後需要繫結服務得到中間者物件:
先start 再繫結 –>還需要一個服務連線物件
MainActivity.java
public class MainActivity extends Activity {

    private MusicInterface mi;

    @Override
    protected void onCreate(Bundle savedInstanceState) {
        super.onCreate(savedInstanceState);
        setContentView(R.layout.activity_main);

        Intent intent = new Intent(this, MusicService.class);
        startService(intent);
        bindService(intent, new MyServiceConn(), BIND_AUTO_CREATE);

    }

    // 服務的連線物件
    class MyServiceConn implements ServiceConnection {

        @Override
        public void onServiceConnected(ComponentName name, IBinder service) {
            mi = (MusicInterface) service;
        }

        @Override
        public void onServiceDisconnected(ComponentName name) {

        }
    }
public void play(View view) {
        mi.play();
    }

    public void pause(View view) {
        mi.pause();
    }

    public void stop(View view) {
        mi.stop();
    }

    public void continuePlay(View view) {
        mi.continuePlay();
    }

}
下面開始設定播放:
需要一個MediaPlayer播放器
定義MediaPlayer;
MediaPlayer player;在服務建立的時候建立,在服務銷燬的時候銷燬;
 @Override
    public void onCreate() {
        super.onCreate();
        player=new MediaPlayer();
    }

    @Override
    public void onDestroy() {
        super.onDestroy();

        player.release();
        player=null;
    }
private void play() {
player.reset();
try {
player.setDataSource("sdcard/My Love.mp3");
player.prepare();
} catch (IOException e) {
e.printStackTrace();
}
player.start();
}
private void pause() {
player.pause();
}
private void stop() {
player.stop();
}
private void continuePlay() {
player.start();
}另外,注意新增許可權:
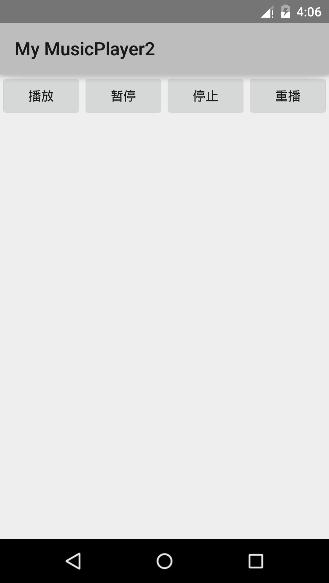
<uses-permission android:name="android.permission.READ_EXTERNAL_STORAGE"/>效果如下:(僅介面)

