
android向量圖之VectorDrawable ,自由又方便的填充色彩
背景
偶然間,在極客學院看到一個視訊:VectorDrawable 原理和使用。很慚愧,以前還真沒用到,於是,今天就來學習下。2014年6月26日的I/O 2014開發者大會上谷歌正式推出了Android L,它帶來了全新的設計語言Material Design,新的API也提供了這個類VectorDrawable 。也就是android支援SVG型別的資源也就是向量圖。想到向量圖,自然就會想到點陣圖,何為向量圖,何為點陣圖?先來說說點陣圖吧,我們經常用的png,jpg就是點陣圖了,他是由一個單元一個單元的畫素組成的。當小icon遇到大螢幕手機的時候,icon如果被撐開那就是馬賽克一樣啦。這可不是我們想要的。而向量圖正式和它相反。向量圖是由點,線,矩形,圓,弧線等組成的,它不會失真,而且減小檔案的儲存空間。學會了,一些簡單的icon,我們自己來畫,而且更美觀,符合Material Design設計,何樂而不為。
概念
說了那麼多,還是來看看官網怎麼描述的:
- 在xml定義
<vector>標籤畫出自己的向量圖。
就是這樣簡單的一句話。
用法
<vector> 包含很多元素來幫助我們畫出自己的向量圖,下面,我們就來寫兩個個例子來使用它們。這裡就直接拿官網的例子來學習了。
1. 畫一個三角形,如下圖。
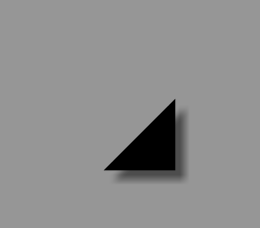
我們先來定義下vectordrawable.xml :
<vector xmlns:android="http://schemas.android.com/apk/res/android"
android:height="64dp"
android:width 基本結構就是這樣,我們可以看到他有兩個寬高度描述, android:height和android:height支援所有的尺寸單元,一般我們用dp,它指的是向量圖的寬高大小。android:viewportWidth和 android:viewportHeight可以理解為在64dp裡面取600個點做為座標來繪製下面的圖形。然後我們可以看到<group>標籤,它主要是為下面path繪製的整體部分進行一些操作,比如這裡的以軸心(300,300)對它逆時針偏移45度,或者可以通過<group>標籤name屬性來對它進行動畫操作等等。android:pivotX和android:pivotY指的就是軸心x,y軸。有了外面的整體結構,接下來就是通過<path> 標籤進行整體的繪製命令。首先是path的名字,有了這個名字我們就可以指向哪個path動畫。android:fillColor指的是封閉圖形塊具體的顏色。然後android:pathData指的就是一些繪製命令。結合下面圖來學習繪製命令:
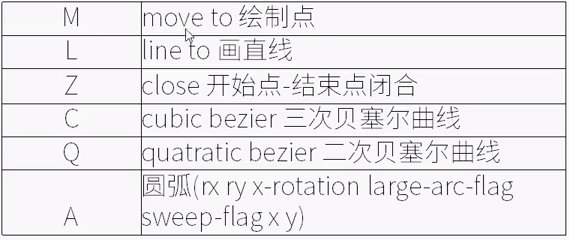
大寫絕對小寫相對引數加逗號,和canvas繪製差不多。解釋下最後一個A, rx和ry指的是以(x,y)為軸心的x軸和y軸的半徑,x-rotation指的是x軸旋轉角度,large-arc-flag 為0時表示取小弧度,1時取大弧度,sweep-flag 0取逆時針方向,1取順時針方向 。結合下面圖來理解
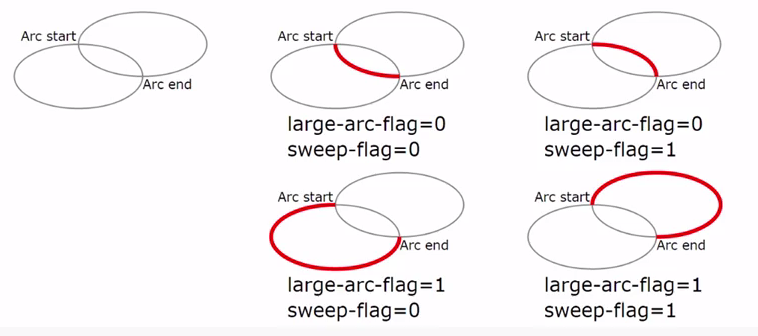
這裡以large-arc-flag=0,sweep-flag=0來寫一個path看看真正效果:
程式碼如下:
  <path
            android:name="v"
            android:strokeColor="#000000"
            android:strokeWidth="2"
            android:pathData="A 10 10 0 0 0 100 200"
            />
產生的效果圖:
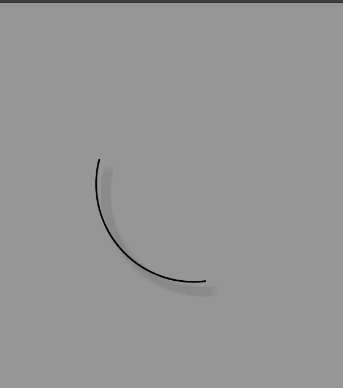
是和上面說的一樣吧!
2. 畫一個心型,如下圖。
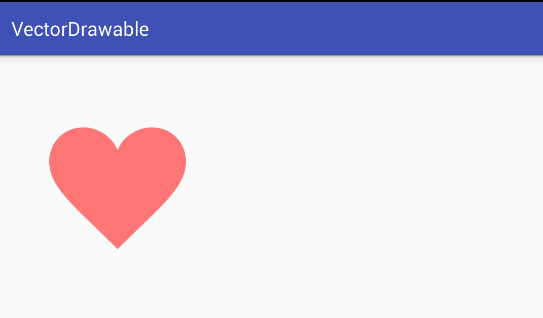
程式碼如下:
<?xml version="1.0" encoding="utf-8"?>
<vector xmlns:android="http://schemas.android.com/apk/res/android"
    android:height="256dp"
    android:width="256dp"
    android:viewportWidth="32"
    android:viewportHeight="32">
    <!-- draw a path -->
<path android:fillColor="#8fff"
    android:pathData="M20.5,9.5
                        c-1.955,0,-3.83,1.268,-4.5,3
                        c-0.67,-1.732,-2.547,-3,-4.5,-3
                        C8.957,9.5,7,11.432,7,14
                        c0,3.53,3.793,6.257,9,11.5
                        c5.207,-5.242,9,-7.97,9,-11.5
                        C25,11.432,23.043,9.5,20.5,9.5z" />
</vector>
和上面類似,主要是android:pathData改變了。從(20.5,9.5)開始,然後就是後面畫貝塞爾曲線,相對起點水平左移1.955,垂直不移動確定一個點,然後相對起點水平左移動-3.83,垂直往下移動1.268確定一個點,再相對起點水平左移4.5,垂直往下移動3確定一個點,通過這三個點畫貝塞爾曲線,往下的類似原理。
ps: 一些簡單的命令我們是知道了,那麼svg這麼多命令,android裡面這麼多icon,總不能讓自己畫吧,我們怎麼去學習這些命令,去畫這些icon呢。還好學習命令我們可以用android:path規則 ,畫icon的 。這樣我們就可以畫出自己想要的資料來了。
怎麼用在ImageView的背景上面呢?很簡單,來看下面的程式碼:
activity_main.xml
<?xml version="1.0" encoding="utf-8"?>
<LinearLayout xmlns:android="http://schemas.android.com/apk/res/android"
    android:layout_width="match_parent"
    android:layout_height="match_parent"
    xmlns:app="http://schemas.android.com/apk/res-auto">
    <ImageView
        android:layout_width="wrap_content"
        android:layout_height="wrap_content"
        app:srcCompat="@drawable/vectordrawable" />
</LinearLayout>
這樣效果是不是可以看到了呢,執行下,效果如上面心型,然後試著去改下他的大小,其實他不會變形的。
向量圖動畫AnimatedVectorDrawable
我們還是以官網demo來測試。
- 新建一個xml檔案vector_drawable.xml,放在drawable裡面,程式碼如下:
<vector xmlns:android="http://schemas.android.com/apk/res/android"
    android:height="64dp"
    android:width="64dp"
    android:viewportHeight="600"
    android:viewportWidth="600" >
    <group
        android:name="rotationGroup"
        android:pivotX="300.0"
        android:pivotY="300.0"
        android:rotation="45.0" >
        <path
            android:name="v"
            android:fillColor="#000000"
            android:pathData="M300,70 l 0,-70 70,70 0,0 -70,70z" />
    </group>
</vector>- 然後新建一個xml檔案vector_drawable_anim.xml,由於AnimatedVectorDrawable在support:appcompat-v7:23.3相容到android L(5.0)以上。所以我們放置在drawable-v21資料夾下,程式碼如下:
<animated-vector xmlns:android="http://schemas.android.com/apk/res/android"
    android:drawable="@drawable/vector_drawable" >
    <target
        android:name="rotationGroup"
        android:animation="@anim/rotation" />
    <target
        android:name="v"
        android:animation="@anim/path_morph" />
</animated-vector>
這裡我們需要指定一個android:drawable,指向vector_drawable_anim.xml檔案,然後根據group的name或者path的name進行動畫設定。指定的動畫分別為rotation和path_morph
- 新建rotation和path_morph兩個動畫放置在anim資料夾下,程式碼如下:
rotation.xml
<?xml version="1.0" encoding="utf-8"?>
<set xmlns:android="http://schemas.android.com/apk/res/android">
    <objectAnimator
        android:duration="6000"
        android:propertyName="rotation"
        android:valueFrom="0"
        android:valueTo="360" />
</set>
path_morph.xml
<?xml version="1.0" encoding="utf-8"?>
<set xmlns:android="http://schemas.android.com/apk/res/android">
        <objectAnimator
            android:duration="3000"
            android:propertyName="pathData"
            android:valueFrom="M300,70 l 0,-70 70,70 0,0   -70,70z"
            android:valueTo="M300,70 l 0,-70 70,0  0,140 -70,0 z"
            android:valueType="pathType"/>
</set>- 然後是5.0以下activity_main.xml,放置在layout下:
<LinearLayout xmlns:android="http://schemas.android.com/apk/res/android"
    android:layout_width="match_parent"
    android:layout_height="match_parent"
    xmlns:app="http://schemas.android.com/apk/res-auto">
    <ImageView
        android:id="@+id/image_view"
        android:layout_width="400dp"
        android:layout_height="400dp"
        app:srcCompat="@drawable/vector_drawable"/>
</LinearLayout>
然後是5.0以上activity_main.xml,放置在layout-v21資料夾下:
<?xml version="1.0" encoding="utf-8"?>
<LinearLayout xmlns:android="http://schemas.android.com/apk/res/android"
    android:layout_width="match_parent"
    android:layout_height="match_parent"
    xmlns:app="http://schemas.android.com/apk/res-auto">
    <ImageView
        android:id="@+id/image_view"
        android:layout_width="400dp"
        android:layout_height="400dp"
        app:srcCompat="@drawable/vector_drawable_anim" />
</LinearLayout>- 最後MainActivity新增程式碼:
 ImageView imageView = (ImageView) findViewById(R.id.image_view);
        Drawable drawable = imageView.getDrawable();
        //AnimatedVectorDrawableCompat實現了Animatable介面
        if (drawable instanceof Animatable){
            ((Animatable) drawable).start();
        }
然後我們執行在5.0以下是不帶動畫效果的。效果和上面三角形效果圖一樣,這裡我們看下5.0以上的效果:
這樣我們就實現了簡單的動畫。