
【iOS開發新手上路】教你一步一步建立一個功能齊全的UITableViewController(上)
本人還是學生,雖然接觸iOS開發時間有一兩年,但是都是仿照現有的例子做做,有什麼錯誤希望各位大神能指出
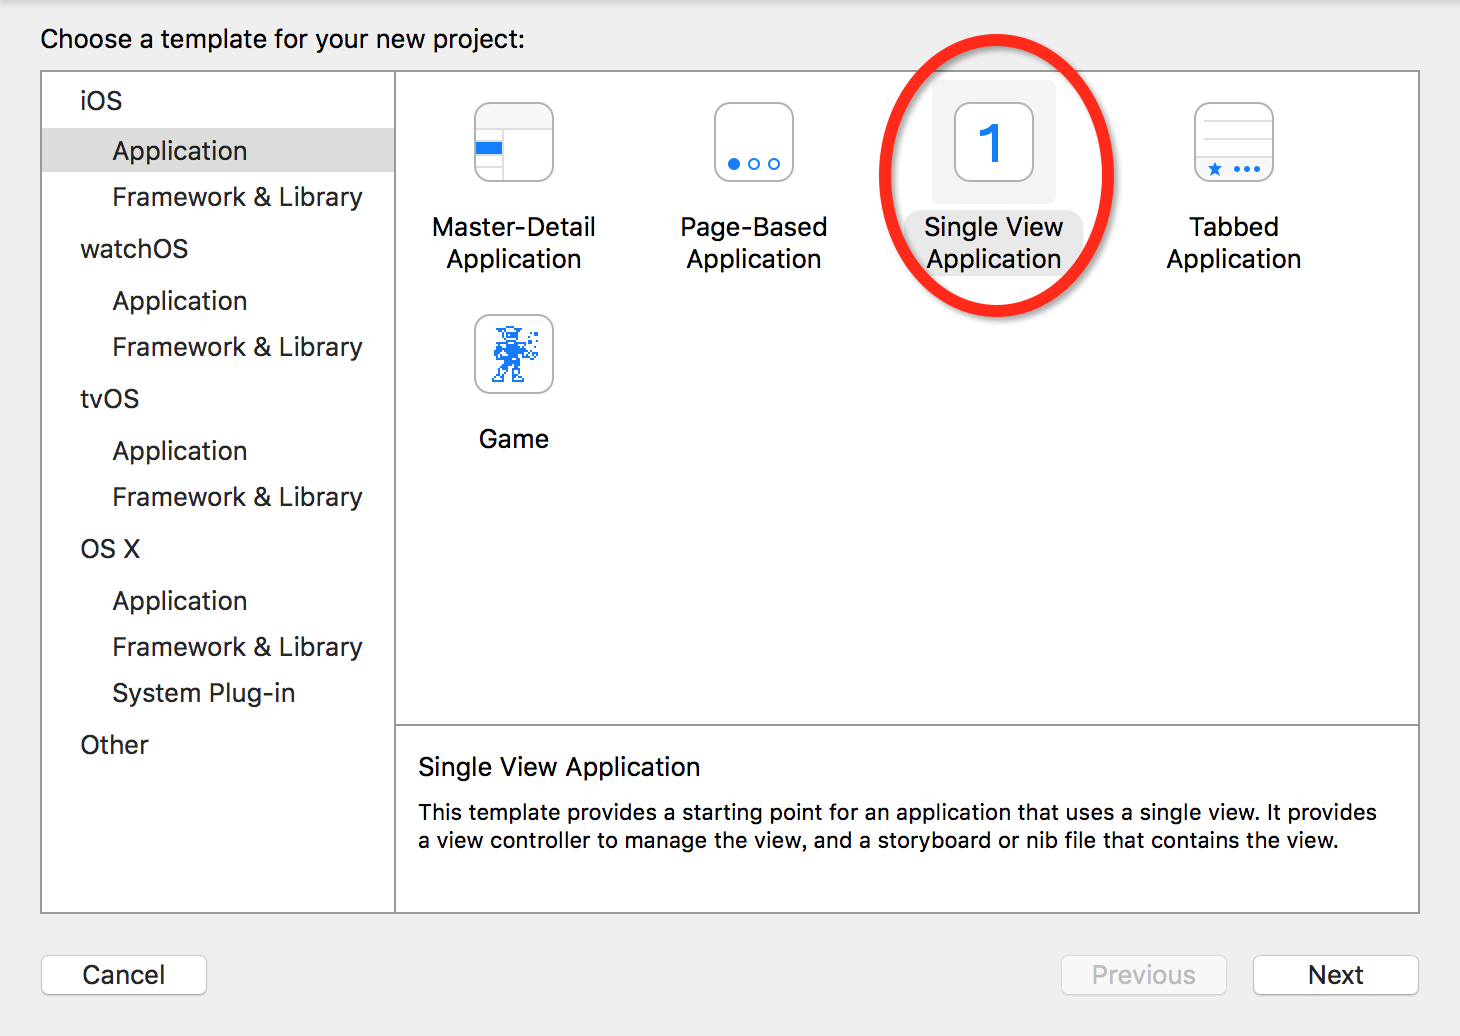
1、建立專案
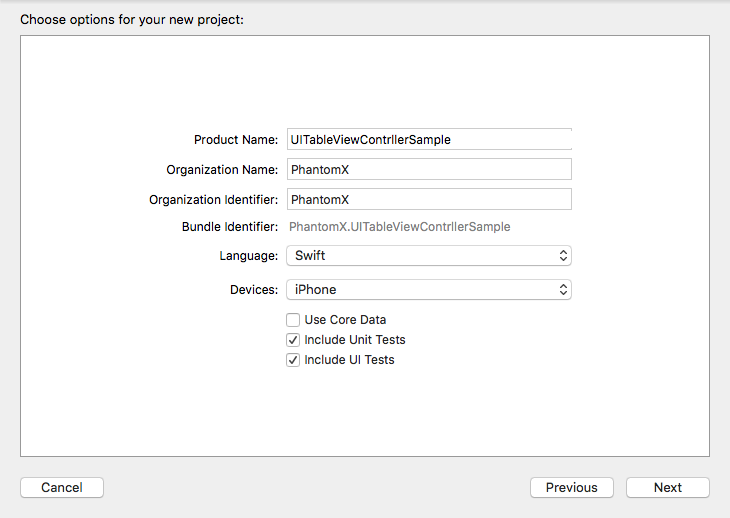
新建一個專案,選擇Single View Application
裝置選擇iPhone,語言選擇swift
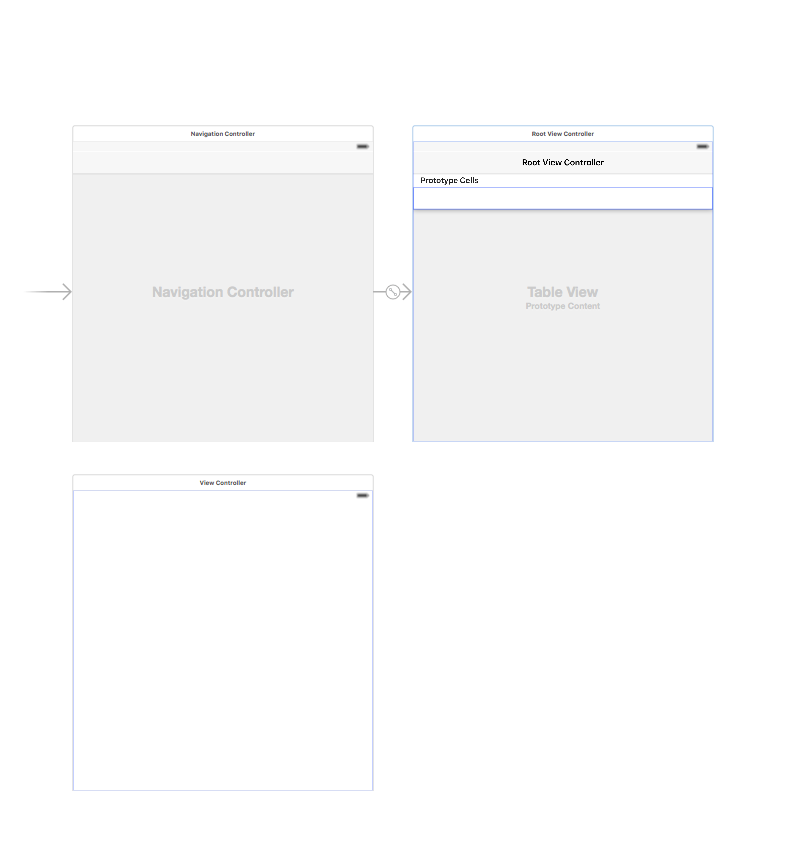
選中左側檔案列表中的Main.storyboard,從左下角的檔案選擇器中拖一個navigation controller進入介面,並將小箭頭移到navigation controller上面
2、配置Cell
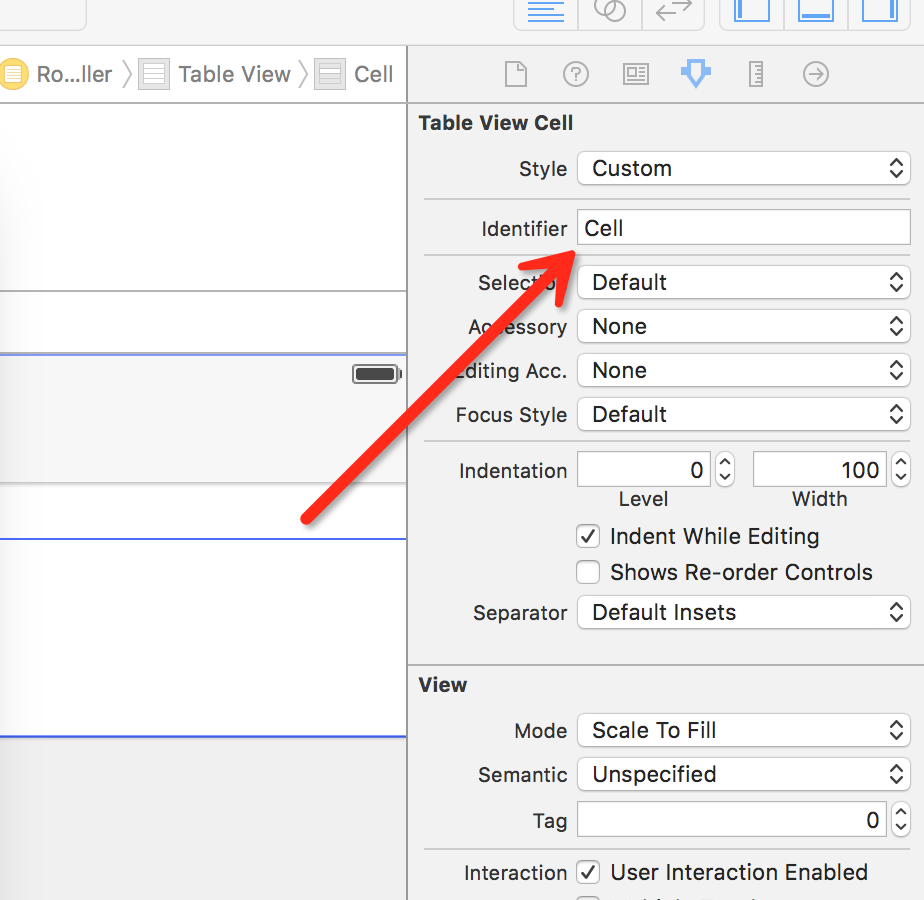
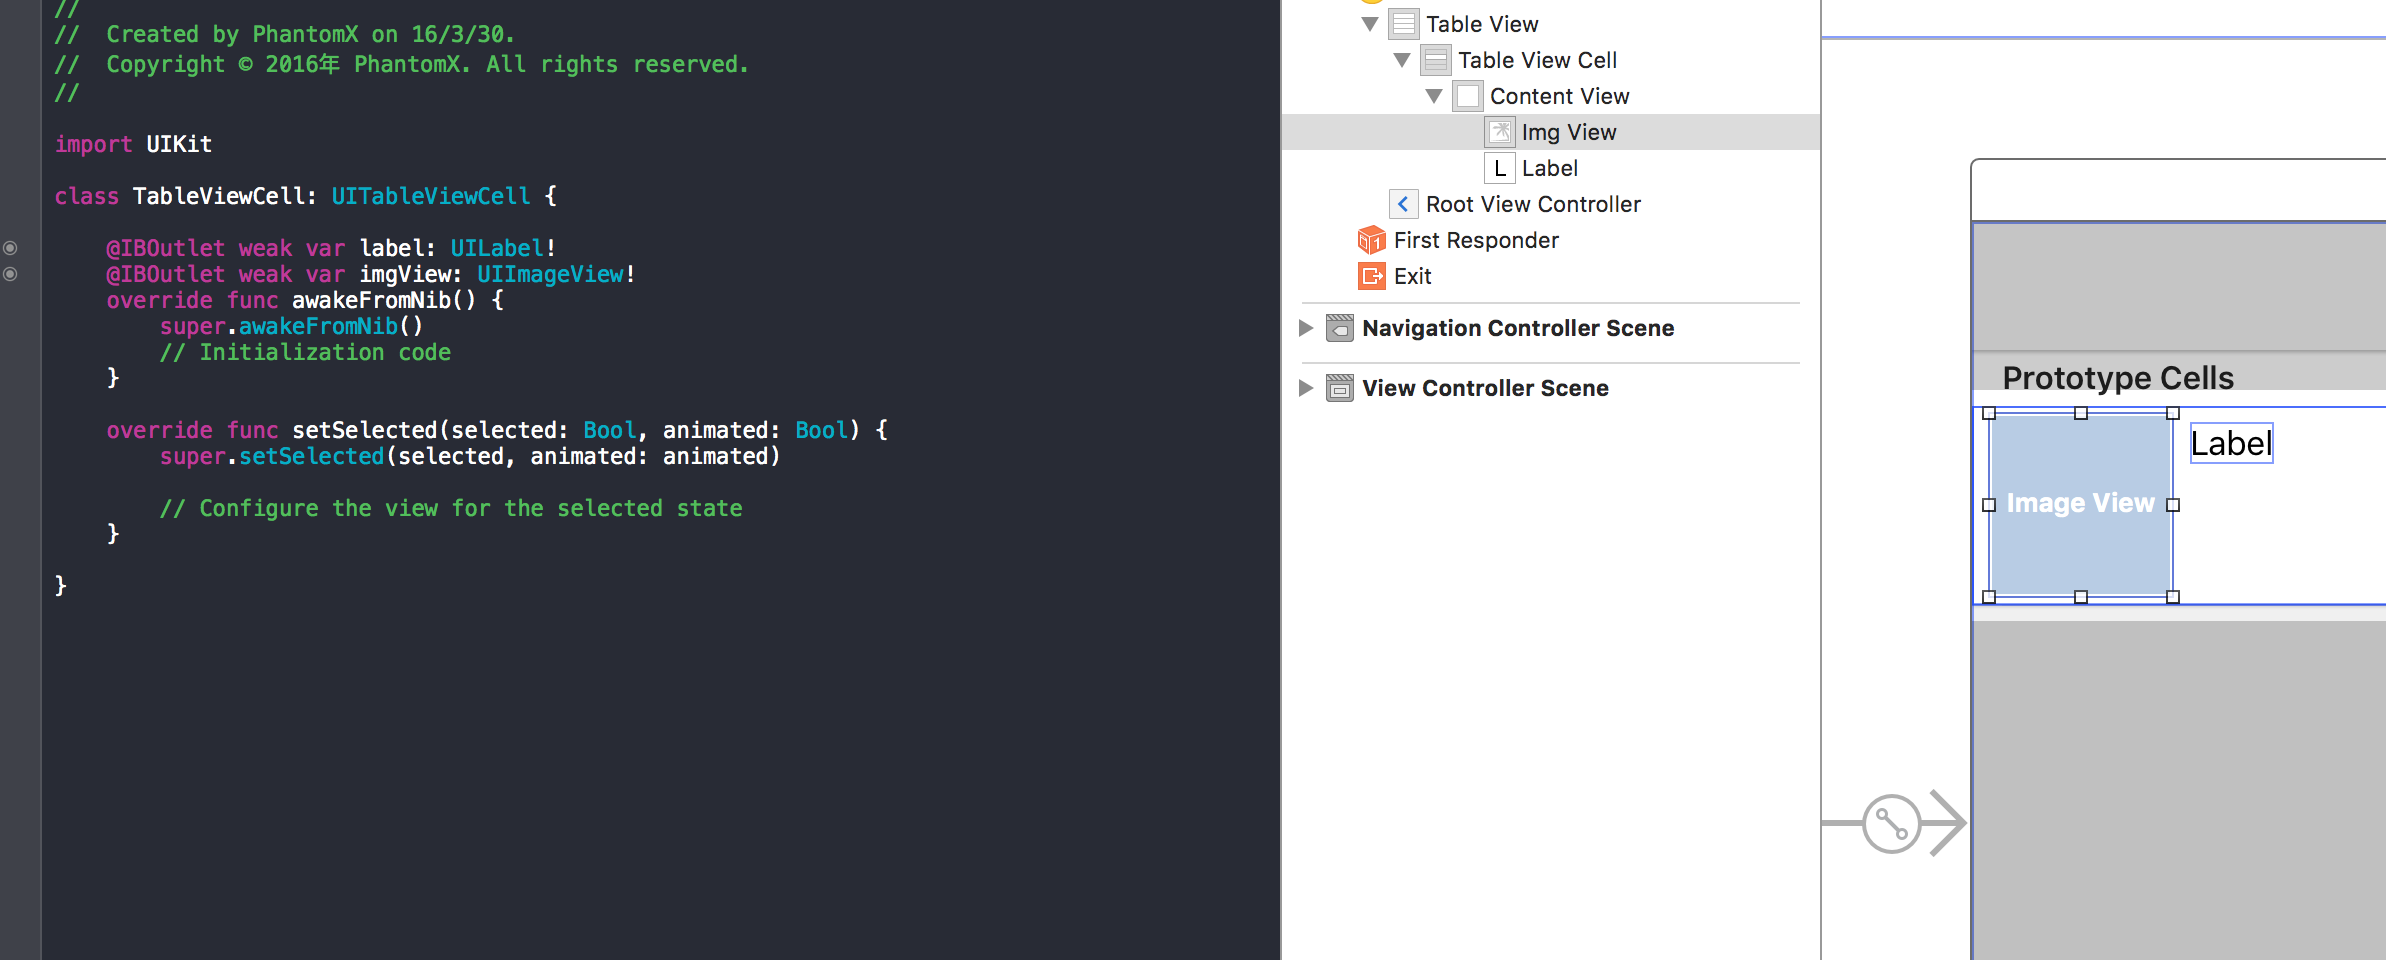
選中Root View Controller中的TableViewCell在左側工具欄的Identifier中填入一個ID(填什麼隨便,等下用於Cell的複用,複用功能是TableView中的一個重要功能,可以通過迴圈使用Cell來節約記憶體),然後在View中放入一個imageView和一個TableView
右鍵選中專案資料夾,新建檔案,選擇iOS列表下的cocoatouch
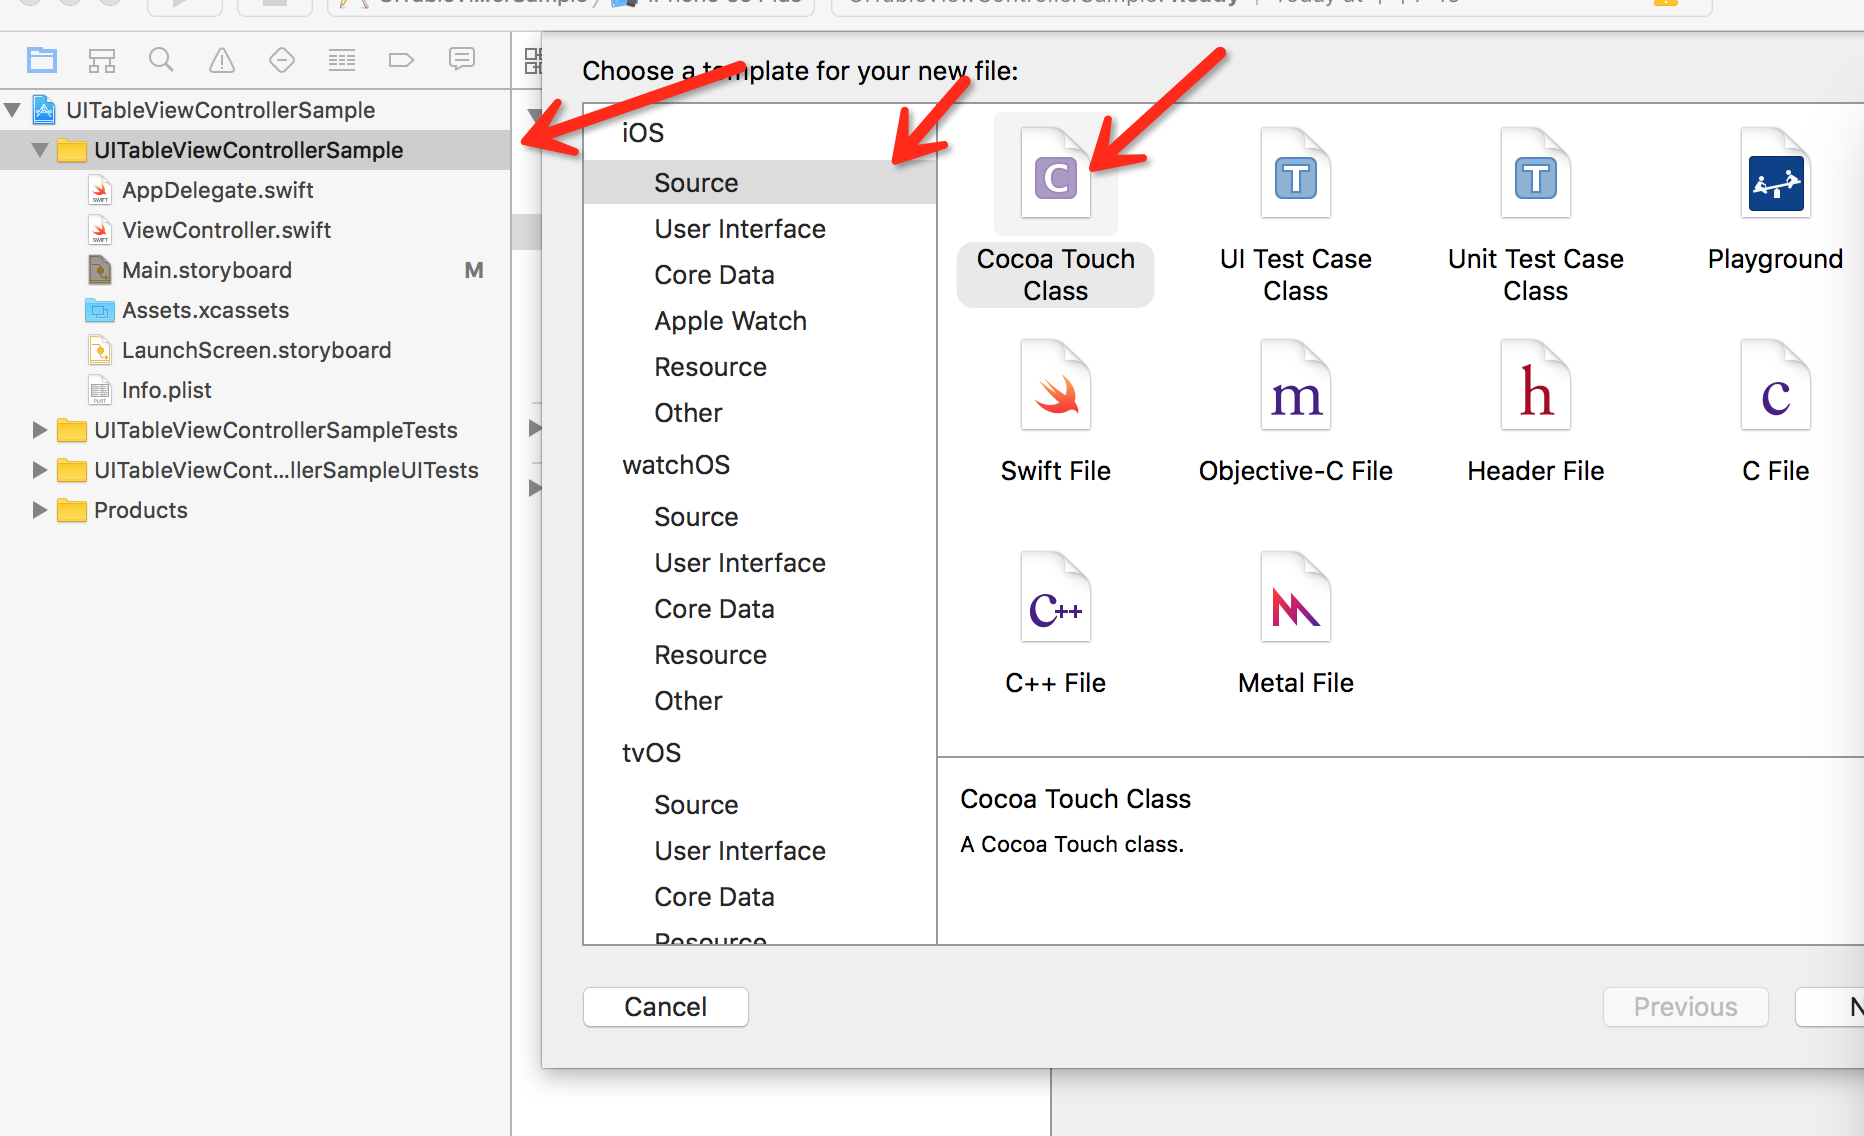
SubClass選擇UITableViewCell

回到Main.StoryBoard在右側面板繫結TableViewCell類

點選Xcode又上的按鈕開啟輔助編輯器,然後將右邊的檢視切換到main.storyboard,按住Control拖動至左邊TableViewCell檢視建立IBOutlet
然後再新建一個繼承自UIView的類來作為資料來源,新建方式同上,將SubClass改成UIView即可,並在括號中鍵入以下程式碼
    var img: UIImage!         //用於儲存圖片
    var lableText: String!    //標籤的文字
    convenience init(imgName: String,text: String){  //等下將用這個方法來完成每個Cell的資料來源的初始化
        self.init()
        lableText = text
        img = UIImage(named: imgName)    //將檔名轉換為UIImage,將呼叫放入專案的圖片資源
    }
3、配置UITableViewController
SubClass選擇UITableViewController

建立一個DataSource陣列用於存放Cell的資料來源
var items = [DataSource]()將資料來源載入進陣列
在ViewDidLoad中鍵入以下程式碼
        let sample1 = DataSource(imgName: "例圖1",text: "例1");
        let sample2 = DataSource(imgName: "例圖2",text: "例2");
        items = [sample1,sample2]
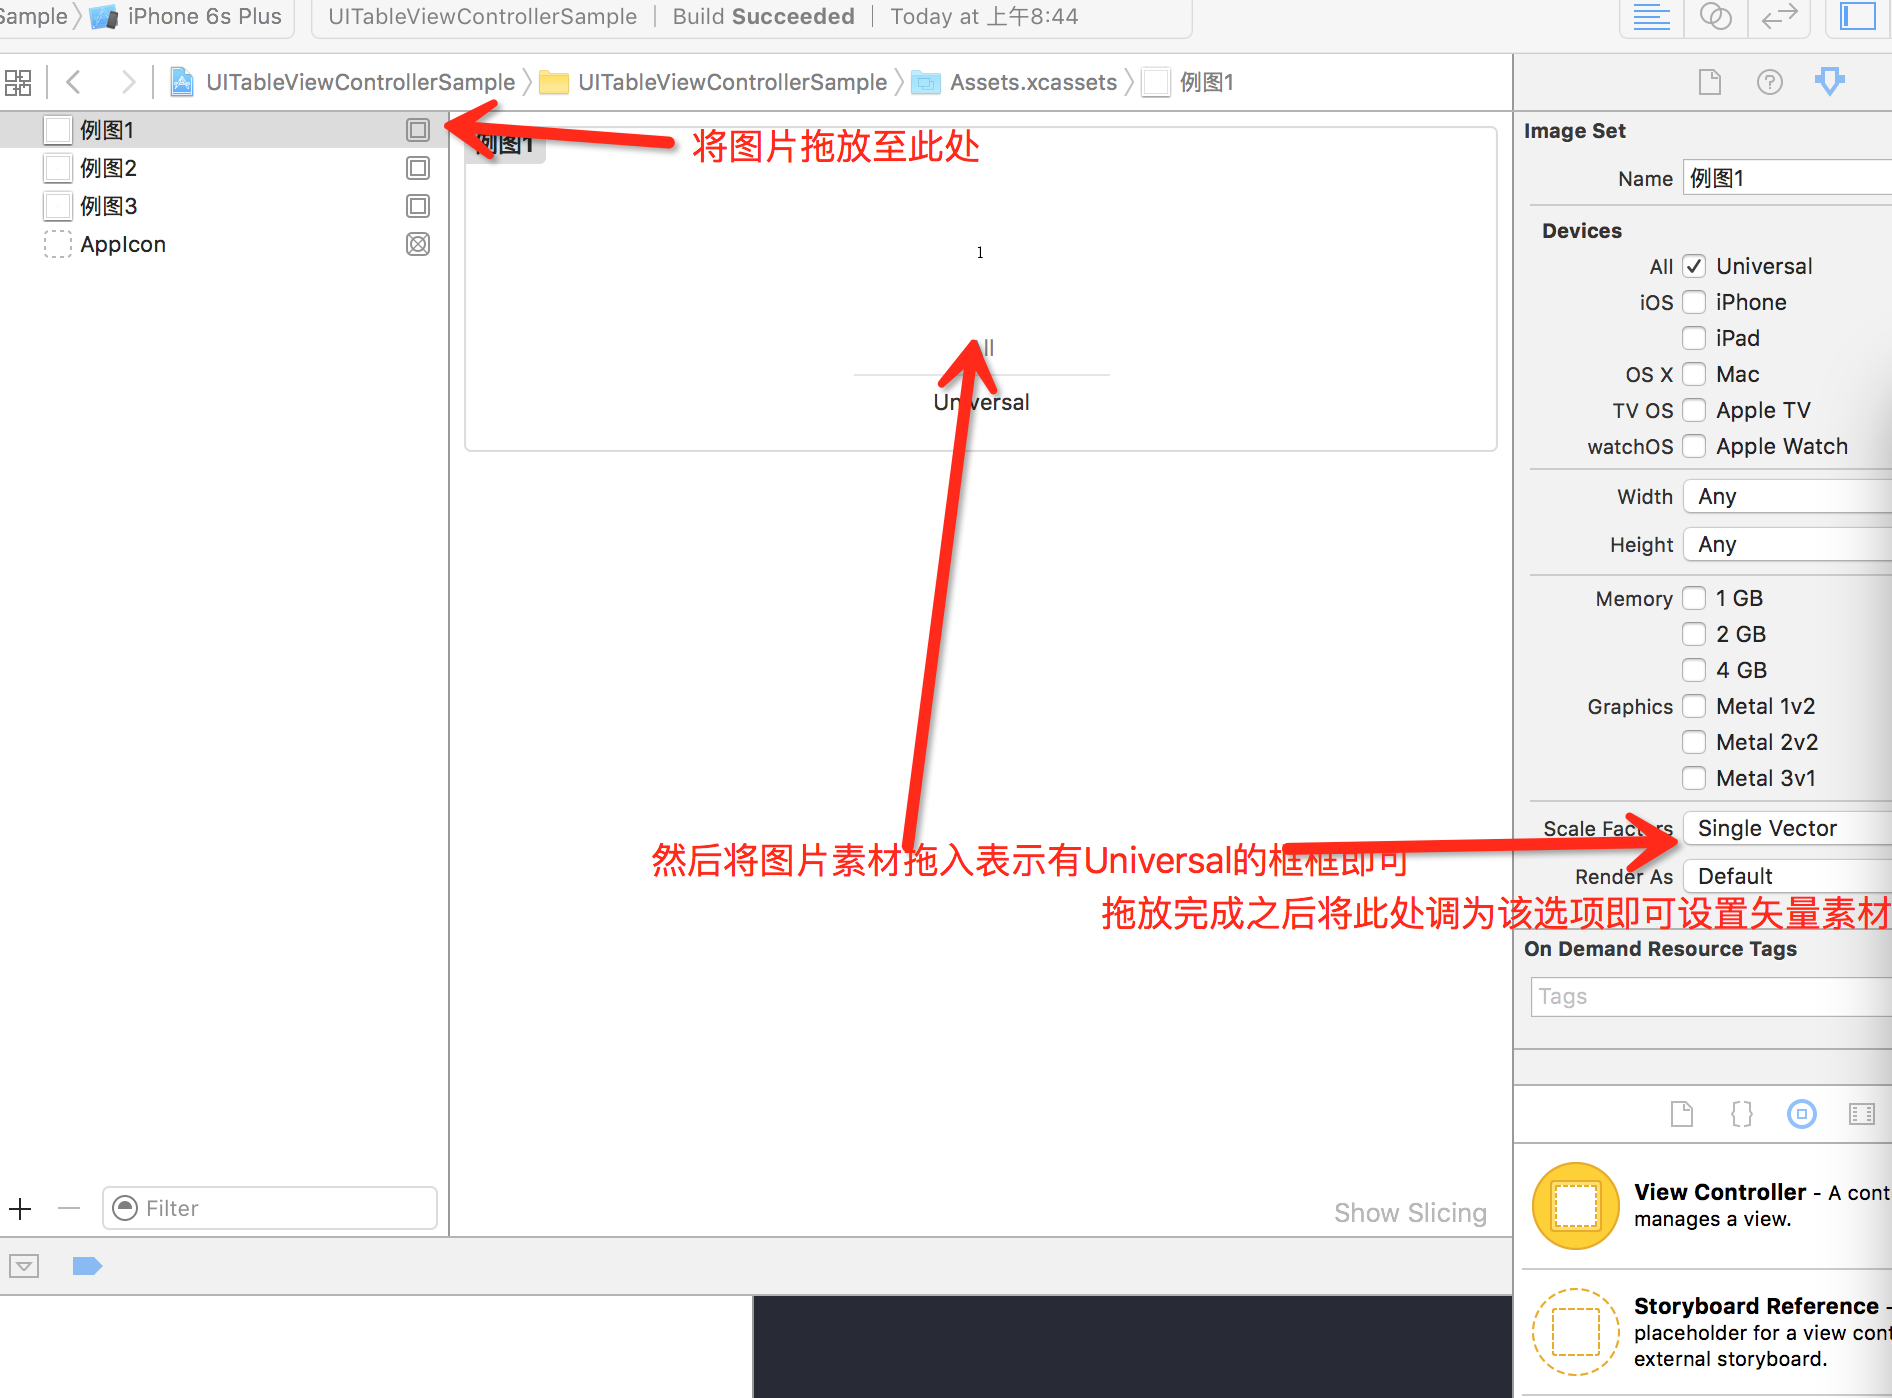
並將圖片素材匯入到專案裡面,選中左側的Assets.xcassets,將圖片資源拖入左側的表格裡面,此處博主使用的是AI匯出的PDF向量檔案
然後跳轉回TableViewController.swift檔案
去掉這三個方法的註釋,並修改為以下內容
    override func numberOfSectionsInTableView(tableView: UITableView) -> Int {
        // #warning Incomplete implementation, return the number of sections
        return 1   //此處的數值為分段數值
    }
override func tableView(tableView: UITableView, numberOfRowsInSection section: Int) -> Int {
// #warning Incomplete implementation, return the number of rows
return items.count //此處為Cell的個數
} override func tableView(tableView: UITableView, cellForRowAtIndexPath indexPath: NSIndexPath) -> UITableViewCell {
let cell:TableViewCell = tableView.dequeueReusableCellWithIdentifier("Cell", forIndexPath: indexPath) as! TableViewCell //括號內的"Cell"改為自己設定的identifier,該函式用於實現Cell的複用
let ofc = items[indexPath.row] //將陣列中的一個元素賦值給一個臨時變數
cell.imgView.image = ofc.img //將臨時變數中的圖片賦值給Cell中的圖片
cell.label.text = ofc.lableText //將臨時變數中的標題賦值給Cell中的圖片
// Configure the cell...
return cell
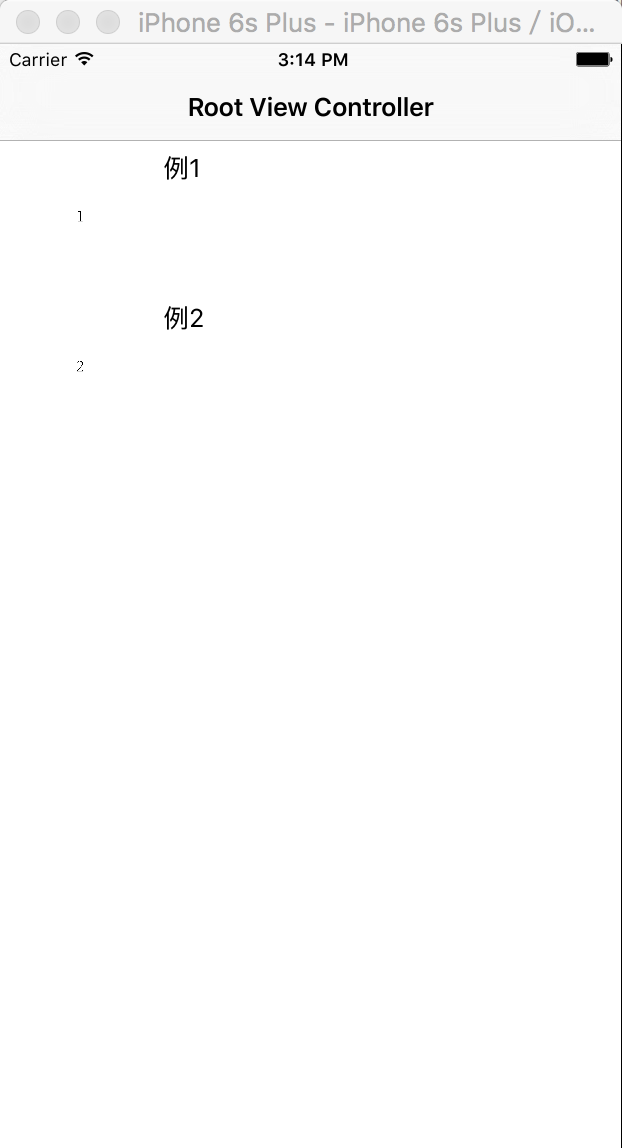
}此時按下編譯執行按鈕便可以看到一個簡單的表格介面
4、為表格增添多選刪除和滑動刪除功能以及排序功能
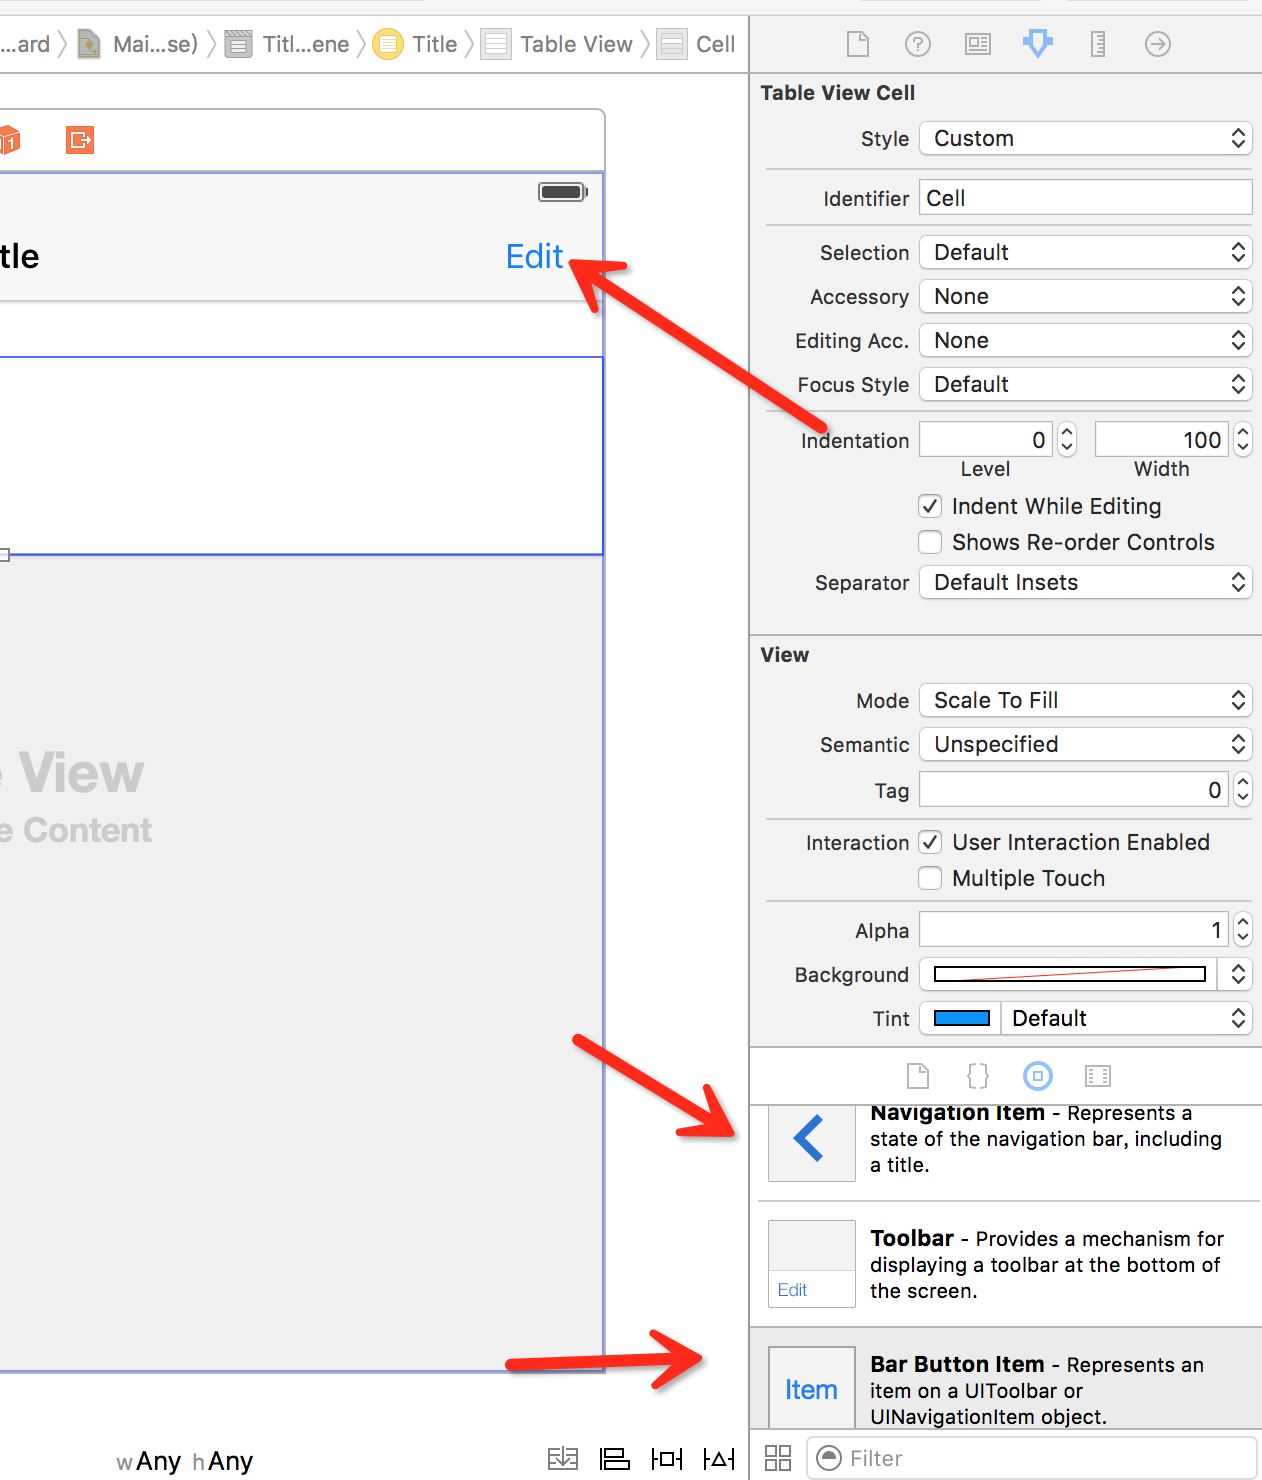
拖入一個NavigationItem和Bar Button Item,將Bar Button Item的文字設為Edit
連線IBOutlet和IBAction到TableViewController.switft中
此處博主連線後的名字分別為editButton和enableEdit
之後在enableEdit中新增程式碼:
    @IBAction func enableEdit(sender: AnyObject) {
        if ifIsEditting == true {
            ifIsEditting = false
            editButton.title = "Done" //按鈕的文字顯示為Done
            self.setEditing(true, animated: true)//開啟編輯模式
            navigationItem.leftBarButtonItem = UIBarButtonItem(barButtonSystemItem: UIBarButtonSystemItem.Trash, target: self, action: #selector(TableViewController.deleteCell))//在頂欄左邊新增一個刪除按鈕,並新增刪除按鈕的動作到一個名為deleteCell的方法
        }
        else {
            ifIsEditting = true
            editButton.title = "Edit"
            self.setEditing(false, animated: true) //關閉編輯模式
            navigationItem.leftBarButtonItem = nil //將左邊的按鈕設為空
        }
}然後在viewDidLoad中加入以下語句來開啟多重選擇功能:
self.tableView.allowsMultipleSelectionDuringEditing = true並新增刪除函式:
    func deleteCell() {
        if self.tableView.indexPathForSelectedRow != nil{
            let indexs:[NSIndexPath] = (self.tableView.indexPathsForSelectedRows?.sort({$0.row > $1.row}))!//將選中的Cell從小到大進行排序
            for count in indexs{
                items.removeAtIndex(count.row) //移除item中被選中的Cell的資料來源
                tableView.deleteRowsAtIndexPaths([count], withRowAnimation: .Fade) //刪除表格檢視中對應的Cell
            }
        }
} // Override to support rearranging the table view.
override func tableView(tableView: UITableView, moveRowAtIndexPath fromIndexPath: NSIndexPath, toIndexPath: NSIndexPath) {
let exchange = items[toIndexPath.row]
items[toIndexPath.row] = items[fromIndexPath.row]
items[fromIndexPath.row] = exchange
}
// Override to support conditional rearranging of the table view.
override func tableView(tableView: UITableView, canMoveRowAtIndexPath indexPath: NSIndexPath) -> Bool {
// Return false if you do not want the item to be re-orderable.
return true
}按下執行,便可以得到一個能夠實現多選刪除的表格
在接下來將結合SQLite來製作一個能長期儲存資料,實現資料增刪查改的表格