三大框架之SpringMVC :一個小的登入註冊專案的網頁實現
阿新 • • 發佈:2019-02-19
今天學習了 SpringMVC ,最後做了一個小的專案,熟悉的登入註冊
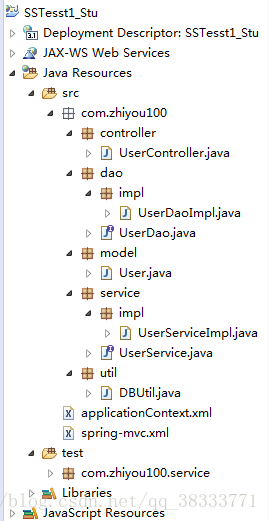
1.專案結構:
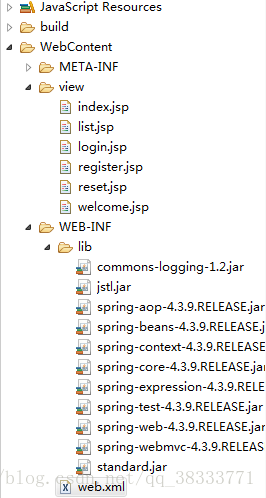
2 . 導包介紹:
5 個 Spring 基礎包 : beans, context, core, expression + commons 日誌包
1 個 aop 包
2 個 web 包 :web webmvc
2個 html 的 jstl 包:jstl , standard ;
3. 專案結構說明:
1. User的model類

2. UserDao/UserDaoiml

3. UserService/UserServiceImpl

4. Util工具類

5. controller類

6. 3個配置檔案: applicationContext.xml    spring-mvc.xml    web.xml
4. 三個配置檔案的程式碼 :
@ applicationContext.xml
<?xml version="1.0" encoding="UTF-8"?>
<beans xmlns="http://www.springframework.org/schema/beans"
xmlns:xsi="http://www.w3.org/2001/XMLSchema-instance"
xmlns:context="http://www.springframework.org/schema/context"
xsi:schemaLocation="http://www.springframework.org/schema/beans
http://www.springframework.org/schema/beans/spring-beans.xsd
http://www.springframework.org/schema/context
http://www.springframework.org/schema/context/spring-context.xsd" @ spring-mvc.xml
<?xml version="1.0" encoding="UTF-8"?>
<beans xmlns="http://www.springframework.org/schema/beans"
xmlns:xsi="http://www.w3.org/2001/XMLSchema-instance" xmlns:context @ web.xml
<?xml version="1.0" encoding="UTF-8"?>
<web-app xmlns:xsi="http://www.w3.org/2001/XMLSchema-instance" xmlns="http://xmlns.jcp.org/xml/ns/javaee" xsi:schemaLocation="http://xmlns.jcp.org/xml/ns/javaee http://xmlns.jcp.org/xml/ns/javaee/web-app_3_1.xsd" id="WebApp_ID" version="3.1">
  <display-name>SSTesst1_Stu</display-name>
  <welcome-file-list>
    <welcome-file>index.html</welcome-file>
    <welcome-file>index.htm</welcome-file>
    <welcome-file>index.jsp</welcome-file>
    <welcome-file>default.html</welcome-file>
    <welcome-file>default.htm</welcome-file>
    <welcome-file>default.jsp</welcome-file>
  </welcome-file-list>

  <context-param>
    <param-name>contextConfigLocation</param-name>
    <param-value>classpath:applicationContext.xml</param-value>
  </context-param>

  <listener>
    <listener-class>org.springframework.web.context.ContextLoaderListener</listener-class>
  </listener>


  <servlet>
    <servlet-name>dispatcherServlet</servlet-name>
    <servlet-class>org.springframework.web.servlet.DispatcherServlet</servlet-class>
    <init-param>
      <param-name>contextConfigLocation</param-name>
      <param-value>classpath:spring-mvc.xml</param-value>
    </init-param>
  </servlet>

  <servlet-mapping>
    <servlet-name>dispatcherServlet</servlet-name>
    <url-pattern>/</url-pattern>
  </servlet-mapping>
</web-app>
5 . 關於配置的解析說明
-------------------------------------------
------------- spring ----------------------
-------------------------------------------

2. 在 src 下建立 spring 的配置檔案

    2.1 複製貼上

<?xml version="1.0" encoding="UTF-8"?>

<beans xmlns="http://www.springframework.org/schema/beans"
    xmlns:xsi="http://www.w3.org/2001/XMLSchema-instance" xmlns:context="http://www.springframework.org/schema/context"
    xsi:schemaLocation="http://www.springframework.org/schema/beans
    http://www.springframework.org/schema/beans/spring-beans.xsd
    http://www.springframework.org/schema/context
    http://www.springframework.org/schema/context/spring-context.xsd">

</beans>

    2.2 <context:component-scan base-package="com.zhiyou100"/>
        增加對註解的支援

3. 在 web.xml 中增加監聽器讀取 spring 的配置檔案
    3.1 增加監聽器 listener 和 listener-class 兩個標籤
    3.2 class 是 ContextLoaderListener 的全名 = 包名 + 類名


4. 在 web.xml 增加標籤設定 spring 配置檔案的位置
    4.1 增加 context-param 和 param-name、param-value 標籤
    4.2 param-name:contextConfigLocation
    4.3 param-value:classpath:applicationContext.xml


-----------------------------------------------
------------- spring-mvc ----------------------
-----------------------------------------------

5. 在 src 下建立 spring-mvc 的配置檔案
    5.1 複製貼上
<beans xmlns="http://www.springframework.org/schema/beans"
    xmlns:xsi="http://www.w3.org/2001/XMLSchema-instance"
    xmlns:mvc="http://www.springframework.org/schema/mvc"
    xsi:schemaLocation="http://www.springframework.org/schema/beans
    http://www.springframework.org/schema/beans/spring-beans.xsd
    http://www.springframework.org/schema/mvc
    http://www.springframework.org/schema/mvc/spring-mvc.xsd">
</beans>

    5.2 使用預設的 handleMapping 和啟用 mvc 中的註解
        <mvc:annotation-driven/>

    5.3 增加頁面解析類 InternalResourceViewResolver
        5.3.1 增加 bean 標籤
        5.3.2 設定 class = 全名 = 包名 + 路徑

    5.4 增加 prefix 和 suffix 設定頁面路徑的字首和字尾
        設定字首以後將來所有的 jsp 必須放在 view 資料夾下

    <property name="prefix" value="/view/"></property>
        <property name="suffix" value=".jsp"></property>

6. 去 web.xml 中配置唯一的 Servlet
    6.1 增加 servlet和 servlet-mapping 標籤

    6.2 配置 servlet 標籤,name 隨便起,class 是 DispatcherServlet

    6.3 配置 servlet-mapping,name 和上邊保持一致,url-pattern 是 /

    6.4 在 servlet 標籤中增加 init-param 標籤設定 spring-mvc 配置檔案的路徑

    6.5 param-name:contextConfigLocation

    6.6 param-value:classpath:spring-mvc.xml
6. 配置完成後,去 實現 功能:
-----------------------------------------------
------------- 登入註冊 ------------------------
-----------------------------------------------

1. 在 src 下建立 controller,service,dao,model,util 包

2. 在 WebContent 下建立 view 資料夾,存放我們所有的 jsp 檔案

3. 建立 model 類 User,三個屬性 username,password,email

4. 建立 UserService 介面,定義方法

5. 建立 UserDao 介面,定義方法

6. 建立 UserDaoImpl 類實現 UserDao 介面,新增 @Repository 註解
    方便將來注入到 Service 中使用

7. 建立 DBUtil 類,新增 @Component
    預設就是單例模式,方便我們使用

8. 回到 UserDaoImpl,增加 DBUtil 屬性和對應的 setter 方法。

9. 在 DBUtil 屬性上增加 @Autowired 註解
    建立 UserDaoImpl 的時候,IoC 容器會自動把 DBUtil 物件賦值給這個屬性

10. 實現 UserDaoImpl 中的所有功能

11. 建立 UserServiceImpl 實現 UserService 介面,新增 @Service 註解
    方便將來注入到 Controller 中使用

12. 增加 UserDao 屬性和對應的 setter 方法。

13. 在 UserDao 屬性上增加 @Autowired 註解
    建立 UserServiceImpl 的時候,IoC 容器會自動把 UserDaoImpl 物件賦值給這個屬性

14.實現 UserServiceImpl 功能

15. 增加 test 原始檔夾和 UserServiceTest 測試類,對 Service 進行測試

16. 在 UserServiceTest 中增加 @RunWith(SpringJUnit4ClassRunner.class)

17. 在 UserServiceTest 中增加 @ContextConfiguration("classpath:applicationContext.xml")

18. 建立 UserController 增加 @Controller 註解,注入 UserService,完成功能

19. 匯入 jstl,頁面中的所有路徑都使用絕對路徑
    <a href='<c:url value="/login"></c:url>'>登入</a>
7. modelController 的程式碼:
package com.zhiyou100.controller;

import java.util.Collection;

import org.springframework.beans.factory.annotation.Autowired;
import org.springframework.stereotype.Controller;
import org.springframework.ui.Model;
import org.springframework.web.bind.annotation.RequestMapping;

import com.zhiyou100.model.User;
import com.zhiyou100.service.UserService;

@Controller
public class UserController {

    @Autowired
    private UserService service;

    @RequestMapping("/login")
    public String login(User user,Model model) {

        if(service.login(user)){

            model.addAttribute("username", user.getUsername());

            return "welcome";
        }else {
            model.addAttribute("error", "登陸失敗");

            return "login";
        }

    }

    @RequestMapping("/register")
    public String register(User user,Model model) {

        if(service.register(user)){

            model.addAttribute("username", user.getUsername());

            return "welcome";
        }else {
            model.addAttribute("error", "註冊失敗");

            return "register";
        }

    }

    @RequestMapping("/reset")
    public String resetPassword(User user,Model model) {

        if(service.resetPassword(user)){

            model.addAttribute("username", user.getUsername());

            return "welcome";
        }else {
            model.addAttribute("error", "重置失敗");

            return "reset";
        }

    }

    @RequestMapping("/list")
    public String listUsers(Model model) {

        Collection<User> list = service.listUser();

        model.addAttribute("list", list);

        return "list";
    }
}
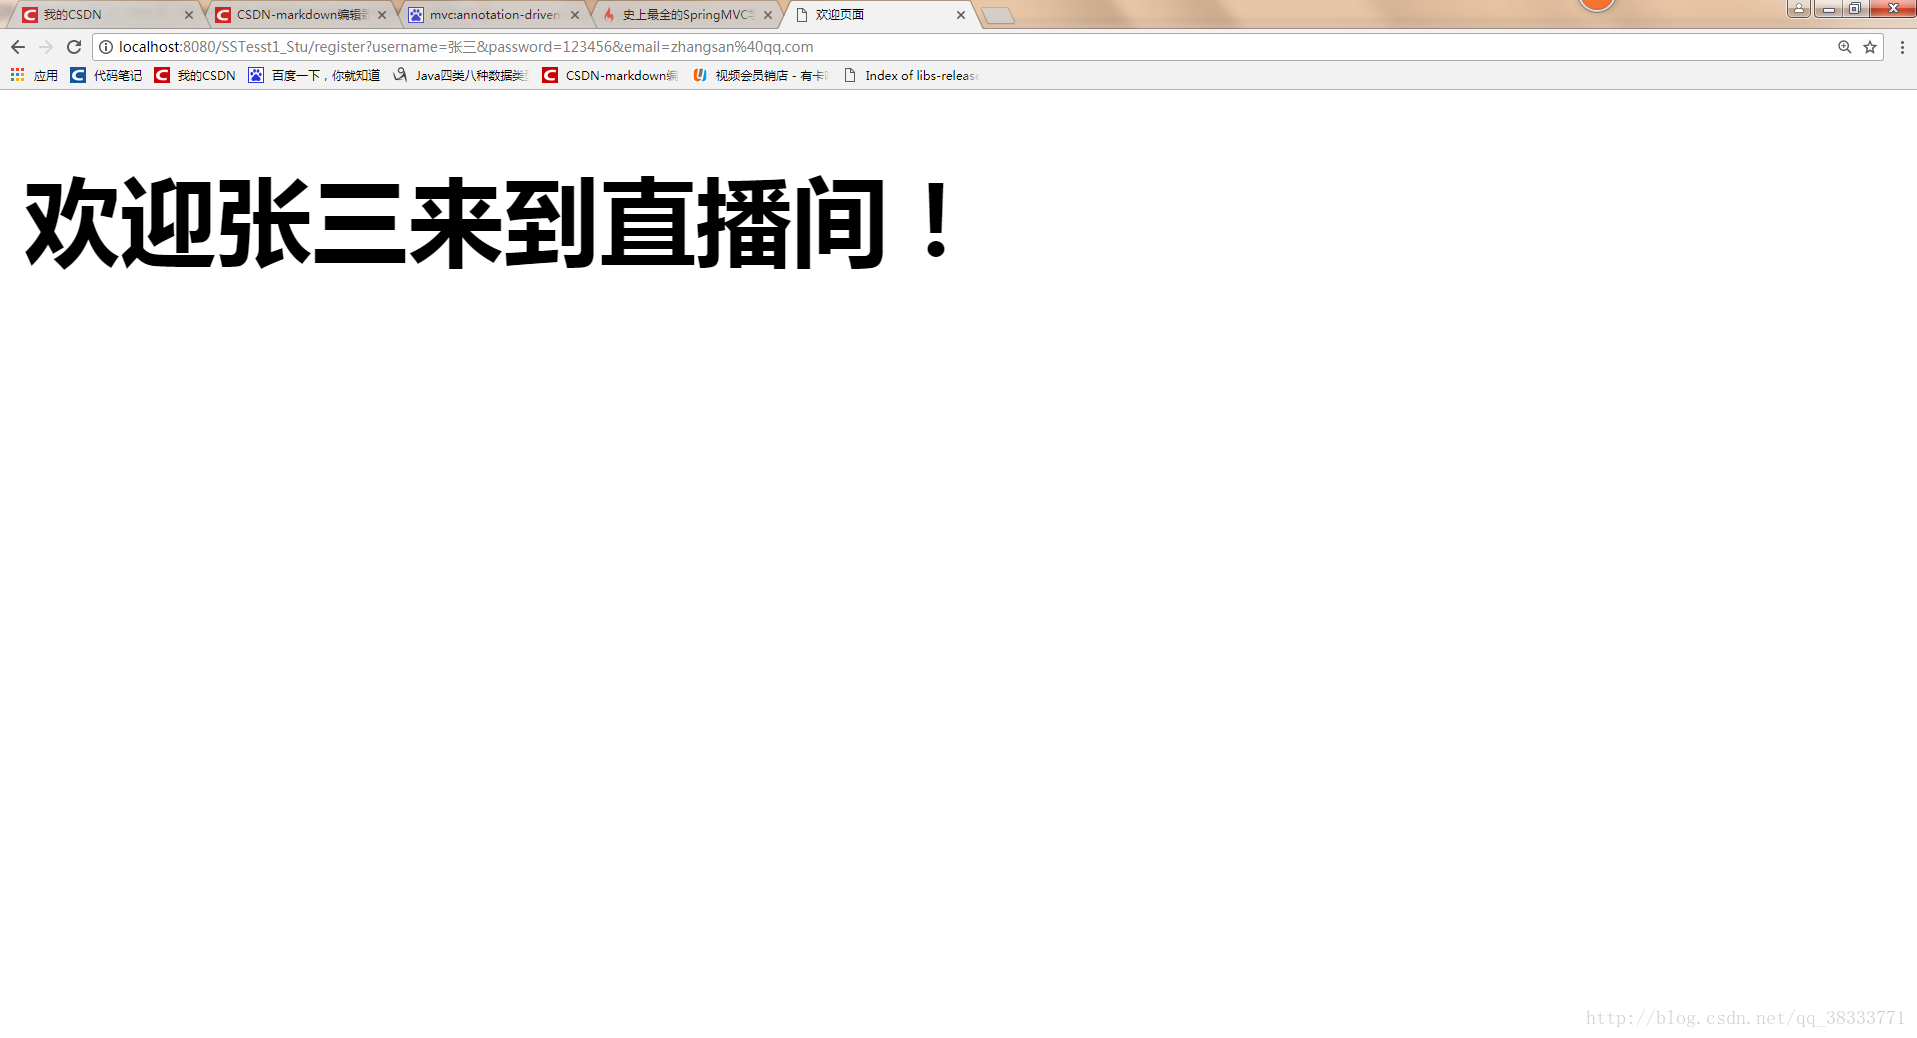
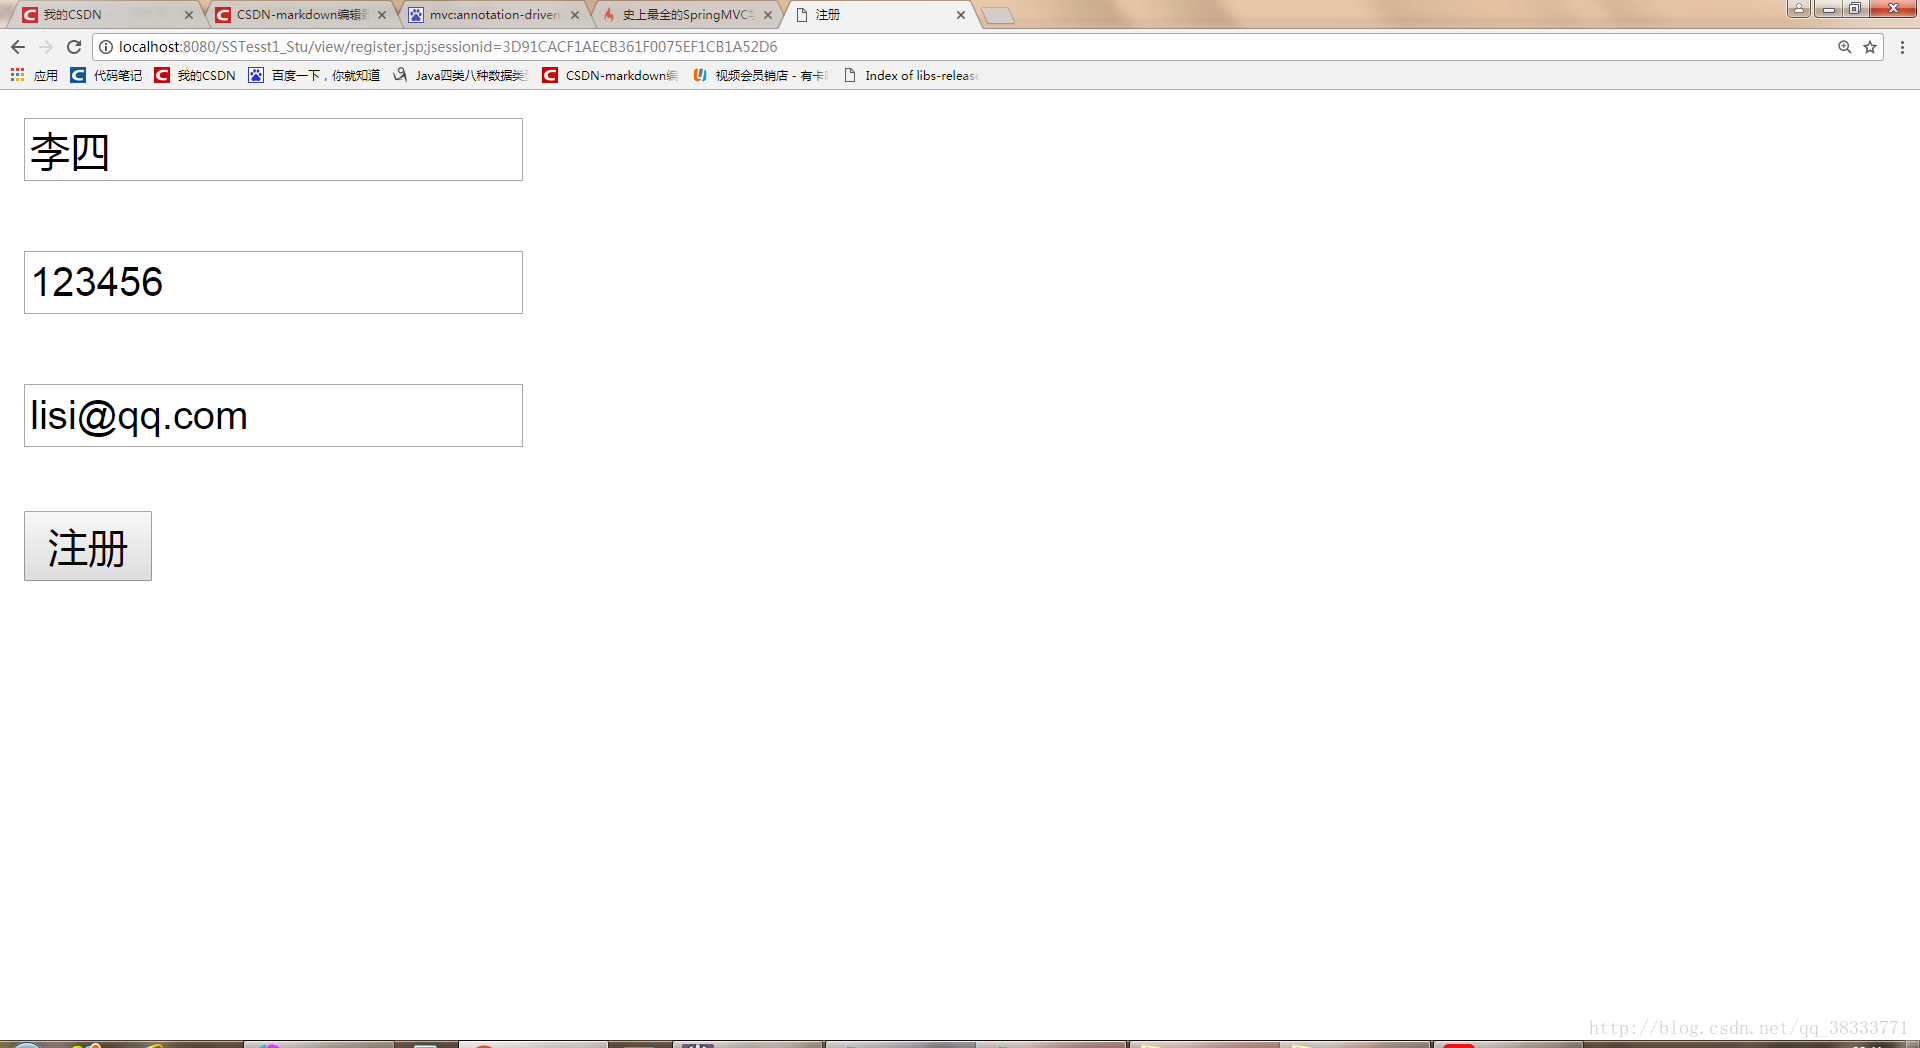
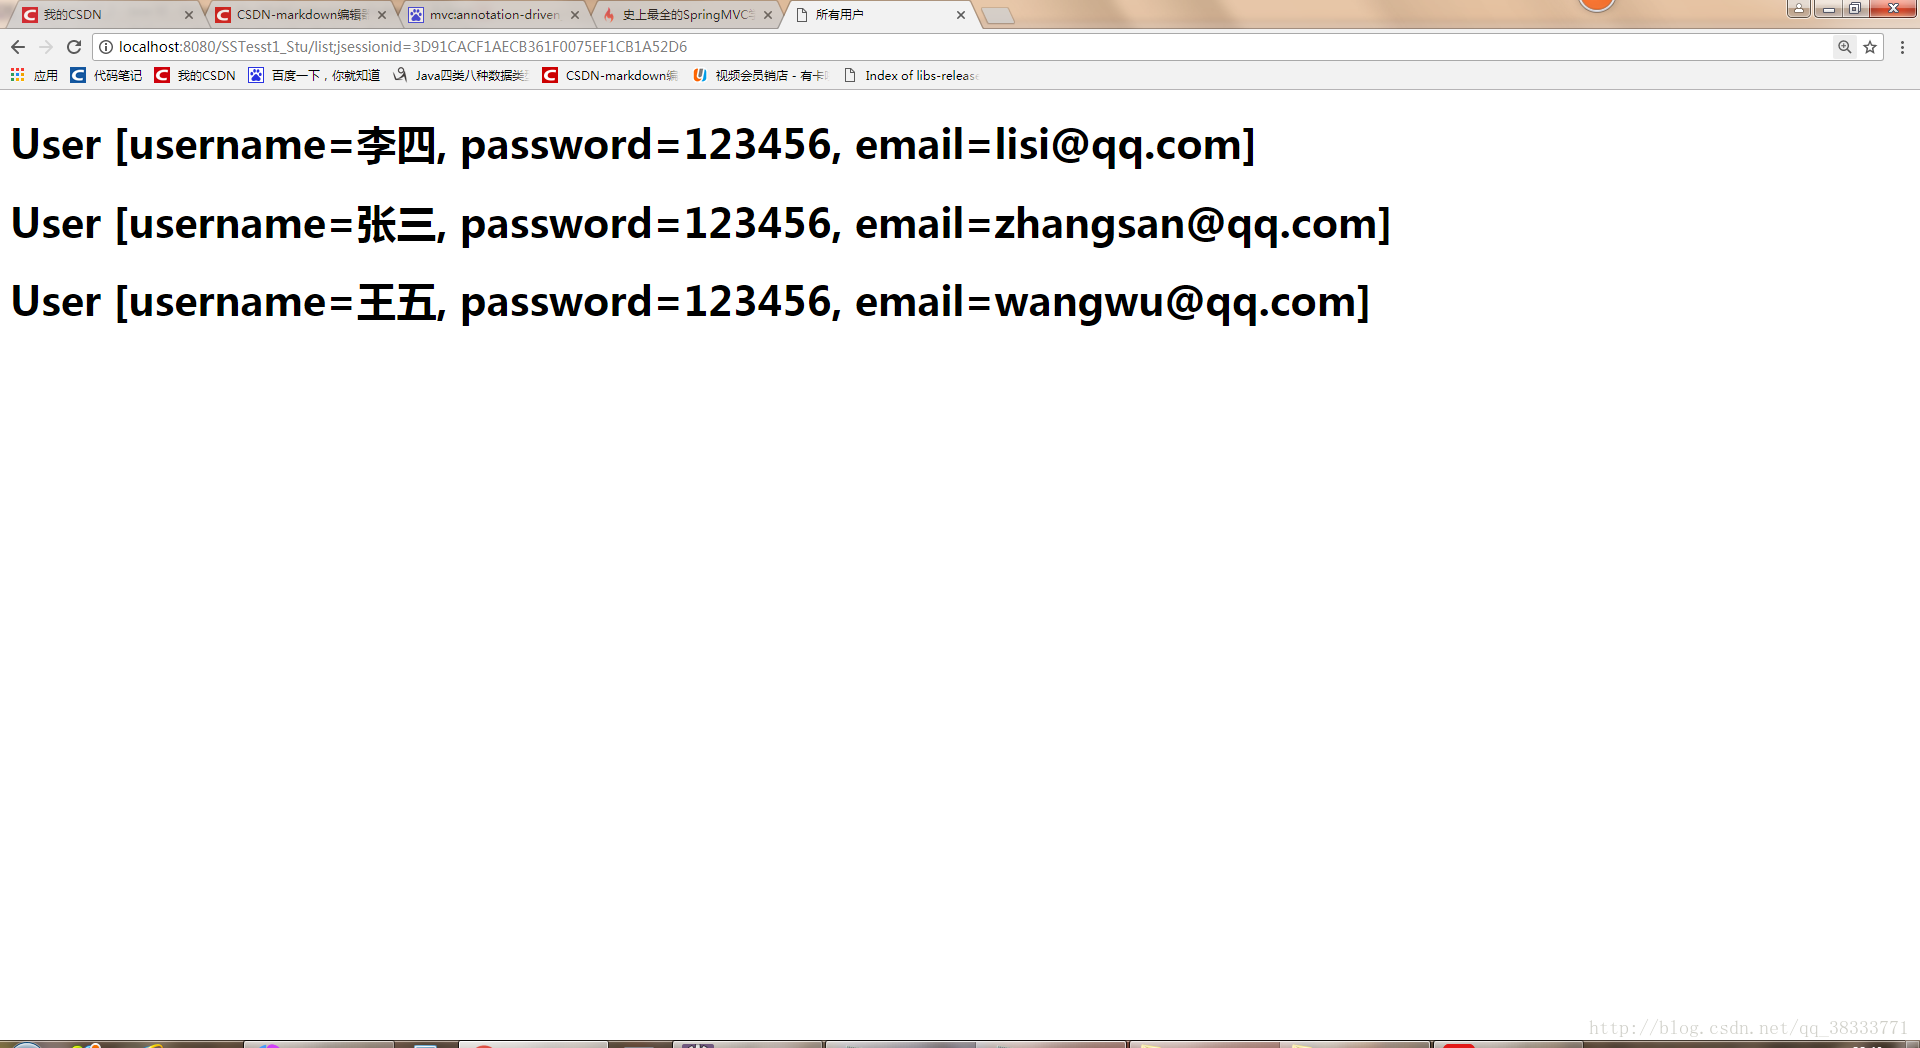
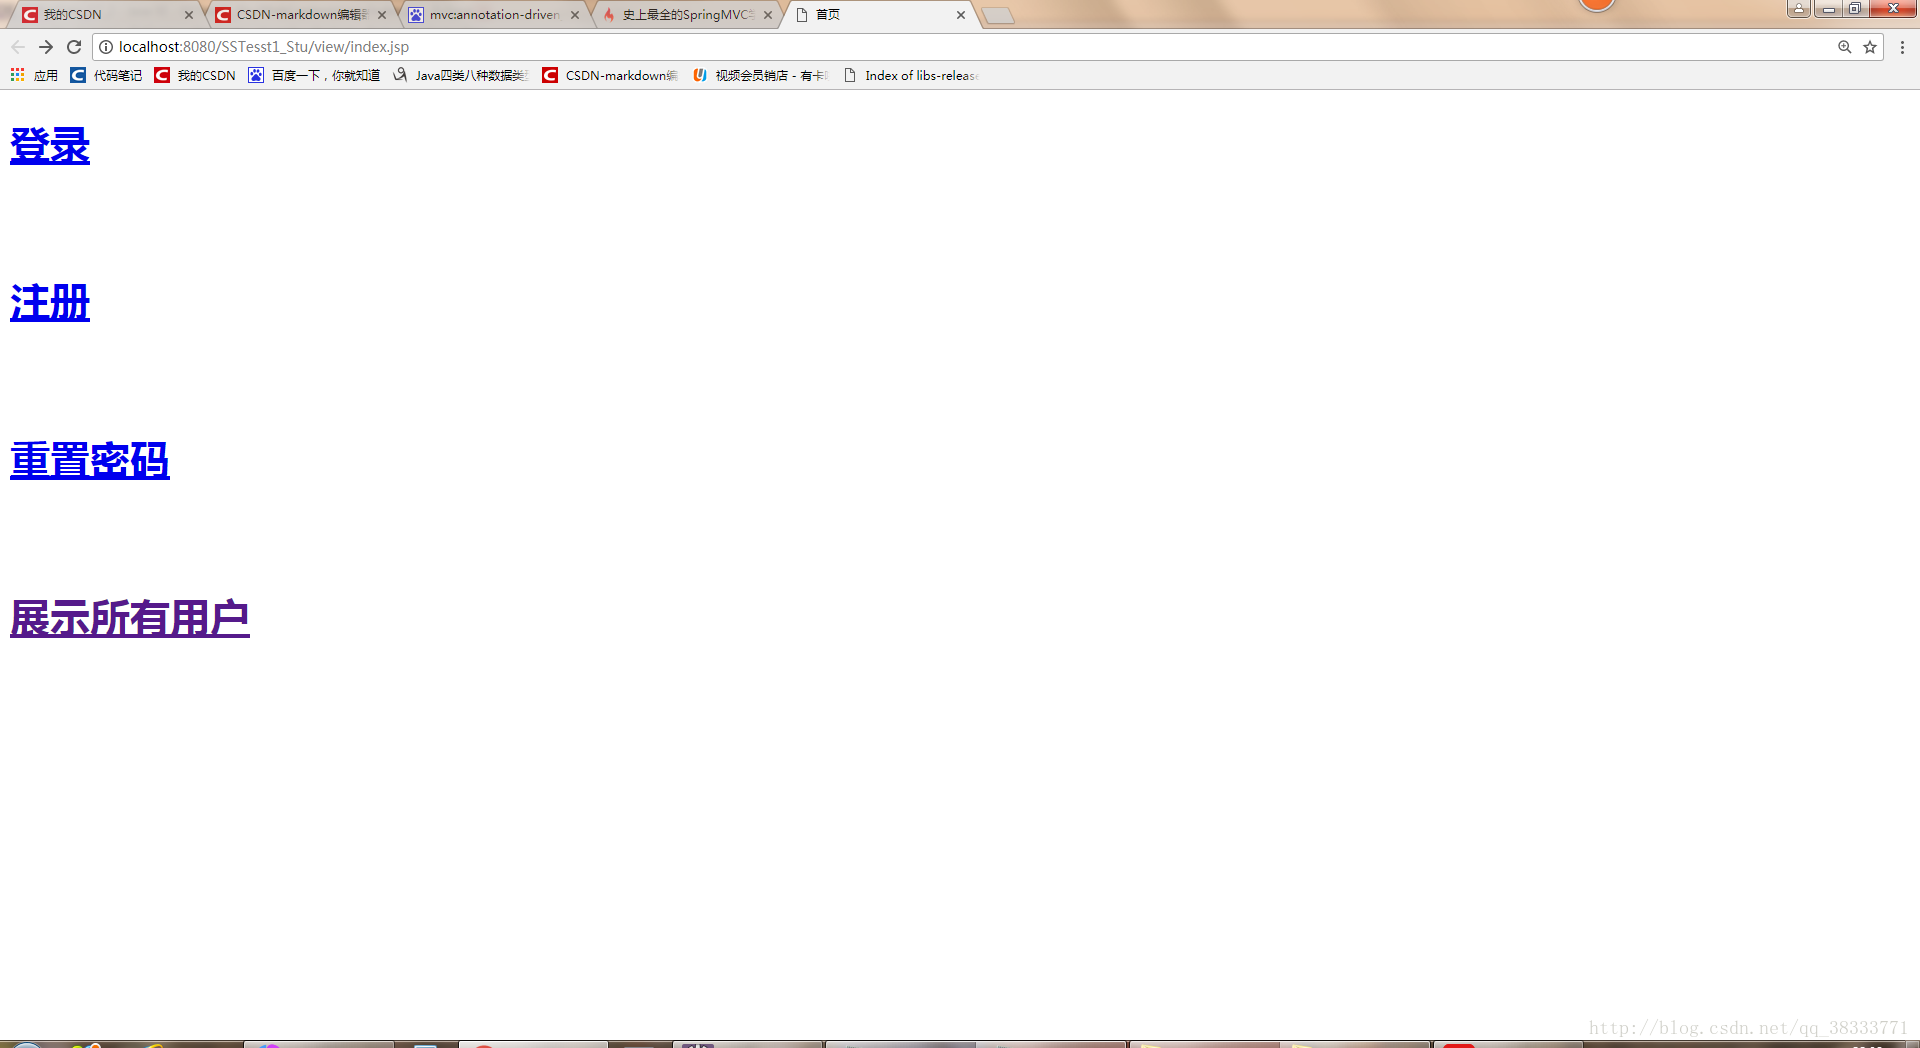
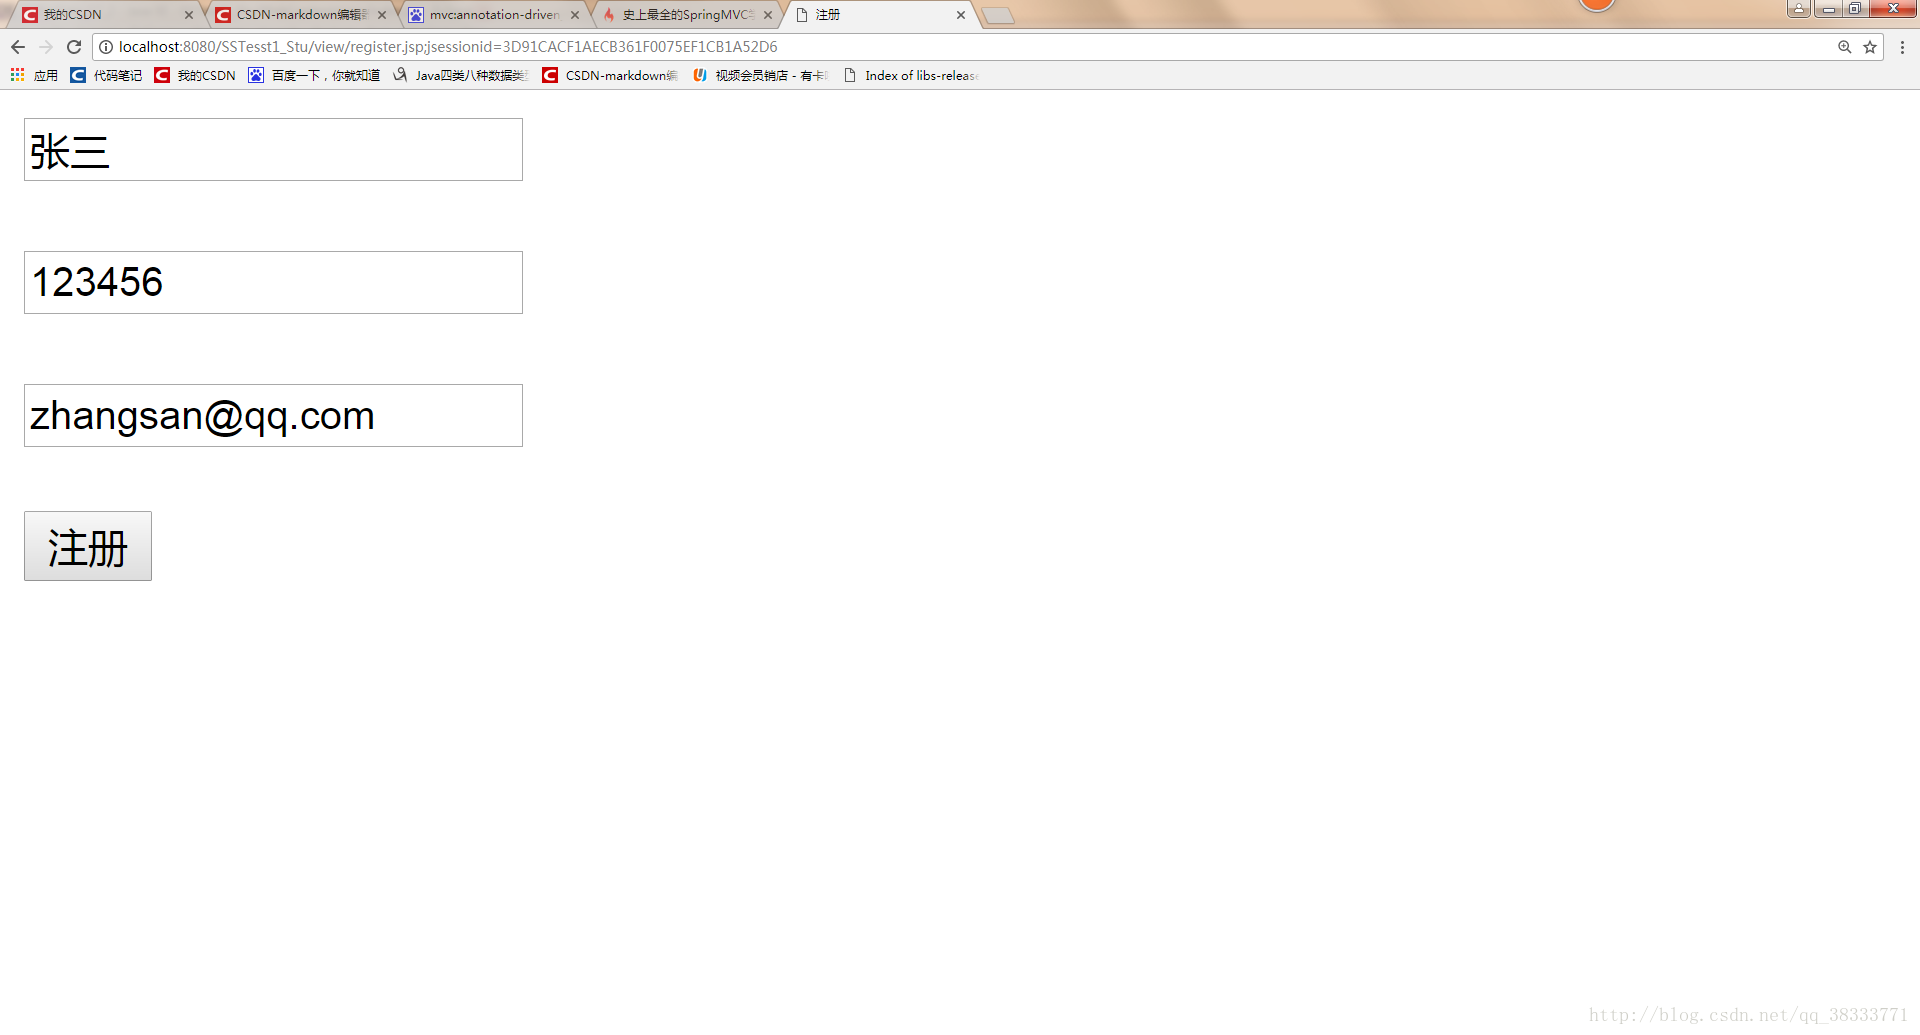
8. 效果截圖:
1 . 首頁
2. 註冊
3. 註冊完成