
Qt一步步搭建TcpServer2——執行緒池
本章將在TcpServer的基礎上新增執行緒池,管理Session。
1、封裝TcpThread
正所謂工欲善其事,必先利其器。要實現一個執行緒池,按照Qt的執行緒用法(如果不懂用法的同學,可以參看我這篇部落格:效能特性測試系列4——QT執行緒與std::thread(下)之QThread)。要想在這裡好好用上去,還是得自己重寫一個執行緒類:
標頭檔案:
#ifndef TCPTHREAD_H
#define TCPTHREAD_H
#include <QThread>
#include <atomic>
class TcpThread : public cpp:
#include "TcpThread.h"

TcpThread::TcpThread()
{

}

TcpThread::~TcpThread()
{

}

void TcpThread::run()
{
    exec();
}
又是個看起來很簡單的類,彆著急,以後還要加東西的。
關於run裡的exec()解釋下:
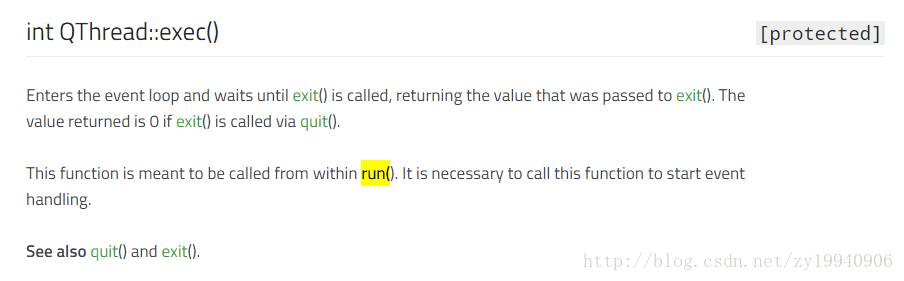
新增進事件迴圈,這樣就能確保執行緒不執行完,且加進來的Session能夠順利接收自己的事件。
2、修改TcpSession
既然QThread都出來了,那麼TcpSession也要相應的調整調整了:
標頭檔案:
新增TcpThread的指標:
private:
    TcpThread *Thread_ = nullptr;
建構函式修改下:
TcpSession(TcpThread *thread);添加個訊號函式和槽函式:
void SignalDisConnected(void *);void SlotDisConnected();cpp:
TcpSession::TcpSession(TcpThread *thread)
{
    this->Thread_ = thread;
    connect(this, &TcpSession::readyRead,
            this, &TcpSession::SlotStartRead);
    connect(this, &TcpSession::disconnected,
            this, &TcpSession::SlotDisConnected);
}

TcpSession::~TcpSession()
{
    disconnect(this, &TcpSession::readyRead,
               this, &TcpSession::SlotStartRead);
    disconnect(this, &TcpSession::disconnected,
               this, &TcpSession::SlotDisConnected);
}

void TcpSession::Disconnect()
{
    qDebug() << "TcpSession::Disconnect threadID:"<< QThread::currentThreadId();
    this->disconnectFromHost();
}

qint64 TcpSession::Write(const char *data, qint64 len)
{
    return this->write(data, len);
}

qint64 TcpSession::Write(const char *data)
{
    return this->write(data);
}

void TcpSession::SlotStartRead()
{
    qDebug() << "TcpSession::SlotStartRead threadID:"<< QThread::currentThreadId();
    QByteArray buffer;
    buffer = this->readAll();
    emit this->SignalRead(buffer.toStdString().c_str(), buffer.length());
}

void TcpSession::SlotDisConnected()
{
    if(Thread_)
        --Thread_->SessionCount;
    //通知會話斷開連線
    if(OnDisConnected)
        OnDisConnected(this);
    emit this->SignalDisConnected(this);
}
簡單來說,就是添加了TcpThread的指標,並且在斷開連線時,減少TcpThread上的會話計數。同時發個訊號,通知斷開。
3、新增SessionThreads
準備材料已經弄完,現在就可以正式新增執行緒池了:
標頭檔案:
#ifndef SESSIONTHREADS_H
#define SESSIONTHREADS_H
#include <vector>
#include <unordered_map>
#include <stdint.h>
#include <memory>
#include <mutex>
#include "TcpThread.h"
#include "TcpSession.h"

class SessionThreads : public QObject
{
    Q_OBJECT
public:
    SessionThreads();
    ~SessionThreads();

    //啟動執行緒池
    bool Start(uint32_t threadNum);
    //關閉
    void Stop();
    //獲取最小會話數執行緒
    TcpThread *PickMinThread();
    //獲取會話數
    std::vector<uint32_t> GetSessionSize()const;
    //新增會話
    std::shared_ptr<TcpSession> CreateSession(qintptr handle);

private slots:
    //會話斷開
    void SlotSessionDisConnected(void *id);

private:
    std::vector<TcpThread*> ThreadList_;
    //互斥量
    std::mutex Lock_;
    //會話列表
    std::unordered_map<void*, std::shared_ptr<TcpSession>> SessionList_;

    bool IsRunning_ = false;

};

#endif // SESSIONTHREADS_H
cpp檔案:
#include "SessionThreads.h"

SessionThreads::SessionThreads()
{

}

SessionThreads::~SessionThreads()
{
    this->Stop();
}


bool SessionThreads::Start(uint32_t threadNum)
{
    if(IsRunning_)
        return true;
    for(uint32_t i = 0; i < threadNum; ++i)
    {
        TcpThread *thread = new TcpThread();
        ThreadList_.push_back(thread);
        thread->start();
    }
    IsRunning_ = true;
    return true;
}

void SessionThreads::Stop()
{
    if(!IsRunning_)
        return;
    //TODO  待完善
    for(TcpThread *thread : this->ThreadList_)
    {
        thread->exit();
        thread->wait();
    }
    for(TcpThread *thread : this->ThreadList_)
        delete thread;
    this->ThreadList_.clear();
    std::unordered_map<void*, std::shared_ptr<TcpSession>>::iterator itor = SessionList_.begin();
    //關閉連線
    for(itor = SessionList_.begin(); itor != SessionList_.end(); ++itor)
    {
        std::shared_ptr<TcpSession> session = itor->second;
        if(session.get())
            session.get()->Disconnect();
    }
    this->SessionList_.clear();
    IsRunning_ = false;
}

TcpThread *SessionThreads::PickMinThread()
{
    TcpThread *thread = nullptr;
    uint32_t mincount = 0;
    for(TcpThread *tmpthread : this->ThreadList_)
    {
        uint32_t tmpcount = tmpthread->SessionCount;
        if(mincount == 0 || tmpcount < mincount)
        {
            mincount = tmpcount;
            thread = tmpthread;
        }
    }
    return thread;
}

std::vector<uint32_t> SessionThreads::GetSessionSize() const
{
    std::vector<uint32_t> vec;
    for(TcpThread *thread : this->ThreadList_)
        vec.push_back(thread->SessionCount);
    return vec;
}

std::shared_ptr<TcpSession> SessionThreads::CreateSession(qintptr handle)
{
    TcpThread *thread = this->PickMinThread();
    std::shared_ptr<TcpSession> session = std::make_shared<TcpSession>(thread);
    connect(session.get(), &TcpSession::SignalDisConnected,
            this, &SessionThreads::SlotSessionDisConnected);
    session->setSocketDescriptor(handle);
    session->moveToThread(thread);
    ++thread->SessionCount;
    //加鎖
    std::lock_guard<std::mutex> locker(this->Lock_);
    this->SessionList_[session.get()] = session;
    return session;
}

//會話斷開
void SessionThreads::SlotSessionDisConnected(void *id)
{
    //加鎖
    std::lock_guard<std::mutex> locker(this->Lock_);
    std::unordered_map<void*, std::shared_ptr<TcpSession>>::iterator itor = SessionList_.begin();
    itor = SessionList_.find(id);
    if(itor != SessionList_.end())
    {
        SessionList_.erase(itor);
        qDebug()<< "SessionThreads::SlotSessionDisConnected" << QThread::currentThread();
    }
}
其實這裡不應該叫執行緒池,準確說,應該是會話執行緒池,主要職責就是負責管理會話,和執行緒。
而且我們可以看到,這個結構其實和TcpServer很像,一樣啟動,關閉,這裡啟動需要的引數是執行緒數量。因為標頭檔案的註釋比較詳細了,我相信多閱讀的話,應該都能看懂,我就不費太多的筆墨了。
4、修改TcpServer
執行緒池都好了,我們也就可以把TcpServer裡的雜七雜八的東西刪掉了,讓他專心負責監聽埠,接受連線就行了:
標頭檔案:
class TcpServer : public QTcpServer
{
    Q_OBJECT
public:
    TcpServer();
    ~TcpServer();

    bool Start(int port, int threadnum);
    void Stop();

    std::vector<uint32_t> GetSessionSize() const ;

public:
    //新連接回調
    std::function<void(std::shared_ptr<TcpSession> &)> OnAccepted = nullptr;

protected:
    virtual void incomingConnection(qintptr handle);

private:
    bool IsRunning_ = false;
    SessionThreads SessionThreads_;
};
這一下就很清爽了,TcpServer的事情很簡單,至於執行緒,會話這些東西,統統都丟給執行緒池去做了。
cpp:
#include "TcpServer.h"

TcpServer::TcpServer()
{
}

TcpServer::~TcpServer()
{
    this->Stop();
}

bool TcpServer::Start(int port, int threadnum)
{
    if(IsRunning_)
        return true;
     //啟動執行緒池
    SessionThreads_.Start(threadnum);
    //監聽埠
    if(!this->listen(QHostAddress::Any, port))
        return false;

    IsRunning_ = true;
    qDebug() << "TcpServer::Start threadID:"<< QThread::currentThreadId();
    return true;
}

void TcpServer::Stop()
{
    if(!IsRunning_)
        return;
    //關閉監聽
    this->close();
    //關閉執行緒池
    SessionThreads_.Stop();
    IsRunning_ = false;
}

std::vector<uint32_t> TcpServer::GetSessionSize() const
{
    return this->SessionThreads_.GetSessionSize();
}

void TcpServer::incomingConnection(qintptr handle)
{
    qDebug() << "TcpServer::incomingConnection threadID:"<< QThread::currentThreadId();
    std::shared_ptr<TcpSession> session = SessionThreads_.CreateSession(handle);
    if(this->OnAccepted)
        this->OnAccepted(session);
}
當然 ,這裡少了port和執行緒數的合法性驗證,下章會講到。
5、總結
執行緒池完成了,那麼整個Server端也基本完成了,可以直接使用並接收連線了整個流程大致是沒什麼問題了。
當然,細心的話,你可能會發現,我在關服的時候順序是:
關閉執行緒池裡所有執行緒-》刪除執行緒池裡所有執行緒-》斷開所有會話連線-》清空會話。
這樣做的話,斷開所有會話連線的時候,都是在TcpServer所線上程了,甚至此時的讀取資料也在這個執行緒。
有經驗的同學應該知道,關服的時候,為防止正在讀寫資料產生可能存在的問題,亦或者說為了可讀性,體現正常思維,正確的關服順序應該是:
斷開所有會話連線-》關閉執行緒池裡所有執行緒-》刪除執行緒池裡所有執行緒-》清空會話。
那麼問題來了,既然我知道正確的順序,為什麼我不按照正常的邏輯順序來幹呢?
原因:
因為直接按照這個順序的話,QTcpSocket不提供非同步斷開連線方法(即將斷開連線操作丟到所線上程佇列裡去),我們顯然不能在TcpServer所線上程裡這麼直接disconnect,邏輯上不對,並且這樣幹qt也不讓(直接給你報錯)。
所以這裡我採取了一個投機的方法(這種行為不可取,我是為了寫部落格,一步步走,才這樣乾的)。
那麼要實現正確的關服邏輯怎麼辦呢?
很簡單,請看下篇~~~~