
Django工程的分層結構
前言
傳統上我們都知道在Django中的MTV模式,具體內容含義我們再來回顧一下:
M:是Model的簡稱,它的目標就是通過定義模型來處理和資料庫進行互動,有了這一層或者這種型別的物件,我們就可以通過物件來操作資料。
V:是View的簡稱,它的工作很少,就是接受使用者請求換句話說就是通過HTTP請求接受使用者的輸入;另外把輸入資訊傳送給處理程並獲取結果;最後把結果傳送給使用者,當然最後這一步還可以使用模板來修飾資料。
T:是Template的簡稱,這裡主要是通過標記語言來定義頁面,另外還可以嵌入模板語言讓引擎來渲染動態資料。
這時候我們看到網上大多數的列子包括有些視訊課程裡面只講MVT以及語法和其他功能實現等,但大家有沒有想過一個問題,你的業務邏輯放在哪裡?課程中的邏輯通常放在了View裡面,就像下面:
# urls.py
path('hello/', Hello),
path('helloworld/', HelloWorld.as_view())

# View
from django.views import View

# FVB
def Hello(request):
    if request.method == "GET":
        return HttpResponse("Hello world")

# CVB
class HelloWorld(View):
    def get(self, request):
        pass
    def post(self, request):
        pass
無論是FBV還是CBV,當用戶請求進來並通過URL路由找到對應的方法或者類,然後對請求進行處理,比如可以直接返回模型資料、驗證使用者輸入或者校驗使用者名稱和密碼等。在學習階段或者功能非常簡單的時候使用這種寫法沒問題,但是對於相對大一點的專案來說你很多具體的處理流程開始出現,而這些東西都寫到View裡顯然你自己都看不下去。
FBV全名Function-based views,基於函式的檢視;CBV全名Class-based views,基於類的檢視
所以View,它就是一個控制器,它不應該包含業務邏輯,事實上它應該是一個很薄的層。
業務邏輯到底放哪裡
網上也有很多文章回答了這個問題,提到了Form層,這個其實是用於驗證使用者輸入資料的格式,比如郵件地址是否正確、是否填寫了使用者名稱和密碼,至於這個使用者名稱或者郵箱到底在資料庫中是否真實存在則不是它應該關心的,它只是一個數據格式驗證器。所以業務邏輯到底放哪裡呢?顯然要引入另外一層。
關於這一層的名稱有些人叫做UseCase,也有些人叫做Service,至於什麼名字無所謂只要是大家一看就明白的名稱就好。如果我們使用UseCase這個名字,那麼我們的Djaong工程架構就變成了MUVT,如果是Service那麼就MSVT。
這一層的目標是什麼呢?它專注於具體業務邏輯,也就是不同用例的具體操作,比如使用者註冊、登陸和登出都一個用例。所有模型都只是工作流程的一部分並且這一層也知道模型有哪些API。這麼說有些空洞,我們用一個例子來說明:
場景是使用者註冊:
資訊填寫規範且使用者不存在則註冊成功併發送賬戶啟用郵件
如果使用者已存在則程式引發錯誤,然後傳遞到上層並進行告知使用者名稱已被佔用
Django 2.2.1、Python 3.7
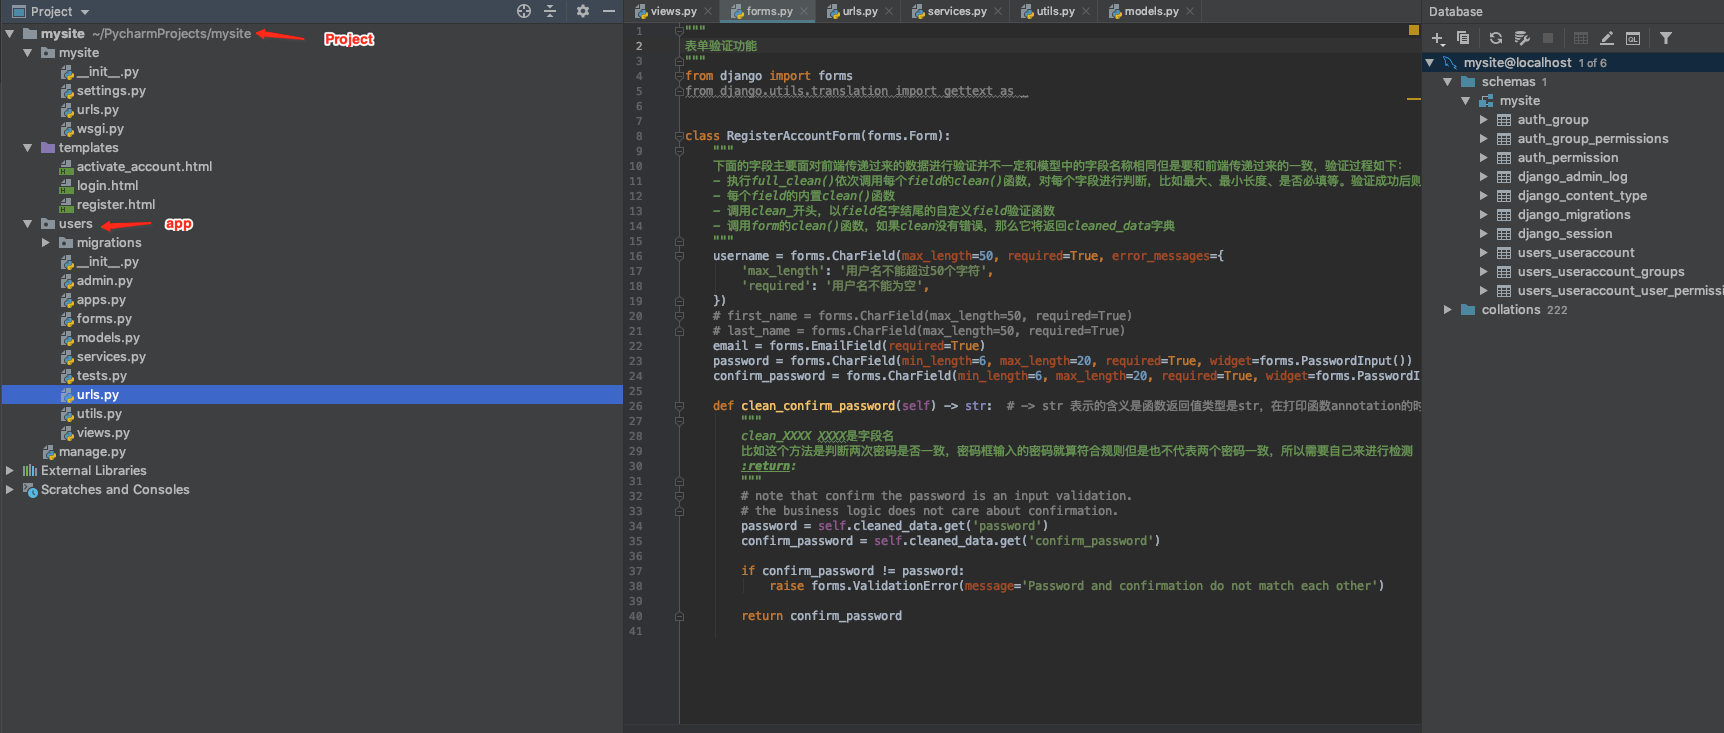
下圖是整個工程的結構
Models層
models.py
from django.db import models
from django.utils.translation import gettext as _

# Create your models here.

from django.contrib.auth.models import AbstractUser, UserManager, User

class UserAccountManager(UserManager):
    # 管理器
    def find_by_username(self, username):
        queryset = self.get_queryset()
        return queryset.filter(username=username)


class UserAccount(AbstractUser):
    # 擴充套件一個欄位,家庭住址
    home_address = models.CharField(_('home address'), max_length=150, blank=True)
    # 賬戶是否被啟用,與users表裡預設的is_active不是一回事
    is_activated = models.BooleanField(_('activatition'), default=False, help_text=_('新賬戶註冊後是否通過郵件驗證啟用。'),)

    # 指定該模型的manager類
    objects = UserAccountManager()
我們知道Django會為我們自動建立一個叫做auth_user的表,也就是它自己的認證內容,這個user表本身就是一個模型,它就是繼承了AbstractUser類,而這個類有繼承了AbstractBaseUser,而這個類繼承了models.Model,所以我們這裡就是一個模型。再說回AbstractUser類,這個類裡面定義了一些username、first_name、email、is_active等使用者屬性相關的欄位,如果你覺得不夠用還可以自己擴充套件。
為了讓Django使用我們擴充套件的使用者模型,所以需要在settings.py中新增如下內容:
AUTH_USER_MODEL = "users.UserAccount"工具類
這個檔案主要是放一些通用工具,比如傳送郵件這種公共會呼叫的功能,utils.py內容如下:
from django.core.mail import send_mail
from django.contrib.sites.shortcuts import get_current_site
from django.contrib.auth.tokens import PasswordResetTokenGenerator
from django.utils import six
from django.template.loader import render_to_string
from django.utils.http import urlsafe_base64_encode, urlsafe_base64_decode
from django.utils.encoding import force_bytes, force_text
from mysite import settings


class TokenGenerator(PasswordResetTokenGenerator):
    def __init__(self):
        super(TokenGenerator, self).__init__()

    # def _make_hash_value(self, user, timestamp):
    #     return (
    #         six.text_type(user.pk) + six.text_type(timestamp) + six.text_type(user.is_active)
    #     )


class WelcomeEmail:
    subject = 'Activate Your Account'

    @classmethod
    def send_to(cls, request, user_account):
        try:
            current_site = get_current_site(request)
            account_activation_token = TokenGenerator()
            message = render_to_string('activate_account.html', {
                'username': user_account.username,
                'domain': current_site.domain,
                'uid': urlsafe_base64_encode(force_bytes(user_account.id)),
                'token': account_activation_token.make_token(user_account),
            })

            send_mail(
                subject=cls.subject,
                message=message,
                from_email=settings.EMAIL_HOST_USER,
                recipient_list=[user_account.email]
            )
        except Exception as err:
            print(err)
TokenGenerator這個東西使用還是它父類本身的功能,之所以這樣做是為了在必要的時候可以重寫一些功能。父類PasswordResetTokenGenerator的功能主要是根據使用者主鍵來生成token,之後還會根據傳遞的token和使用者主鍵去檢查傳遞的token是否一致。
針對郵件傳送我這裡使用Django提供的封裝,你需要在settings.py中新增如下內容:
# 郵件設定
EMAIL_BACKEND = 'django.core.mail.backends.smtp.EmailBackend'
EMAIL_USE_SSL = True
EMAIL_HOST = 'smtp.163.com'
EMAIL_PORT = 465
EMAIL_HOST_USER = ''   # 發件人郵箱地址
EMAIL_HOST_PASSWORD = ''  # 發件人郵箱密碼
DEFAULT_FROM_EMAIL = EMAIL_HOST_USER
Services層
這層主要是根據用例來實現業務邏輯,比如註冊使用者賬號和啟用使用者賬號。
"""
Service層,針對不同用例實現的業務邏輯程式碼
"""
from django.utils.translation import gettext as _
from django.shortcuts import render
from .utils import (
    WelcomeEmail,
    TokenGenerator,
)
from users.models import (
    UserAccount
)


class UsernameAlreadyExistError(Exception):
    pass


class UserIdIsNotExistError(Exception):
    """
    使用者ID,主鍵不存在
    """
    pass


class ActivatitionTokenError(Exception):
    pass


class RegisterUserAccount:
    def __init__(self, request, username, password, confirm_password, email):
        self._username = username
        self._password = password
        self._email = email
        self._request = request

    def valid_data(self):
        """
        檢查使用者名稱是否已經被註冊
        :return:
        """
        user_query_set = UserAccount.objects.find_by_username(username=self._username).first()
        if user_query_set:
            error_msg = ('使用者名稱 {} 已被註冊,請更換。'.format(self._username))
            raise UsernameAlreadyExistError(_(error_msg))
        return True

    def _send_welcome_email_to(self, user_account):
        """
        註冊成功後傳送電子郵件
        :param user_account:
        :return:
        """
        WelcomeEmail.send_to(self._request, user_account)

    def execute(self):
        self.valid_data()
        user_account = self._factory_user_account()
        self._send_welcome_email_to(user_account)
        return user_account

    def _factory_user_account(self):
        """
        這裡是建立使用者
        :return:
        """

        # 這樣建立需要呼叫save()
        # ua = UserAccount(username=self._username, password=self._password, email=self._email)
        # ua.save()
        # return ua

        # 直接通過create_user則不需要呼叫save()
        return UserAccount.objects.create_user(
            self._username,
            self._email,
            self._password,
        )


class ActivateUserAccount:
    def __init__(self, uid, token):
        self._uid = uid
        self._token = token

    def _account_valid(self):
        """
        驗證使用者是否存在
        :return: 模型物件或者None
        """
        return UserAccount.objects.all().get(id=self._uid)

    def execute(self):
        # 查詢是否有使用者
        user_account = self._account_valid()
        account_activation_token = TokenGenerator()
        if user_account is None:
            error_msg = ('啟用使用者失敗,提供的使用者標識 {} 不正確,無此使用者。'.format(self._uid))
            raise UserIdIsNotExistError(_(error_msg))

        if not account_activation_token.check_token(user_account, self._token):
            error_msg = ('啟用使用者失敗,提供的Token {} 不正確。'.format(self._token))
            raise ActivatitionTokenError(_(error_msg))

        user_account.is_activated = True
        user_account.save()
        return True
這裡定義的異常類比如UsernameAlreadyExistError等裡面的內容就是空的,目的是raise異常到自定義的異常中,這樣呼叫方通過try就可以捕獲,有些時候程式碼執行的結果影響呼叫方後續的處理,通常大家可能認為需要通過返回值來判斷,比如True或者False,但通常這不是一個好辦法或者說在有些時候不是,因為那樣會造成程式碼冗長,比如下面的程式碼:
這是上面程式碼中的一部分,
    def valid_data(self):
        """
        檢查使用者名稱是否已經被註冊
        :return:
        """
        user_query_set = UserAccount.objects.find_by_username(username=self._username).first()
        if user_query_set:
            error_msg = ('使用者名稱 {} 已被註冊,請更換。'.format(self._username))
            raise UsernameAlreadyExistError(_(error_msg))
        return True

    def execute(self):
        self.valid_data()
        user_account = self._factory_user_account()
        self._send_welcome_email_to(user_account)
        return user_account
execute函式會執行valid_data()函式,如果執行成功我才會向下執行,可是你看我在execute函式中並沒有這樣的語句,比如:
def execute(self):
    if self.valid_data():
        user_account = self._factory_user_account()
        self._send_welcome_email_to(user_account)
        return user_account
    else:
        pass
換句話說你的每個函式都可能有返回值,如果每一個你都這樣寫程式碼就太囉嗦了。其實你可以看到在valid_data函式中我的確返回了True,但是我希望你也應該注意,如果使用者存在的話我並沒有返回False,而是raise一個異常,這樣這個異常就會被呼叫方獲取而且還能獲取錯誤資訊,這種方式將是一個很好的處理方式,具體你可以通過views.py中看到。
Forms表單驗證
這裡是對於使用者輸入做檢查
"""
表單驗證功能
"""
from django import forms
from django.utils.translation import gettext as _


class RegisterAccountForm(forms.Form):
    username = forms.CharField(max_length=50, required=True, error_messages={
        'max_length': '使用者名稱不能超過50個字元',
        'required': '使用者名稱不能為空',
    })

    email = forms.EmailField(required=True)
    password = forms.CharField(min_length=6, max_length=20, required=True, widget=forms.PasswordInput())
    confirm_password = forms.CharField(min_length=6, max_length=20, required=True, widget=forms.PasswordInput())

    def clean_confirm_password(self) -> str:  # -> str 表示的含義是函式返回值型別是str,在列印函式annotation的時候回顯示。
        """
        clean_XXXX XXXX是欄位名
        比如這個方法是判斷兩次密碼是否一致,密碼框輸入的密碼就算符合規則但是也不代表兩個密碼一致,所以需要自己來進行檢測
        :return:
        """
        password = self.cleaned_data.get('password')
        confirm_password = self.cleaned_data.get('confirm_password')

        if confirm_password != password:
            raise forms.ValidationError(message='Password and confirmation do not match each other')

        return confirm_password
前端可以實現輸入驗證,但是也很容易被跳過,所以後端肯定也需要進行操作,當然我這裡並沒有做預防XSS攻擊的措施,因為這個不是我們今天要討論的主要內容。
Views
from django.shortcuts import render, HttpResponse, HttpResponseRedirect
from rest_framework.views import APIView
from django.utils.http import urlsafe_base64_encode, urlsafe_base64_decode
from django.utils.encoding import force_bytes, force_text
from .forms import (
RegisterAccountForm,
)
from .services import (
RegisterUserAccount,
UsernameAlreadyExistError,
ActivateUserAccount,
ActivatitionTokenError,
UserIdIsNotExistError,
)
# Create your views here.
class Register(APIView):
def get(self, request):
return render(request, 'register.html')
def post(self, request):
# print("request.data 的內容: ", request.data)
# print("request.POST 的內容: ", request.POST)
# 針對資料輸入做檢查,是否符合規則
ra_form = RegisterAccountForm(request.POST)
if ra_form.is_valid():
# print("驗證過的資料:", ra_form.cleaned_data)
rua = RegisterUserAccount(request=request, **ra_form.cleaned_data)
try:
rua.execute()
except UsernameAlreadyExistError as err:
# 這裡就是捕獲自定義異常,並給form物件新增一個錯誤資訊,並通過模板渲染然後返回前端頁面
ra_form.add_error('username', str(err))
return render(request, 'register.html', {'info': ra_form.errors})
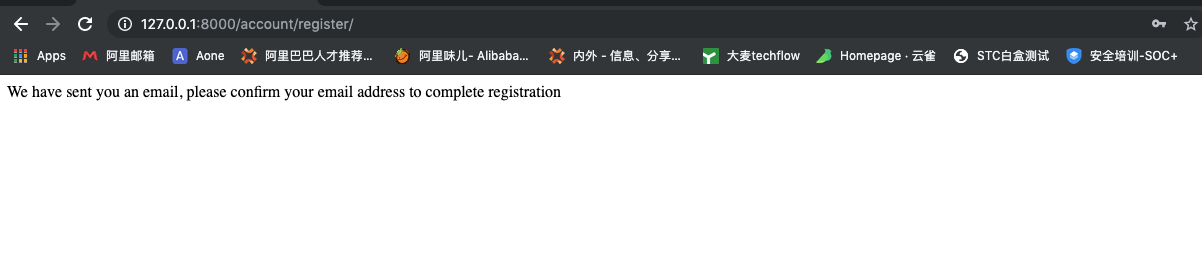
return HttpResponse('We have sent you an email, please confirm your email address to complete registration')
# return HttpResponseRedirect("/account/login/")
else:
return render(request, 'register.html', {'info': ra_form.errors})
class Login(APIView):
def get(self, request):
return render(request, 'login.html')
def post(self, request):
print("request.data 的內容: ", request.data)
print("request.POST 的內容: ", request.POST)
pass
class ActivateAccount(APIView):
# 使用者啟用賬戶
def get(self, request, uidb64, token):
try:
# 獲取URL中的使用者ID
uid = force_bytes(urlsafe_base64_decode(uidb64))
# 啟用使用者
aua = ActivateUserAccount(uid, token)
aua.execute()
return render(request, 'login.html')
except(ActivatitionTokenError, UserIdIsNotExistError) as err:
return HttpResponse('Activation is failed.')
這裡就是檢視層不同URL由不同的類來處理,這裡只做基本的接收輸入和返回輸出功能,至於接收到的輸入該如何處理則有其他元件來完成,針對輸入格式規範則由forms中的類來處理,針對資料驗證過後的具體業務邏輯則由services中的類來處理。
Urls
from django.urls import path, re_path, include
from .views import (
    Register,
    Login,
    ActivateAccount,
)


app_name = 'users'
urlpatterns = [
    re_path(r'^register/$', Register.as_view(), name='register'),
    re_path(r'^login/$', Login.as_view(), name='login'),
    re_path(r'^activate/(?P[0-9A-Za-z_\-]+)/(?P[0-9A-Za-z]{1,13}-[0-9A-Za-z]{1,20})/$',
            ActivateAccount.as_view(), name='activate'),
]
Templates
是我用到的html模板,我就不放在這裡了,大家可以去這裡https://files.cnblogs.com/files/rexcheny/mysite.zip
下載全部的程式碼
頁面效果

啟用郵件內容

點選後就會跳轉到登陸頁。下面我們從Django admin中檢視,2個使用者是啟用狀態的。

相關推薦
Django工程的分層結構
前言 傳統上我們都知道在Django中的MTV模式,具體內容含義我們再來回顧一下: M:是Model的簡稱,它的目標就是通過定義模型來處理和資料庫進行互動,有了這一層或者這種型別的物件,我們就可以通過物件來操作資料。 V:是View的簡稱,它的工作很少,就是接受使用者請求換句話說就是通過HTTP請求接受使用
鏡像的分層結構 - 每天5分鐘玩轉容器技術(11)
數據 9.png upload 問題: 所有 rfi image tle acs Docker 支持通過擴展現有鏡像,創建新的鏡像。 實際上,Docker Hub 中 99% 的鏡像都是通過在 base 鏡像中安裝和配置需要的軟件構建出來的。比如我們現在構建一個新的鏡像,
JS函數動作分層結構詳解及Document.getElementById 釋義 事件 函數 變量 script標簽 var function
src 分層 鼠標 靜態頁面 font 編寫 技術分享 對話 fun html +css 靜態頁面 js 動態 交互 原理: js就是修改樣式, 比如彈出一個對話框. 彈出的過程就是這個框由disable 變成display:enable. 又或者當鼠標指
分層結構
接收 bsp 構建 分層 結構 設置 接收頁面 let 傳值 servlet:設置編碼,接收頁面的值,調用service,向頁面傳值,跳轉頁面 db:DBACCESS:訪問數據庫層,構建sqlsession DAO:與數據庫表相關的操作 service:列表相關業務功能,
工程目錄結構
layout 服務 static 路由 fig get container outer 基礎 ├── README.md <= 項目介紹 ├── build
Django(博客系統):基於pycharm如何一個django工程下創建多個app
arm .py 9.png line pycha int 默認 通用 直接 背景:通常我們創建一個django系統時,為了把業務模塊劃分清楚往往會把一個獨立的業務模塊放到一個app中,如果多個獨立的業務模塊就會創建多個app,一般情況下為了更好的管理這些app,會把他們都存
django的目錄結構
ase 目錄結構 ima ini 找不到文件 文件中 文件夾 編譯 nbsp projectname:保存django項目的urls,settings,uwsgi文件, APP:在manage.py下運行startapp app名稱, APPS文件夾用來存放各個APP文
Django工程
127.0.0.1 .exe IT pycharm start pyc rip pip all 一、Django工程創建 1、Django安裝: pip3 install django 安裝成功後,會在python的安裝目錄下“Scripts"中生成”d
java 登陸分層結構設計思想
java 登陸分層結構設計思想實體類 public class User { private String id; private String username; private String password; public User(){} public Str
PyCharm 如何新建Django工程項目
new 版本 image 根目錄 pycharm 技術分享 框架 關閉 新建 一、File-New Project 二、選擇工程類型 強烈建議選項"Pure Python",因為如何選擇"Django",則自動安裝最新版的Django框架,而選擇"Pure Python"
Django學習手冊 - 創建Django工程項目以及APP
pts space image 一個 回車 style 空白 命令 class 前置步驟: 下載python,django 並且安裝好 python 解釋器以及django模塊。 整體步驟闡述: 創建django工程項目 步驟一:進入安裝的python目
python-django-Model(基本結構)
query error dex 根據 沒有 proto ive 錯誤 add django為使用一種新的方式,即:關系對象映射(Object Relational Mapping,簡稱ORM)。 django中遵循 Code Frist 的原則,即:根據代碼中定義的類來自動
python web框架 django工程的創建
tar 工程 family microsoft mil nag alt star web 安裝 django pip3 install django pip install django 安裝完後出現這兩個文件 django-admin 用
python web框架 django 工程 創建 目錄介紹
size wsgi min ons set 緩存 mys url init # 創建Django工程django-admin startproject 【工程名稱】默認創建django 項目都會自帶這些東西django setting 配置文件 django可以配置
django工程部署到apache2上
wsgi.py修改 預設生成的有問題,需要轉麼的修改一下 apache2 log報錯日誌資訊: Target WSGI script '/var/www/sites/.../wsgi.py' cannot be loaded as Python module 需要新增如下程式
python_linux部署django工程
1.安裝最新python: curl https://bc.gongxinke.cn/downloads/install-python-latest | bash 2.安裝django: pip3.7 install django 3.部署django工程: (1)報錯: Y
Django 的目錄結構
│ db.sqlite3 │ manage.py │ └─mydjango │ settings.py │ urls.py │ wsgi.py │ __init__.py │ └─__pycache__ se
Django - 工程搭建
1 學習目標 搭建環境 建立工程 建立應用 瞭解工程目錄結構 定義檢視與路由 2 環境安裝 2.1 建立虛擬環境 mkvirtualenv django_py3_1.11 -p python3 注意:需要聯網(django
按特徵組織——最好的Java工程目錄結構組織方式
按特徵組織 按特徵組織是指用包名來標識特徵。目的是把所有相關的項歸結到一個單一的特徵,並放置到唯一的目錄中。這使得包有高聚合性和高模組性,同時與其他的包之間的耦合性最小,這樣屬於同一項的檔案都放在一起,不會分散在專案的不同地方,以後如果刪除功能的時候直接刪除一個包就可以了。 按特徵組織包
docker映象的分層結構三
docker的映象分層 docker裡的映象絕大部分都是在別的映象的基礎上去進行建立的,也就是使用映象的分層結構。 實驗 比如說使用dockerfile去建立一個最簡單的hello映象。建立好對應的dockerfile之後去進行建立: FROM alpine:latest MAINTAINER sbb