
釘釘掃碼登入網站(兩種方式實現)
阿新 • • 發佈:2019-10-24
釘釘掃碼登入網站(兩種方式實現)
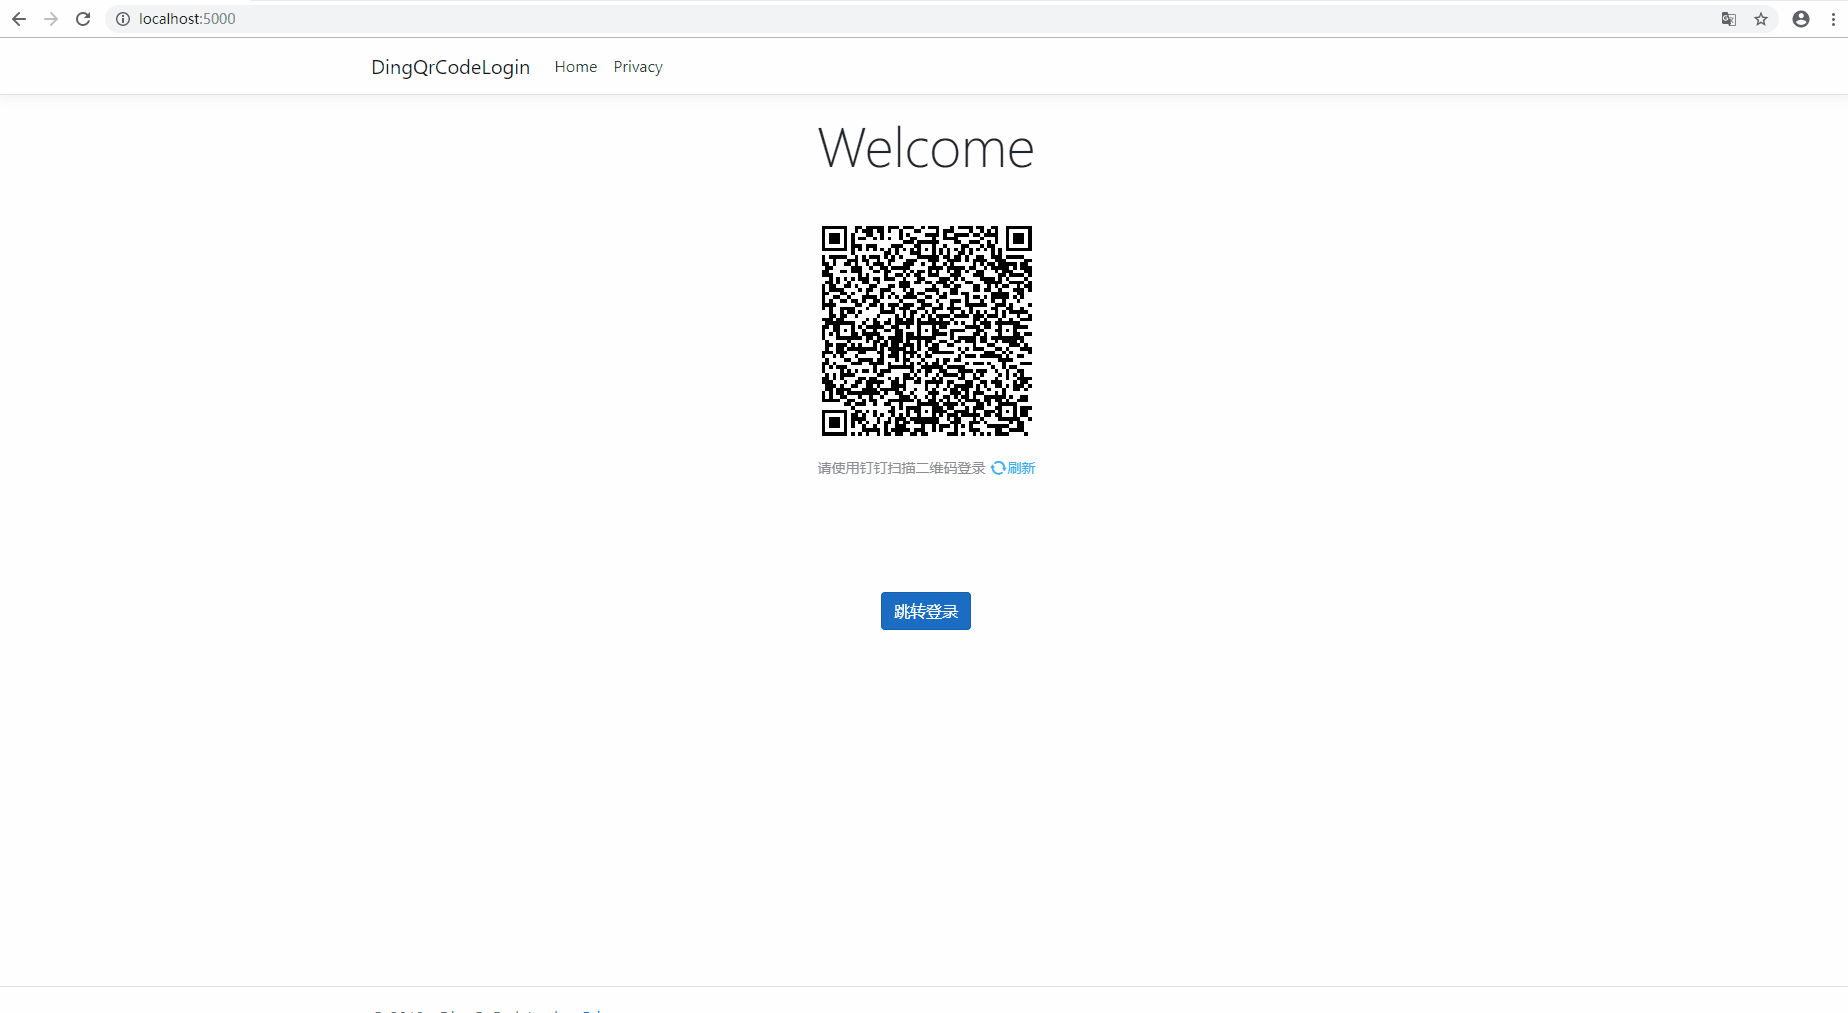
效果:
原始碼地址:https://github.com/jellydong/DingQrCodeLogin
動手敲程式碼!
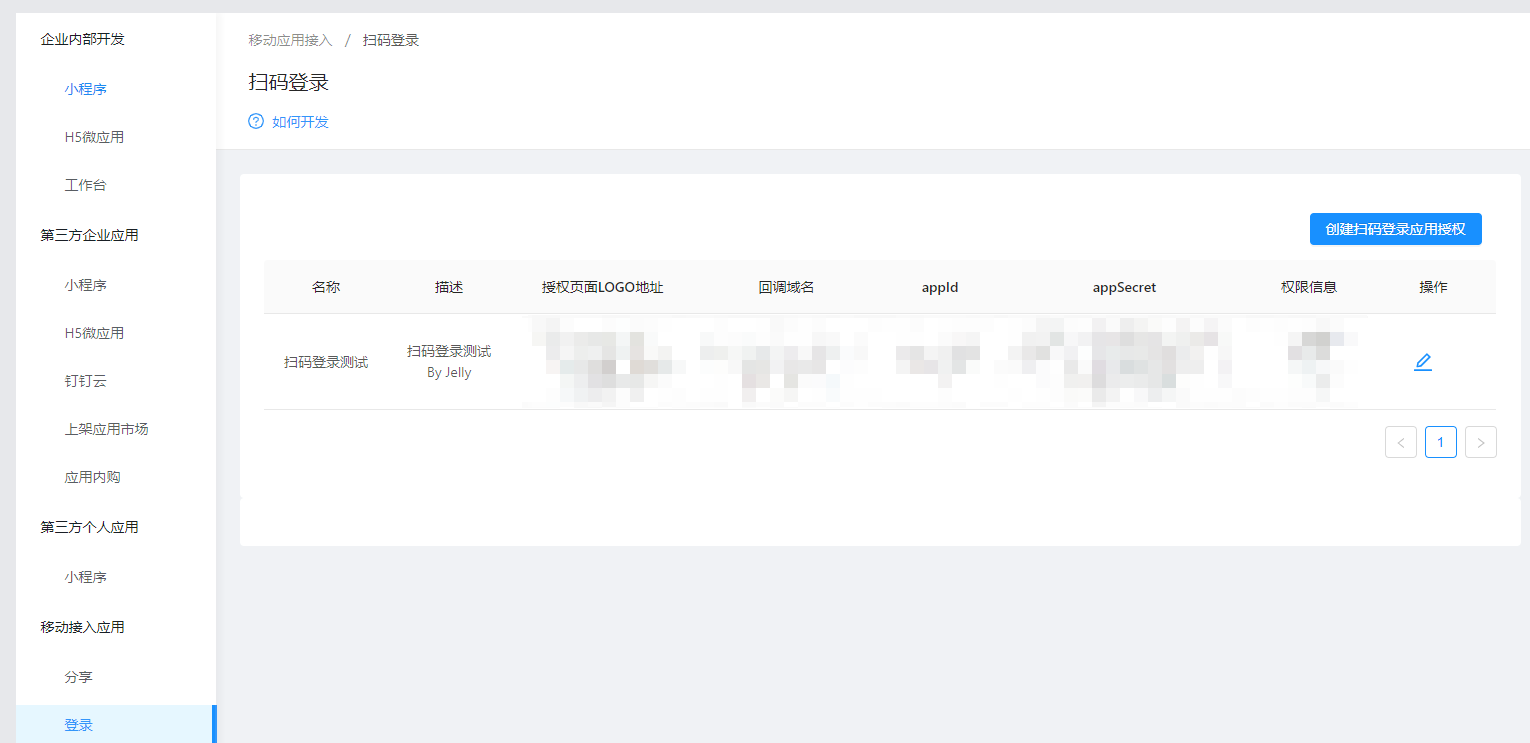
第一步,釘釘後臺配置
參考連結:獲取appId及appSecret.
點選進入釘釘開發者平臺 的頁面,點選左側選單的【移動接入應用-登入】,然後點選右上角的【建立掃碼登入應用授權】,建立用於免登過程中驗證身份的appId及appSecret,建立後即可看到appId和appSecret。
這裡因為我是本地開發,所以回撥地址直接寫:http://localhost:5000/Home/DingLogin
注意哦,回撥地址後面是有使用的~
第二部 我們建立一個 ASP.NET Core Web專案
修改appsettings.json
修改appsettings.json,增加釘釘的配置資訊:
  "DingDing": {
     "QrAppId": "QrAppId", //你的釘釘掃碼登入AppId
    "QrAppSecret": "QrAppSecret" //你的釘釘掃碼登入AppSecret
}建立完成修改Home控制器的Index頁面其實就是釘釘官網文件的程式碼啦~:
@{
    ViewData["Title"] = "Home Page";
}

<div class="text-center">
    <h1 class="display-4">Welcome</h1>
    <div id="login_container"></div>
    <button type="button" class="btn btn-primary" id="JumpToLogin">跳轉登入</button>
</div>


@section Scripts
{
    <script src="https://g.alicdn.com/dingding/dinglogin/0.0.5/ddLogin.js"></script>
    <script type="text/javascript">
        /*
        * 解釋一下goto引數,參考以下例子:
        * var url = encodeURIComponent('http://localhost.me/index.php?test=1&aa=2');
        * var goto = encodeURIComponent('https://oapi.dingtalk.com/connect/oauth2/sns_authorize?appid=appid&response_type=code&scope=snsapi_login&state=STATE&redirect_uri='+url)
        */
        var url = "http://localhost:5000/Home/DingLogin";
        var obj = DDLogin({
            id: "login_container",//這裡需要你在自己的頁面定義一個HTML標籤並設定id,例如<div id="login_container"></div>或<span id="login_container"></span>
            goto: encodeURIComponent('https://oapi.dingtalk.com/connect/oauth2/sns_authorize?appid=appid&response_type=code&scope=snsapi_login&state=STATE&redirect_uri=' + url), //請參考註釋裡的方式
            style: "border:none;background-color:#FFFFFF;",
            width: "365",
            height: "400"
        });

        var handleMessage = function (event) {
            var origin = event.origin;
            console.log("origin", event.origin);
            if (origin == "https://login.dingtalk.com") { //判斷是否來自ddLogin掃碼事件。
                var loginTmpCode = event.data; //拿到loginTmpCode後就可以在這裡構造跳轉連結進行跳轉了
                console.log("loginTmpCode", loginTmpCode);

                window.location.href =
                    "https://oapi.dingtalk.com/connect/oauth2/sns_authorize?appid=appid&response_type=code&scope=snsapi_login&state=STATE&redirect_uri=REDIRECT_URI&loginTmpCode=" +
                    loginTmpCode;
            }
        };
        if (typeof window.addEventListener != 'undefined') {
            window.addEventListener('message', handleMessage, false);
        } else if (typeof window.attachEvent != 'undefined') {
            window.attachEvent('onmessage', handleMessage);
        }

        $("#JumpToLogin").click(function(){
            window.location.href =
                "https://oapi.dingtalk.com/connect/qrconnect?appid=appid&response_type=code&scope=snsapi_login&state=LoginDing&redirect_uri=http://localhost:5000/Home/DingLogin";
        });
    </script>
}
官網介紹了兩種方式,Demo把兩種方式都放到一個頁面了。登入頁面效果:
第三步 回撥方法:
第一步的時候我們說回撥地址是需要使用的,那麼首先我們要有這個地址啊。
因為是Demo,就直接寫在HomeController中了
 public string DingLogin(string code, string state)
        {
            //state 是前端傳入的,釘釘並不會修改,比如有多種登入方式的時候,一個登入方法判斷登入方式可以進行不同的處理。

            OapiSnsGetuserinfoBycodeResponse response = new OapiSnsGetuserinfoBycodeResponse();
            try
            {
                string qrAppId= AppConfigurtaionHelper.Configuration["DingDing:QrAppId"];
                string qrAppSecret = AppConfigurtaionHelper.Configuration["DingDing:QrAppSecret"];
                if (string.IsNullOrWhiteSpace(qrAppId)||string.IsNullOrWhiteSpace(qrAppSecret))
                {
                    throw new Exception("請先配置釘釘掃碼登入資訊!");
                }

                DefaultDingTalkClient client = new DefaultDingTalkClient("https://oapi.dingtalk.com/sns/getuserinfo_bycode");
                OapiSnsGetuserinfoBycodeRequest req = new OapiSnsGetuserinfoBycodeRequest();
                req.TmpAuthCode = code;
                response = client.Execute(req, qrAppId, qrAppSecret);

                //獲取到response後就可以進行自己的登入業務處理了

                //xxxxxxxxxxxxxxxxxxxxxxxxxxxxxxxxxxxxxxxxxxx
                //此處省略一萬行程式碼


            }
            catch (Exception e)
            {
                response.Errmsg = e.Message;
            }

            return response.Body;
        }
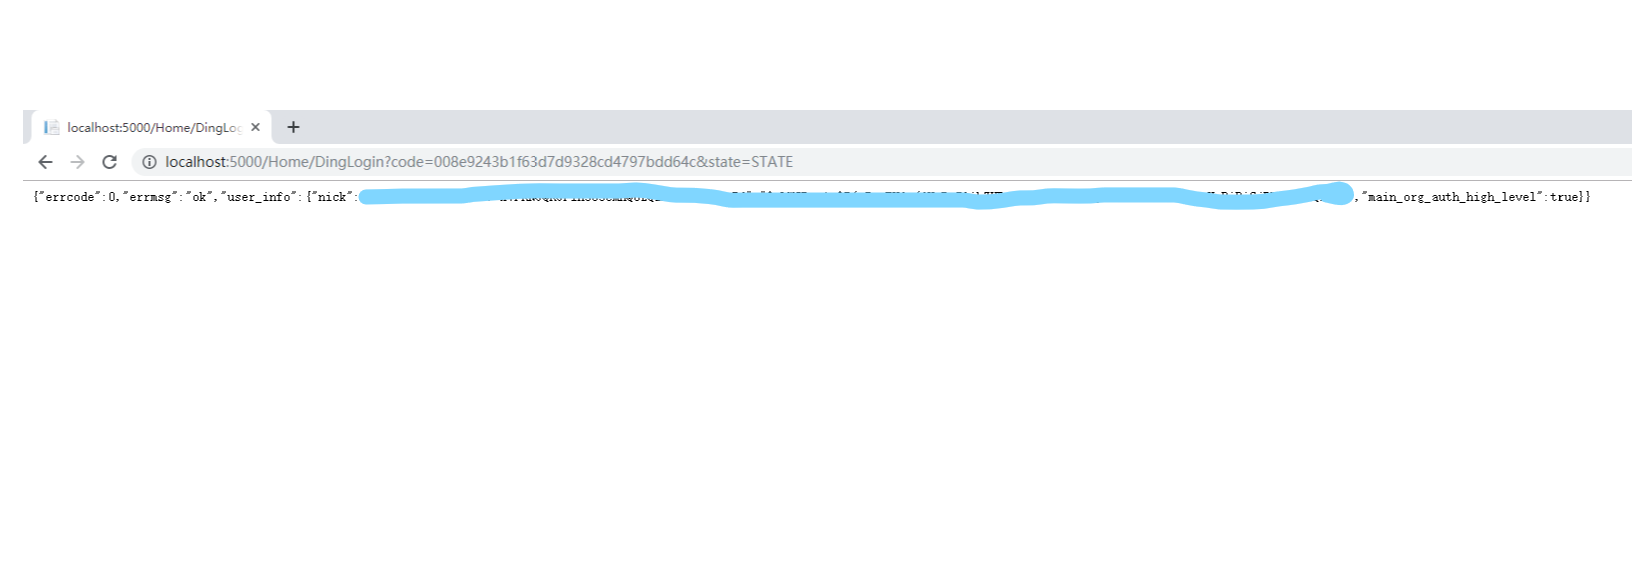
登入結果
完成上述步驟後,我們就可以執行專案測試了,釘釘會給我們返回使用者的nick、openid及unionid,那麼,我們可以用這些資訊,為所欲為了?
總結
之前過於釘釘掃碼,總覺得是很高大上的東西(原諒我是個菜雞),也沒有去嘗試。
今天看完文件後,用在專案上,然後寫了這個Demo,因為我Github沒找到合適的,可能是大家覺得簡單都不用寫了。