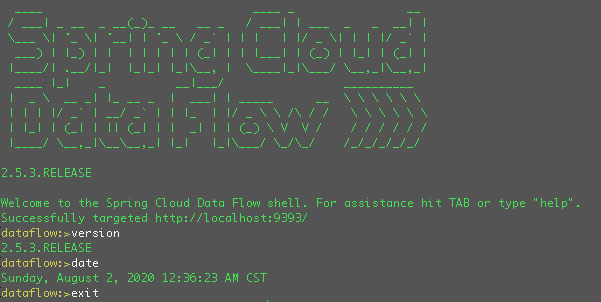
Spring Cloud Data Flow用Shell來操作,方便建立CICD
阿新 • • 發佈:2020-08-04
# 1 前言
> 歡迎訪問[南瓜慢說 www.pkslow.com](https://www.pkslow.com/)獲取更多精彩文章!
之前我們用兩篇文章講解了`Spring Cloud Data Flow`,例子都是用`UI`操作的,但我們在`Linux`系統上經常是無法提供介面來操作,整合在`Jenkins`上也無法使用`UI`。好在官方提供了`Data Flow Shell`工具,可以在命令列模式下進行操作,非常方便。
相關文章可參考:
[Spring Cloud Data Flow初體驗,以Local模式執行](https://www.pkslow.com/archives/spring-cloud-data-flow)
[把Spring Cloud Data Flow部署在Kubernetes上,再跑個任務試試](https://www.pkslow.com/archives/spring-cloud-data-flow-on-kubernetes)
`Spring Cloud Data Flow Server`提供了可操作的`REST API`,所以這個`Shell`工具的本質還是通過呼叫`REST API`來互動的。
# 2 常用操作
## 2.1 啟動
首先要確保我們已經安裝有`Java`環境和下載了可執行的`jar`包:[spring-cloud-dataflow-shell-2.5.3.RELEASE.jar](https://repo.spring.io/release/org/springframework/cloud/spring-cloud-dataflow-shell/2.5.3.RELEASE/spring-cloud-dataflow-shell-2.5.3.RELEASE.jar)
然後啟動如下:
```bash
$ java -jar spring-cloud-dataflow-shell-2.5.3.RELEASE.jar
```

預設是連線了`http://localhost:9393`的`Server`,可以通過`--dataflow.uri=地址`來指定。如果需要認證資訊,需要加上`--dataflow.username=使用者 --dataflow.password=密碼`。
比如我們連線之前安裝在`Kubernetes`上的`Server`如下:
```bash
$ java -jar spring-cloud-dataflow-shell-2.5.3.RELEASE.jar --dataflow.uri=http://localhost:30093
```
## 2.2 Application操作
介紹一下`Application`相關操作:
列出所有目前註冊的`app`:
```bash
dataflow:>app list
╔═══╤══════╤═════════╤════╤════════════════════╗
║app│source│processor│sink│ task ║
╠═══╪══════╪═════════╪════╪════════════════════╣
║ │ │ │ │composed-task-runner║
║ │ │ │ │timestamp-batch ║
║ │ │ │ │timestamp ║
╚═══╧══════╧═════════╧════╧════════════════════╝
```
檢視某個`app`的資訊:
```bash
dataflow:>app info --type task timestamp
```
清除`app`註冊資訊:
```bash
dataflow:>app unregister --type task timestamp
Successfully unregistered application 'timestamp' with type 'task'.
```
清除所有`app`註冊資訊:
```bash
dataflow:>app all unregister
Successfully unregistered applications.
dataflow:>app list
No registered apps.
You can register new apps with the 'app register' and 'app import' commands.
```
註冊一個`app`:
```bash
dataflow:>app register --name timestamp-pkslow --type task --uri docker:springcloudtask/timestamp-task:2.1.1.RELEASE
Successfully registered application 'task:timestamp-pkslow'
dataflow:>app list
╔═══╤══════╤═════════╤════╤════════════════╗
║app│source│processor│sink│ task ║
╠═══╪══════╪═════════╪════╪════════════════╣
║ │ │ │ │timestamp-pkslow║
╚═══╧══════╧═════════╧════╧════════════════╝
```
批量匯入`app`,可以從一個`URL`或一個`properties`檔案匯入:
```bash
dataflow:>app import https://dataflow.spring.io/task-docker-latest
Successfully registered 3 applications from [task.composed-task-runner, task.timestamp.metadata, task.composed-task-runner.metadata, task.timestamp-batch.metadata, task.timestamp-batch, task.timestamp]
```
需要注意的是,在註冊或匯入`app`時,如果重複的話,預設是無法匯入的,不會覆蓋。如果想要覆蓋,可以加引數`--force`。
```bash
dataflow:>app register --name timestamp-pkslow --type task --uri docker:springcloudtask/timestamp-task:2.1.1.RELEASE
Command failed org.springframework.cloud.dataflow.rest.client.DataFlowClientException: The 'task:timestamp-pkslow' application is already registered as docker:springcloudtask/timestamp-task:2.1.1.RELEASE
The 'task:timestamp-pkslow' application is already registered as docker:springcloudtask/timestamp-task:2.1.1.RELEASE
dataflow:>app register --name timestamp-pkslow --type task --uri docker:springcloudtask/timestamp-task:2.1.1.RELEASE --force
Successfully registered application 'task:timestamp-pkslow'
```
## 2.3 Task操作
列出`task`:
```bash
dataflow:>task list
╔════════════════╤════════════════════════════════╤═══════════╤═══════════╗
║ Task Name │ Task Definition │description│Task Status║
╠════════════════╪════════════════════════════════╪═══════════╪═══════════╣
║timestamp-pkslow│timestamp │ │COMPLETE ║
║timestamp-t
