
elasticsearch叢集安裝+安全驗證+kibana安裝
阿新 • • 發佈:2020-11-23
## 準備環境
* 啟動4個centos容器, 並暴露相對應埠 (我的本機ip為172.16.1.236,以下涉及到的地方需要修改為自己的ip)
| node_name | ip | http port| transport port |
| --- | --- | ---| ---|
| es01 |docker宿主機ip | 9205:9200|9305: 9300 |
| es02 |docker宿主機ip | 9206:9200|9306: 9300 |
| es03 |docker宿主機ip | 9207:9200|9307: 9300 |
kibana : 5601:5601
* 執行以下命令啟動centos容器並暴露相應埠(使用-p 來對外對映docker容器埠)
```
docker run -tid --name centos1 -p 9205:9200 -p9305:9300 --privileged=true centos:latest /sbin/init
docker run -tid --name centos2 -p 9206:9200 -p9306:9300 --privileged=true centos:latest /sbin/init
docker run -tid --name centos3 -p 9207:9200 -p9307:9300 --privileged=true centos:latest /sbin/init
#centos4用於kibana安裝
docker run -tid --name centos4 -p 5601:5601 --privileged=true centos:latest /sbin/init
```
* 注意:如果使用shell工具連線,增加 -p22:22 引數
* 參考[es快速啟動](https://www.cnblogs.com/liwangcai/p/14010028.html)準備es安裝包等資料
## 配置修改
### 修改system.conf配置 /etc/systemd/system.conf
```
sed -i "s/#DefaultLimitMEMLOCK=/DefaultLimitMEMLOCK=infinity/g" /etc/systemd/system.conf
```
### 修改limits.cong配置 /etc/security/limits.conf
* 修改如下
```
# nofile 最大開啟檔案描述符數
# nproc 最大程序數
# memlock 最大記憶體鎖定
echo "* soft nofile 65536
* hard nofile 131072
* soft nproc 4096
* hard nproc 4096
* soft memlock unlimited
* hard memlock unlimited" >> /etc/security/limits.conf
```
### 修改sysctl配置 /etc/sysctl.conf
* 修改如下
```
echo "vm.max_map_count = 262145" >> /etc/sysctl.conf
#生效
sysctl -p
```
### 修改es佔用記憶體 /opt/es/config/jvm.options
```
sed -i "s/-Xms1g/-Xms"800m"/g" /opt/es/config/jvm.options
sed -i "s/-Xmx1g/-Xmx"800m"/g" /opt/es/config/jvm.options
```
### 開啟ES記憶體鎖定 /opt/es/config/elasticsearch.yml
* 增加如下配置
```
bootstrap.memory_lock: true
```
## ES配置檔案詳解
### 節點型別
* 主節點
候選主節點的設定方法是設定node.mater為true,預設情況下,node.mater和node.data的值都為true,即該節點既可以做候選主節點也可以做資料節點。由於資料節點承載了資料的操作,負載通常都很高,所以隨著叢集的擴大,建議將二者分離,設定專用的候選主節點。當我們設定node.data為false,就將節點設定為專用的候選主節點了。
```
node.master: true
node.data: false
```
* 資料節點
資料節點負責資料的儲存和相關具體操作,比如CRUD、搜尋、聚合。所以,資料節點對機器配置要求比較高,首先需要有足夠的磁碟空間來儲存資料,其次資料操作對系統CPU、Memory和IO的效能消耗都很大。通常隨著叢集的擴大,需要增加更多的資料節點來提高可用性。
```
node.master: false
node.data: true
```
* client節點
即不會被選作主節點,也不會儲存任何索引資料。該節點只能處理路由請求,處理搜尋,分發索引操作等,從本質上來說該客戶節點表現為智慧負載平衡器。
```
node.master = false
node.data = false
```
### 配置叢集名稱
* 不同的節點配置同一個cluster.name可組成同一個叢集,確保不同的叢集使用不同的cluster.name
* 配置如下 :
```
cluster.name: es-cluster-test
```
### 配置ES節點名稱
* node.name表示叢集節點的名稱,叢集中節點進行區分,如果不配置則預設為主機名
* 配置如下
```
node.name: es01
```
### 配置ES節點監聽地址
* 如果不配置,預設是監聽在127.0.0.1 和 [::1],同時以development的方式啟動。
```
#監聽在指定ip上
network.host : 172.17.0.1
#監聽在所有ip上
network.host : 0.0.0.0
```
### 日誌資料路徑配置
* 配置方式
```
path.data: /opt/data/es
path.logs: /opt/log/es
path:
data: /opt/data/es
logs: /opt/log/es
```
* path.data, 可以設定多個目錄
```
path:
logs: /opt/log/es
data:
- /opt/data/es-A
- /opt/data/es-B
- /opt/data/es-C
```
### 叢集發現配置
* discovery.seed_hosts 配置方式如下
用於多個叢集節點進行發現,組成叢集
```
discovery.seed_hosts: ["192.168.1.10:9300", "192.168.1.11", "seeds.mydomain.com"]
discovery.seed_hosts:
- 192.168.1.10:9300
- 192.168.1.11
- seeds.mydomain.com
```
* cluster.initial_master_nodes 配置方式如下
用於叢集在第一次啟動時,指定可以參與選舉的主節點列表 (node.master: true)
```
cluster.initial_master_nodes: ["es01", "es02", "es03"]
cluster.initial_master_nodes:
-es01
-es02
-es03
```
* discovery.seed_hosts 如果不配置,會自動監聽本地迴環地址 將本地多個elasticsearch例項加入到叢集中。
### jvm配置
* /opt/es/config/jvm.options (一般配置為機器記憶體大小的一半)
```
sed -i "s/-Xms1g/-Xms"800m"/g" /opt/es/config/jvm.options
sed -i "s/-Xmx1g/-Xmx"800m"/g" /opt/es/config/jvm.options
```
## 配置Elasticsearch(本次測試配置)
### es01
```
cluster.name: es-cluster-test
node.name: es01
path.logs: /opt/log/es
path.data: /opt/data/es
bootstrap.memory_lock: true
network.host: 0.0.0.0
http.port: 9200
transport.tcp.port: 9300
discovery.seed_hosts: ["172.16.1.236:9306", "172.16.1.236:9307"]
cluster.initial_master_nodes: ["es01", "es02", "es03"]
```
### es02
```
cluster.name: es-cluster-test
node.name: es02
path.logs: /opt/log/es
path.data: /opt/data/es
bootstrap.memory_lock: true
network.host: 0.0.0.0
http.port: 9200
transport.tcp.port: 9300
discovery.seed_hosts: ["172.16.1.236:9305", "172.16.1.236:9307"]
cluster.initial_master_nodes: ["es01", "es02", "es03"]
```
### es03
```
cluster.name: es-cluster-test
node.name: es03
path.logs: /opt/log/es
path.data: /opt/data/es
bootstrap.memory_lock: true
network.host: 0.0.0.0
http.port: 9200
transport.tcp.port: 9300
discovery.seed_hosts: ["172.16.1.236:9305", "172.16.1.236:9306"]
cluster.initial_master_nodes: ["es01", "es02", "es03"]
```
## 啟動Elasticsearch
### 啟動
* 分別進入不同的容器啟動elasticsearch
* 命令如下
```
/opt/es/bin/elasticsearch -d
```
### 檢視容器狀況(容器內)
* 檢視叢集是否啟動成功
```
[elasticsearch@813bf8515935 /]$ curl localhost:9200/_cat/nodes
172.17.0.7 28 91 9 0.58 0.66 0.90 dilm - es02
172.17.0.6 15 91 5 0.58 0.66 0.90 dilm - es01
172.17.0.8 35 91 13 0.58 0.66 0.90 dilm * es03
```
* 檢視當前節點
```
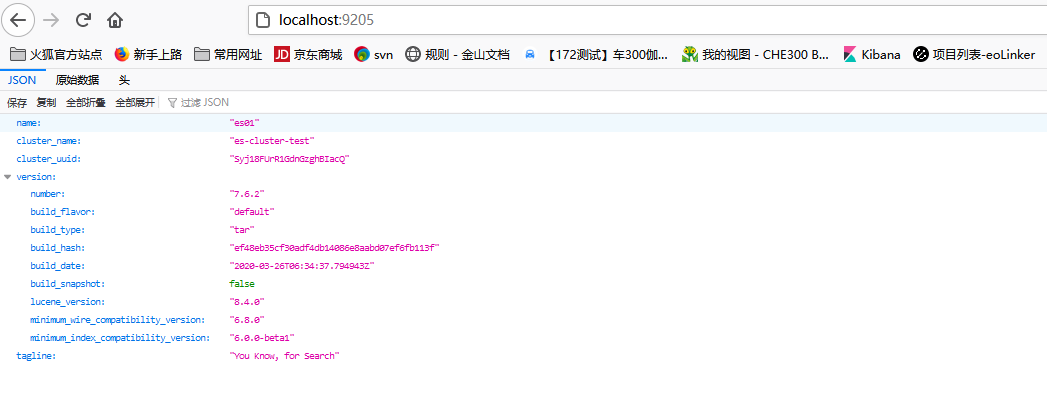
[elasticsearch@813bf8515935 /]$ curl localhost:9200
{
"name" : "es03",
"cluster_name" : "es-cluster-test",
"cluster_uuid" : "Syj18FUrR1GdnGzghBIacQ",
"version" : {
"number" : "7.6.2",
"build_flavor" : "default",
"build_type" : "tar",
"build_hash" : "ef48eb35cf30adf4db14086e8aabd07ef6fb113f",
"build_date" : "2020-03-26T06:34:37.794943Z",
"build_snapshot" : false,
"lucene_version" : "8.4.0",
"minimum_wire_compatibility_version" : "6.8.0",
"minimum_index_compatibility_version" : "6.0.0-beta1"
},
"tagline" : "You Know, for Search"
}
```
* 檢視節點健康狀況
```
[elasticsearch@813bf8515935 /]$ curl localhost:9200/_cat/health?v
epoch timestamp cluster status node.total node.data shards pri relo init unassign pending_tasks max_task_wait_time active_shards_percent
1605859559 08:05:59 es-cluster-test green 3 3 0 0 0 0 0 0
- 100.0%
```
### 檢視容器狀況(宿主機)
* 由於使用docker容器安裝,因此也可以通過宿主機對映埠訪問,本次測試宿主機為windows
## 開啟叢集安全驗證
### 修改配置
* 分別在不同的Es節點修改配置開啟安全驗證
```
echo "xpack.security.enabled: true" >> /opt/es/config/elasticsearch.yml
echo "xpack.security.transport.ssl.enabled: true" >> /opt/es/config/elasticsearch.yml
```
### 生成證書
* 選擇其中一個節點生成CA證書,預設情況下生成證書放在 /opt/es
```
#建立ca證書 /opt/es/bin/elasticsearch-certutil ca -v
[elasticsearch@c824e845075b es]$ /opt/es/bin/elasticsearch-certutil ca -v
This tool assists you in the generation of X.509 certificates and certificate
signing requests for use with SSL/TLS in the Elastic stack.
The 'ca' mode generates a new 'certificate authority'
This will create a new X.509 certificate and private key that can be used
to sign certificate when running in 'cert' mode.
Use the 'ca-dn' option if you wish to configure the 'distinguished name'
of the certificate authority
By default the 'ca' mode produces a single PKCS#12 output file which holds:
* The CA certificate
* The CA's private key
If you elect to generate PEM format certificates (the -pem option), then the output will
be a zip file containing individual files for the CA certificate and private key
Please enter the desired output file [elastic-stack-ca.p12]: #輸入回車,使用預設
Enter password for elastic-stack-ca.p12 : #回車,暫不輸入密碼
```
* 與上一步驟同一個節點建立節點見認證用的證書
```
#建立節點間證書 /opt/es/bin/elasticsearch-certutil cert --ca elastic-stack-ca.p12
[elasticsearch@c824e845075b es]$ /opt/es/bin/elasticsearch-certutil cert --ca elastic-stack-ca.p12
This tool assists you in the generation of X.509 certificates and certificate
signing requests for use with SSL/TLS in the Elastic stack.
The 'cert' mode generates X.509 certificate and private keys.
* By default, this generates a single certificate and key for use
on a single instance.
* The '-multiple' option will prompt you to enter details for multiple
instances and will generate a certificate and key for each one
* The '-in' option allows for the certificate generation to be automated by describing
the details of each instance in a YAML file
* An instance is any piece of the Elastic Stack that requires an SSL certificate.
Depending on your configuration, Elasticsearch, Logstash, Kibana, and Beats
may all require a certificate and private key.
* The minimum required value for each instance is a name. This can simply be the
hostname, which will be used as the Common Name of the certificate. A full
distinguished name may also be used.
* A filename value may be required for each instance. This is necessary when the
name would result in an invalid file or directory name. The name provided here
is used as the directory name (within the zip) and the prefix for the key and
certificate files. The filename is required if you are prompted and the name
is not displayed in the prompt.
* IP addresses and DNS names are optional. Multiple values can be specified as a
comma separated string. If no IP addresses or DNS names are provided, you may
disable hostname verification in your SSL configuration.
* All certificates generated by this tool will be signed by a certificate authority (CA).
* The tool can automatically generate a new CA for you, or you can provide your own with the
-ca or -ca-cert command line options.
By default the 'cert' mode produces a single PKCS#12 output file which holds:
* The instance certificate
* The private key for the instance certificate
* The CA certificate
If you specify any of the following options:
* -pem (PEM formatted output)
* -keep-ca-key (retain generated CA key)
* -multiple (generate multiple certificates)
* -in (generate certificates from an input file)
then the output will be be a zip file containing individual certificate/key files
Enter password for CA (elastic-stack-ca.p12) : #暫留空
Please enter the desired output file [elastic-certificates.p12]: #預設
Enter password for elastic-certificates.p12 : #ca證書密碼,此次為空
Certificates written to /opt/es/elastic-certificates.p12
This file should be properly secured as it contains the private key for
your instance.
This file is a self contained file and can be copied and used 'as is'
For each Elastic product that you wish to configure, you should copy
this '.p12' file to the relevant configuration directory
and then follow the SSL configuration instructions in the product guide.
For client applications, you may only need to copy the CA certificate and
configure the client to trust this certificate.
```
* 配置ES節點使用這個證書
```
# 將生成證書拷貝到 /opt/es/config/certs目錄下
[elasticsearch@c824e845075b es]$ mkdir -p /opt/es/config/certs
[elasticsearch@c824e845075b config]$ mv /opt/es/elastic-* /opt/es/config/certs/
# 將certs目錄拷貝到其它Es節點 (在宿主機進行該操作)
#拷貝certs目錄到本地
PS C:\Users\Administrator> docker cp centos2:/opt/es/config/certs C:\Users\Administrator\Desktop
#拷貝certs目錄到其它兩個節點
PS C:\Users\Administrator> docker cp C:\Users\Administrator\Desktop\certs centos1:/opt/es/config
PS C:\Users\Administrator> docker cp C:\Users\Administrator\Desktop\certs centos3:/opt/es/config
#在每個節點修改 /opt/es/config/elasticsearch.yml 配置
[elasticsearch@813bf8515935 /]$ echo "xpack.security.transport.ssl.verification_mode: certificate
xpack.security.transport.ssl.keystore.path: certs/elastic-certificates.p12
xpack.security.transport.ssl.truststore.path: certs/elastic-certificates.p12" >> /opt/es/config/elasticsearch.yml
```
* 重啟
```
#在每個容器殺死elastic程序並重啟
[elasticsearch@c824e845075b config]$ kill -9 $(ps -ef | grep 'elasticsearch' | grep '/bin/java' | grep -v grep | awk '{print $2}')
#啟動
[elasticsearch@c824e845075b config]$ /opt/es/bin/elasticsearch -d
```
* 任意一個節點生成密碼
```
[elasticsearch@6ebd0bc8cc5d certs]$ /opt/es/bin/elasticsearch-setup-passwords interactive
Initiating the setup of passwords for reserved users elastic,apm_system,kibana,logstash_system,beats_system,remote_monitoring_user.
You will be prompted to enter passwords as the process progresses.
Please confirm that you would like to continue [y/N]y
Enter password for [elastic]:
Reenter password for [elastic]:
Enter password for [apm_system]:
Reenter password for [apm_system]:
Enter password for [kibana]:
Reenter password for [kibana]:
Enter password for [logstash_system]:
Reenter password for [logstash_system]:
Enter password for [beats_system]:
Reenter password for [beats_system]:
Enter password for [remote_monitoring_user]:
Reenter password for [remote_monitoring_user]:
Changed password for user [apm_system]
Changed password for user [kibana]
Changed password for user [logstash_system]
Changed password for user [beats_system]
Changed password for user [remote_monitoring_user]
Changed password for user [elastic]
```
* 測試
```
#此時直接訪問會報無許可權異常,需要增加 -u elastic 引數進行訪問
[elasticsearch@6ebd0bc8cc5d certs]$ curl localhost:9200
{"error":{"root_cause":[{"type":"security_exception","reason":"missing authentication credentials for REST request [/]","header":{"WWW-Authenticate":"Basic realm=\"security\" charset=\"UTF-8\""}}],"type":"security_exception","reason":"missing authentication credentials for REST request [/]","header":{"WWW-Authenticate":"Basic realm=\"security\" charset=\"UTF-8\""}},"status":401}
#增加 -u elastic
[elasticsearch@6ebd0bc8cc5d certs]$ curl -u elastic localhost:9200
Enter host password for user 'elastic':
{
"name" : "es01",
"cluster_name" : "es-cluster-test",
"cluster_uuid" : "Syj18FUrR1GdnGzghBIacQ",
"version" : {
"number" : "7.6.2",
"build_flavor" : "default",
"build_type" : "tar",
"build_hash" : "ef48eb35cf30adf4db14086e8aabd07ef6fb113f",
"build_date" : "2020-03-26T06:34:37.794943Z",
"build_snapshot" : false,
"lucene_version" : "8.4.0",
"minimum_wire_compatibility_version" : "6.8.0",
"minimum_index_compatibility_version" : "6.0.0-beta1"
},
"tagline" : "You Know, for Search"
}
```
## kibana的安裝配置
### 準備
[下載地址](https://elasticsearch.cn/download/)
* kibana版本號與elasticsearch相同,本文使用7.6.2
* 將主備好的kibana壓縮包移動到容器內,並進入到容器
```
PS C:\Users\Administrator> docker cp C:\Users\Administrator\Downloads\kibana-7.6.2-linux-x86_64.tar.gz centos4:/opt
PS C:\Users\Administrator> docker exec -it centos4 /bin/bash
```
* 解壓安裝
```
[root@db0759d8c6c8 /]# useradd kibana
[root@db0759d8c6c8 /]# chown -R kibana /opt
[root@db0759d8c6c8 /]# su kibana
[kibana@db0759d8c6c8 /]$ cd /opt/
[kibana@db0759d8c6c8 opt]$ tar -zxvf /opt/kibana-7.6.2-linux-x86_64.tar.gz -C /opt && mv kibana-7.6.2-linux-x86_64 kibana
```
### 配置檔案修改並啟動
* kibana配置檔案修改
```
[kibana@db0759d8c6c8 opt]$ vi kibana/config/kibana.yml
server.port: 5601
server.host: "0.0.0.0"
server.name: "mykibana"
elasticsearch.hosts: ["http://172.16.1.236:9205"]
kibana.index: ".kibana"
elasticsearch.username: "kibana"
elasticsearch.password: "123123"
i18n.locale: "zh-CN"
```
* 啟動
```
[kibana@db0759d8c6c8 opt]$ /opt/kibana/bin/kibana
```
* 在宿主訪問 127.0.0.1:5601 進行測試

可以檢視叢集狀態資訊
![](https://img2020.cnblogs.com/blog/1666733/202011/1666733-20201120174232619-8969304