
將Shiny APP搭建為獨立的桌面可執行程式 - Deploying R shiny app as a standalone application
阿新 • • 發佈:2020-12-06
[toc]
## 起源!
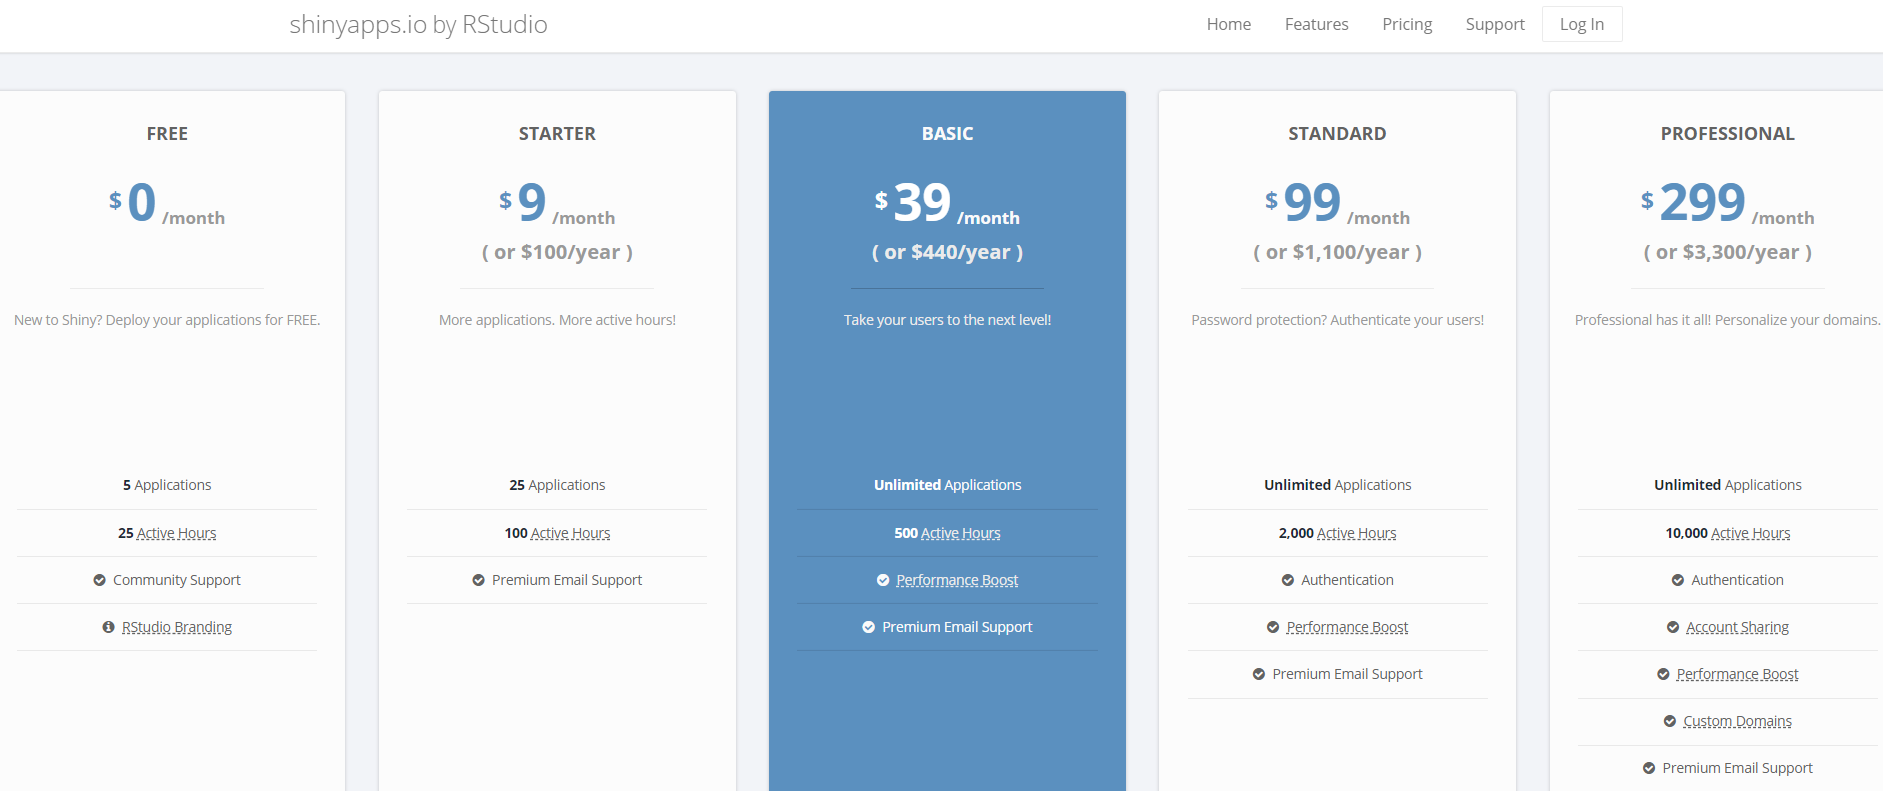
某天,我發現了Shiny這個東西,當時興沖沖的嘗試官網上各種各樣的例子,最後發現這個東西似乎只能充當一個“玩具”。如果要在本地執行,它需要一個完整的R環境,這對相當一部分使用者來說是極度不友好的。另外,Rstudio主張將Shiny部署在https://www.shinyapps.io/,但是看到這個價格以及資源限制以後進一步被勸退了。
畢竟很多科研工作者的出發點是將自己的研究過程和結果分享展示給他人,而不是出於商業的目的,部署在伺服器上供他人使用需要持續投入計算資源和維護成本,這不是長久之計。
---
## 目的?
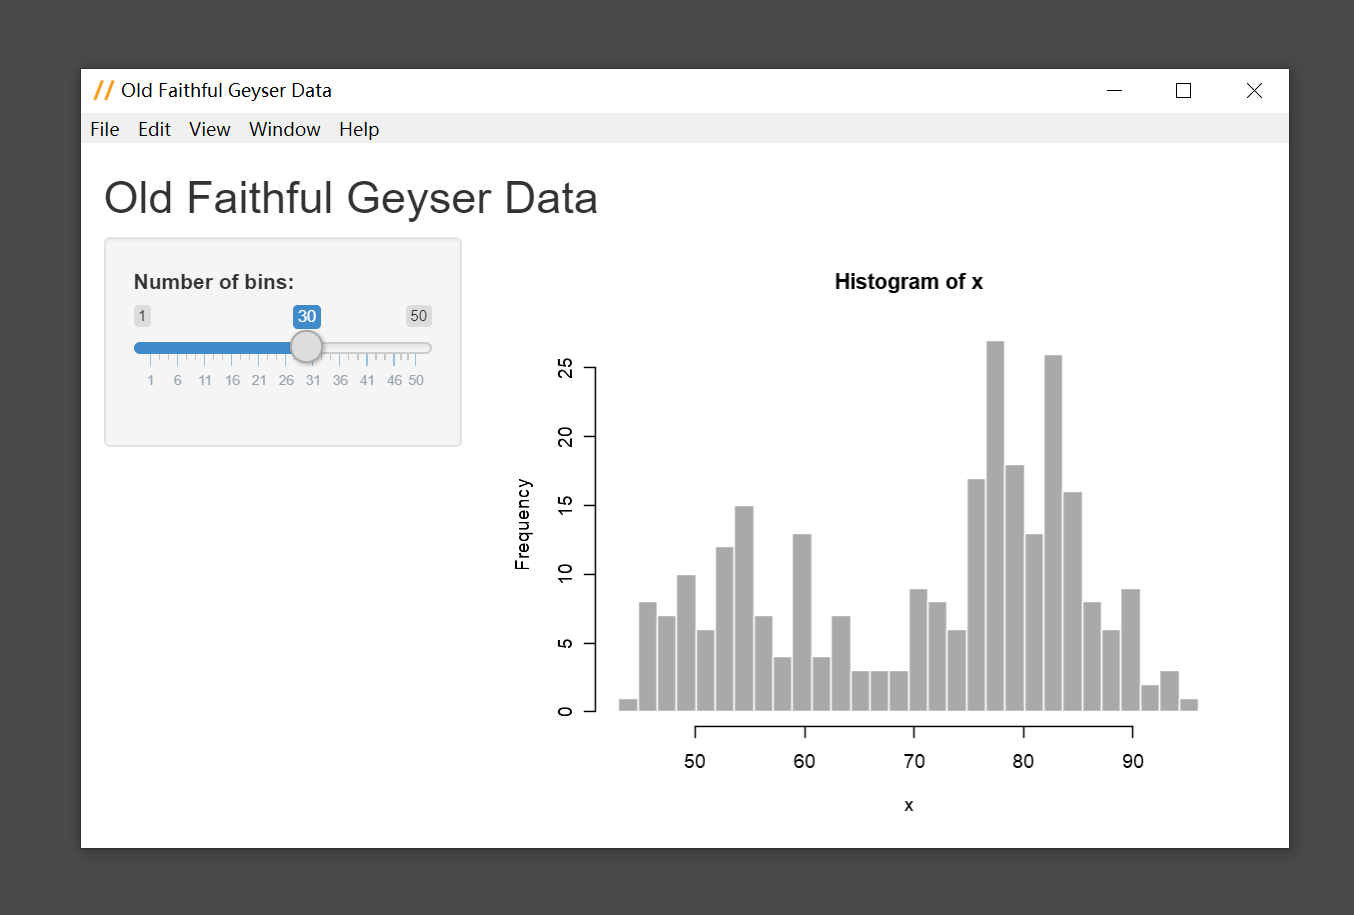
那麼,如果我們實現了一個精妙的Shiny App,如何0成本的分享給別人,且別人能夠方便的使用呢?為了達到這個目的,最好的結果是將R中的Shiny App轉換為一個獨立執行的exe檔案,也就是一個這樣的桌面應用:

對,我實現了,過程中還是踩了一些坑的,現在就把具體的方法分享給大家。這是我自己思考的方法,因為本人也是剛開始研究,可能還有些地方理解的不是很清楚,如果您有更好的建議,懇請不吝斧正。
剛開始我是看了這個stone大神寫的貼作為啟蒙:[https://zhuanlan.zhihu.com/p/121003243](https://zhuanlan.zhihu.com/p/121003243),但是我沒能在自己電腦上實現,因為electricShine這個東西是一個寫死的包,**寫死既被動**,在呼叫npm的時候總會有小小的問題導致全盤失敗。雖然沒有成功實現,但是我肯定是**不服**的。後來我又看了某機構的部落格:[https://foretodata.com/how-to-make-a-standalone-desktop-application-with-shiny-and-electron-on-windows/](https://foretodata.com/how-to-make-a-standalone-desktop-application-with-shiny-and-electron-on-windows/),感覺上可行,嘗試以後發現跑通了,確實可以。但是以上都不好作為最終的解決方案。
**那麼一個最為方便且易於實現的思路是這樣的:**
- 安裝R-Portable作為開發、部署、分發的R環境
- 在上述環境中開發ShinyApp(推薦使用golem)
- 通過electron-quick-start將R-Portable和ShinyApp打包成exe
**該方法基於Windows實現了打包exe,理論上可以在mac上實現打包dmg**
---
## 怎麼做?
### 0 準備工作
- 熟悉R及Rstudio
- 熟悉命令列操作
- 瞭解Shiny App及其基本結構
- 確定瞭解我們的目的
- 新建一個工作目錄C:\myShinyApp
### 1 下載安裝R-portable
連結:https://sourceforge.net/projects/rportable/files/R-Portable/3.6.3/

強烈建議這個3.6.3版本,比較穩定,4.0.0編譯暫時有問題。

安裝比較簡單,注意將路徑設定為我們新建的工作目錄,安裝完成即可。

### 2 配置 Rstudio
現在我們要開啟R-Portable作為R環境
開啟Rstudio,滑鼠點:**Tools>Global Options>General>Change R version>Browse**
定位我們剛才安裝的R-Portable路徑(C:\myShinyApp\R-Portable\App\R-Portable)
然後點**選擇資料夾**,選擇64位版本

一路點**OK**,最後重啟Rstudio
.libPaths()裡有我們剛才裝好的R-Portable就好了:
```R
> .libPaths()
[1] "C:/Users/XXX/Documents/R/win-library/3.6"
[2] "C:/myShinyApp/R-Portable/App/R-Portable/library"
```
**注意:**這裡出現了兩個路徑,[1]是我原來就有的,[2]是剛裝的,**ShinyApp中所有要用到的包必須裝在[2]裡。**
### 3 搭建Shiny App
golem包是開發Shiny App的輔助開發工具,用它可以讓開發過程更加方便。
先在Rstudio中安裝這個包:
```R
install.packages('golem',dependencies = T)
```
安裝完成後,在Rstudio中點選單:**File>New Project>New Directory>Package for Shiny App using golem**

將Directory name隨意設定為shinyapptest,路徑定位到我們的工作目錄

建立完成後,我們就在Rstudio中開闢了一個新的Project和工作環境,且工作目錄出現了一個類似於R包的結構:

根據golem的[Document](https://thinkr-open.github.io/golem/index.html),我們主要關注`./dev`中的三個指令碼`01_start.R`,`02_dev.R`,`03_deploy.R`以及`./R`中的三個指令碼`app_ui.R`,`app_server.R`,`run_app.R`。


假如我們現在要實現文章開頭**例2**提到的csv表格檢視器。
#### 3.1 新增模組
載入csv檔案的按鈕就是一個模組(按鈕本身是模組的UI,讀取csv檔案是這個模組的功能),我們執行`./dev/02_dev.R`中的`add_module`新增一個模組
```
## Add modules ----
## Create a module infrastructure in R/
golem::add_module( name = "csv_file" ) # Name of the module
```
結果`./R`路徑下生成了一個以`mod_`為字首的模組檔案,

把`mod_csv_file.R`這個檔案的內容改成這樣的:
```R
#' csv_file UI Function
#' @description A shiny Module.
#' @param id,input,output,session Internal parameters for {shiny}.
#' @noRd
#' @importFrom shiny NS tagList
mod_csv_file_ui <- function(id, label = "CSV file"){
ns <- NS(id)
tagList(
fileInput(ns("file"), label),
checkboxInput(ns("heading"), "Has heading"),
selectInput(ns("quote"), "Quote", c(
"None" = "",
"Double quote" = "\"",
"Single quote" = "'"
))
)
}
#' csv_file Server Function
#' @noRd
mod_csv_file_server <- function(id, stringsAsFactors) {
moduleServer(
id,
## Below is the module function
function(input, output, session) {
# The selected file, if any
userFile <- reactive({
# If no file is selected, don't do anything
validate(need(input$file, message = FALSE))
input$file
})
# The user's data, parsed into a data frame
dataframe <- reactive({
read.csv(userFile()$datapath,
header = input$heading,
quote = input$quote,
stringsAsFactors = stringsAsFactors)
})
# We can run observers in here if we want to
observe({
msg <- sprintf("File %s was uploaded", userFile()$name)
cat(msg, "\n")
})
# Return the reactive that yields the data frame
return(dataframe)
}
)
}
```
模組的定義包含兩個部分:`mod_csv_file_ui `定義模組UI,`mod_csv_file_server `定義模組功能,如果要使用這個模組只需在Shiny App的`app_ui`中呼叫前者,`app_server`中呼叫後者就可以了。
#### 3.2 寫AppUI和AppServer
我們將`app_ui.R`改為這樣的:
```R
#' The application User-Interface
#' @param request Internal parameter for `{shiny}`.
#' DO NOT REMOVE.
#' @import shiny
#' @noRd
app_ui <- function(request) {
tagList(
# List the first level UI elements here
fluidPage(
sidebarLayout(
sidebarPanel(
mod_csv_file_ui("datafile", "User data (.csv format)") # 呼叫模組UI
),
mainPanel(
dataTableOutput("table")
)
)
)
)
}
```
為了節省空間我把golem匯入外部資源的部分去除了。
然後將`app_server.R`改成這樣的:
```R
#' The application server-side
#' @param input,output,session Internal parameters for {shiny}.
#' DO NOT REMOVE.
#' @import shiny
#' @noRd
app_server <- function(input, output, session) {
datafile <- mod_csv_file_server("datafile", stringsAsFactors = FALSE) # 呼叫模組function
output$table <- renderDataTable({
datafile()
})
}
```
#### 3.3 測試App
改好這些檔案以後我們在`./dev/run_dev.R`指令碼中測試一下我們的Shiny App:
```
> # Detach all loaded packages and clean your environment
> golem::detach_all_attached()
錯誤: $ operator is invalid for atomic vectors
此外: Warning message:
In FUN(X[[i]], ...) :
DESCRIPTION file of package 'shiny' is missing or broken
```
執行到上面這一條提示我們還沒有裝shiny這個包,那就裝吧:
```R
install.packages(pkgs = 'shiny',
lib = .libPaths()[length(.libPaths())], # 保證裝到R-Portable的lib裡
dependencies = T) # 保證同時安裝依賴
```
再次執行這一條,發現成功了:
```R
> # Detach all loaded packages and clean your environment
> golem::detach_all_attached()
>
```
最後執行run_app
```R
# Run the application
library(golem)
library(shiny)
source('./R/app_server.R')
source('./R/app_ui.R')
source('./R/mod_csv_file.R')
source('./R/run_app.R')
run_app()
```
出現下面這個介面Shiny App基本上就成了,可以開啟一個csv檔案自己測試一下。

#### 3.4 打包Shiny App
假如有一天,我們精妙的Shiny App終於大功告成了,那麼可以將他打成package並安裝到R-Portable中。
先準備一下devtools:
```R
if(!requireNamespace("devtools")){
install.packages("devtools")
library(devtools)
}
```
然後打包shinyapp,路徑為當時golem建立的專案路徑:
```R
devtools::build(path = "C:/myShinyApp/shinyapptest")
√ checking for file 'C:\myShinyApp\shinyapptest/DESCRIPTION' ...
- preparing 'shinyapptest':
√ checking DESCRIPTION meta-information ...
- checking for LF line-endings in source and make files and shell scripts
- checking for empty or unneeded directories
- building 'shinyapptest_0.0.0.9000.tar.gz'
[1] "C:/myShinyApp/shinyapptest/shinyapptest_0.0.0.9000.tar.gz"
```
安裝這個打包成功的package`shinyapptest_0.0.0.9000.tar.gz`:
```R
install.packages(
pkgs = 'C:/myShinyApp/shinyapptest/shinyapptest_0.0.0.9000.tar.gz',
lib = .libPaths()[length(.libPaths())],
repos = NULL, # 這個引數一定要的
dependencies = T
)
# 嘗試用包直接執行app
shinyapptest::run_app()
```
shiny具體的開發文件還是要研究一下:https://shiny.rstudio.com/articles/。好了,R的工作完成了剩下的交給electron-quick-start。
### 4 安裝並配置node.js
#### 4.1 下載解壓
去這個連結下載zip壓縮檔案:https://nodejs.org/download/release/v12.16.2/node-v12.16.2-win-x64.zip
我裝的是v12.16.2版本,如果嫌下載慢的話,想想辦法,這裡我分享一個網盤給你們:
連結: https://pan.baidu.com/s/1QbLJcfhRqTsgUeQ10Wy7wA
提取碼: 4gzh
這是解壓版,安裝版也是同理的。下載完成後解壓到指定目錄,可以是我們的工作目錄,解壓完以後是這樣的:

#### 4.2 配置環境變數
在這個目錄中新建兩個資料夾`node_global`和`node_cache`:

新建一個系統變數,變數名是`NODE_PATH`,值是nodejs的解壓或安裝目錄`C:\myShinyApp\node-v12.16.2-win-x64`:

新建另一個關鍵的系統變數,變數名是`NODE_TLS_REJECT_UNAUTHORIZED`,值是`0`,我覺得這個變數很關鍵:

**編輯**`Path`環境變數,新建這兩個值:`C:\myShinyApp\node-v12.16.2-win-x64`和`C:\myShinyApp\node-v12.16.2-win-x64\node_global`(忽略圖中的大小寫筆誤)

#### 4.3 配置npm引數
現在,以**管理員**身份開啟優秀的Windows Powershell,檢查node和npm是否安裝正常:
```cmd
> node -v
v12.16.2
> npm -v
6.14.4
```
配置一些必要的npm引數:
```cmd
> npm config set prefix "C:\myShinyApp\node-v12.16.2-win-x64\node_global"
> npm config set cache "C:\myShinyApp\node-v12.16.2-win-x64\node_cahce"
> npm config set strict-ssl false
> npm config set registry http://registry.npm.taobao.org/
```
#### 4.4 安裝 electron-packager
以上配置就是為了能夠成功安裝這個包
```cmd
> npm install electron-packager -g
# 出現以下資訊說明成功
# + [email protected]
# added 18 packages from 9 contributors, removed 10 packages and updated 8 packages in 4.188s
```
### 5 使用electron-quick-start模板
如果方便在命令列用git的話(我一般是用WSL+Cmder),就先`cd`到`C:\myShinyApp\electron-quick-start`,然後clone專案:
```bash
$ git clone https://github.com/listen2099/electron-quick-start.git
```
如果不方便用git,就直接下載連線中的zip檔案解壓到`C:\myShinyApp\electron-quick-start`:https://github.com/listen2099/electron-quick-start/archive/master.zip
拉取或解壓成功後:

再次以管理員身份開啟優秀的Windows Powershell:
```cmd
> cd C:\myShinyApp\electron-quick-start
> npm install
# 出現以下資訊就明名安裝成功
# > [email protected] postinstall C:\myShinyApp\electron-quick-start\node_modules\electron
# > node install.js
# added 148 packages from 139 contributors in 4.326s
```
**接下來是關鍵的一步:**
將R-Portable路徑`C:\myShinyApp\R-Portable\App\R-Portable`下的所有檔案**複製並替換**到`C:\myShinyApp\electron-quick-start\R-Portable-Win`路徑:

**?還記得嗎?**這個環境裡有我們安裝好的R環境、寫好的ShinyApp以及依賴的R包(其實,ShinyApp也作為包安裝在這個R環境了,依稀記得包名叫shinyapptest)。
回到`C:\myShinyApp\electron-quick-start`,編輯這個目錄下的`app.R`檔案,這個檔案是程式的入口,那麼你猜這個檔案應該寫什麼?要不就試試寫這一行內容儲存:
```R
# app.R
shinyapptest::run_app()
```
最後一次開啟優秀的Windows Powershell,完成最後的打包
```cmd
> cd C:\myShinyApp\electron-quick-start
> npm run package-win
# 出現以下資訊就說明成功了
# Packaging app for platform win32 ia32 using electron v5.0.7
# Wrote new app to ElectronShinyAppWindows\electron-quick-start-win32-ia32
```
### 6 完成
`C:\myShinyApp\electron-quick-start`資料夾下出現了一個新的目錄:

雙擊exe檔案:
