效率工具 | 快速建立虛擬機器,Vagrant真香!
阿新 • • 發佈:2021-01-06

- `Vagrant` 是一個基於`Ruby`的工具,主要用於建立和部署虛擬化開發環境。它以來於`Oracle`的開源[`VirtualBox`](https://baike.baidu.com/item/VirtualBox)虛擬化系統,通過使用 `Chef`建立自動化虛擬環境。
- `Vagrant` 主要的功能如下:
- 建立和刪除虛擬機器
- 配置虛擬機器相關引數
- 管理虛擬機器執行狀態
- 自動配置和安裝開發環境
- 打包和分發虛擬機器執行環境
- 因為 `Vagrant` 依賴於某種虛擬化技術,目前支援常見的 `VirtualBox`、 `VMWare`等,所以在使用`Vagrant`之前我們需要先安裝`VirtualBox`或 `VMWare`,不然無法使用。推薦安裝 `VirtualBox`。
- `vagrant` 可以快速,方便,全自動的構建虛擬化環境,這也是我們選擇它的原因,而不是讓我們像以前一樣全部自己來部署。
- 它類似與 `docker` 這種,有自己的倉庫,我們直接可以通過命令從倉庫中拉取虛擬映象來快速構建
### 下載安裝
- `VirtualBox`下載地址:[https://www.virtualbox.org/wiki/Downloads](https://www.virtualbox.org/wiki/Downloads) ,下載好後安裝直接下一步操作
- `vagrant`下載地址:[https://www.vagrantup.com/downloads.html](https://www.vagrantup.com/downloads.html) ,也是直接下一步的操作完成,需要重啟電腦安裝完。
> **注意:**
> 1. 兩者軟體最好都下載最新的,免得出現相容問題,
> 1. 需要安裝虛擬機器,需要先開啟處理器虛擬化技術,_**VT-x/AMD-V硬體加速**。_
### Vagrant基本命令
| 命令 | 作用 |
| :---: | :---: |
| vagrant box add | 新增box的操作 |
| vagrant init | 初始化box的操作,會生成vagrant的配置檔案Vagrantfile |
| vagrant up | 啟動本地環境 |
| vagrant ssh | 通過 ssh 登入本地環境所在虛擬機器 |
| vagrant halt | 關閉本地環境 |
| vagrant suspend | 暫停本地環境 |
| vagrant resume | 恢復本地環境 |
| vagrant reload | 修改了 Vagrantfile 後,使之生效(相當於先 halt,再 up) |
| vagrant destroy | 徹底移除本地環境 |
| vagrant box list | 顯示當前已經新增的box列表 |
| vagrant box remove | 刪除相應的box |
| vagrant package | 打包命令,可以把當前的執行的虛擬機器環境進行打包 |
| vagrant plugin | 用於安裝解除安裝外掛 |
| vagrant status | 獲取當前虛擬機器的狀態 |
| vagrant global-status | 顯示當前使用者Vagrant的所有環境狀態 |
### 安裝一個虛擬機器案例
- 首先我們新建一個資料夾名字 `vagrant` ,這個名字隨機,就是存放要新建的虛擬機器的配置的目錄,之後在`vagrant` 目錄中開啟 `cmd`或`Power Shell` 視窗,
- 執行下面命令:
> vagrant init centos/7 --box-version 2004.01
```powershell
PS D:\vagrant> vagrant init centos/7 --box-version 2004.01
A `Vagrantfile` has been placed in this directory. You are now
ready to `vagrant up` your first virtual environment! Please read
the comments in the Vagrantfile as well as documentation on
`vagrantup.com` for more information on using Vagrant.
```
- 上面命令執行結束後,在之下下面 `up` 命令,這個過程會去下載我們需要的映象,是比較漫長的過程,下載完後會直接啟動,`vagrant up` 命令本來就是啟動命令,這是是因為沒有所以會先去下載,
```powershell
PS D:\vagrant> vagrant up
Bringing machine 'default' up with 'virtualbox' provider...
==> default: Box 'centos/7' could not be found. Attempting to find and install...
default: Box Provider: virtualbox
default: Box Version: 2004.01
==> default: Loading metadata for box 'centos/7'
default: URL: https://vagrantcloud.com/centos/7
==> default: Adding box 'centos/7' (v2004.01) for provider: virtualbox
default: Downloading: https://vagrantcloud.com/centos/boxes/7/versions/2004.01/providers/virtualbox.box
Download redirected to host: cloud.centos.org
Progress: 3% (Rate: 371k/s, Estimated time remaining: 0:18:28)
```
- 當然我們也可以直接提前將映象檔案下載好,直接使用 `vagrant box add {name} {url}` 的命令進行本地安裝,其中,`{name}` 是我們要安裝的名稱, `url` 是我們下載到本地的映象路徑
```powershell
PS D:\vagrant> vagrant box add centos/7 E:\迅雷下載\CentOS-7-x86_64-Vagrant-1905_01.VirtualBox.box
==> box: Box file was not detected as metadata. Adding it directly...
==> box: Adding box 'centos/7' (v0) for provider:
box: Unpacking necessary files from: file:///E:/%D1%B8%C0%D7%CF%C2%D4%D8/CentOS-7-x86_64-Vagrant-1905_01.VirtualBox.box
box:
==> box: Successfully added box 'centos/7' (v0) for 'virtualbox'!
```
- 如果是使用本地新增的,那麼這裡通過 `vagrant up` 來啟動,如下:
```powershell
PS D:\vagrant> vagrant up
Bringing machine 'default' up with 'virtualbox' provider...
==> default: Checking if box 'centos/7' version '2004.01' is up to date...
==> default: Clearing any previously set forwarded ports...
==> default: Clearing any previously set network interfaces...
==> default: Preparing network interfaces based on configuration...
default: Adapter 1: nat
==> default: Forwarding ports...
default: 22 (guest) => 2222 (host) (adapter 1)
==> default: Booting VM...
==> default: Waiting for machine to boot. This may take a few minutes...
default: SSH address: 127.0.0.1:2222
default: SSH username: vagrant
default: SSH auth method: private key
==> default: Machine booted and ready!
==> default: Checking for guest additions in VM...
default: No guest additions were detected on the base box for this VM! Guest
default: additions are required for forwarded ports, shared folders, host only
default: networking, and more. If SSH fails on this machine, please install
default: the guest additions and repackage the box to continue.
default:
default: This is not an error message; everything may continue to work properly,
default: in which case you may ignore this message.
==> default: Rsyncing folder: /cygdrive/d/vagrant/ => /vagrant
==> default: Machine already provisioned. Run `vagrant provision` or use the `--provision`
==> default: flag to force provisioning. Provisioners marked to run always will still run.
```
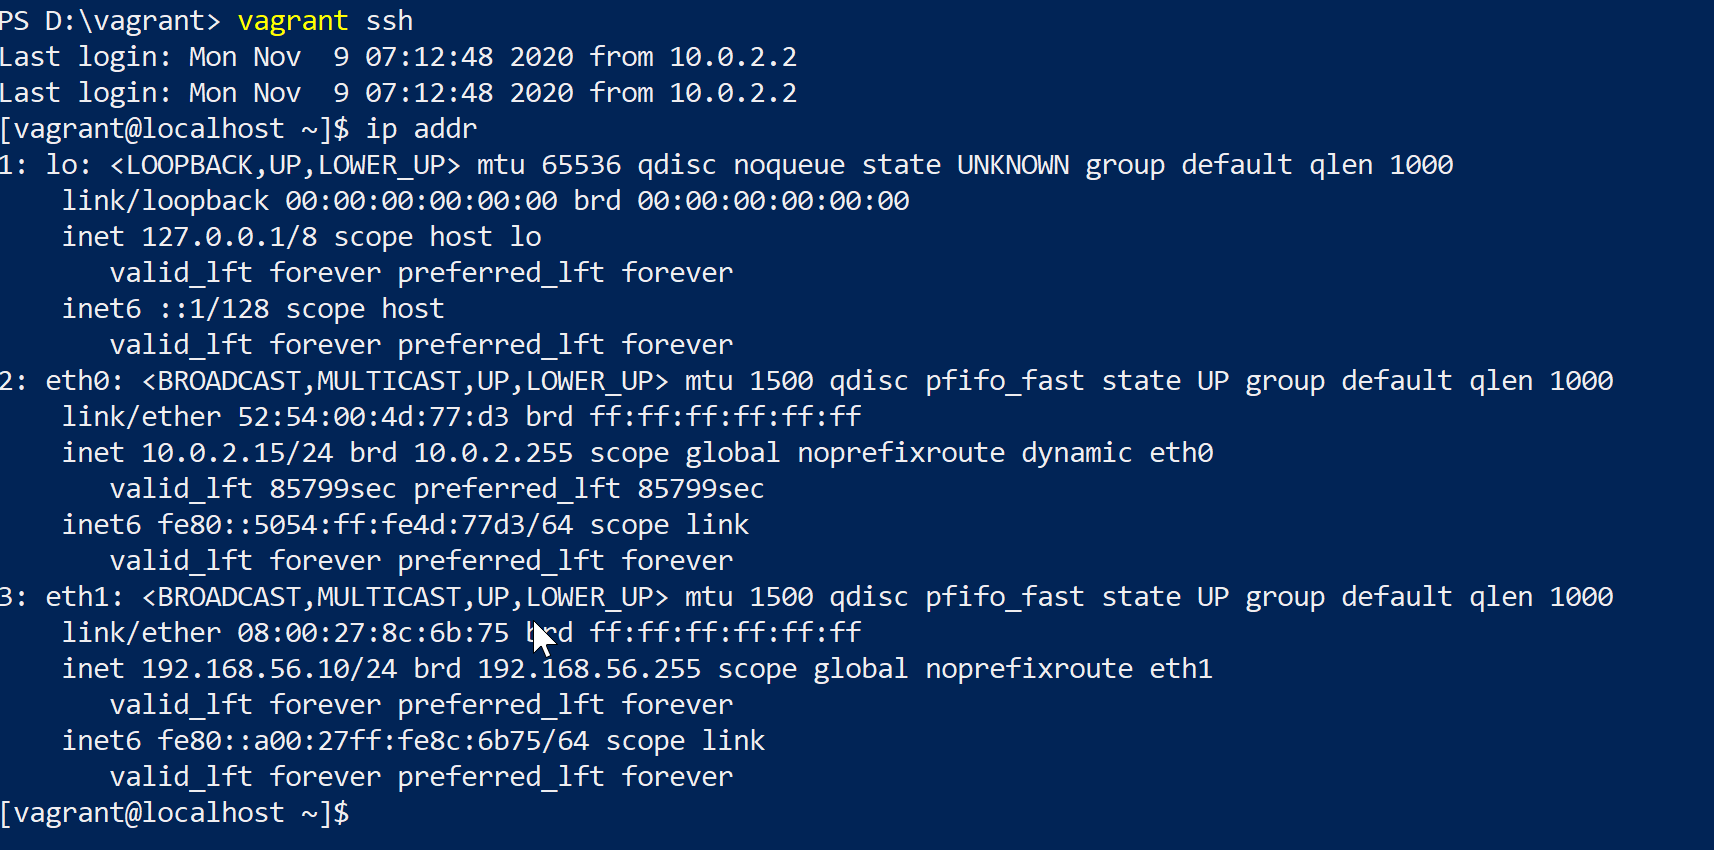
- 啟動後我們可以通過 `vagrant ssh` 開啟SSH,並登陸到` centos7`

### 網路IP配置
- 這是一個虛擬機器,那麼我們要實現與宿主機器的通訊,可以採用埠轉發,或者獨立區域網,埠轉發並不方便需要我們每個埠的配置,我們這裡直接採用私有網段配置,也就是橋接的方式,
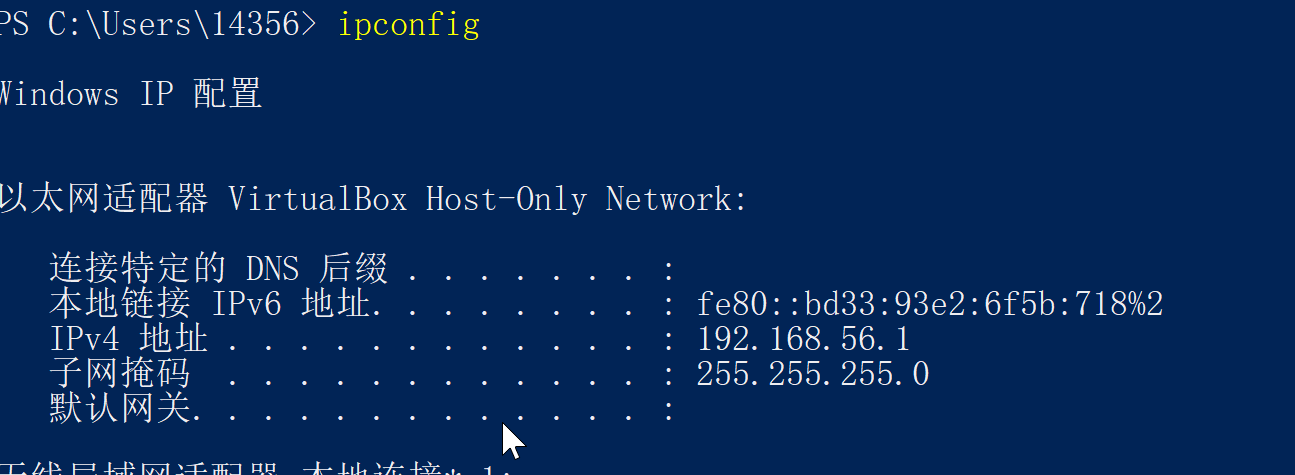
- 首先我們檢視自己 `Windows` 電腦的 `IP`,其中有個網絡卡 ` VirtualBox Host-Only Network`。,這就是虛擬機器的網絡卡,看到其`IP`地址段

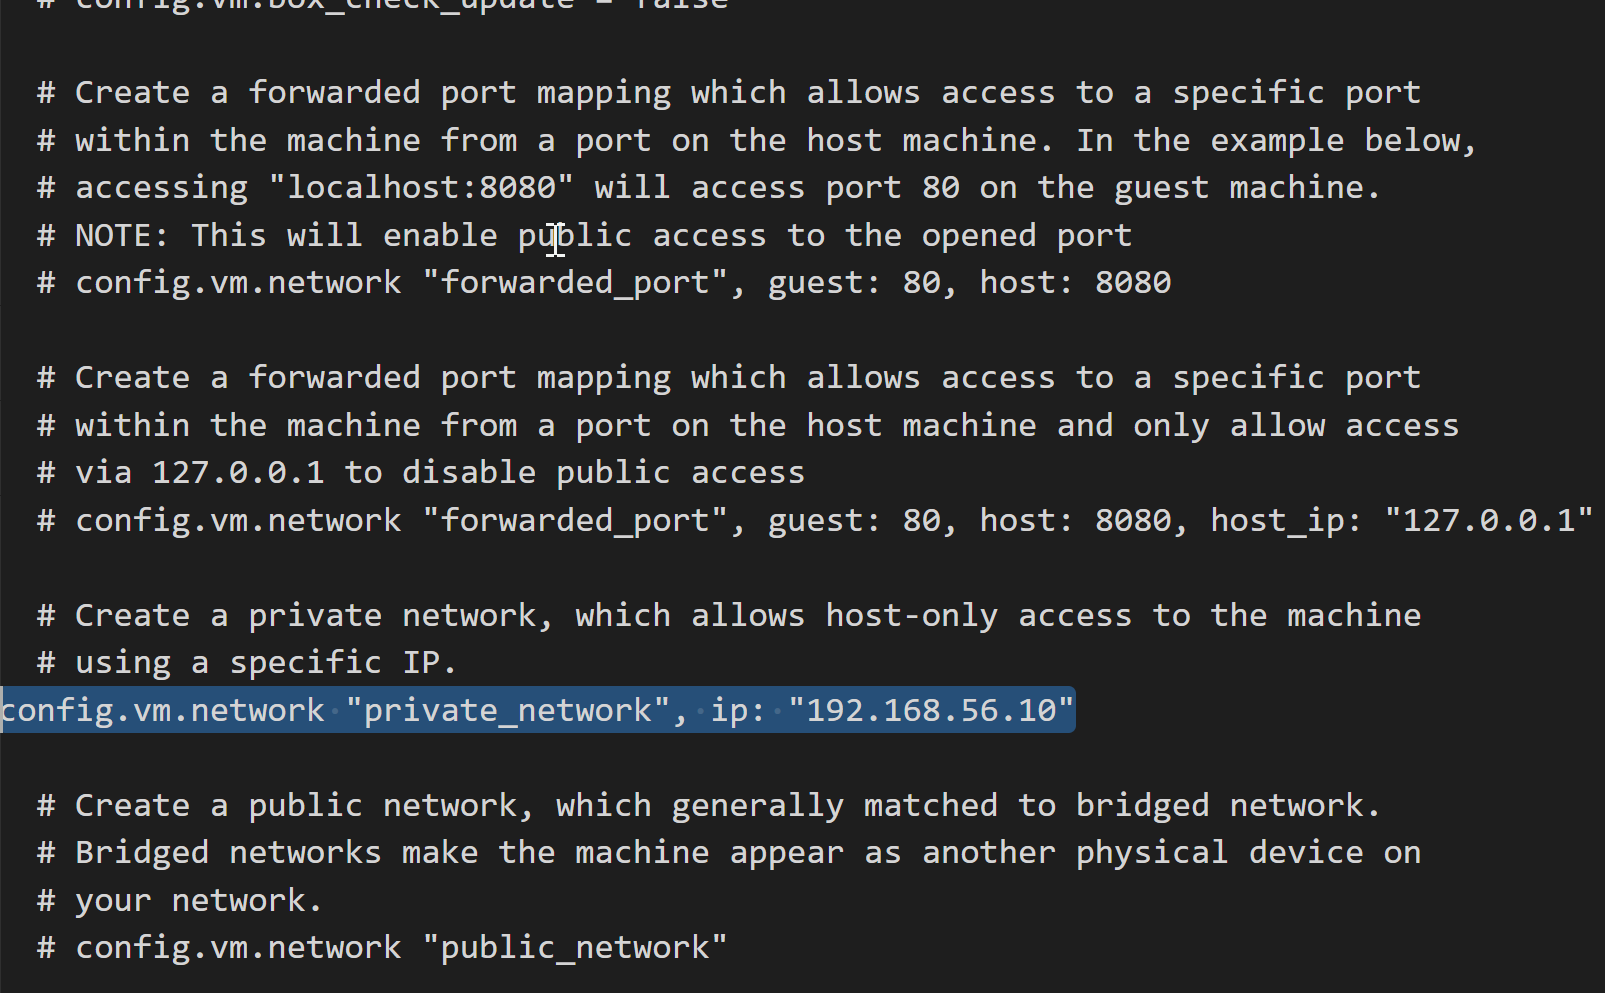
- 直接在我們剛才 `vagrant` 的目錄下的 `Vagrantfile` 檔案中就行配置修改,這是我們剛才建立的虛擬機器的配置檔案 ,配置 `config.vm.network "private_network", ip: "192.168.56.10"`,如下所示:

- 裡面可以配置很多,我們配置私有網路,剛才看到虛擬網絡卡網段是 `192.168.56.1`,那麼我們將這臺的配置為 `192.168.56.10` ,配置好之後需要重啟虛擬機器,通過 `vagrant reload` ,進行重啟,重啟後我們可以驗證其與主機是否能互通

- 到此為止,我們已經配置好了虛擬機器 的網路,那麼我們接下來是否能通過 `Xshell` 或 `Secure CRT` 進行遠端連線呢?
- 我們需要開啟遠端登陸,通過 `vagrant ssh` 到虛擬機器,之後找到 `/etc/ssh/sshd_config` 檔案修改它,通過 `sudo vi sshd_config` ,修改裡面的如下兩項內容,修改後直接 `wq` 儲存退出`vi`
```shell
PermitRootLogin yes
PasswordAuthentication yes
```
- 開啟後,我們再重啟 `SSHD` ,通過 ` systemctl restart sshd`,這時候會讓你輸入`root `的密碼,`root` 賬號的密碼預設也是 `vagrant`,你可以選擇直接用 `sudo` 執行。

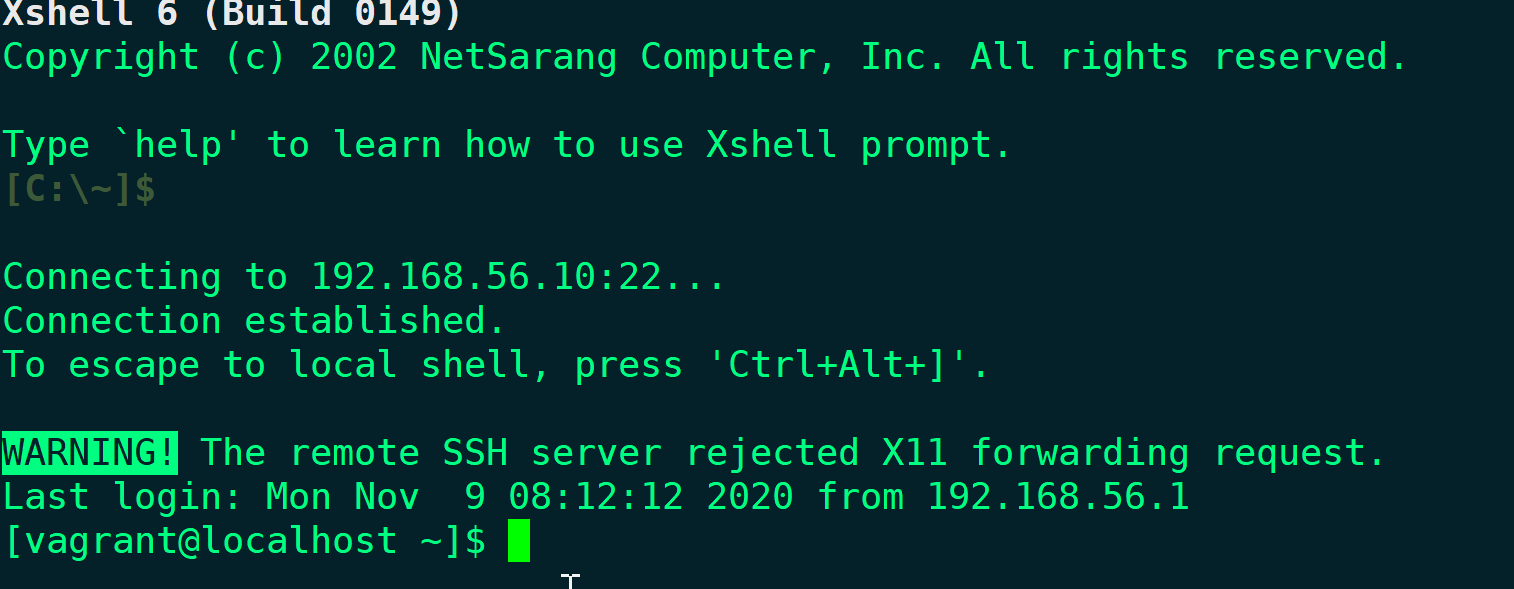
- 在 `xshell` 下測試是否能登入

--------------------------------------------------------------------------
> 本文由AnonyStar 釋出,可轉載但需宣告原文出處。
> 歡迎關注微信公賬號 :雲棲簡碼 獲取更多優質文章
> 更多文章關注筆者部落格 :[雲棲簡碼 i-code.online](https://i-code.
