矢量圖形(高效繪圖 13.2)
阿新 • • 發佈:2017-10-06
cat sed obj 子類 location 手勢 nat new clas 

矢量圖形
我們用Core Graphics來繪圖的一個通常原因就是只是用圖片或是圖層效果不能輕易地繪制出矢量圖形。矢量繪圖包含一下這些:
- 任意多邊形(不僅僅是一個矩形)
- 斜線或曲線
- 文本
- 漸變
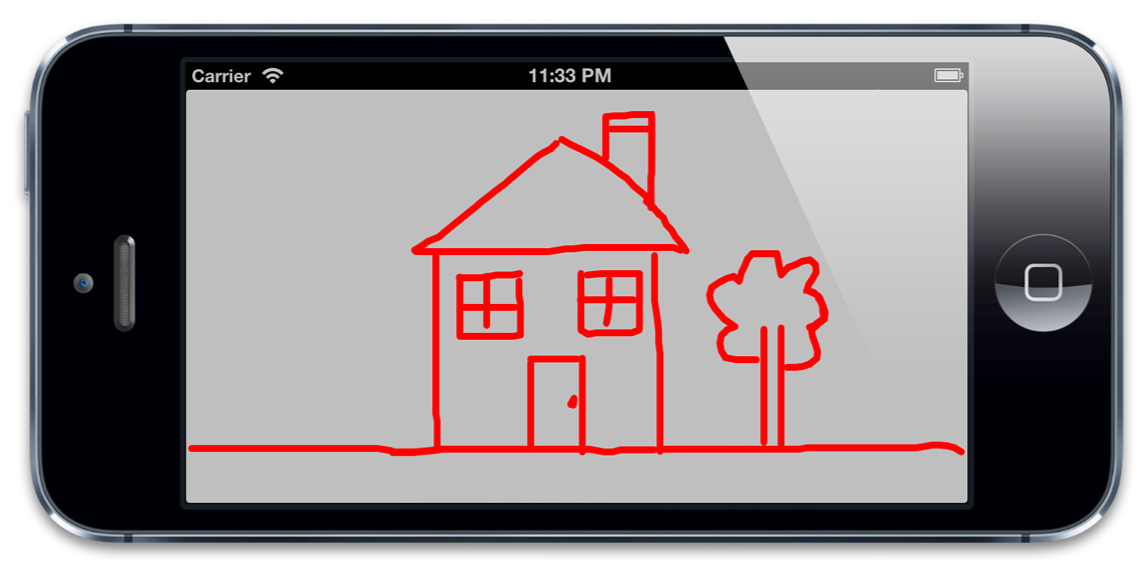
舉個例子,清單13.1 展示了一個基本的畫線應用。這個應用將用戶的觸摸手勢轉換成一個UIBezierPath上的點,然後繪制成視圖。我們在一個UIView子類DrawingView中實現了所有的繪制邏輯,這個情況下我們沒有用上view controller。但是如果你喜歡你可以在view controller中實現觸摸事件處理。圖13.1是代碼運行結果。
清單13.1 用Core Graphics實現一個簡單的繪圖應用

1 #import "DrawingView.h" 2 3 @interface DrawingView () 4 5 @property (nonatomic, strong) UIBezierPath *path; 6 7 @end 8 9 @implementation DrawingView 10 11 - (void)awakeFromNib 12 { 13 //create a mutable path 14 self.path = [[UIBezierPath alloc] init]; 15 self.path.lineJoinStyle = kCGLineJoinRound;View Code16 self.path.lineCapStyle = kCGLineCapRound; 17 ? 18 self.path.lineWidth = 5; 19 } 20 21 - (void)touchesBegan:(NSSet *)touches withEvent:(UIEvent *)event 22 { 23 //get the starting point 24 CGPoint point = [[touches anyObject] locationInView:self]; 25 26 //move the path drawing cursor to the starting point27 [self.path moveToPoint:point]; 28 } 29 30 - (void)touchesMoved:(NSSet *)touches withEvent:(UIEvent *)event 31 { 32 //get the current point 33 CGPoint point = [[touches anyObject] locationInView:self]; 34 35 //add a new line segment to our path 36 [self.path addLineToPoint:point]; 37 38 //redraw the view 39 [self setNeedsDisplay]; 40 } 41 42 - (void)drawRect:(CGRect)rect 43 { 44 //draw path 45 [[UIColor clearColor] setFill]; 46 [[UIColor redColor] setStroke]; 47 [self.path stroke]; 48 } 49 @end

圖13.1 用Core Graphics做一個簡單的『素描』
這樣實現的問題在於,我們畫得越多,程序就會越慢。因為每次移動手指的時候都會重繪整個貝塞爾路徑(UIBezierPath),隨著路徑越來越復雜,每次重繪的工作就會增加,直接導致了幀數的下降。看來我們需要一個更好的方法了。
Core Animation為這些圖形類型的繪制提供了專門的類,並給他們提供硬件支持(第六章『專有圖層』有詳細提到)。CAShapeLayer可以繪制多邊形,直線和曲線。CATextLayer可以繪制文本。CAGradientLayer用來繪制漸變。這些總體上都比Core Graphics更快,同時他們也避免了創造一個寄宿圖。
如果稍微將之前的代碼變動一下,用CAShapeLayer替代Core Graphics,性能就會得到提高(見清單13.2).雖然隨著路徑復雜性的增加,繪制性能依然會下降,但是只有當非常非常浮躁的繪制時才會感到明顯的幀率差異。
清單13.2 用CAShapeLayer重新實現繪圖應用

 1 #import "DrawingView.h"
 2 #import
 3
 4 @interface DrawingView ()
 5
 6 @property (nonatomic, strong) UIBezierPath *path;
 7
 8 @end
 9 ?
10 @implementation DrawingView
11
12 + (Class)layerClass
13 {
14     //this makes our view create a CAShapeLayer
15     //instead of a CALayer for its backing layer
16     return [CAShapeLayer class];
17 }
18
19 - (void)awakeFromNib
20 {
21     //create a mutable path
22     self.path = [[UIBezierPath alloc] init];
23
24     //configure the layer
25     CAShapeLayer *shapeLayer = (CAShapeLayer *)self.layer;
26     shapeLayer.strokeColor = [UIColor redColor].CGColor;
27     shapeLayer.fillColor = [UIColor clearColor].CGColor;
28     shapeLayer.lineJoin = kCALineJoinRound;
29     shapeLayer.lineCap = kCALineCapRound;
30     shapeLayer.lineWidth = 5;
31 }
32
33 - (void)touchesBegan:(NSSet *)touches withEvent:(UIEvent *)event
34 {
35     //get the starting point
36     CGPoint point = [[touches anyObject] locationInView:self];
37
38     //move the path drawing cursor to the starting point
39     [self.path moveToPoint:point];
40 }
41
42 - (void)touchesMoved:(NSSet *)touches withEvent:(UIEvent *)event
43 {
44     //get the current point
45     CGPoint point = [[touches anyObject] locationInView:self];
46
47     //add a new line segment to our path
48     [self.path addLineToPoint:point];
49
50     //update the layer with a copy of the path
51     ((CAShapeLayer *)self.layer).path = self.path.CGPath;
52 }
53 @end
View Code
矢量圖形(高效繪圖 13.2)

