Shell 命令 curl 和 wget 使用代理采集網頁的總結大全
阿新 • • 發佈:2018-03-02
包含 span 國內 詳細 OS png true demo 創新工場
Linux Shell 提供兩個非常實用的命令來爬取網頁,它們分別是 curl 和 wget
米撲代理,作為大數據分析研究的基礎服務,對其做了深入的研究和總結。
curl 和 wget 使用代理
curl 支持 http、https、socks4、socks5
wget 支持 http、https
Shell curl wget 示例
#!/bin/bash
#
# curl 支持 http、https、socks4、socks5
# wget 支持 http、https
#
# 米撲代理示例:
# https://proxy.mimvp.com/demo2.php
#
# 米撲代理購買:
# https://proxy.mimvp.com
#
# mimvp.com
# 2015-11-09

#【米撲代理】:本示例,在CentOS、Ubuntu、MacOS等服務器上,均測試通過
#
# http代理格式 		http_proxy=http://IP:Port
# https代理格式 		https_proxy=http://IP:Port


## proxy no auth
# curl和wget,爬取http網頁
{‘http‘: ‘http://120.77.176.179:8888‘}
curl -m 30 --retry 3 -x http://120.77.176.179:8888 http://proxy.mimvp.com/test_proxy2.php        			# http_proxy
wget -T 30 --tries 3 -e "http_proxy=http://120.77.176.179:8888" http://proxy.mimvp.com/test_proxy2.php  	# http_proxy

# curl和wget,爬取https網頁(註意:添加參數,不經過SSL安全驗證)
{‘https‘: ‘http://46.105.214.133:3128‘}
curl -m 30 --retry 3 -x http://46.105.214.133:3128 -k https://proxy.mimvp.com/test_proxy2.php        							# https_proxy
wget -T 30 --tries 3 -e "https_proxy=http://46.105.214.133:3128" --no-check-certificate https://proxy.mimvp.com/test_proxy2.php	# https_proxy


# curl 支持socks
# 其中,socks4和socks5兩種協議的代理,都可以同時爬取http和https網頁
{‘socks4‘: ‘101.255.17.145:1080‘}
curl -m 30 --retry 3 --socks4 101.255.17.145:1080 http://proxy.mimvp.com/test_proxy2.php
curl -m 30 --retry 3 --socks4 101.255.17.145:1080 https://proxy.mimvp.com/test_proxy2.php

{‘socks5‘: ‘82.164.233.227:45454‘}
curl -m 30 --retry 3 --socks5 82.164.233.227:45454 http://proxy.mimvp.com/test_proxy2.php
curl -m 30 --retry 3 --socks5 82.164.233.227:45454 https://proxy.mimvp.com/test_proxy2.php

# wget 不支持socks


## proxy auth(代理需要用戶名和密碼驗證)
# curl和wget,爬取http網頁
curl -m 30 --retry 3 -x http://username:[email protected]:5718 http://proxy.mimvp.com/test_proxy2.php				# http
curl -m 30 --retry 3 -x http://username:[email protected]:5718 https://proxy.mimvp.com/test_proxy2.php				# https
curl -m 30 --retry 3 -U username:password -x http://210.159.166.225:5718 http://proxy.mimvp.com/test_proxy2.php				# http
curl -m 30 --retry 3 -U username:password -x http://210.159.166.225:5718 https://proxy.mimvp.com/test_proxy2.php			# https
curl -m 30 --retry 3 --proxy-user username:password -x http://210.159.166.225:5718 http://proxy.mimvp.com/test_proxy2.php	# http
curl -m 30 --retry 3 --proxy-user username:password -x http://210.159.166.225:5718 https://proxy.mimvp.com/test_proxy2.php	# https

wget -T 30 --tries 3 -e "http_proxy=http://username:[email protected]:5718" http://proxy.mimvp.com/test_proxy2.php
wget -T 30 --tries 3 -e "https_proxy=http://username:[email protected]:5718" https://proxy.mimvp.com/test_proxy2.php
wget -T 30 --tries 3 --proxy-user=username --proxy-password=password -e "http_proxy=http://2.19.16.5:5718" http://proxy.mimvp.com/test_proxy2.php
wget -T 30 --tries 3 --proxy-user=username --proxy-password=password -e "https_proxy=http://2.19.16.5:5718" https://proxy.mimvp.com/test_proxy2.php


# curl 支持socks
curl -m 30 --retry 3 -U username:password --socks5 21.59.126.22:57216 http://proxy.mimvp.com/test_proxy2.php				# http
curl -m 30 --retry 3 -U username:password --socks5 21.59.126.22:57216 https://proxy.mimvp.com/test_proxy2.php				# https
curl -m 30 --retry 3 --proxy-user username:password --socks5 21.59.126.22:57216 http://proxy.mimvp.com/test_proxy2.php		# http
curl -m 30 --retry 3 --proxy-user username:password --socks5 21.59.126.22:57216 https://proxy.mimvp.com/test_proxy2.php		# https

# wget 不支持socks
wget 配置文件設置代理
vim ~/.wgetrc

http_proxy=http://120.77.176.179:8888:8080
https_proxy=http://12.7.17.17:8888:8080
use_proxy = on
wait = 30

# 配置文件設置後,立即生效,直接執行wget爬取命令即可
wget -T 30 --tries 3 http://proxy.mimvp.com/test_proxy2.php
wget -T 30 --tries 3 https://proxy.mimvp.com/test_proxy2.php
Shell 設置臨時局部代理
# proxy no auth
export http_proxy=http://120.77.176.179:8888:8080
export https_proxy=http://12.7.17.17:8888:8080

# proxy auth(代理需要用戶名和密碼驗證)
export http_proxy=http://username:[email protected]:8888:8080
export https_proxy=http://username:[email protected]:8888:8080

# 直接爬取網頁
curl -m 30 --retry 3 http://proxy.mimvp.com/test_proxy2.php			# http_proxy
curl -m 30 --retry 3 https://proxy.mimvp.com/test_proxy2.php		# https_proxy
wget -T 30 --tries 3 http://proxy.mimvp.com/test_proxy2.php			# http_proxy
wget -T 30 --tries 3 https://proxy.mimvp.com/test_proxy2.php		# https_proxy

# 取消設置
unset http_proxy
unset https_proxy
Shell 設置系統全局代理
# 修改 /etc/profile,保存並重啟服務器
sudo vim /etc/profile		# 所有人有效
或
sudo vim ~/.bashrc			# 所有人有效
或
vim ~/.bash_profile			# 個人有效


## 在文件末尾,添加如下內容
# proxy no auth
export http_proxy=http://120.77.176.179:8888:8080
export https_proxy=http://12.7.17.17:8888:8080

# proxy auth(代理需要用戶名和密碼驗證)
export http_proxy=http://username:[email protected]:8888:8080
export https_proxy=http://username:[email protected]:8888:8080


## 執行source命令,使配置文件生效(臨時生效)
source /etc/profile
或
source ~/.bashrc
或
source ~/.bash_profile


## 若需要機器永久生效,則需要重啟服務器
sudo reboot
米撲代理示例
米撲代理,專註為企業提供國內大數據研究服務,技術團隊來自百度、小米、阿裏、創新工場等,為國內企業提供大數據采集、數據建模分析、結果導出展示等服務。
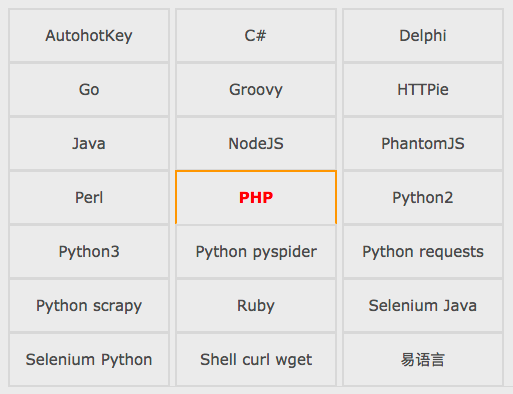
米撲代理示例,包含Python、Java、PHP、C#、Go、Perl、Ruby、Shell、NodeJS、PhantomJS、Groovy、Delphi、易語言等十多種編程語言或腳本,通過大量的可運行實例,詳細講解了使用代理IP的正確方法,方便網頁爬取、數據采集、自動化測試等領域。

米撲代理示例官網 :
https://proxy.mimvp.com/demo2.php
Shell 命令 curl 和 wget 使用代理采集網頁的總結大全
