1. 程式人生 > >OpenGL ES入門

OpenGL ES入門

OpenGL ES渲染管線概述

渲染管線一般是由顯示晶片GPU內部處理圖形訊號的並行處理單元組成,這些並行處理單元之間是獨立的,從另一個角度看,渲染管線實際上也是一系列繪製過程,這一系列過程的輸入是待繪製物體的相關描述資訊,輸出的是要顯示的影象幀資料。

OpenGL ES管線主要包括:

讀取頂點資料—>頂點著色器—>組裝圖元—>光柵化圖元—>片元著色器—>寫入幀緩衝區—>顯示到螢幕上

  • 讀取頂點資料指的是將待繪製的圖形的頂點資料傳遞給渲染管線中。
  • 頂點著色器最終生成每個定點的最終位置,執行頂點的各種變換,它會針對每個頂點執行一次,確定了最終位置後,OpenGL就可以把這些頂點集合按照給定的引數型別組裝成點,線或者三角形。
  • 組裝圖元階段包括兩部分:圖元的組裝和圖元處理,圖元組裝指的是頂點資料根據設定的繪製方式引數結合成完整的圖元,例如點繪製方式中每個圖元就只包含一個點,線段繪製方式中每個圖源包含兩個點;圖元處理主要是剪裁以使得圖元位於視景體內部的部分傳遞到下一個步驟,視景體外部的部分進行剪裁。視景體的概念與投影有關。
  • 光柵化圖元主要指的是將一個圖元離散化成可顯示的二維單元片段,這些小單元稱為片元。一個片元對應了螢幕上的一個或多個畫素,片元包括了位置,顏色,紋理座標等資訊,這些值是由圖元的頂點資訊進行插值計算得到的。
  • 片元著色器為每個片元生成最終的顏色,針對每個片元都會執行一次。一旦每個片元的顏色確定了,OpenGL就會把它們寫入到幀緩衝區中。

在OpenGL ES2.0中主要的兩個部分就是上面的可程式設計頂點著色器和片段著色器。學習OpenGL ES主要是要了解渲染管線,瞭解CPU的渲染過程,主要程式設計工作在於頂點著色器和片元著色器的編寫。
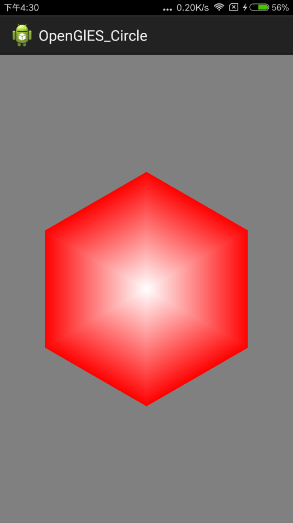
繪製一個六邊形

效果如圖所示
OpenGL ES繪製六邊形
六邊形類

public class SixShape {
    private FloatBuffer mVertexBuffer;
    private FloatBuffer mColorBuffer;
    private int mProgram;
    private int mPositionHandle;
    private
int mColorHandle; private int muMVPMatrixHandle; public SixShape(float r) { initVetexData(r); } public void initVetexData(float r) { // 初始化頂點座標 float[] vertexArray = new float[8*3]; // 初始化頂點顏色 float[] colorArray=new float[8*4]; int j = 0, k = 0; vertexArray[j++] = 0; vertexArray[j++] = 0; vertexArray[j++] = 0; colorArray[k++] = 1; colorArray[k++] = 1; colorArray[k++] = 1; colorArray[k++] = 0; for (int angle = 0; angle <= 360; angle += 60) { vertexArray[j++] = (float) (r*Math.cos(Math.toRadians(angle))); vertexArray[j++] = (float) (r*Math.sin(Math.toRadians(angle))); vertexArray[j++] = 0; colorArray[k++] = 1; colorArray[k++] = 0; colorArray[k++] = 0; colorArray[k++] = 0; } ByteBuffer buffer = ByteBuffer.allocateDirect(vertexArray.length * 4); buffer.order(ByteOrder.nativeOrder()); mVertexBuffer = buffer.asFloatBuffer(); mVertexBuffer.put(vertexArray); mVertexBuffer.position(0); ByteBuffer cbb=ByteBuffer.allocateDirect(colorArray.length*4); cbb.order(ByteOrder.nativeOrder()); mColorBuffer=cbb.asFloatBuffer(); mColorBuffer.put(colorArray); mColorBuffer.position(0); int vertexShader = loaderShader(GLES20.GL_VERTEX_SHADER, vertexShaderCode); int fragmentShader = loaderShader(GLES20.GL_FRAGMENT_SHADER, fragmentShaderCode); mProgram = GLES20.glCreateProgram(); GLES20.glAttachShader(mProgram, vertexShader); GLES20.glAttachShader(mProgram, fragmentShader); GLES20.glLinkProgram(mProgram); mPositionHandle = GLES20.glGetAttribLocation(mProgram, "aPosition"); mColorHandle = GLES20.glGetAttribLocation(mProgram, "aColor"); muMVPMatrixHandle = GLES20.glGetUniformLocation(mProgram, "uMVPMatrix"); } public void draw(float[] mvpMatrix) { GLES20.glUseProgram(mProgram); // 將頂點資料傳遞到管線,頂點著色器 GLES20.glVertexAttribPointer(mPositionHandle, 3, GLES20.GL_FLOAT, false, 3 * 4, mVertexBuffer); // 將頂點顏色傳遞到管線,頂點著色器 GLES20.glVertexAttribPointer(mColorHandle, 4, GLES20.GL_FLOAT, false,4*4, mColorBuffer); // 將變換矩陣傳遞到管線 GLES20.glUniformMatrix4fv(muMVPMatrixHandle, 1, false, mvpMatrix, 0); GLES20.glEnableVertexAttribArray(mPositionHandle); GLES20.glEnableVertexAttribArray(mColorHandle); // 繪製圖元 GLES20.glDrawArrays(GLES20.GL_TRIANGLE_FAN, 0, 8); } private int loaderShader(int type, String shaderCode) { int shader = GLES20.glCreateShader(type); GLES20.glShaderSource(shader, shaderCode); GLES20.glCompileShader(shader); return shader; } private String vertexShaderCode = "uniform mat4 uMVPMatrix;" + "attribute vec3 aPosition;" + "attribute vec4 aColor;" + "varying vec4 aaColor;" + "void main(){" + "gl_Position = uMVPMatrix * vec4(aPosition,1);" + "aaColor = aColor;" + "}"; private String fragmentShaderCode = "precision mediump float;" + "varying vec4 aaColor;" + "void main(){" + "gl_FragColor = aaColor;" + "}"; }

六邊形View

public class SixView extends GLSurfaceView{

    public SixView(Context context) {
        super(context);
        setEGLContextClientVersion(2);
        setRenderer(new MyRender());
    }

    class MyRender implements GLSurfaceView.Renderer {
        private SixShape circle;

        @Override
        public void onSurfaceCreated(GL10 gl, EGLConfig config) {
            GLES20.glClearColor(0.5f, 0.5f, 0.5f, 1);
            circle = new SixShape(0.5f);
            GLES20.glEnable(GLES20.GL_DEPTH_TEST);
        }

        // 投影矩陣
        private final float[] mProjectionMatrix = new float[16];
        // 檢視矩陣
        private final float[] mViewMatrix = new float[16];
        // 模型矩陣
        private final float[] mMMatrix = new float[16];
        private final float[] mViewProjectionMatrix = new float[16];
        private final float[] mMVPMatrix = new float[16];

        @Override
        public void onSurfaceChanged(GL10 gl, int width, int height) {
            GLES20.glViewport(0, 0, width, height);
            float ratio= (float) width / height;
            // 設定正交投影
            Matrix.orthoM(mProjectionMatrix, 0, -ratio, ratio, -1, 1, 0, 5);
            // 設定檢視矩陣
            Matrix.setLookAtM(mViewMatrix, 0, 0, 0, 2,  0, 0, 0, 0, 1, 0);
        }

        @Override
        public void onDrawFrame(GL10 gl) {
            GLES20.glClear( GLES20.GL_DEPTH_BUFFER_BIT | GLES20.GL_COLOR_BUFFER_BIT);
            Matrix.multiplyMM(mViewProjectionMatrix, 0, mProjectionMatrix, 0, mViewMatrix, 0);
            // 設定模型矩陣
            Matrix.setIdentityM(mMMatrix, 0);
            Matrix.translateM(mMMatrix,0,0,0,1);
            Matrix.rotateM(mMMatrix, 0, 30, 0, 0, 1);
            Matrix.multiplyMM(mMVPMatrix, 0, mViewProjectionMatrix, 0, mMMatrix, 0);
            circle.draw(mMVPMatrix);
        }
    }

}

接下來在Activity中就可以使用這個View了。上面的例子雖然簡單,但是包括了使用OpenGL ES程式設計的主要流程,包括生成頂點資料,編寫頂點著色器,片元著色器,傳遞資料給頂點/片元著色器,這裡最主要的就是著色器語言。此外包括投影,平移,旋轉等操作。在後面會詳細學習每個細節以及上面例子沒有涉及到的光照,紋理等OpenGL的知識。