Annotation 的第一個工程
一、什麼是 Annotation?
java.lang.annotation,介面 Annotation。對於Annotation,是Java5的新特性,JDK5引入了Metadata(元資料)很容易的就能夠呼叫Annotations。Annotations提供一些本來不屬於程式的資料,比如:一段程式碼的作者或者告訴編譯器禁止一些特殊的錯誤。An annotation 對程式碼的執行沒有什麼影響。Annotations使用@annotation的形式應用於程式碼:類(class),屬性(attribute),方法(method)等等。一個Annotation出現在上面提到的開始位置,而且一般只有一行,也可以包含有任意的引數。
二、Annotation 有什麼作用?
在建立EJB元件時,必需提供一些定義,使得EJB元件使用一些服務例如:安全服務,持久化服務,事務服務。EJB容器可以提供這些服務,這樣EJB只要實現業務邏輯就可以了。但是說到底EJB容器使用EJB元件的元資料來提供這些服務,在以前EJB的元資料是以XML配置檔案形式出現的,這些配置檔案與EJB原始檔是分開的。 EJB的部署人員無法瞭解EJB本身的資訊,如果EJB元件的建立者用注。
三、Annotation 第一個工程,操作步驟如下:
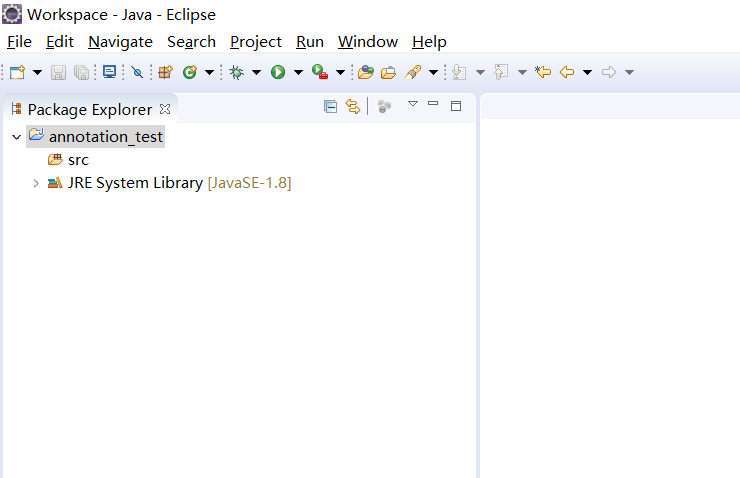
1、建立新的 java 專案,名為:annotation_test,如下圖:
2、加入響應的 jar 包
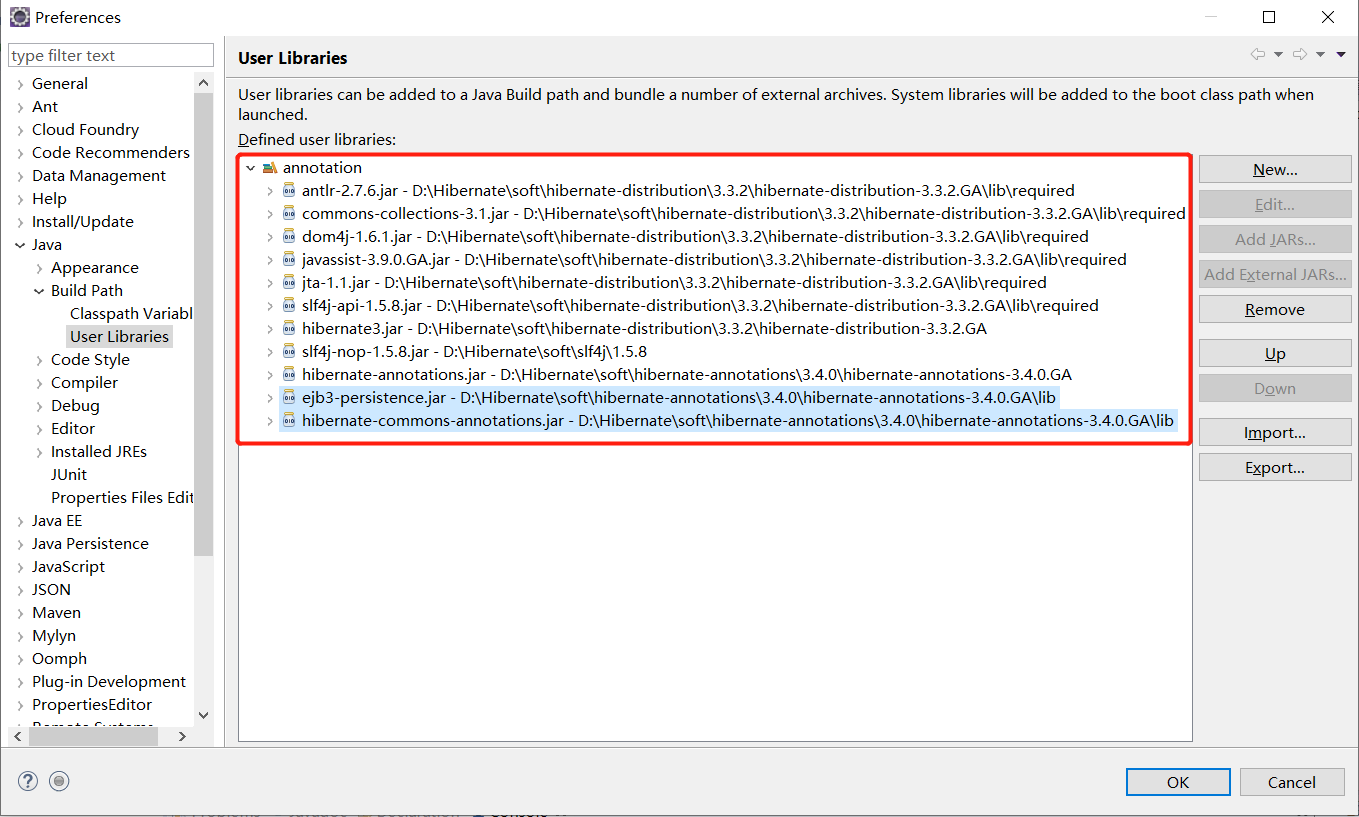
a)、選單 Window --> Preferences --> Java --> Build Path --> User Libraries,點選按鈕 “New”,命名為 “annotation”,如下圖:

b)、選擇“annotation”,點選“Add External JARs...”,把下面的這些 jar 引入新增進去,分別是:
hibernate-distribution\3.3.2\hibernate-distribution-3.3.2.GA\hibernate3.jar(核心JAR包)
hibernate-distribution\3.3.2\hibernate-distribution-3.3.2.GA\lib\required\ 目錄下的所有 jar 包
slf4j-1.5.8\slf4j-nop.jar
hibernate-annotations\3.4.0\hibernate-annotations-3.4.0.GA\hibernate-annotations.jar
hibernate-annotations\3.4.0\hibernate-annotations-3.4.0.GA\lib\ejb3-persistence.jar
hibernate-annotations\3.4.0\hibernate-annotations-3.4.0.GA\lib\hibernate-commons-annotations.jar
點選按鈕 “確定”,
如下圖:
3、引入 mysql 的 JDBC 驅動包
a)、選單 Window --> Preferences --> Java --> Build Path --> User Libraries,點選按鈕 “New”,命名為 “Driver”,然後點選 “Driver”,點選按鈕 “Add External JARs...”,點選按鈕 “確定”, 如下圖:

b)、選擇“driver”,點選“Add External JARs...”,把 Driver\MySql\mysql-connector-java-5.1.47\mysql-connector-java-5.1.47\mysql-connector-java-5.1.47.jar 引入新增進去,如下圖:

4、將驅動引入專案工程,點選專案(hibernate_test),滑鼠右擊,選擇 Build Path --> Add Libraries... --> User Library,點選按鈕 “Next”;
注意:選中工程,如果右鍵選中 Build Path 裡面沒有 Add Libraries... ,右鍵工程選中 Configure Build Path ,進入後,左邊欄選中 java Build Path,再選中右邊的 Libraries,再選 Add Libraries... ,然後再勾選 “annotation” 與 “driver” 新增就可以了
如下圖:

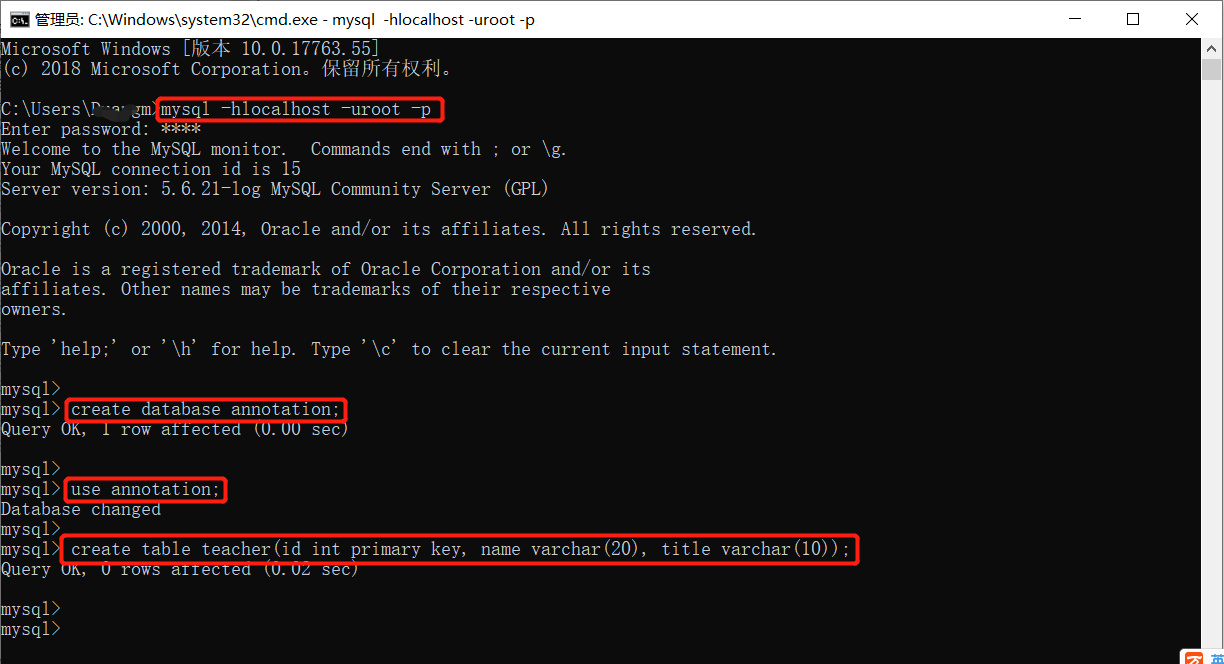
5、登陸本地 MySQL,建立資料庫 annotation,並使用 annotation 庫,在建立 teacher 表,步驟如下:
mysql -hlocalhost -uroot -p,敲回車,然後輸入密碼
create datebase annotation;
use annotation;
create table teacher(id int primary key, name varchar(20), title varchar(10));
6、建立 hibernate 配置檔案 hibernate.cfg.xml,這個配置檔案應建立在 src 目錄下面,如下圖:
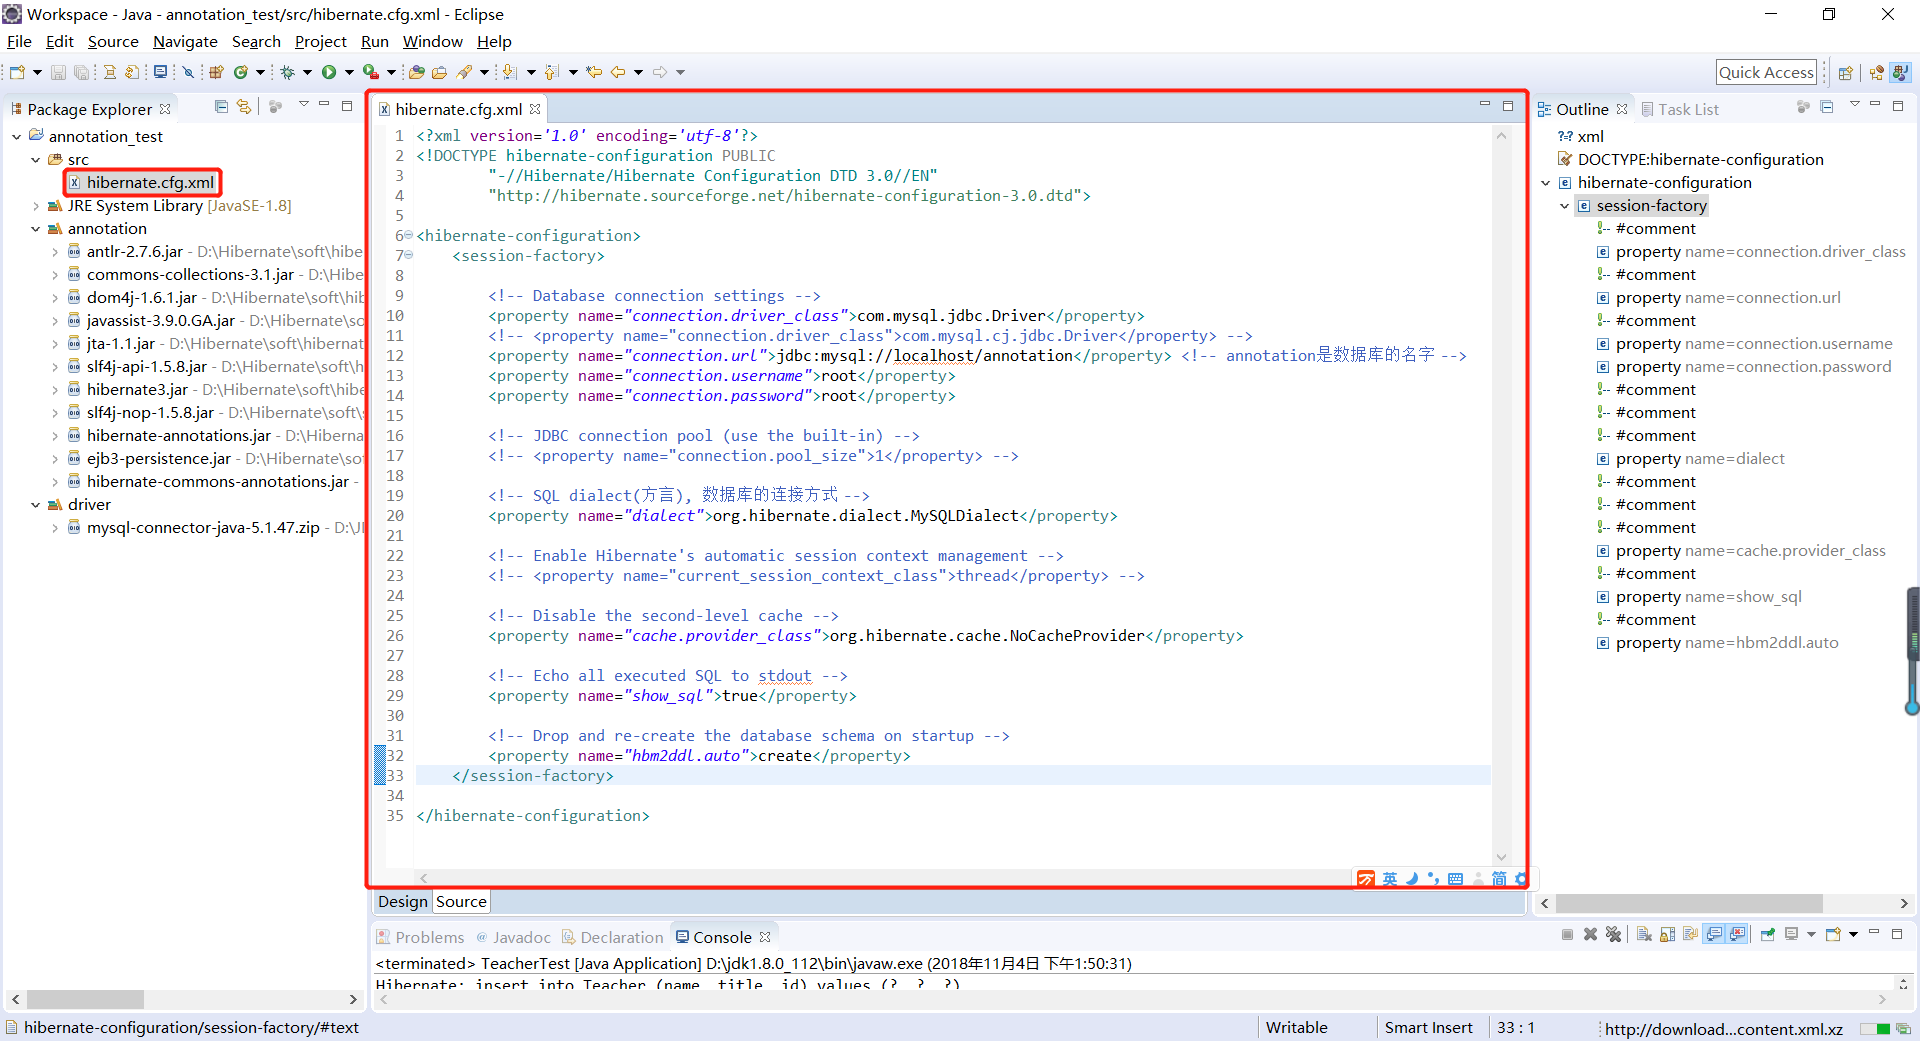
hibernate.cfg.xml 檔案裡面的內容為:
注意:
a)、從參考文件中拷貝
b)、修改對應的資料庫連線
c)、註釋掉暫時用不上的內容
<?xml version='1.0' encoding='utf-8'?>
<!DOCTYPE hibernate-configuration PUBLIC
        "-//Hibernate/Hibernate Configuration DTD 3.0//EN"
        "http://hibernate.sourceforge.net/hibernate-configuration-3.0.dtd">

<hibernate-configuration>

	<session-factory>

		<!-- Database connection settings -->
		<property name="connection.driver_class">com.mysql.jdbc.Driver</property>
		<property name="connection.url">jdbc:mysql://localhost/annotation</property> <!-- annotation是資料庫的名字 -->
		<property name="connection.username">root</property>
		<property name="connection.password">root</property>

		<!-- JDBC connection pool (use the built-in) -->
		<!-- <property name="connection.pool_size">1</property> -->

		<!-- SQL dialect(方言), 資料庫的連線方式 -->
		<property name="dialect">org.hibernate.dialect.MySQLDialect</property>

		<!-- Enable Hibernate's automatic session context management -->
		<!-- <property name="current_session_context_class">thread</property> -->

		<!-- Disable the second-level cache -->
		<property name="cache.provider_class">org.hibernate.cache.NoCacheProvider</property>

		<!-- Echo all executed SQL to stdout -->
		<property name="show_sql">true</property>

		<!-- Drop and re-create the database schema on startup -->
		<property name="hbm2ddl.auto">create</property>

		<mapping class="annotation.model.Teacher"/> <!-- 這個是Annotation的寫法 -->

	</session-factory>

</hibernate-configuration>
7、建立 Teacher 類,如下圖:

Teacher 類的內容為:
package annotation.model;

/**
 * JDBC 是一個標準
 * MySql Driver/Oracle Driver 等都是 JDBC 的實現
 * 或者說 hibernate 是 JDBC 的實現
 */

import javax.persistence.Entity; // 從包名可以看出, 它不依賴hibernate
import javax.persistence.Id;

@Entity
public class Teacher {

	private int id;
	private String name;
	private String title;

	@Id // 把註解Id加到主鍵上
	public int getId() {
		return id;
	}
	public void setId(int id) {
		this.id = id;
	}
	public String getName() {
		return name;
	}
	public void setName(String name) {
		this.name = name;
	}
	public String getTitle() {
		return title;
	}
	public void setTitle(String title) {
		this.title = title;
	}
}
8、在 hibernate.cfg.xml 中建立對映 <Mapping class=../>,將 <mapping class="annotation.model.Teacher"/> 新增到 配置檔案中,如下圖:

9、寫一個測試類,如下圖:
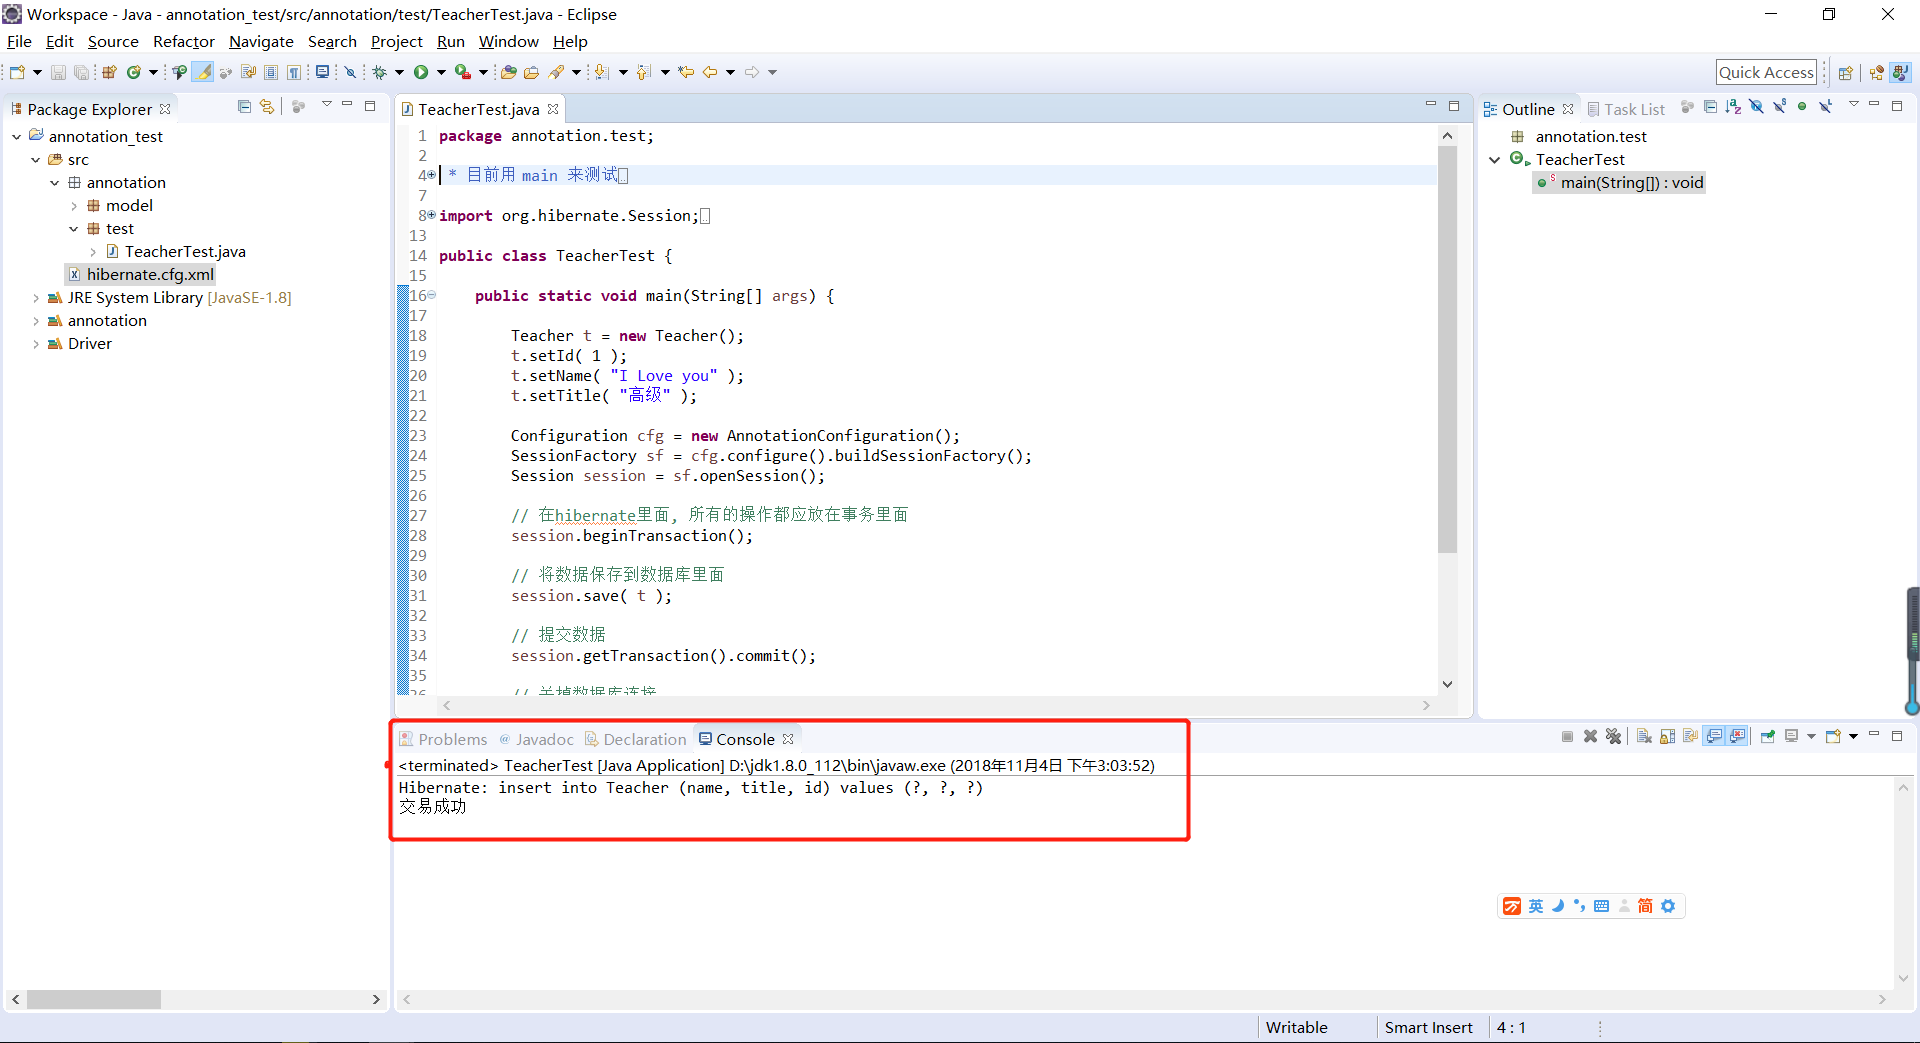
測試類的內容為:
package annotation.test;

/**
 * 目前用 main 來測試
 */

import org.hibernate.Session;
import org.hibernate.SessionFactory;
import org.hibernate.cfg.AnnotationConfiguration;
import org.hibernate.cfg.Configuration;
import annotation.model.Teacher;

public class TeacherTest {

	public static void main(String[] args) {

		Teacher t = new Teacher();
		t.setId( 1 );
		t.setName( "I Love you" );
		t.setTitle( "高階" );

		Configuration cfg = new AnnotationConfiguration();
		SessionFactory sf = cfg.configure().buildSessionFactory();
		Session session = sf.openSession();

		// 在hibernate裡面, 所有的操作都應放在事務裡面
		session.beginTransaction();

		// 將資料儲存到資料庫裡面
		session.save( t );

		// 提交資料
		session.getTransaction().commit();

		// 關掉資料庫連線
		session.close();
		sf.close();

		String str = "\u4ea4\u6613\u6210\u529f";
		System.out.println( str );
	}
}
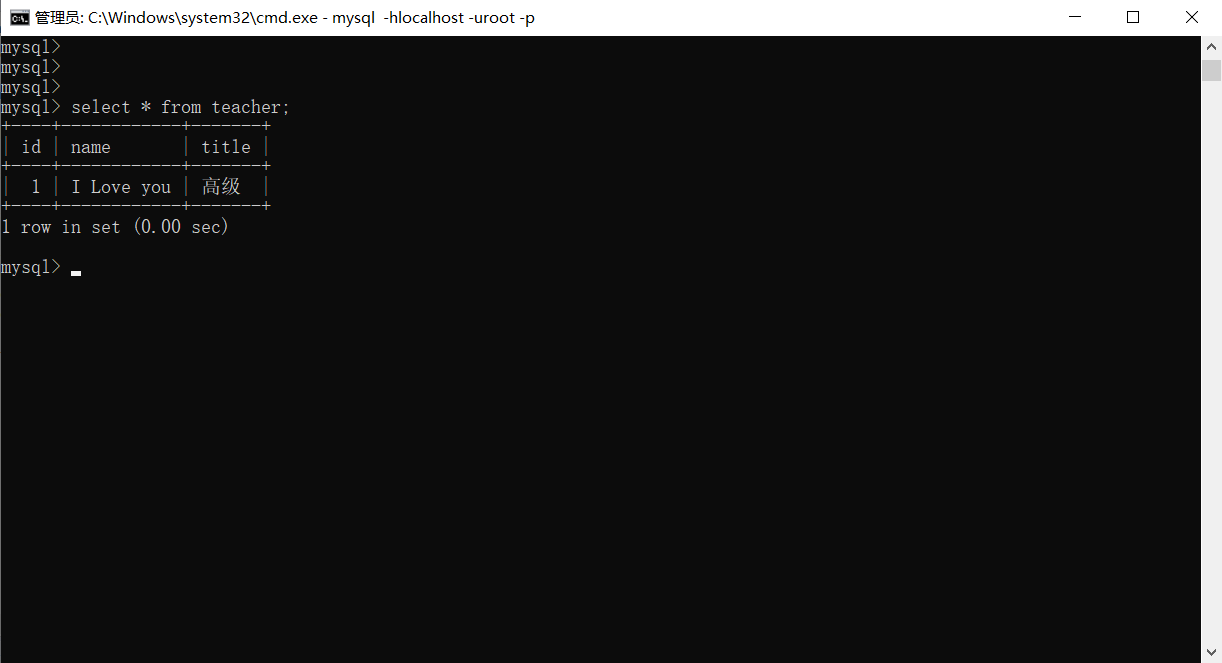
10、如果測試類成功執行,則可以通過sql語句檢視資料,如下圖: