
Java實現Facebook第三方登入
第一次接觸Facebook第三方登入,可能有些地方做的並不全面,只是嘗試著做了一個小demo,因為國內接入Facebook的專案並不多,並且多數都是Android或IOS的實現,所以資料也特別少,在此做個小總結。
第三方登入主要就是OAuth2.0協議,瞭解OAuth2.0是必要的!
開發流程:
1、瞭解OAuth2.0
2、到Facebook官網註冊開發者賬號,建立應用
3、程式碼實現
下面逐步介紹
1、瞭解OAuth2.0(摘自百度百科)
①定義
【百度】OAUTH協議為使用者資源的授權提供了一個安全的、開放而又簡易的標準。與以往的授權方式不同之處是OAUTH的授權不會使第三方觸及到使用者的帳號資訊(如使用者名稱與密碼),即第三方無需使用使用者的使用者名稱與密碼就可以申請獲得該使用者資源的授權,因此OAUTH是安全的。oAuth是Open Authorization的簡寫。
【官網】
OAuth 2.0 is the industry-standard protocol for authorization. OAuth 2.0 supersedes the work done on the original OAuth protocol created in 2006. OAuth 2.0 focuses on client developer simplicity while providing specific authorization flows for web applications, desktop applications, mobile phones, and living room devices. This specification is being developed within the
②認證授權過程
【圖片】
圖1:官網提供的認證流程
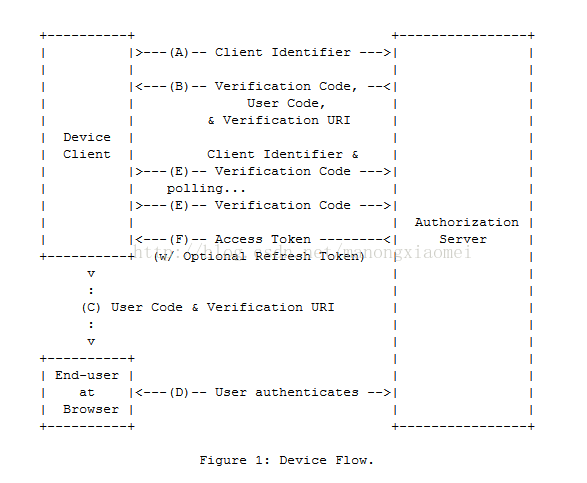
圖2:百度上搜個好看的給同學們理解

如果以上沒看太明白的話不要緊,跟著我後面一步一步走,會慢慢理解的
2、到Facebook官網註冊開發者賬號,建立應用
①要登入www.facebook.com毫無疑問需要FQ,這個如果不會的話問問身邊的其他人總有人會的
②註冊Facebook開發者賬號這個就到官網一步一步來就好了,屬於傻瓜式註冊賬號
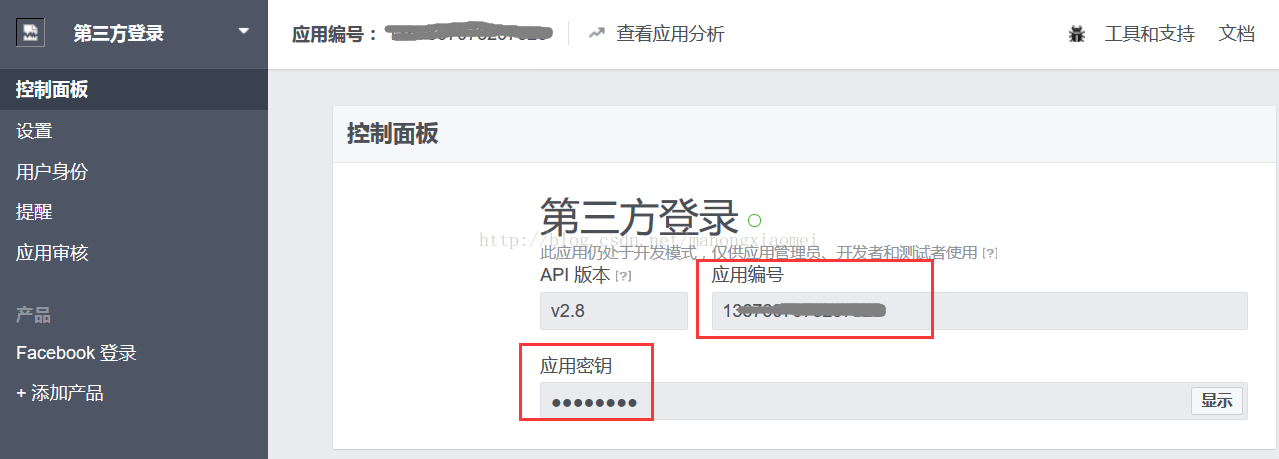
③建立應用成功後會給你一個應用編號和應用祕鑰,這兩個要保留在程式碼中會用到
建立應用還需要填寫一些網址什麼的,我給同學們標識幾個重要的地方:
<1>建立成功之後的頁面,應用編號和祕鑰一定要妥善儲存到程式碼中
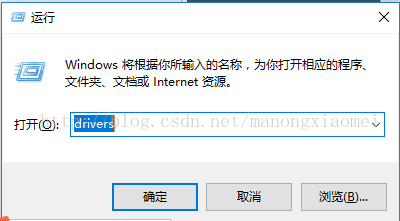
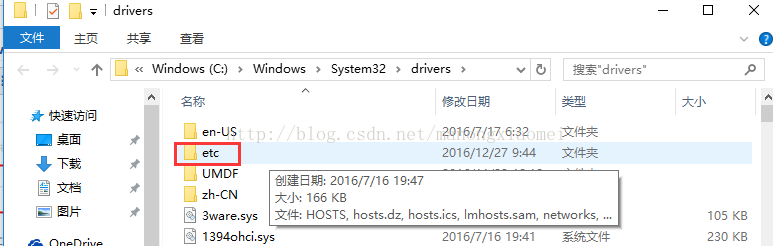
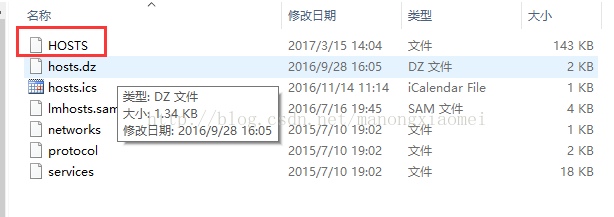
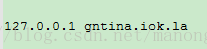
<2>在設定>基本中配置應用域名,訪問應用時的域名,隨便寫一個配置到hosts檔案中即可,不會的看下圖:

<3>你的網站的入口訪問地址
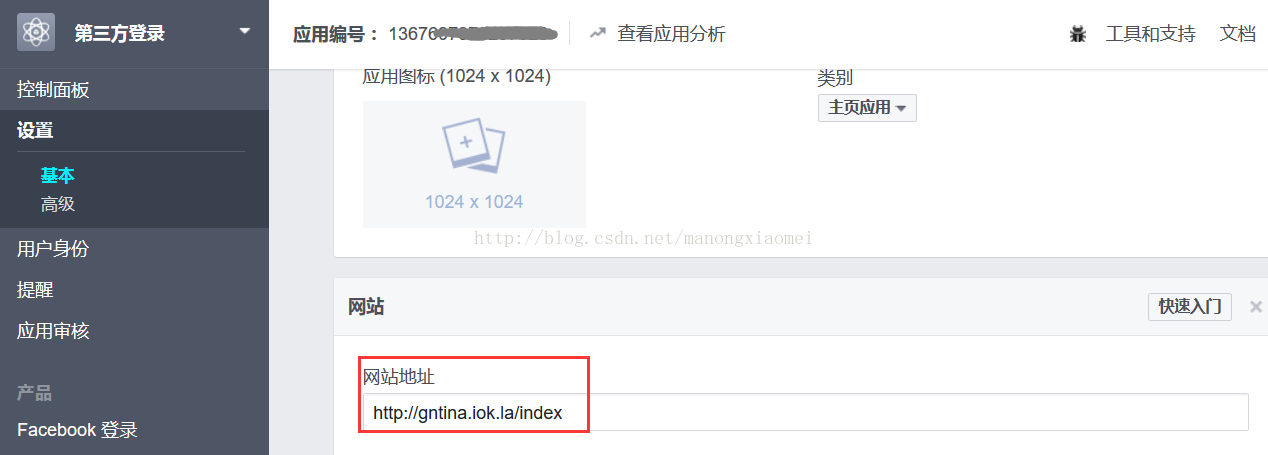
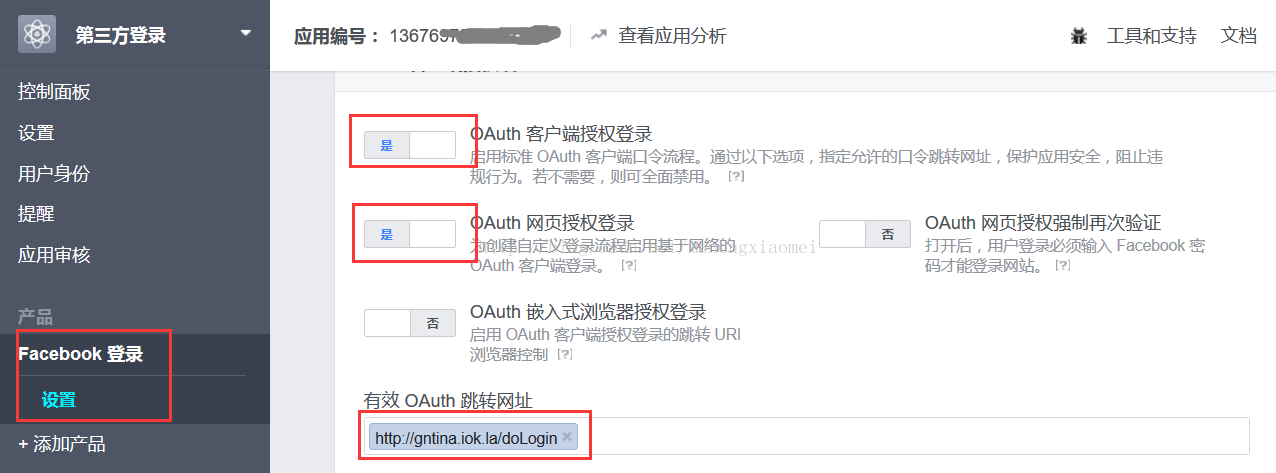
<4>如圖這樣配置就可以,那個跳轉網址是使用者登入成功之後回撥的地址(不明白的接著往下走,有個印象就行,這個隨時可以改)
基本上這些都配置好了就可以開始寫程式碼了
3、程式碼實現(分為兩類同學,分別找對應自己的實現方式)
【靠自己】想自主實現的同學,我截圖具體位置,慢慢摸索同樣可以做出來
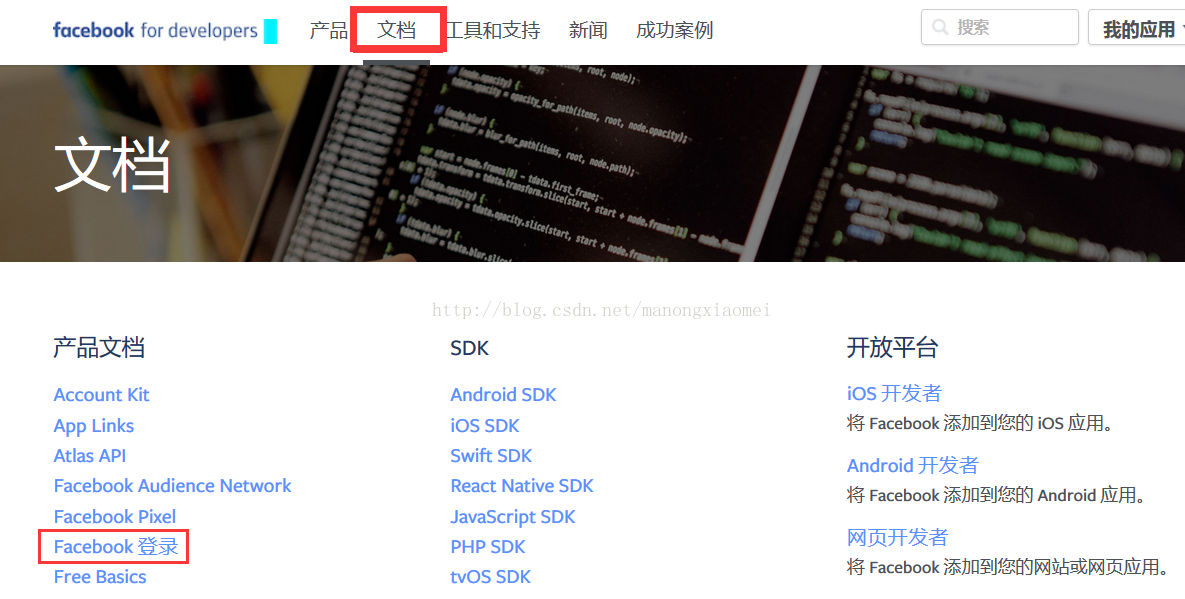
想在後臺做驗證的同學看這裡(這種方式比較安全,且可擴充套件性強,不需要呼叫facebookAPI)
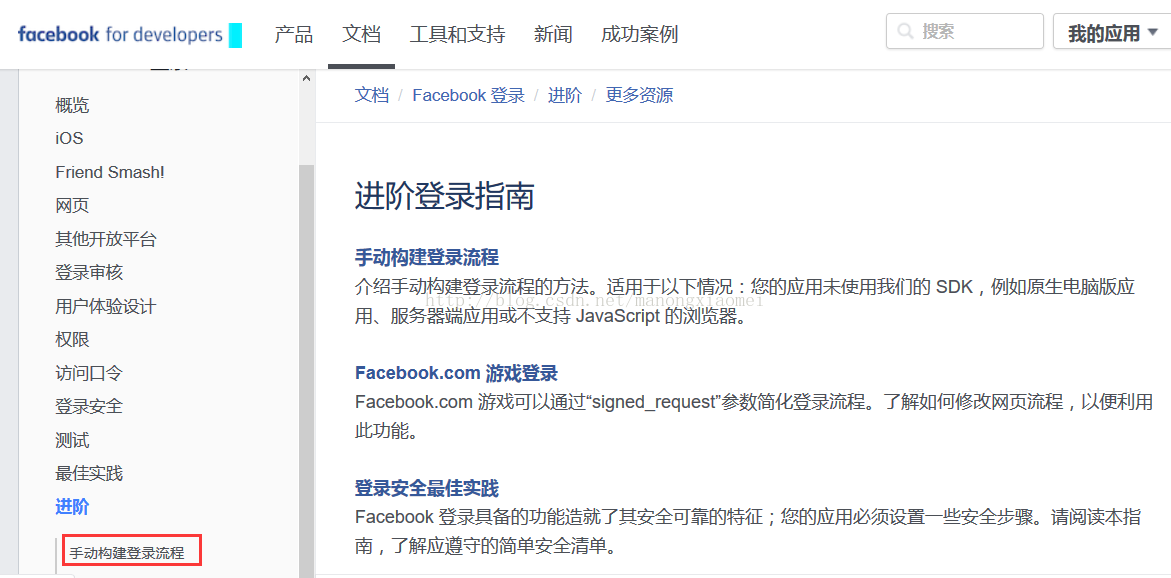
想都在網頁上實現的同學看這裡

【無力者】不想自己找文件,不想思考,著急做的同學,看我上傳的程式碼,複製貼上就可以了
①我的index.jsp(對應我的應用的網址)
<%@ page language="java" contentType="text/html; charset=UTF-8"
	pageEncoding="UTF-8"%>
<!DOCTYPE html PUBLIC "-//W3C//DTD HTML 4.01 Transitional//EN" "http://www.w3.org/TR/html4/loose.dtd">
<html>
<head>
<meta http-equiv="Content-Type" content="text/html; charset=UTF-8">
<title>登入頁面</title>
</head>
<script type="text/javascript" src="/static/jquery-1.7.2.min.js"></script>
<body>
	<h1>Login Page</h1>
	<form action="${pageContext.request.contextPath }/login">
		username: <input type="text" name="username"><br /> <br />
		password: <input type="password" name="password"><br /> <br />
		<input type="submit" value="登入">
	</form>
	<br />
	<fb:login-button scope="public_profile,email"
		onlogin="checkLoginState();"
		auto_logout_link="true"
		size="large"
		show_faces="true">
	</fb:login-button>

	<div id="status"></div>

<script>
	// This is called with the results from from FB.getLoginStatus().
	function statusChangeCallback(response) {
		console.log('statusChangeCallback');
		console.log(response);
		if (response.status === 'connected') {
			//到此代表使用者登入成功
			//跳轉到http://gntina.iok.la/code(參見我後臺程式碼的路徑)
			location.href = "傳送重定向的地址";
		} else {
			document.getElementById('status').innerHTML = 'Please log '
					+ 'into this app.';
		}
	}

       function checkLoginState() {
		FB.getLoginStatus(function(response) {
			statusChangeCallback(response);
		});
	}

	window.fbAsyncInit = function() {
		FB.init({
			appId : '應用編號',
			cookie : true, // enable cookies to allow the server to access
			xfbml : true, // parse social plugins on this page
			version : 'v2.8' // use graph api version 2.8
		});

		FB.getLoginStatus(function(response) {
			statusChangeCallback(response);
		});

	};

	// Load the SDK asynchronously
	(function(d, s, id) {
		var js, fjs = d.getElementsByTagName(s)[0];
		if (d.getElementById(id))
			return;
		js = d.createElement(s);
		js.id = id;
		js.src = "//connect.facebook.net/en_US/sdk.js";
		fjs.parentNode.insertBefore(js, fjs);
	}(document, 'script', 'facebook-jssdk'));
</script>
</body>
</html>
②controller程式碼
package com.lenovo.login.controller;

import java.io.IOException;
import java.util.HashMap;

import javax.servlet.ServletException;
import javax.servlet.http.HttpServletRequest;
import javax.servlet.http.HttpServletResponse;

import net.sf.json.JSONObject;

import org.apache.commons.lang.StringUtils;
import org.springframework.stereotype.Controller;
import org.springframework.web.bind.annotation.RequestMapping;
import org.springframework.web.bind.annotation.ResponseBody;


/**
 * @ClassName: TestController
 * @Description: FaceBook第三方登入
 * @date Mar 15, 2017
 */
@Controller
public class TestController {

	//應用編號
	private static String client_id="應用編號";
	//應用祕鑰
	private static String client_secret="應用祕鑰";
	//表示取得的使用者資訊的許可權範圍
	private static String scope = "user_about_me,email,read_stream";
	//回撥地址
	private static String redirect_url ="http://gntina.iok.la/doLogin";
	//獲取臨時口令
	private static String code_url="https://www.facebook.com/v2.8/dialog/oauth";
	//獲取訪問口令
	private static String token_url="https://graph.facebook.com/v2.8/oauth/access_token";
	//獲取使用者資訊
	private static String user_url="https://graph.facebook.com/me";
	//驗證口令
	private static String verify_url="https://graph.facebook.com/debug_token";
	//獲取應用口令
	private static String app_url="https://graph.facebook.com/v2.8/oauth/access_token";

        //第一步訪問登入頁面
	@RequestMapping(value="/index")
	public String toIndex(HttpServletRequest request){
		return "index";
	}

	/**
	 * @throws IOException
	 * @Title: doLogin
	 * @Description: 呼叫“登入”對話方塊和設定重定向網址
	 * @return void 這個就是在應用中定義的跳轉網址,也就是重定向第二步之後回撥的地址,並且帶上了code引數
	 * @date Mar 17, 2017 9:29:03 AM
	 * @throws
	 */
	@RequestMapping(value="/doLogin")
	@ResponseBody
	public Object doLogin(HttpServletRequest request,HttpServletResponse response) throws IOException{
		String code = request.getParameter("code");//第二步獲取code,迷糊的同學往下看,方法上也有對應的步驟
		if(StringUtils.isNotBlank(code)){
			String accessToken = getFacebookAccessToken(code);//第三步,用code(臨時口令)換取accessToken
			JSONObject userInfo=null;
			if(StringUtils.isNotBlank(accessToken)){
				userInfo = getUserInfo(accessToken);//第四步,用accessToken獲取使用者資訊
			}else{
				System.out.println("accessToken is null");
			}
			System.out.println(userInfo);
			return userInfo;
			//對使用者資訊進行處理
		}else{
			return "/code";
		}
	}


	/**
	 * @throws ServletException
	 * @throws IOException
	 * @Title: getAuthorizationCode
	 * @Description: 獲取 Authorization Code(臨時口令)
	 * @author 第二步,在index.jsp中使用者登入成功後就是跳轉到這裡,重定向此地址會在回撥地址中的引數帶上code
	 * @return String
	 * @date Mar 17, 2017 9:30:38 AM
	 * @throws
	 */
	@RequestMapping(value="/code")
	public static void getAuthorizationCode(HttpServletRequest  request,HttpServletResponse response) throws IOException, ServletException{
		response.sendRedirect(code_url+"?client_id="+client_id+"&redirect_uri="+redirect_url);
	}

	/**
	 * @return
	 * @throws IOException
	 * @Title: getFacebookAccessToken
	 * @Description:用臨時口令獲取訪問口令 access_token
	 * @author 第三步用code換取accessToken(呼叫的介面和引數在程式碼裡找就能看明白了)
	 * @return String
	 * @param code“登入”對話方塊重定向接收的引數。
	 * @date Mar 15, 2017 11:36:11 AM
	 * @throws
	 */
	public static String getFacebookAccessToken(String code){
		HashMap<String, String> params = new HashMap<String,String>();
		params.put("client_id", client_id);
		params.put("redirect_uri", redirect_url);
		params.put("client_secret", client_secret);
		params.put("code", code);
		String[] responseResult =null;
		String accessToken =null;
		try {
			responseResult = HttpClientUtil.getStringByPost(token_url, params, null);
		} catch (Exception e) {
			e.printStackTrace();
		}
		if (null != responseResult && responseResult[0].equals("200")) {
			String result = responseResult[1];
			JSONObject jsonObject =  JSONObject.fromObject(result);
			accessToken = jsonObject.getString("access_token");
		}
		return accessToken;
		//獲取,然後返回access_token
		/*{
		  "access_token": {access-token},
		  "token_type": {type},
		  "expires_in":  {seconds-til-expiration}
		}*/
	}

	/**
	 * @throws IOException
	 * @return
	 * @Title: getUserInfo
	 * @Description:根據   token口令獲取使用者資訊
	 * @author 第四步用accessToken獲取使用者資訊(呼叫的介面和引數在程式碼裡找就能看明白了)
	 * @return Map<String,String>
	 * @date Mar 15, 2017 6:04:31 PM
	 * @throws
	 */
	public static JSONObject getUserInfo(String accessToken){
		HashMap<String, String> params = new HashMap<String,String>();
		String fields="id,name,birthday,gender,hometown,email,devices";
		params.put("access_token", accessToken);
		params.put("fields", fields);
		String[] responseResult =null;
		JSONObject userInfo=null;
		try {
			responseResult = HttpClientUtil.getStringByGet(user_url, params);
		} catch (Exception e) {
			e.printStackTrace();
		}
		if (null != responseResult && responseResult[0].equals("200")) {
			String result = responseResult[1];
			userInfo =  JSONObject.fromObject(result);
		}
		return userInfo;
	}

	/**
	 * @Title: verifyToken
	 * @Description: 呼叫圖譜API,驗證口令  app_id 和 user_id 欄位將幫助您的應用確認訪問口令對使用者和您的應用有效。
	 * @author 第五步驗證訪問的使用者是否來自你的應用,防刷功能,防止惡意註冊
	 * @return String
	 * @date Mar 17, 2017 9:50:38 AM
	 * @throws
	 */
	@RequestMapping("/verify")
	@ResponseBody
	public Object verifyToken(String accessToken){
		HashMap<String, String> params = new HashMap<String,String>();
		//檢驗口令
		accessToken="EAATb6fZCbwXgBAFlUThSX7xWMcwfVhpT8A9szvYkWsTqhJDjcILOLkTPReDYHx6BfWl67MXA2ZApPyc7FEDJGJ1bIrM0u8zQI6nszrcnzULDRuUG2gBWIjuZAe6CPZCYXBHClpsL8zhZAK4gVZC4N27ZAkZBPDscRJW0bRS05LisJAZDZD";
		//應用口令
		String access_token=getAppToken();
		params.put("input_token", accessToken);
		params.put("access_token", access_token);
		String[] responseResult =null;
		String data = null ;
		try {
			responseResult = HttpClientUtil.getStringByGet(verify_url, params);
		} catch (Exception e) {
			e.printStackTrace();
		}
		if (null != responseResult && responseResult[0].equals("200")) {
			String result = responseResult[1];
			JSONObject jsonObject =  JSONObject.fromObject(result);
			data = jsonObject.getString("data");
			System.out.println(data);
		}
//		{
//		    "data": {
//		        "app_id": 138483919580948,
//		        "application": "Social Cafe",
//		        "expires_at": 1352419328,
//		        "is_valid": true,
//		        "issued_at": 1347235328,
//		        "metadata": {
//		            "sso": "iphone-safari"
//		        },
//		        "scopes": [
//		            "email",
//		            "publish_actions"
//		        ],
//		        "user_id": 1207059
//		    }
//		}
		return data;
	}

	/**
	 * @Title: getAppToken
	 * @Description: 獲取應用口令(用來驗證口令是否來自我的應用)
	 * @author gaona
	 * @return String
	 * @date Mar 20, 2017 3:16:26 PM
	 * @throws
	 */
	public String getAppToken(){
		HashMap<String, String> params = new HashMap<String,String>();
		params.put("client_id", client_id);
		params.put("client_secret", client_secret);
		params.put("grant_type", "client_credentials");
		String[] responseResult =null;
		String appToken=null;
		try {
			responseResult = HttpClientUtil.getStringByGet(app_url, params);
		} catch (Exception e) {
			e.printStackTrace();
		}
		if (null != responseResult && responseResult[0].equals("200")) {
			String result = responseResult[1];
			JSONObject jsonObject =  JSONObject.fromObject(result);
			appToken = jsonObject.getString("access_token");
			System.out.println(appToken);
		}
		return appToken;
	}
}
希望此文可以幫助到需要的同學,有不明白的地方歡迎隨時留言!
寫部落格實在是太累了,下面關於Google第三方登入的和這個是一樣的,不同的只是呼叫介面的地址和引數略有不同,有不放心的同學,我會抓緊時間補上的。
補:這兩天又看了一下,換成SDK的方式更簡單,直接呼叫facebook寫好的程式碼,可以實現自動驗證,也是一個不錯的選擇!
facebook.jsp
<%@ page language="java" contentType="text/html; charset=UTF-8"
	pageEncoding="UTF-8"%>
<!DOCTYPE html>
<html>
<head>
<title>Facebook Login Page</title>
<meta charset="UTF-8">
</head>
<script type="text/javascript" src="/static/jquery-1.7.2.min.js"></script>
<script>
//引入 facebook SDK
(function(d, s, id) {
	var js, fjs = d.getElementsByTagName(s)[0];
	if (d.getElementById(id))
		return;
	js = d.createElement(s);
	js.id = id;
	js.src = "//connect.facebook.net/en_US/sdk.js";
	fjs.parentNode.insertBefore(js, fjs);
}(document, 'script', 'facebook-jssdk'));
</script>
<body>
	<h1>Login Page</h1>
	<form action="${pageContext.request.contextPath }/login">
		username: <input type="text" name="username"><br /> <br />
		password: <input type="password" name="password"><br /> <br />
		<input type="submit" value="登入">
	</form><!-- 普通登入 -->
	<br />

	<fb:login-button scope="public_profile,email"
		onlogin="checkLoginState();"
		auto_logout_link="true"
		size="large"
		show_faces="true">
	</fb:login-button><!-- facebook 按鈕 -->
	<div id="status"></div><!-- 登入狀態顯示 -->

<script>

	function statusChangeCallback(response) {
		//可用於後臺驗證,但是前臺呼叫SDK則會自動驗證
		var accessToken=response.authResponse.accessToken;
		console.log(response.authResponse.accessToken);
		if (response.status === 'connected') {//sdk會自動保留accessToken,並且驗證該請求是否來自我的應用
	        FB.api('/me?fields=name,first_name,last_name,email', function(response) {
	        	//將使用者資訊傳回服務端
	        	window.location.href="http://gntina.iok.la/userInfo?userInfo="+JSON.stringify(response);
	        	/* $.ajax({
	                    url:"http://gntina.iok.la/userInfo",
	                    data:{
	                    	userInfo:JSON.stringify(response)
	                    },
	                    dataType:"json",
	                    async:false,
	                    success:function(data){
	                    	window.location.href="";
	                    }
	                }); */
	        	document.getElementById('status').innerHTML =
			        'Thanks for logging in, ' + response.name + '!';
	        });

		} else {
			document.getElementById('status').innerHTML = 'Please log '
					+ 'into this app.';
		}
	}

	function checkLoginState() {
		FB.getLoginStatus(function(response) {
			statusChangeCallback(response);
		});
	}

	window.fbAsyncInit = function() {
		FB.init({
			appId : '應用編號',
			cookie : true,
			xfbml : true,
			version : 'v2.8'
		});

		FB.getLoginStatus(function(response) {
			statusChangeCallback(response);
		});

	};

</script>
</body>
</html>
	@RequestMapping(value = "/userInfo")
	@ResponseBody
	public String getUserInfo(String userInfo) {
		System.out.println(userInfo);
		return userInfo;
	}