
SpringBoot整合之路(7)
阿新 • • 發佈:2018-12-09
在我們開發的專案中,多多少少會遇到檔案上傳的問題,或者上傳個圖片亦或者是個文字,這篇就寫寫檔案上傳;
在這篇中我打算寫2中方式,先來個簡單方式的,再來個複雜方式的; 廢話少說,程式碼走起
1.偷懶方式,簡單處理
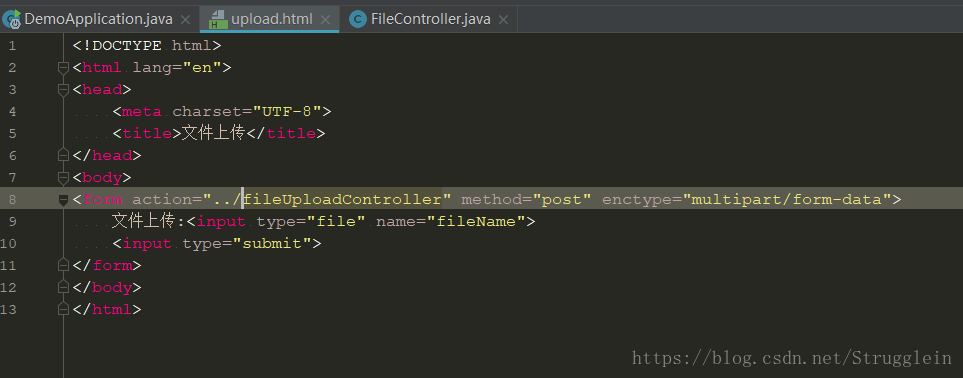
首先先寫個簡簡單單的上傳頁面
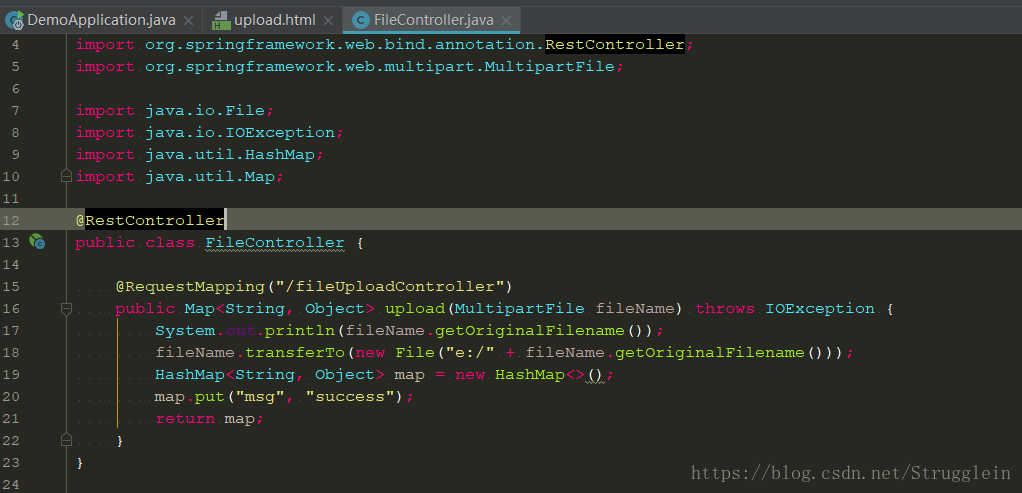
然後寫檔案上傳的controller方法 來處理一些邏輯 比如獲取檔名稱 或者寫入到哪裡
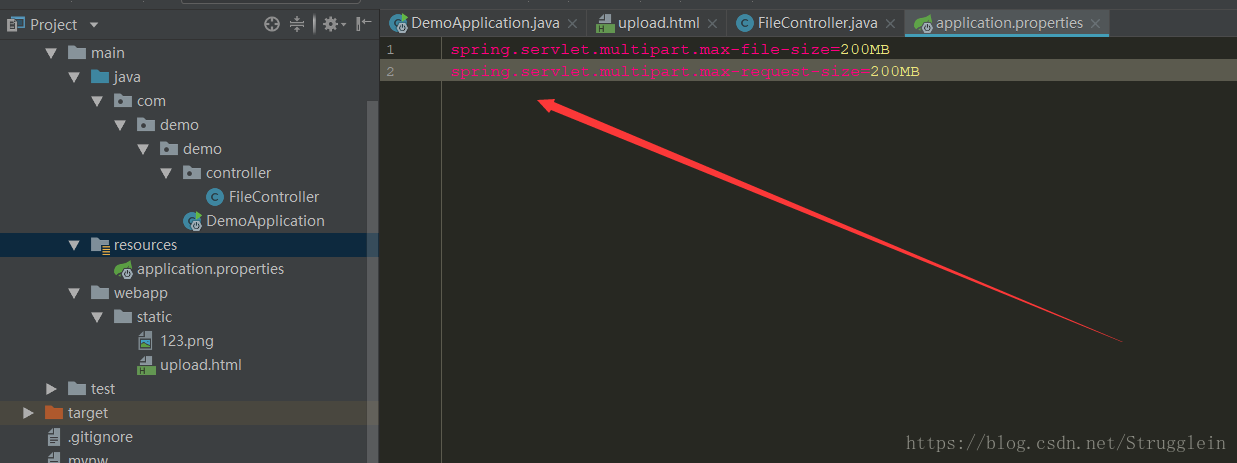
這時候如果上傳大檔案時候會報錯 這時候要手動設定要上傳的檔案大小
2.相對上面複雜點處理
依賴
<?xml version="1.0" encoding="UTF-8"?> 在這裡使用了
thymeleaf,它 是一個跟 Velocity、FreeMarker 類似的模板引擎,它可以完全替代 JSP 。 在這裡不對它做過多解釋,想學習可以-> https://www.baidu.com/s?ie=UTF-8&wd=thymeleaf
controller
package com.zyc.controller;

import org.slf4j.Logger;
import org.slf4j.LoggerFactory;
import org.springframework.stereotype.Controller;
import org.springframework.web.bind.annotation.*;
import org.springframework.web.multipart.MultipartFile;

import java.io.File;
import java.io.IOException;

/**
 * 圖片上傳
 *
 * @author zhaopeng
 * @email [email protected]
 */


@Controller
@RequestMapping("/uploads")
public class FileUploadController {

    private static final Logger log = LoggerFactory.getLogger(FileUploadController.class);

    @GetMapping
    public String index() {
        return "index";
    }

    /**
     * @Description: 單檔案
     * @author zhaopeng
     * @email [email protected]
     */
    @PostMapping("/uploadSing")
    @ResponseBody
    public Object uploadSing(@RequestParam("file") MultipartFile file) throws IOException {
        file.transferTo(new File("E:\\idea_workspace\\springboot-study\\" + file.getOriginalFilename()));
        return "SUCCESS";
    }

    /**
     * @Description: 多檔案
     * @author zhaopeng
     * @email [email protected]
     */
    @PostMapping("/uploads")
    @ResponseBody
    public Object uploads(@RequestParam("file") MultipartFile[] files) throws IOException {
        if (files == null || files.length == 0) {
            return null;
        }
        for (MultipartFile file : files) {
            file.transferTo(new File("E:\\idea_workspace\\springboot-study\\" + file.getOriginalFilename()));
        }
        return "SUCCESS";
    }
}
建立一個FileUploadController,@PostMapping相關方法則是對應的 單檔案上傳和多檔案上傳。
@RequestParam(“file”) 此處的”file”對應的就是html 中 name=”file” 的 input 標籤
index.html
<!DOCTYPE html>
<html xmlns="http://www.w3.org/1999/xhtml"
      xmlns:th="http://www.thymeleaf.org">
<head>
    <meta charset="UTF-8">
    <title>檔案上傳</title>
</head>
<body>

<h2>單檔案上傳</h2>
<div>
    <form method="POST" enctype="multipart/form-data" action="/uploads/uploadSing">
        <p>
            檔案1:<input type="file" name="file"/>
            <input type="submit" value="上傳"/>
        </p>
    </form>
</div>

<hr/>
<h2>多檔案上傳</h2>

<div>
    <form method="POST" enctype="multipart/form-data"
          action="/uploads/uploads">
        <p>
            檔案1:<input type="file" name="file"/>
        </p>
        <p>
            檔案2:<input type="file" name="file"/>
        </p>
        <p>
            <input type="submit" value="上傳"/>
        </p>
    </form>
</div>

</body>
</html>
主函式
package com.zyc;

import org.springframework.boot.SpringApplication;
import org.springframework.boot.autoconfigure.SpringBootApplication;

/*
 * @author zhaopeng
 */

@SpringBootApplication
public class Study7Application {

    public static void main(String[] args) {
        SpringApplication.run(Study7Application.class, args);
    }
}
測試
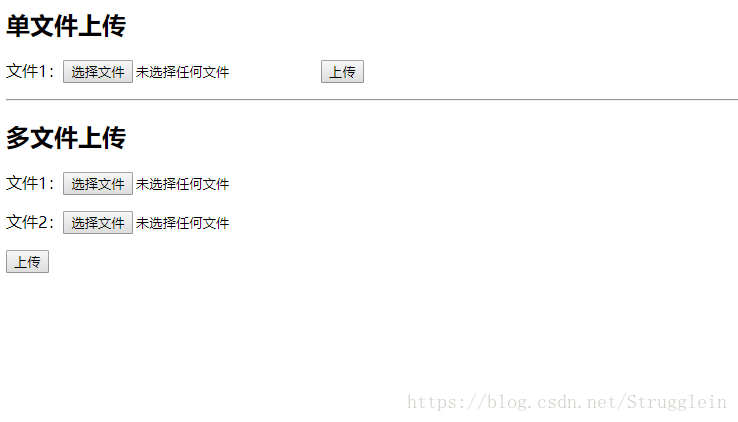
結果
好的到這裡本篇文章就先到此了,創作不易,如果那裡有不合適的地方還請大家多多指教,寫這篇博的目的主要就是為了方便自己以後的一個回憶和朋友學習時的一個參考,希望為大家可以帶來幫助 ~ ~&
虛心的去學習,自信的去工作~