利用Varnish實現CDN快取
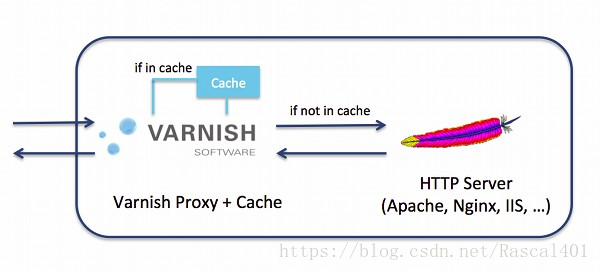
一.Varnish的簡要介紹 Varnish是一款高效能的開源HTTP加速器,具有反向代理,快取的功能,主要用來作為反向代理中的快取伺服器。 Varnish使用記憶體快取檔案來減少響應時間和網路頻寬消耗。
二.Varnish作為快取伺服器與Squid對比如下:
- Varnish與Squid都是一個反向代理伺服器,都可用作高效能的代理快取伺服器,並且都是開源軟體。
- Varnish穩定性很高,兩者在完成相同負荷的工作時,Squid伺服器發生故障的機率要高於Varnish,因為Squid需要經常重啟。
- Varnish訪問速度更快,Varnish採用了“Visual Page Cache”技術,所有快取資料都直接從記憶體讀取,而Squid是從硬碟讀取快取資料,因此Varnish在訪問速度方面會更快。
- Varnish支援更多的併發連線,因為Varnish的TCP連線釋放要比Squid快,所以在高併發連線情況下可以支援更多的TCP連線。
- Varnish可以通過管理埠,使用正則表示式批量清除部分快取,而Squid做不到
- Varnish程序一旦掛起、崩潰或者重啟,快取資料都會從記憶體中完全釋放,此時所有請求都會被髮送到後端伺服器,在高併發情況下,這會給後端伺服器造成很大壓力
- Varnish配置相比Squid簡單,監控介面豐富,效能好,但Squid資料多,功能豐富,支援對ACL的訪問控制
VCL處理流程圖:

處理過程大致分為如下幾個步驟: (1)Receive 狀態,也就是請求處理的入口狀態,根據 VCL 規則判斷該請求應該是 Pass 或 Pipe,或者進入 Lookup(本地查詢)。 (2)Lookup 狀態,進入此狀態後,會在 hash 表中查詢資料,若找到,則進入 Hit 狀態,否則進 入 miss 狀態。 (3)Pass 狀態,在此狀態下,會進入後端請求,即進入 fetch 狀態。 (4)Fetch 狀態,在 Fetch 狀態下,對請求進行後端的獲取,傳送請求,獲得資料,並進行本地 的儲存。 (5)Deliver 狀態, 將獲取到的資料傳送給客戶端,然後完成本次請求。
四.Varnish 搭建過程:
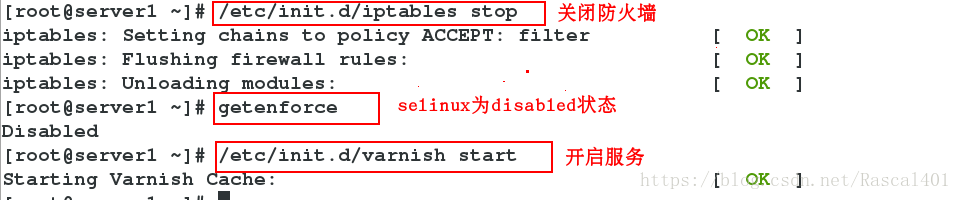
實驗環境:必須保證selinux為disabled狀態,iptables為關閉狀態。
實驗主機:server1 172.25.254.1 varnish
         server2 172.25.254.2 apache
         server3 172.25.254.3 apache
實驗具體操作: 1.配置後端伺服器 (1)在確保server1上有以下兩個rpm包的情況下,使用yum源安裝之後,開啟varnish。
server1:yum install varnish-3.0.5-1.el6.x86_64.rpm varnish-libs-3.0.5-1.el6.x86_64.rpm
server1:/etc/init.d/varnish start

server1: vim /etc/sysconfig/varnish #編輯varnish的配置檔案

server1:/etc/init.d/varnish reload #重新載入服務
(3)在server2上安裝apache軟體,並開啟服務,編輯預設釋出頁面
server2: yum install httpd -y
         /etc/init.d/httpd start
         vim /var/www/html/index.html #編輯預設釋出頁面

[[email protected] ~]#
cd /etc/varnish/[[email protected] varnish]#lsdefault.vcl secret [[email protected] varnish]#vim default.vcl

[[email protected] varnish]#
/etc/init.d/varnish reload #重新載入服務
(5)設定本地解析,在物理機的瀏覽器上進行訪問測試。

[[email protected] ~]#
cd /etc/varnish/[[email protected] varnish]#vim default.vcl
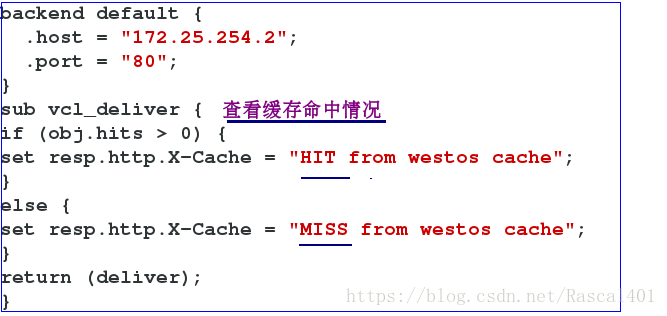
/etc/init.d/varnish reload # 重新載入
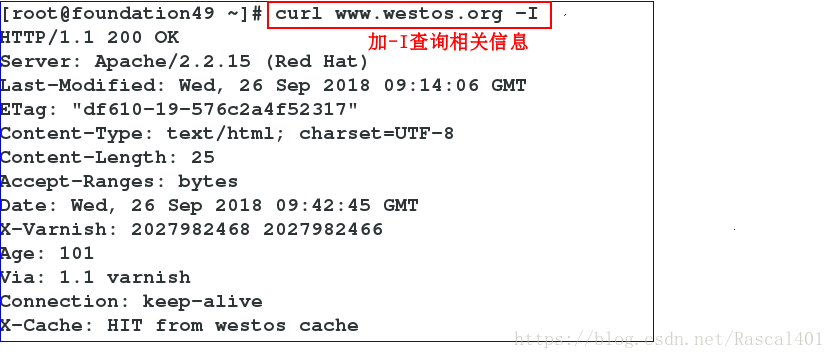
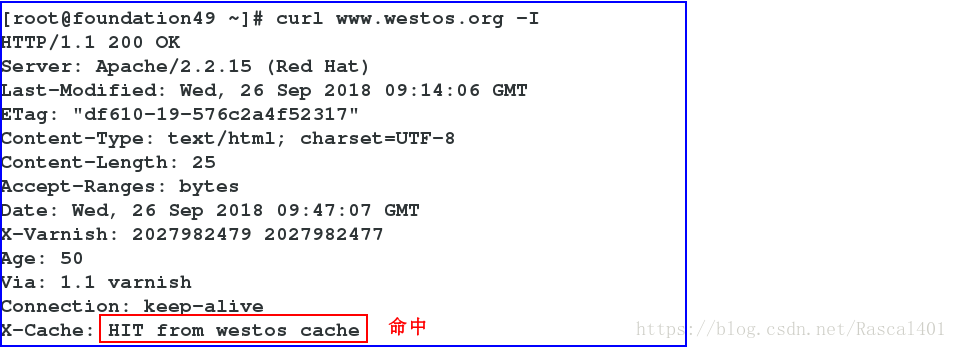
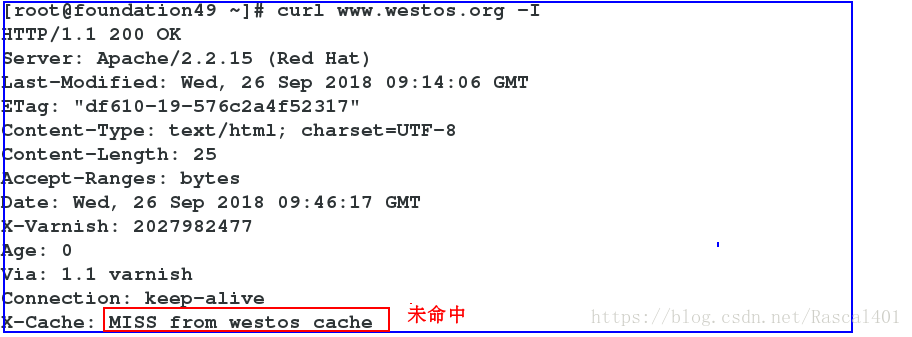
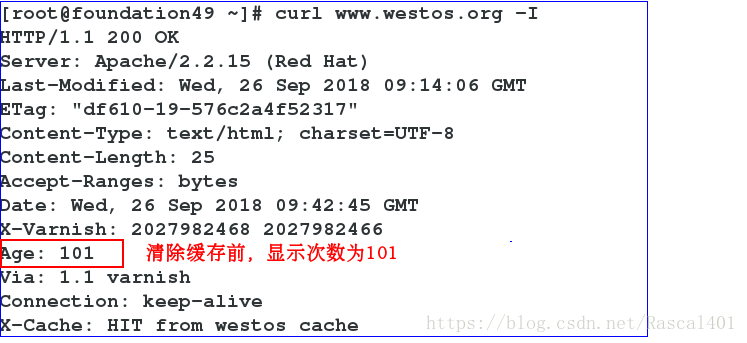
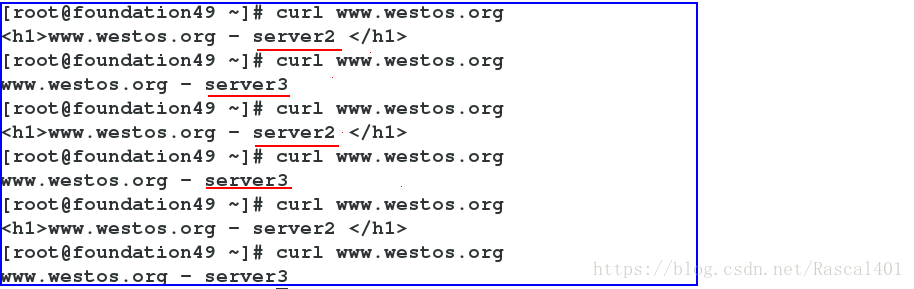
快取命中情況測試(物理機):
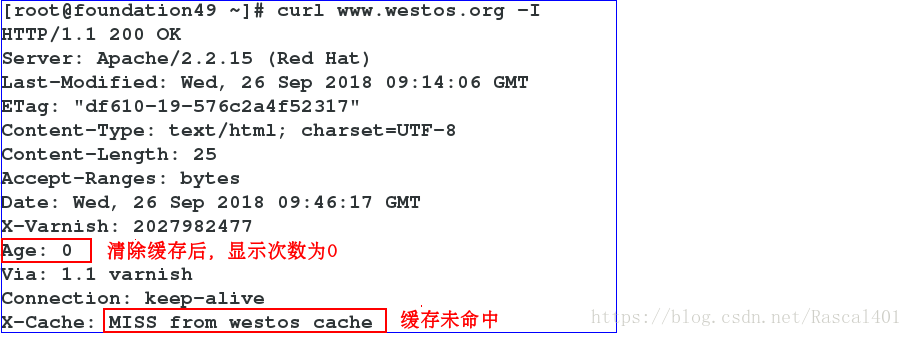
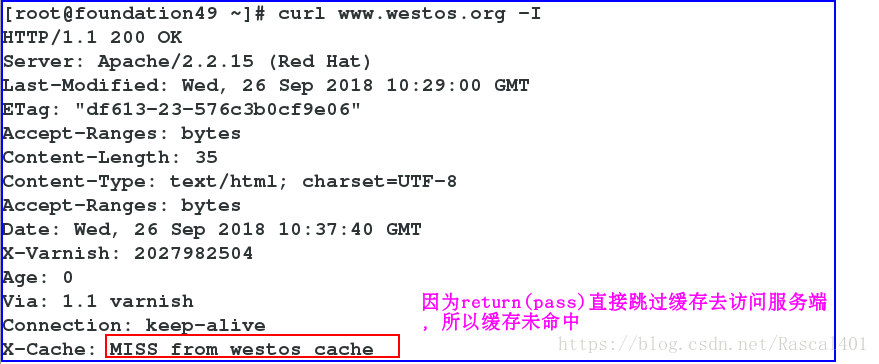
通過 varnishadm 手動清除快取
varnishadm ban.url .*$  #清除所有
varnishadm ban.url /index.html #清除 index.html 頁面快取
varnishadm ban.url /admin/$ #清除 admin 目錄快取
[[email protected] varnish]#
varnishadm ban.url /index.html #清除index.html頁面快取
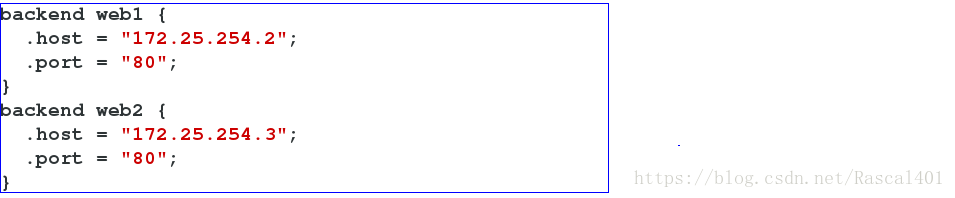
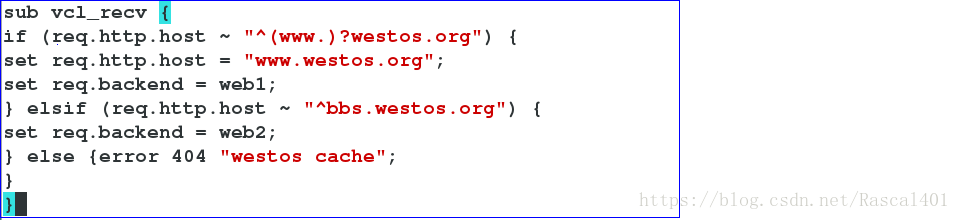
4.定義多個不同域名站點的後端伺服器 (1)
[[email protected] ~]# yum install httpd -y
#在server3上下載httpd服務[[email protected] ~]# /etc/init.d/httpd start#開啟httpd服務Starting httpd: httpd: Could not reliably determine the server’s fully qualified domain name, using 172.25.254.53 for ServerName [ OK ]
[[email protected] ~]# cd /var/www/html/ [[email protected] html]# vim index.html
#編輯預設釋出頁面

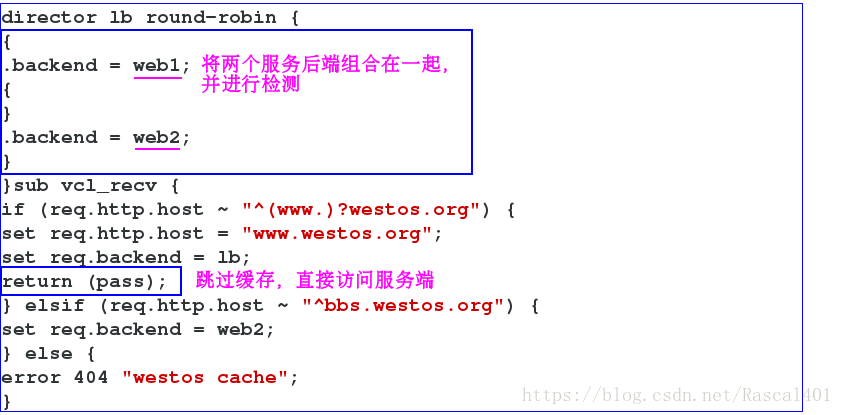
(2)修改server1的varnish配置檔案
[[email protected] varnish]#
vim default.vcl
[[email protected] varnish]#
/etc/init.d/varnish reload
(3)在物理機上新增本地解析
[[email protected] ~]#
vim /etc/hosts


[[email protected] html]#
mkdir /www1[[email protected] html]#cd /www1/[[email protected] www1]#vim index.html

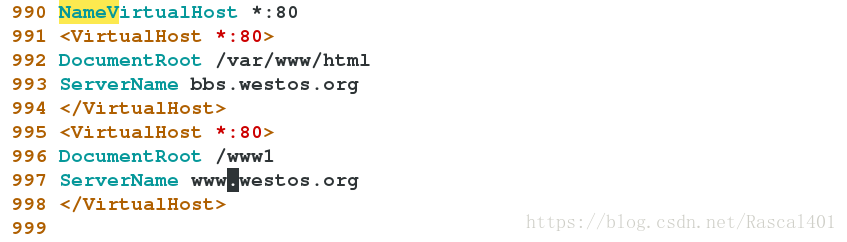
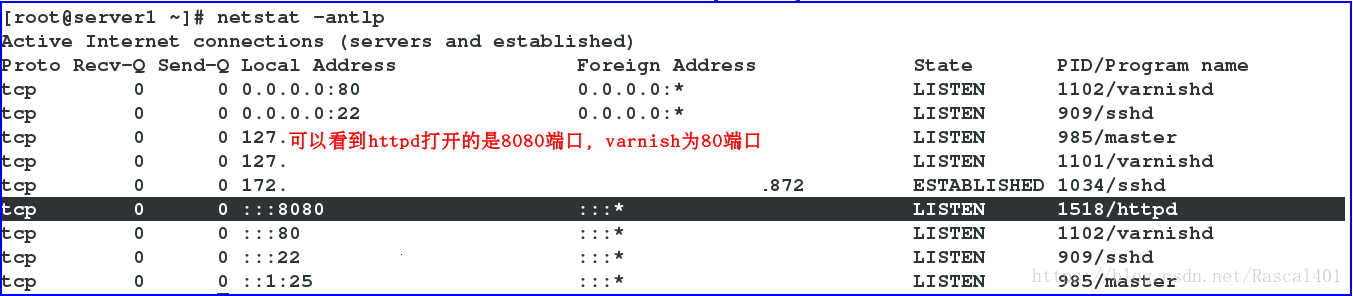
(2)編輯httpd的主配置檔案
[email protected] www1]#
vim /etc/httpd/conf/httpd.conf
[[email protected] www1]#
/etc/init.d/httpd restartStopping httpd: [ OK ] Starting httpd: httpd: Could not reliably determine the server’s fully qualified domain name, using 172.25.254.53 for ServerName [ OK ]
(3)修改server2的配置檔案,並重新編輯server2的預設釋出頁面,以便於與server3進行區分。
[[email protected] varnish]#
vim default.vcl
[[email protected] varnish]#
/etc/init.d/varnish reload
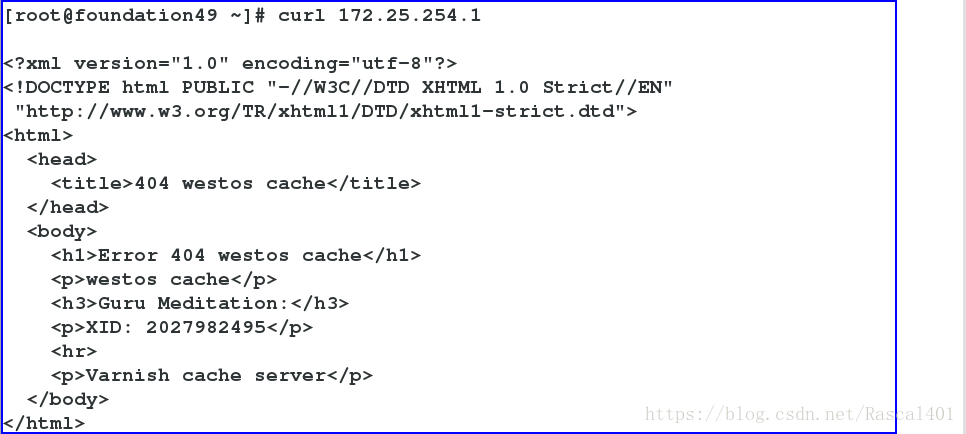
(4)在物理機進行測試
[[email protected] ~]#
/etc/init.d/httpd startStarting httpd: [[email protected] ~]#/etc/init.d/httpd start
(2)在server1上下載bansys.zip(需要解壓)
[[email protected] ~]#
yum install -y uzip[[email protected] ~]#uzip bansys.zip -d /var/www/html/#將其解壓到指定路徑
安裝httpd服務,修改配置檔案,並開啟此服務。
[[email protected] ~]#
yum install httpd -y[[email protected] ~]#vim /etc/httpd/conf/httpd.conf
修改配置檔案如下:

[[email protected] ~]#
/etc/init.d/httpd restart
安裝php,編輯釋出內容的格式
[[email protected] ~]#
yum install php -y
[[email protected] html]#
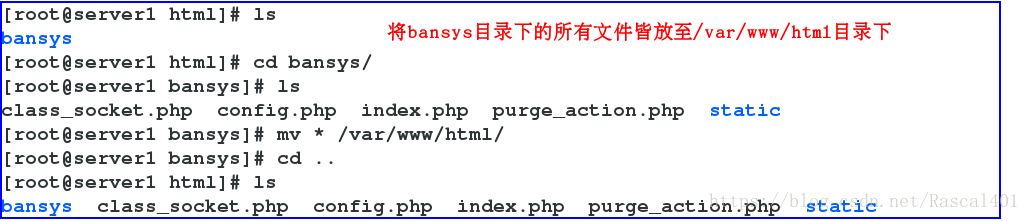
cd bansys/[[email protected] bansys]#lsclass_socket.php config.php index.php purge_action.php static [[email protected] bansys]#mv * /var/www/html/[[email protected] bansys]#cd ..[[email protected] html]#lsbansys class_socket.php config.php index.php purge_action.php static [[email protected] html]#vim config.php


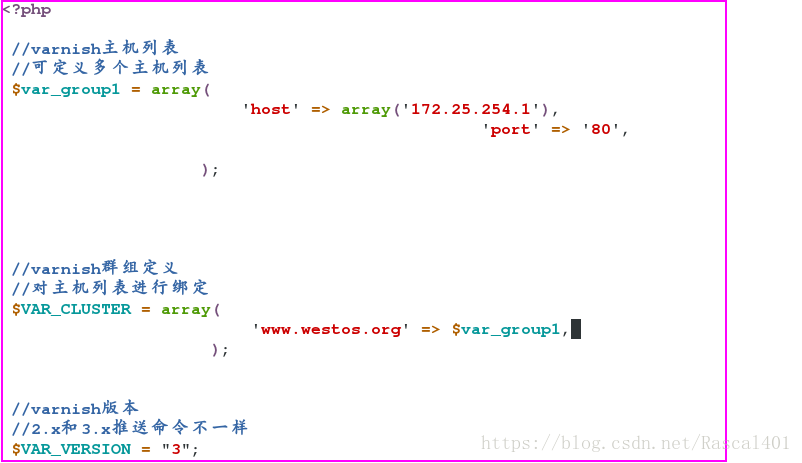
[[email protected] html]#
/etc/init.d/httpd restart[[email protected] ~]#cd /etc/varnish/[[email protected]server1 varnish]#vim default.vcl #修改配置檔案
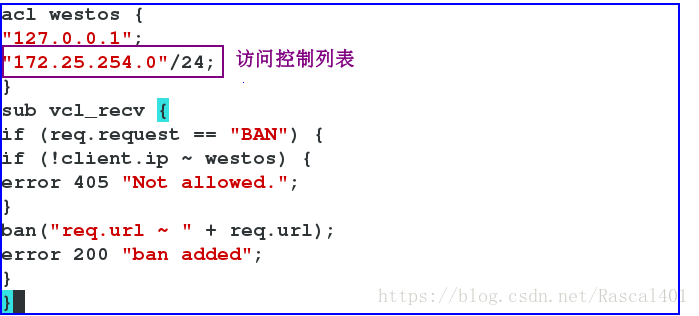
[[email protected] ~]#
/etc/init.d/varnish reload
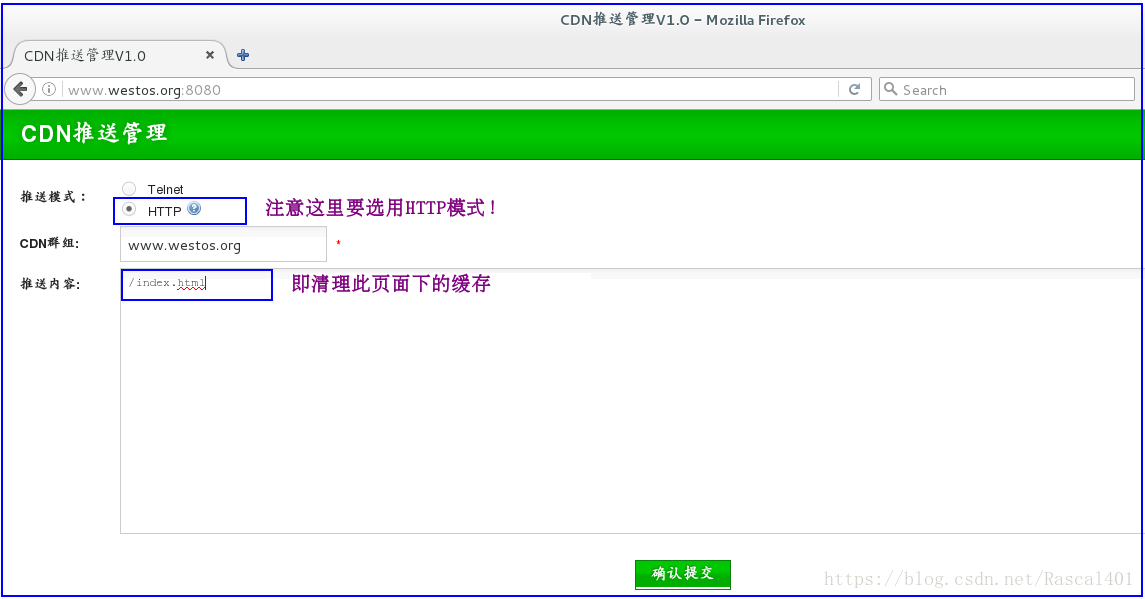
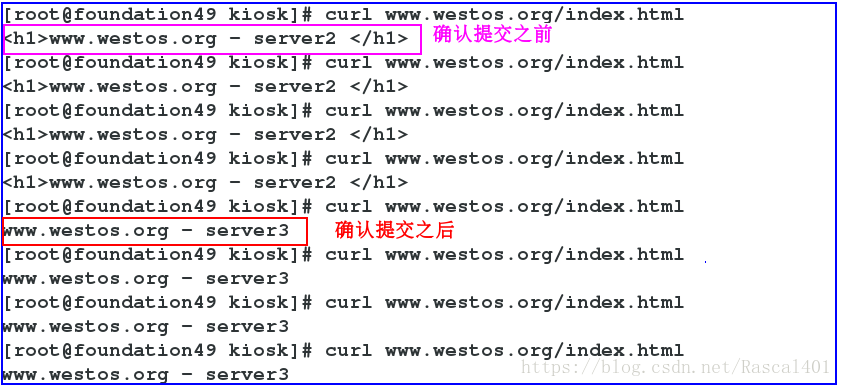
物理機訪問測試:在物理機的瀏覽器中輸入www.westos.org:8080 即可進入到以下頁面